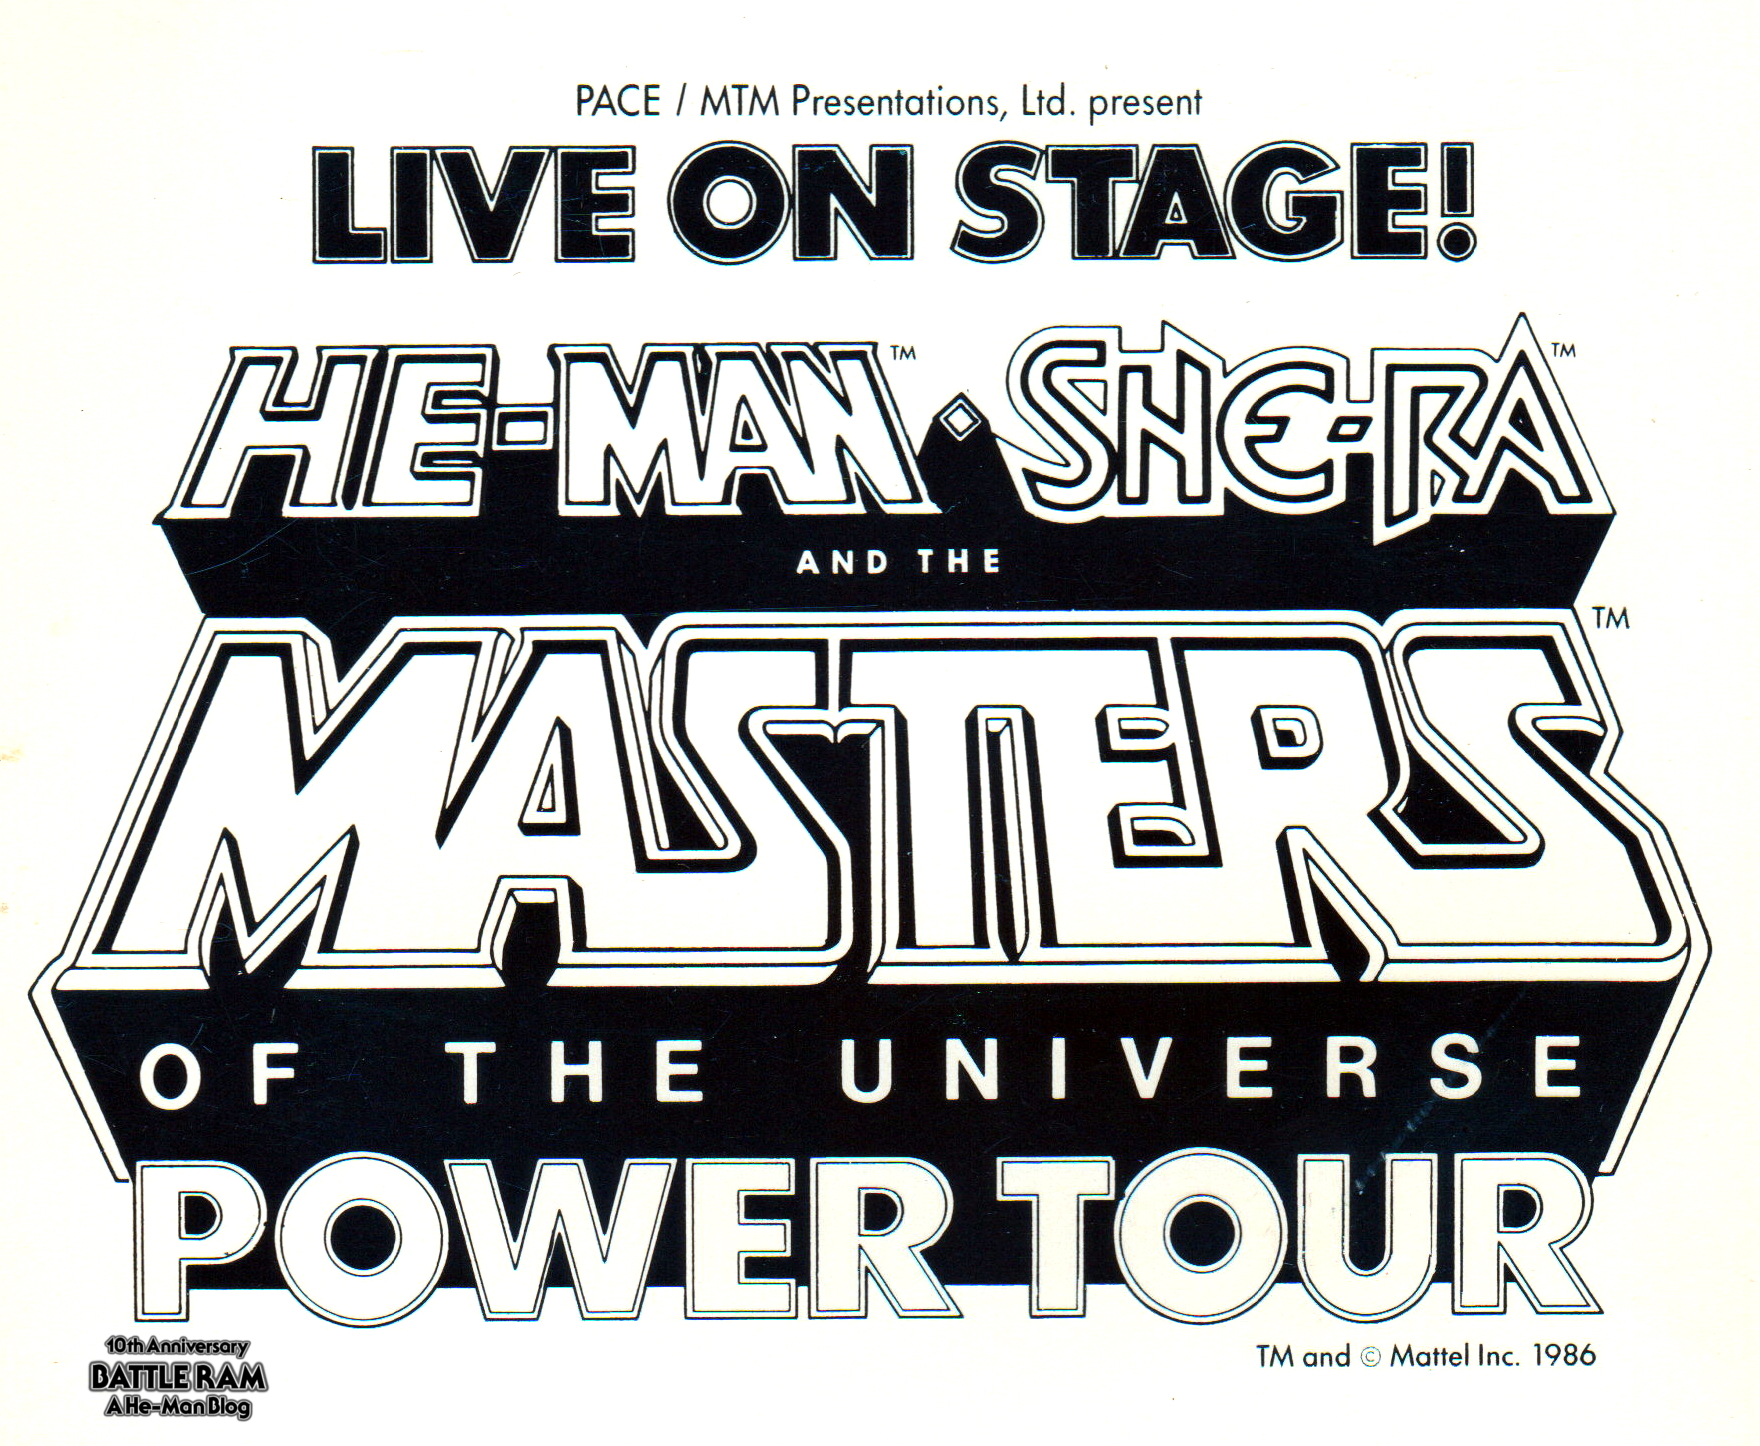
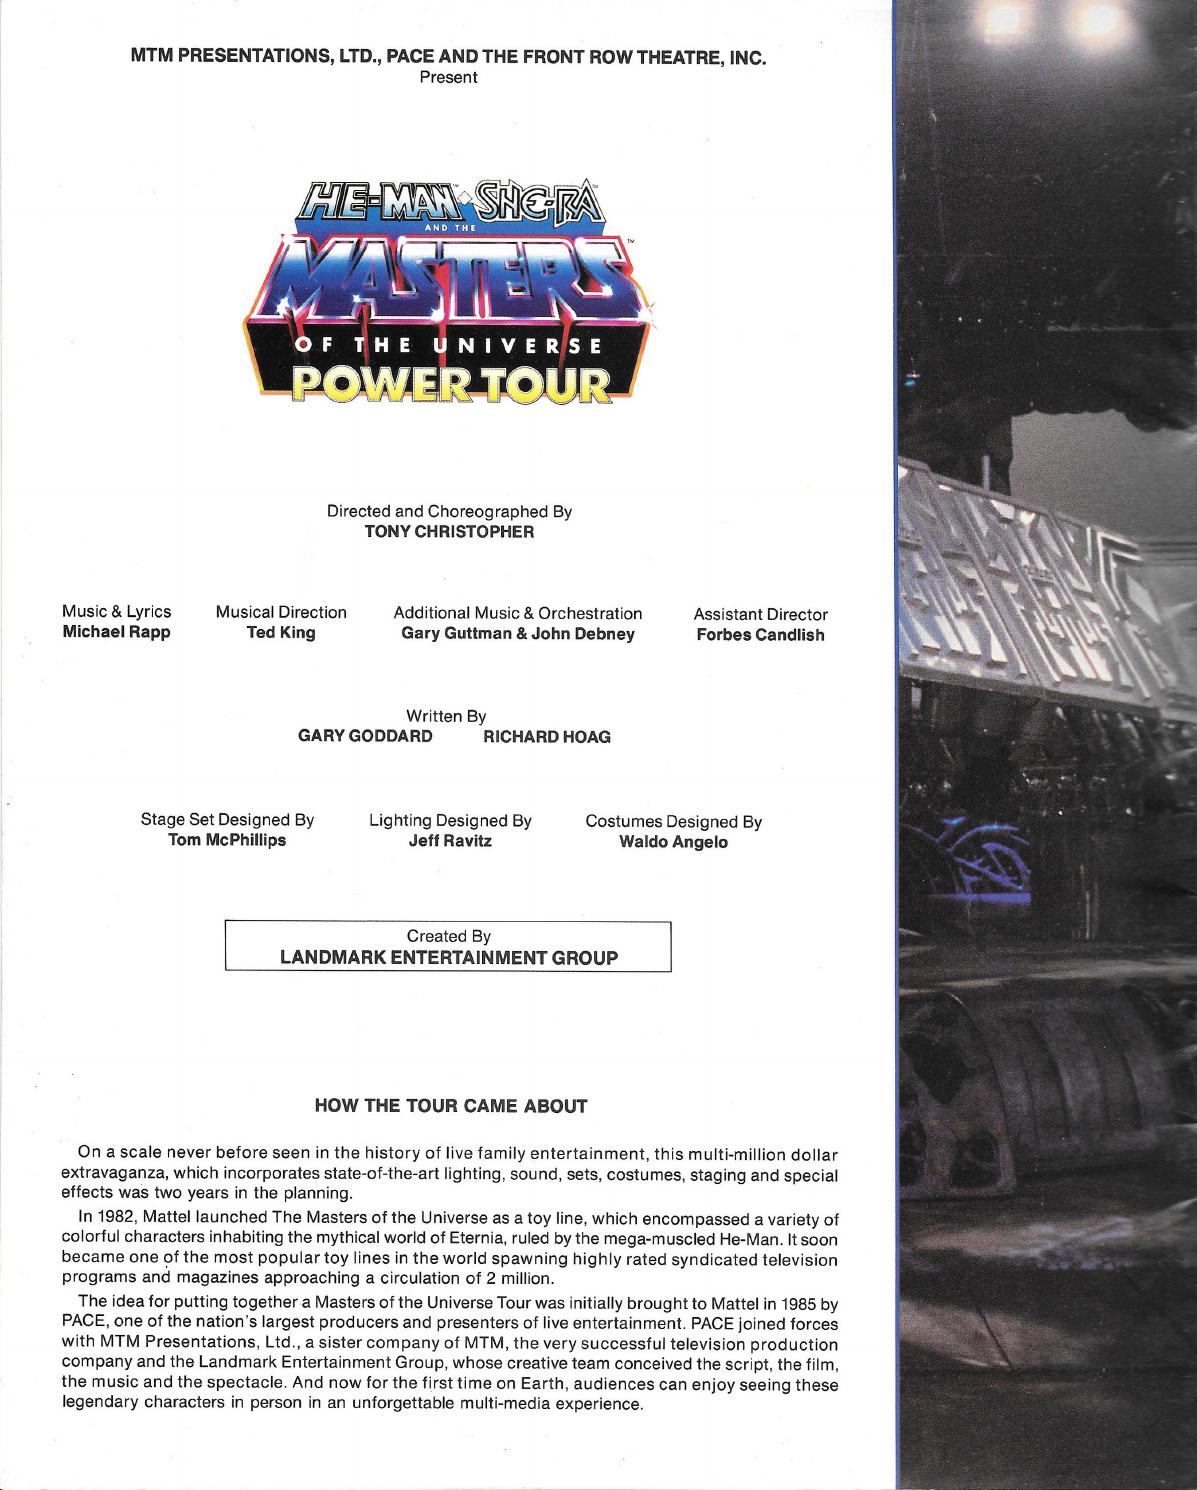
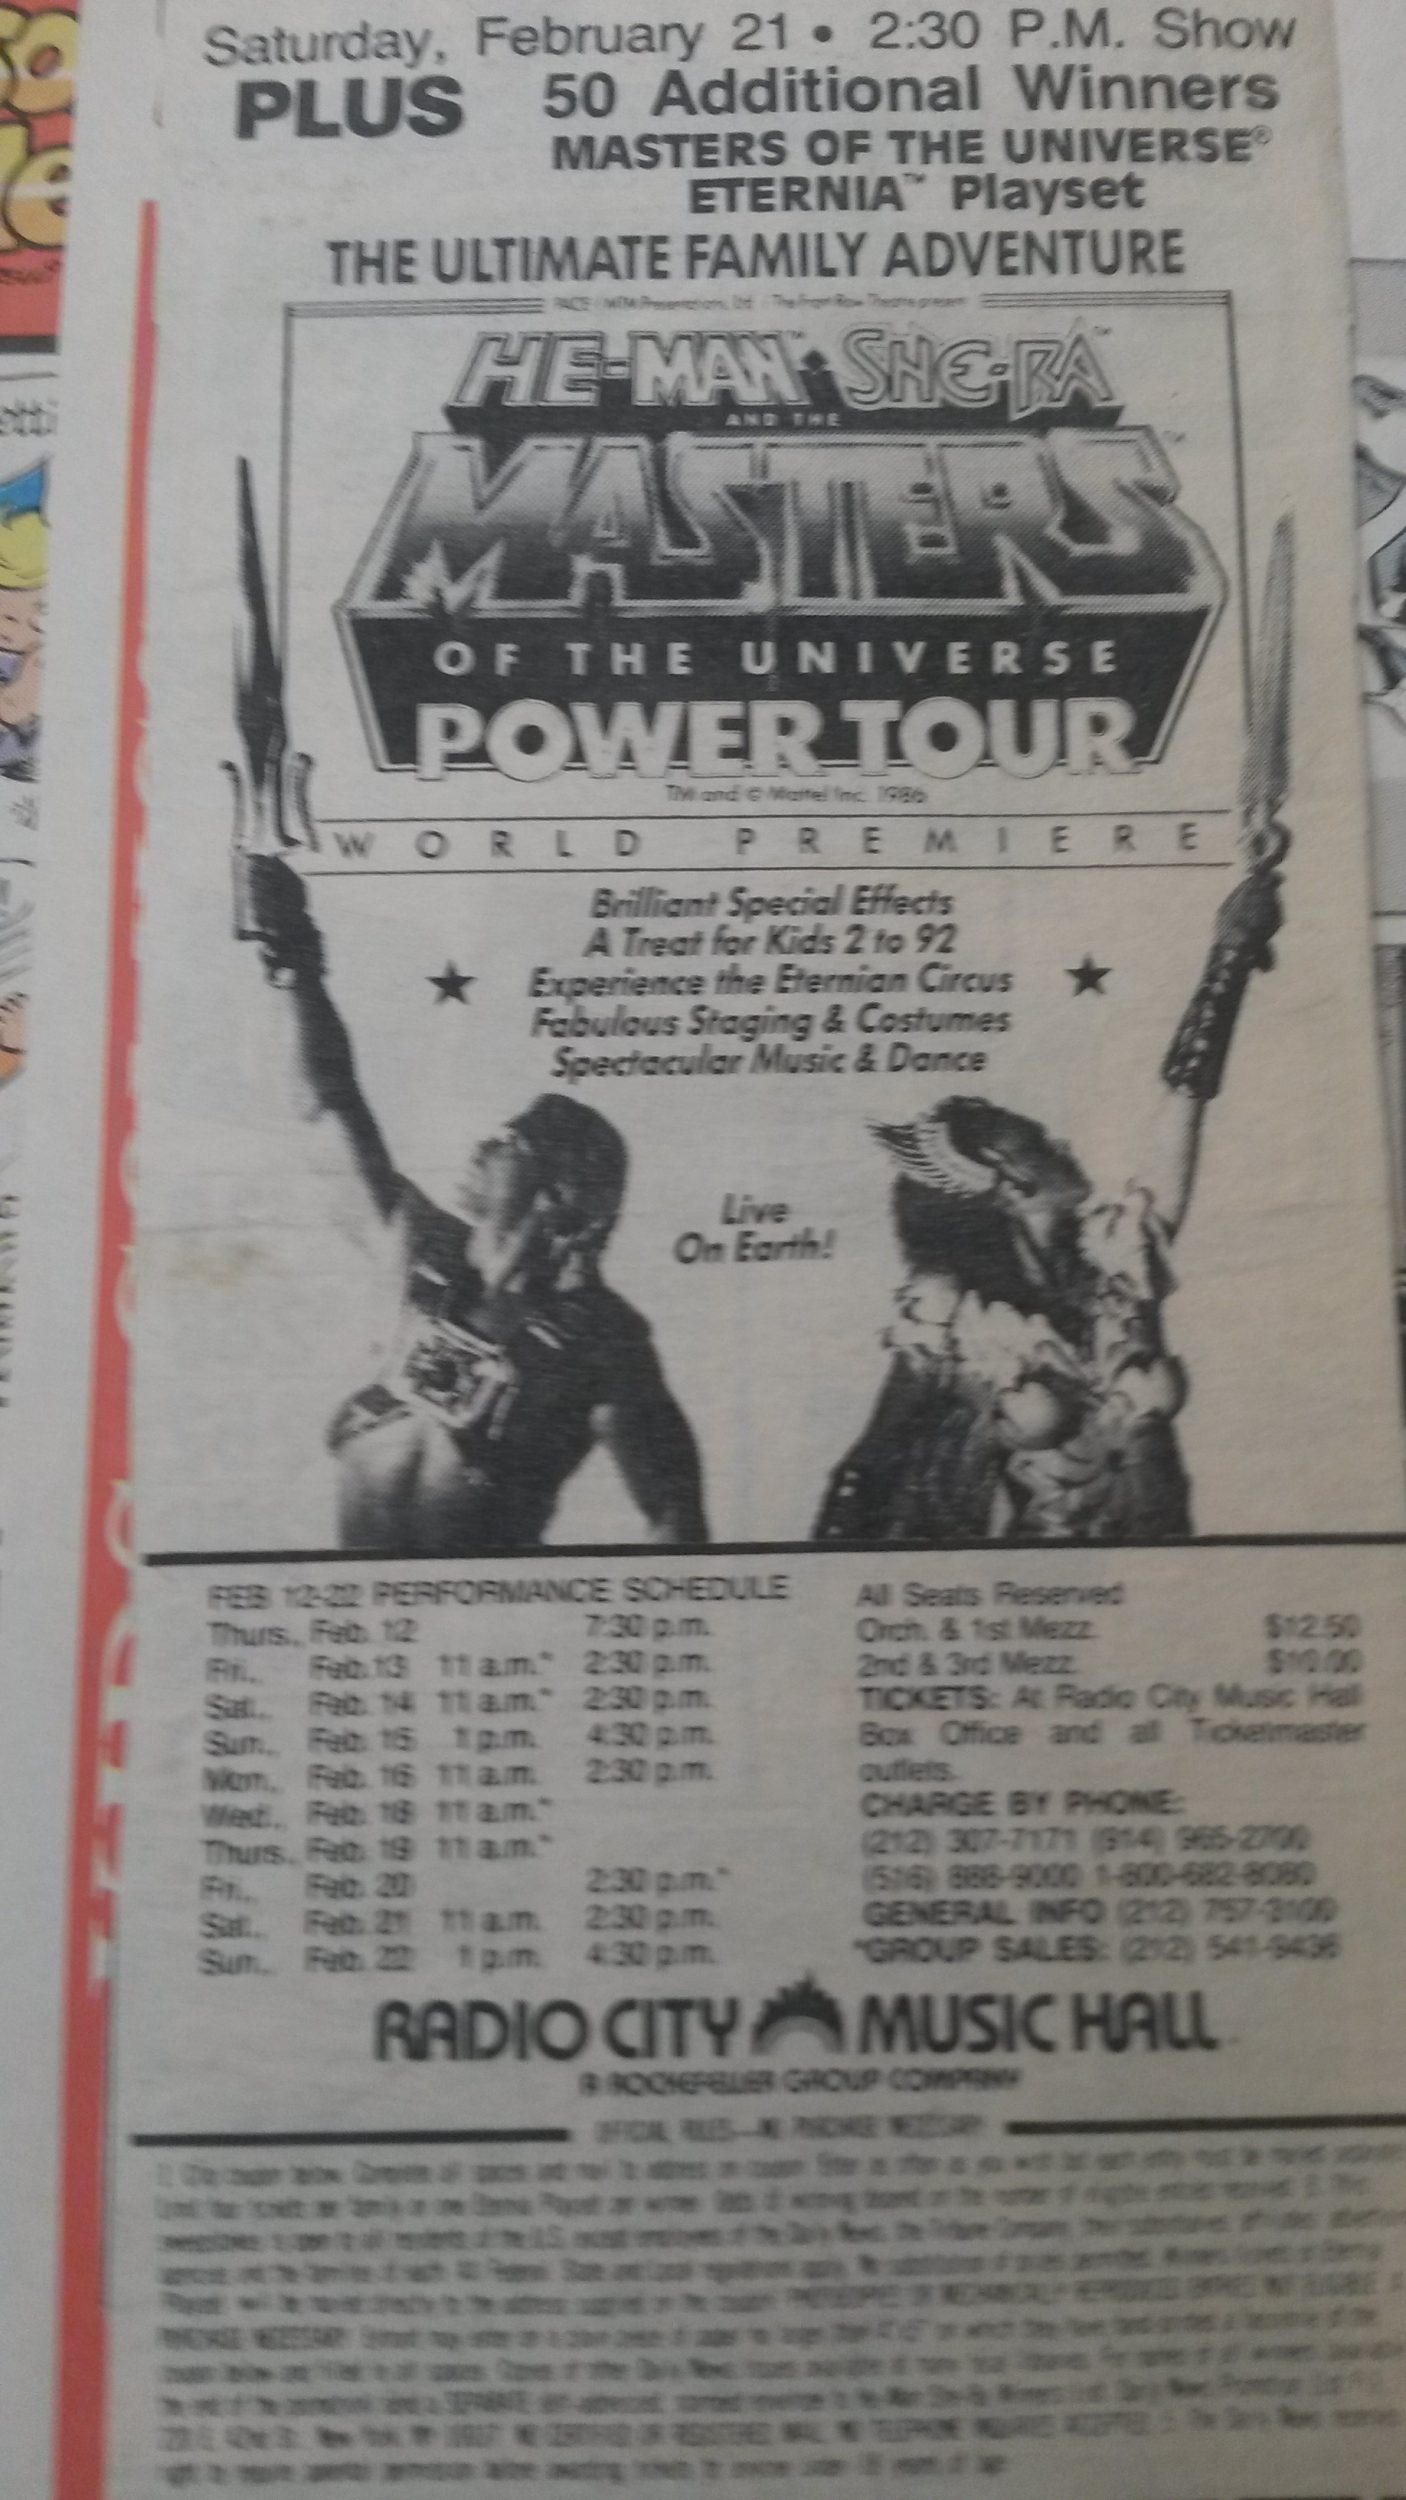
Recently I got a packet of Power Tour promotional materials that Danielle Gelehrter generously sent to me. I’ve been meaning to scan them and share them with all of you. No time like the present! I did not see the Power Tour as a kid, and I didn’t find out about it until I was an adult. It was basically a traveling Masters of the Universe musical. The show was written by Gary Goddard and Richard Hoag, with music composed by Gary Guttman. According to Matthew Martin, the show toured throughout the US from 1986 to 1987. You can actually watch a video of the performance online, uploaded by cast member Gus Park: https://www.youtube.com/watch?v=p6nyQ7OmzBQ
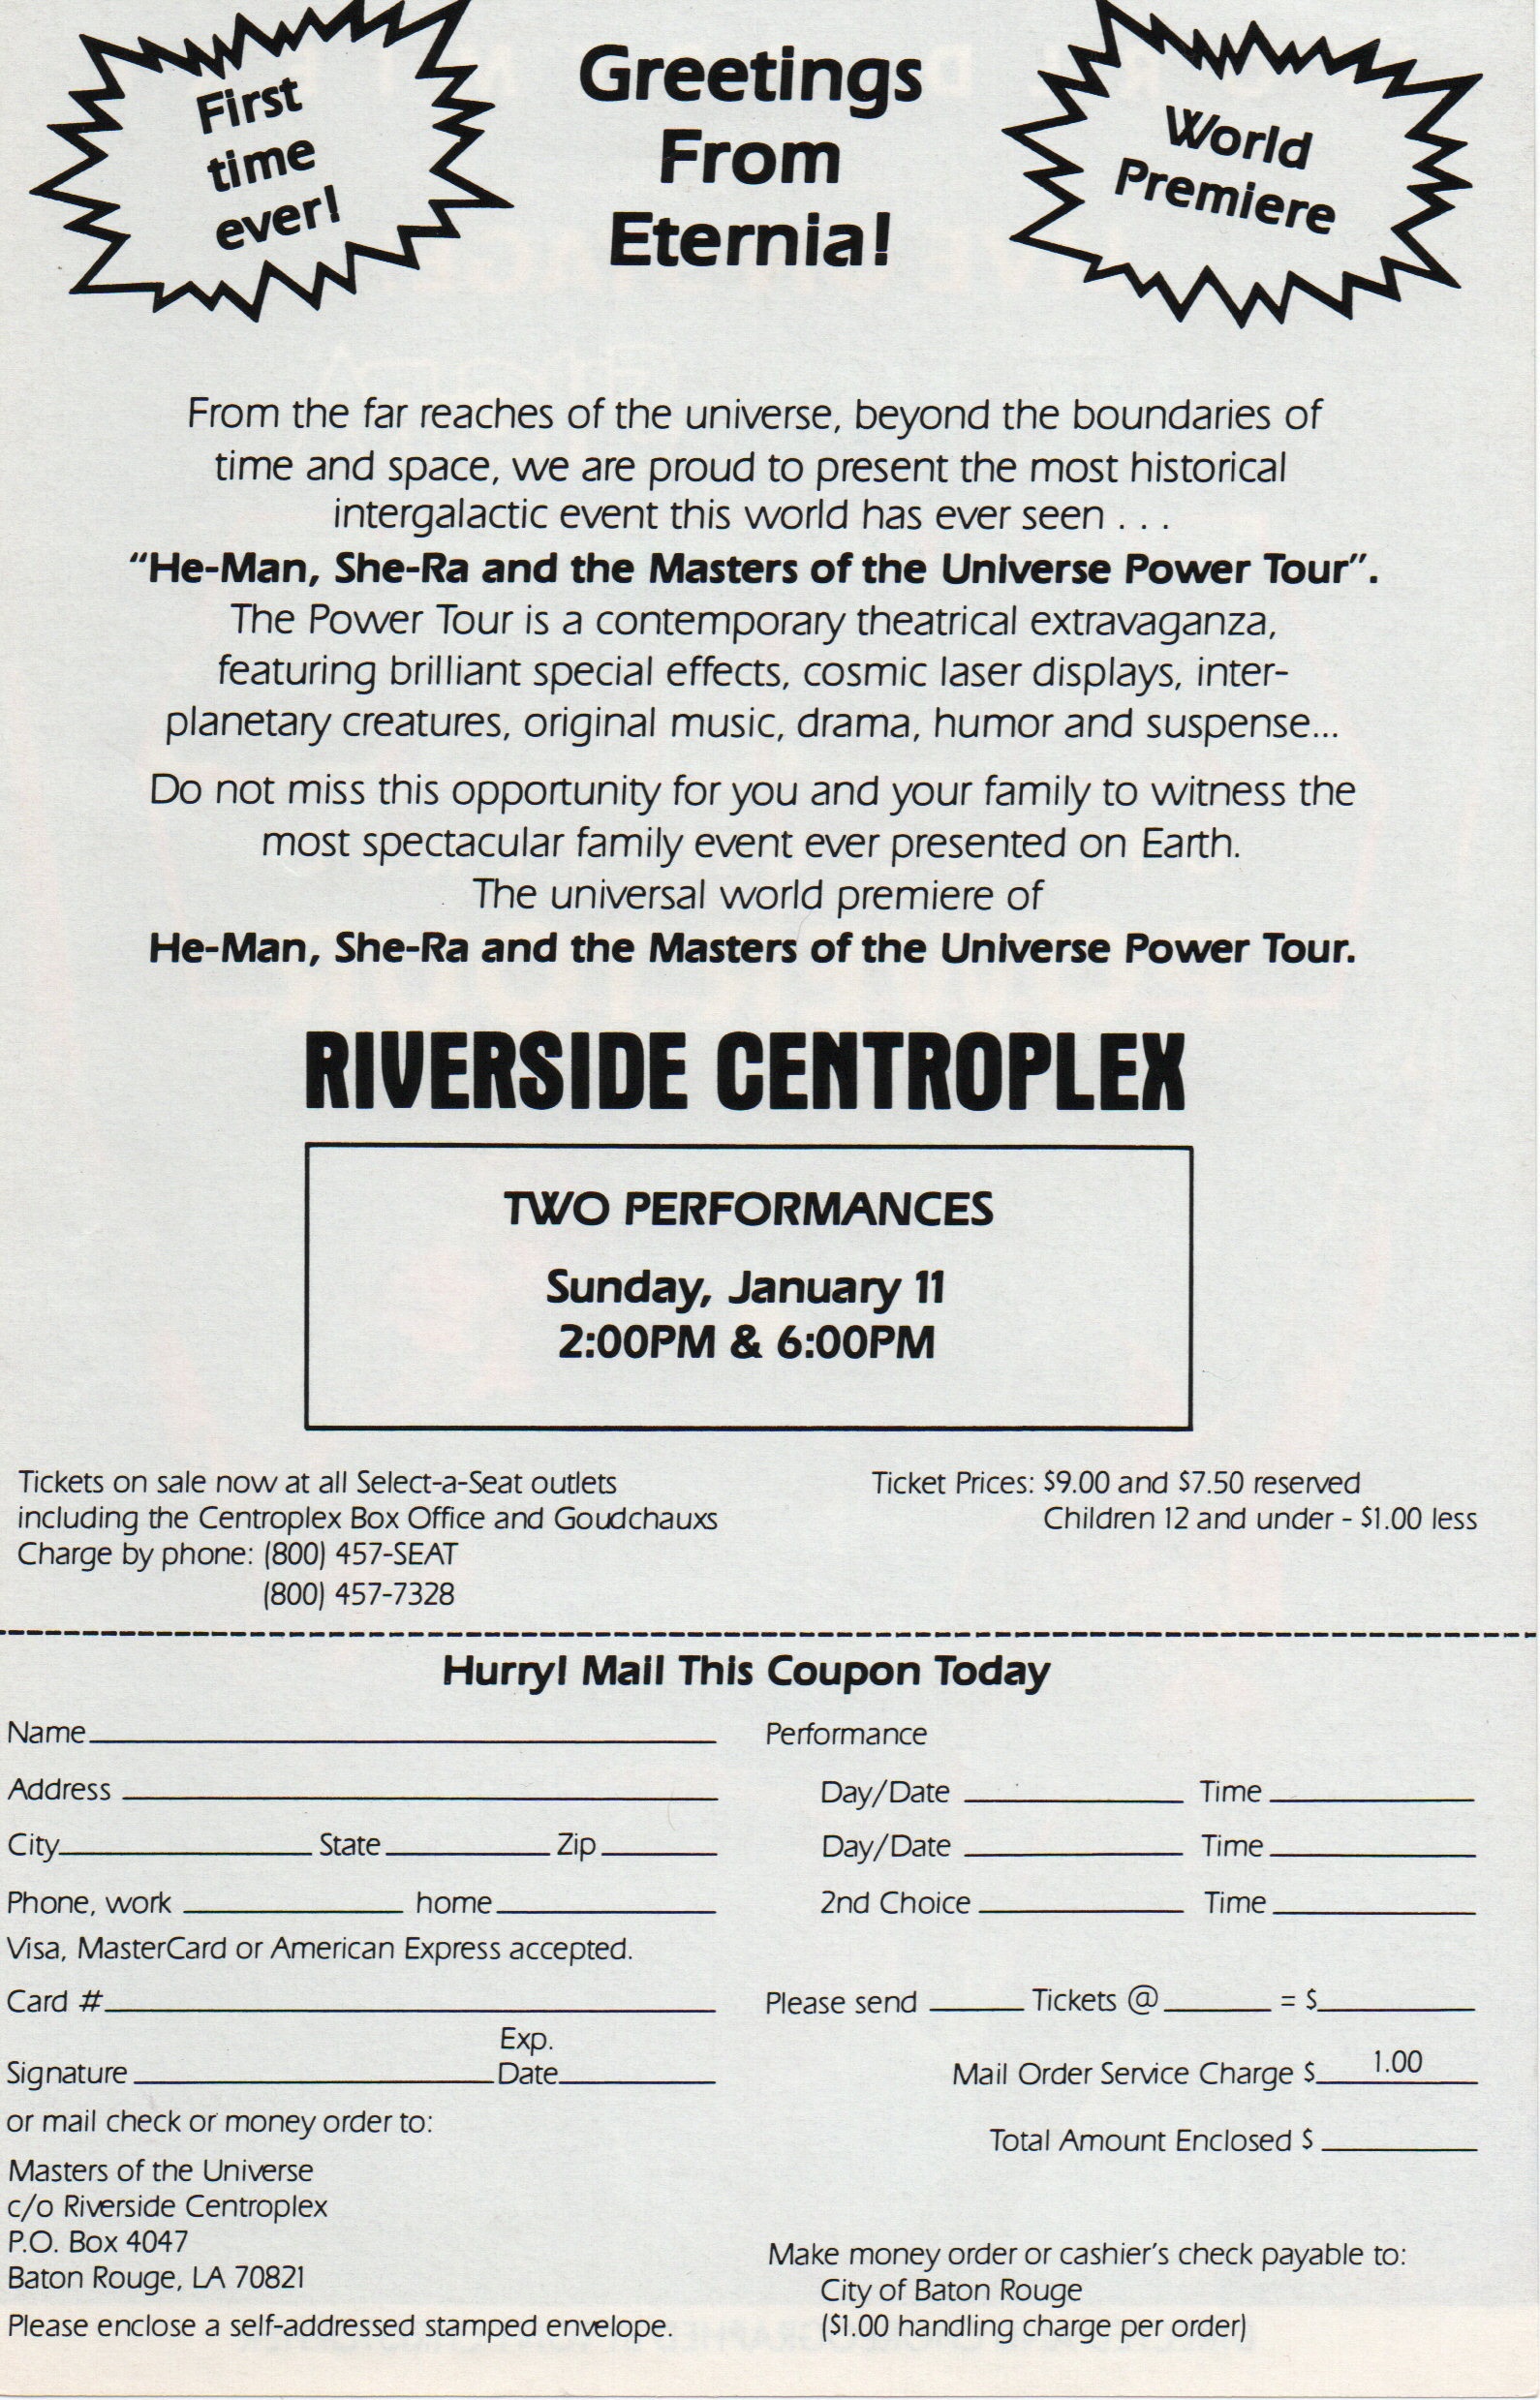
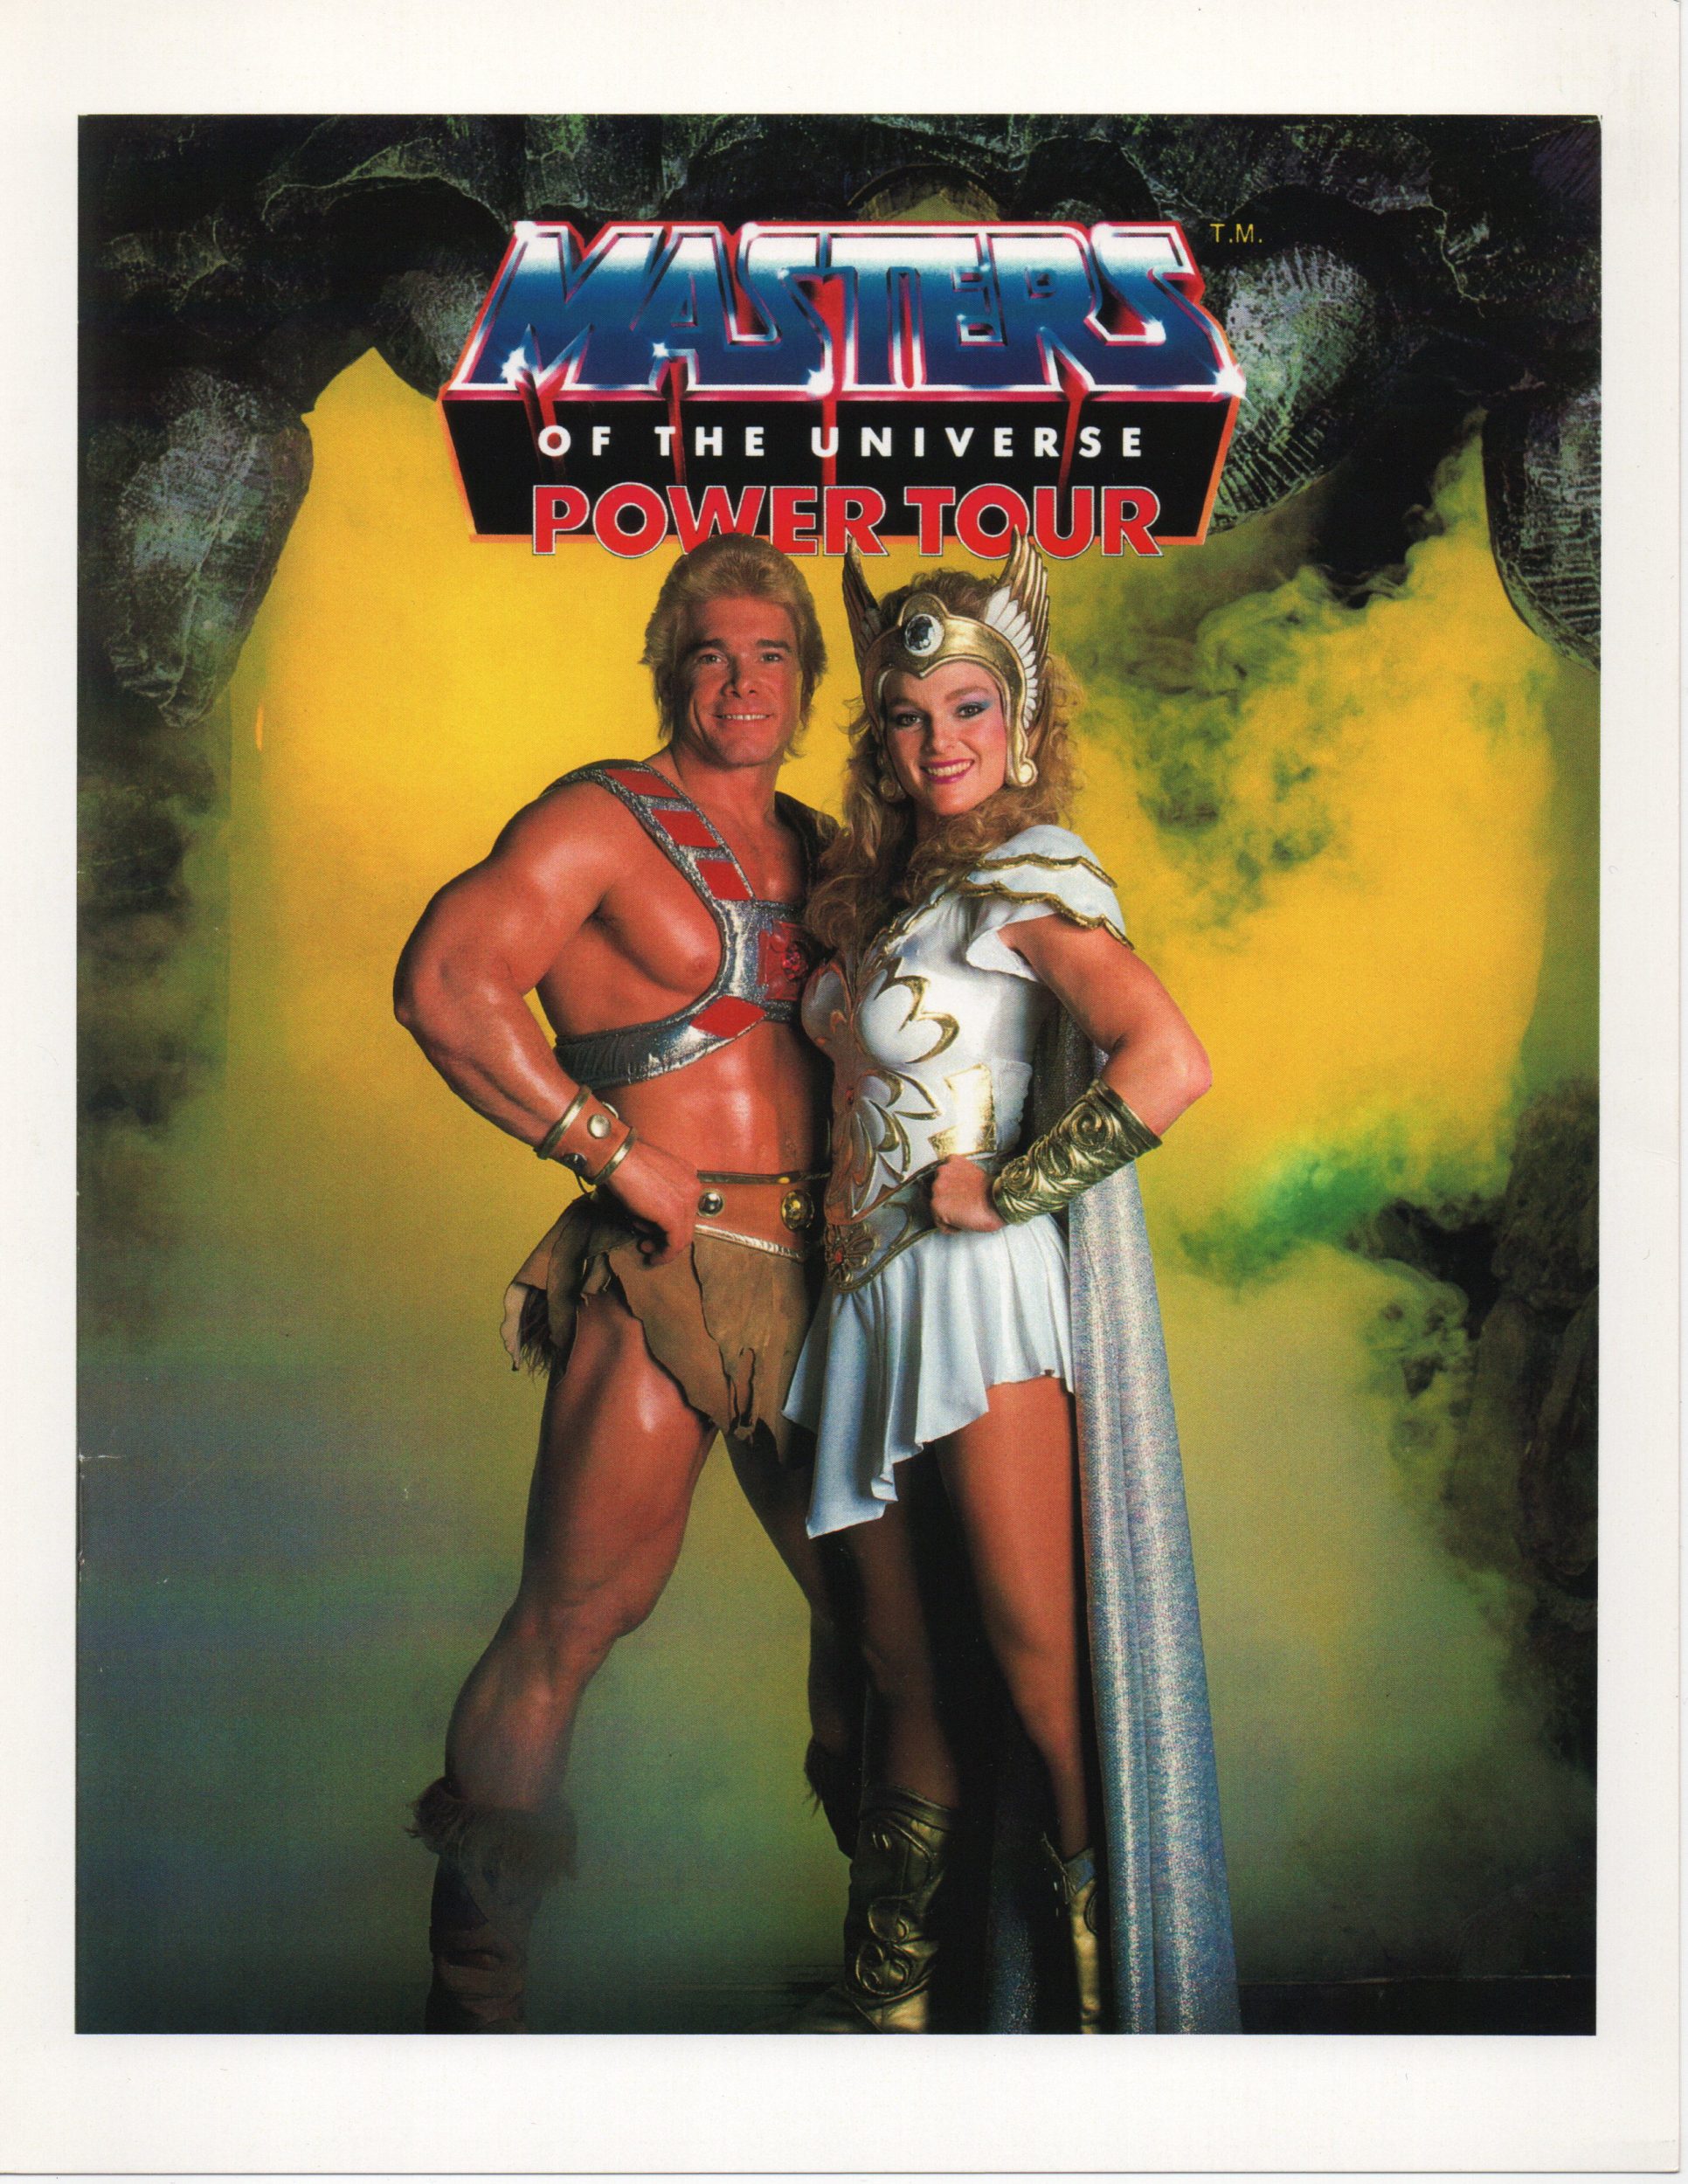
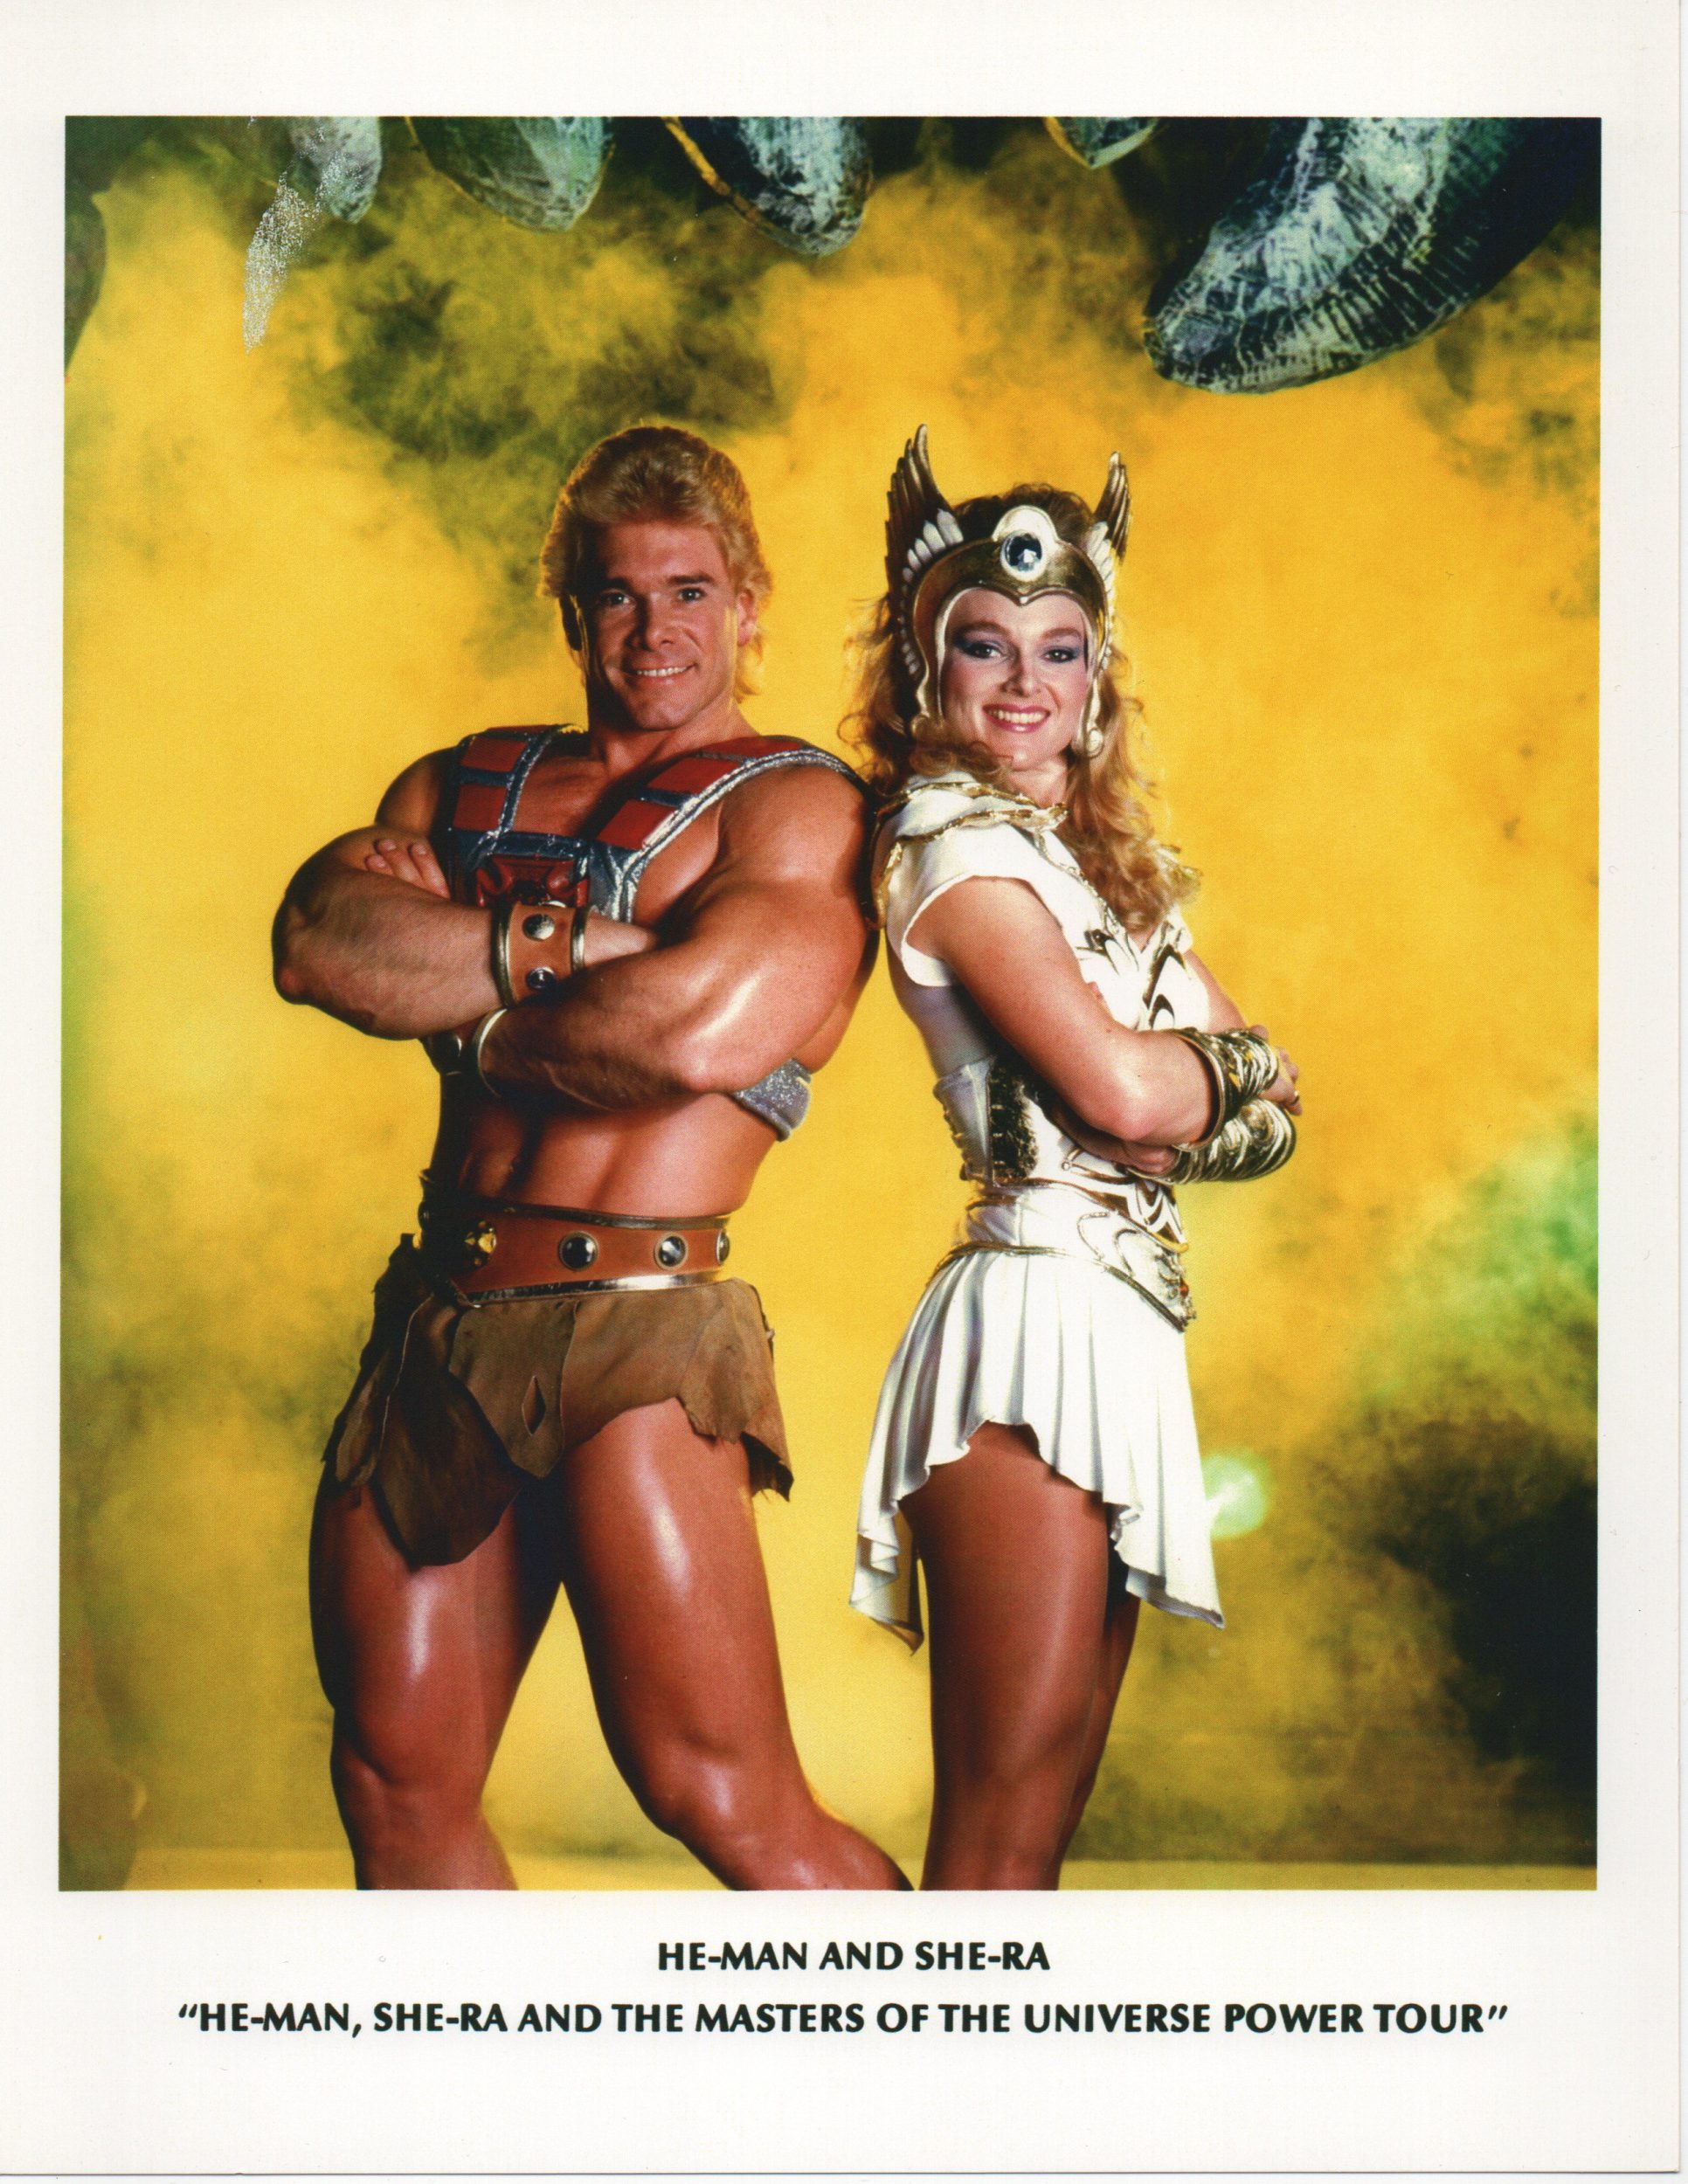
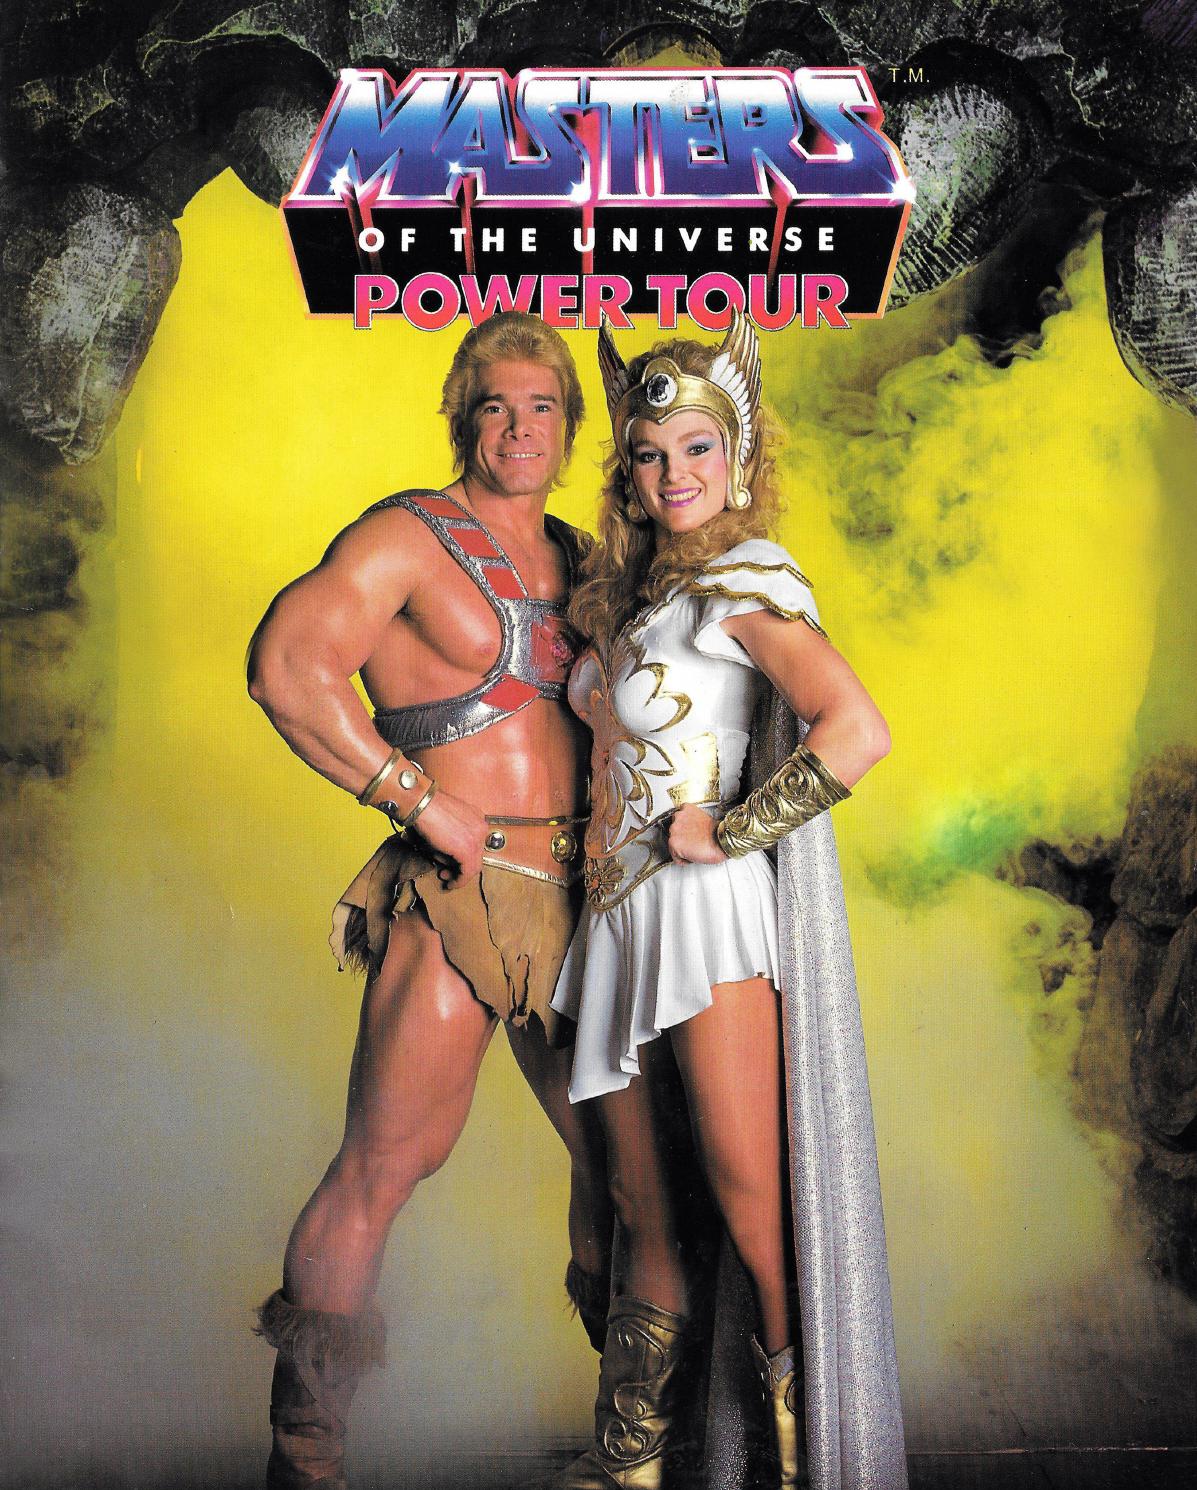
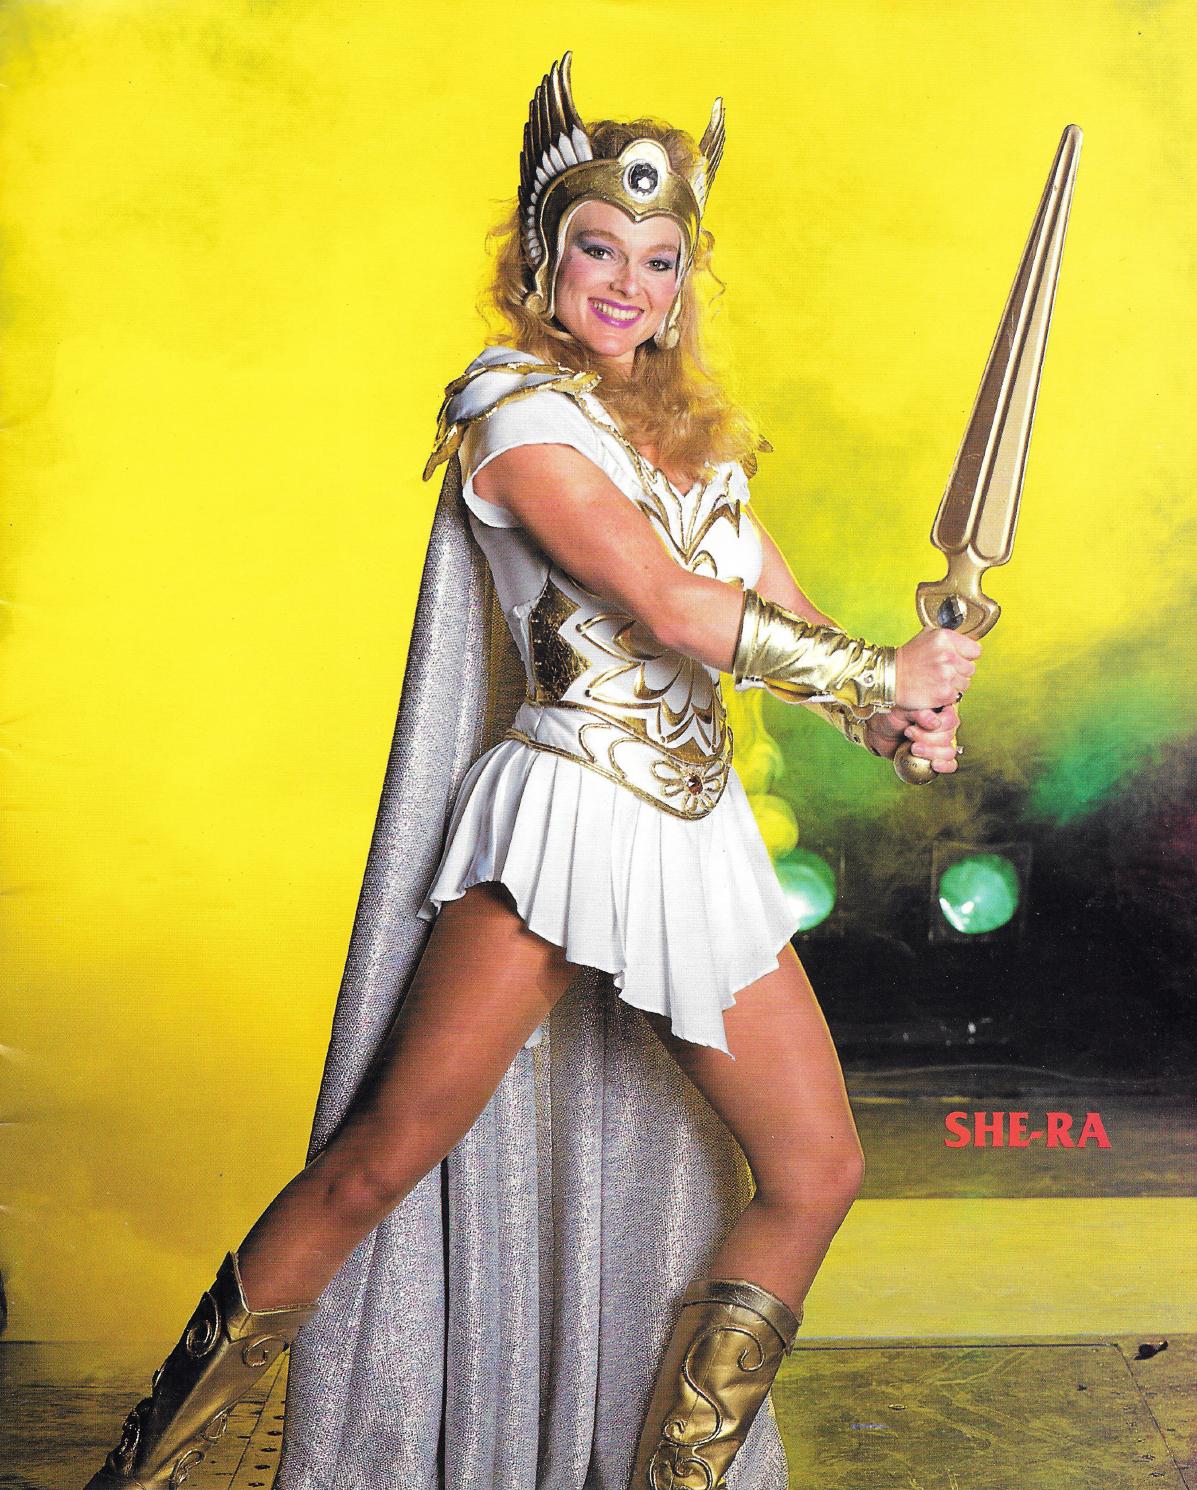
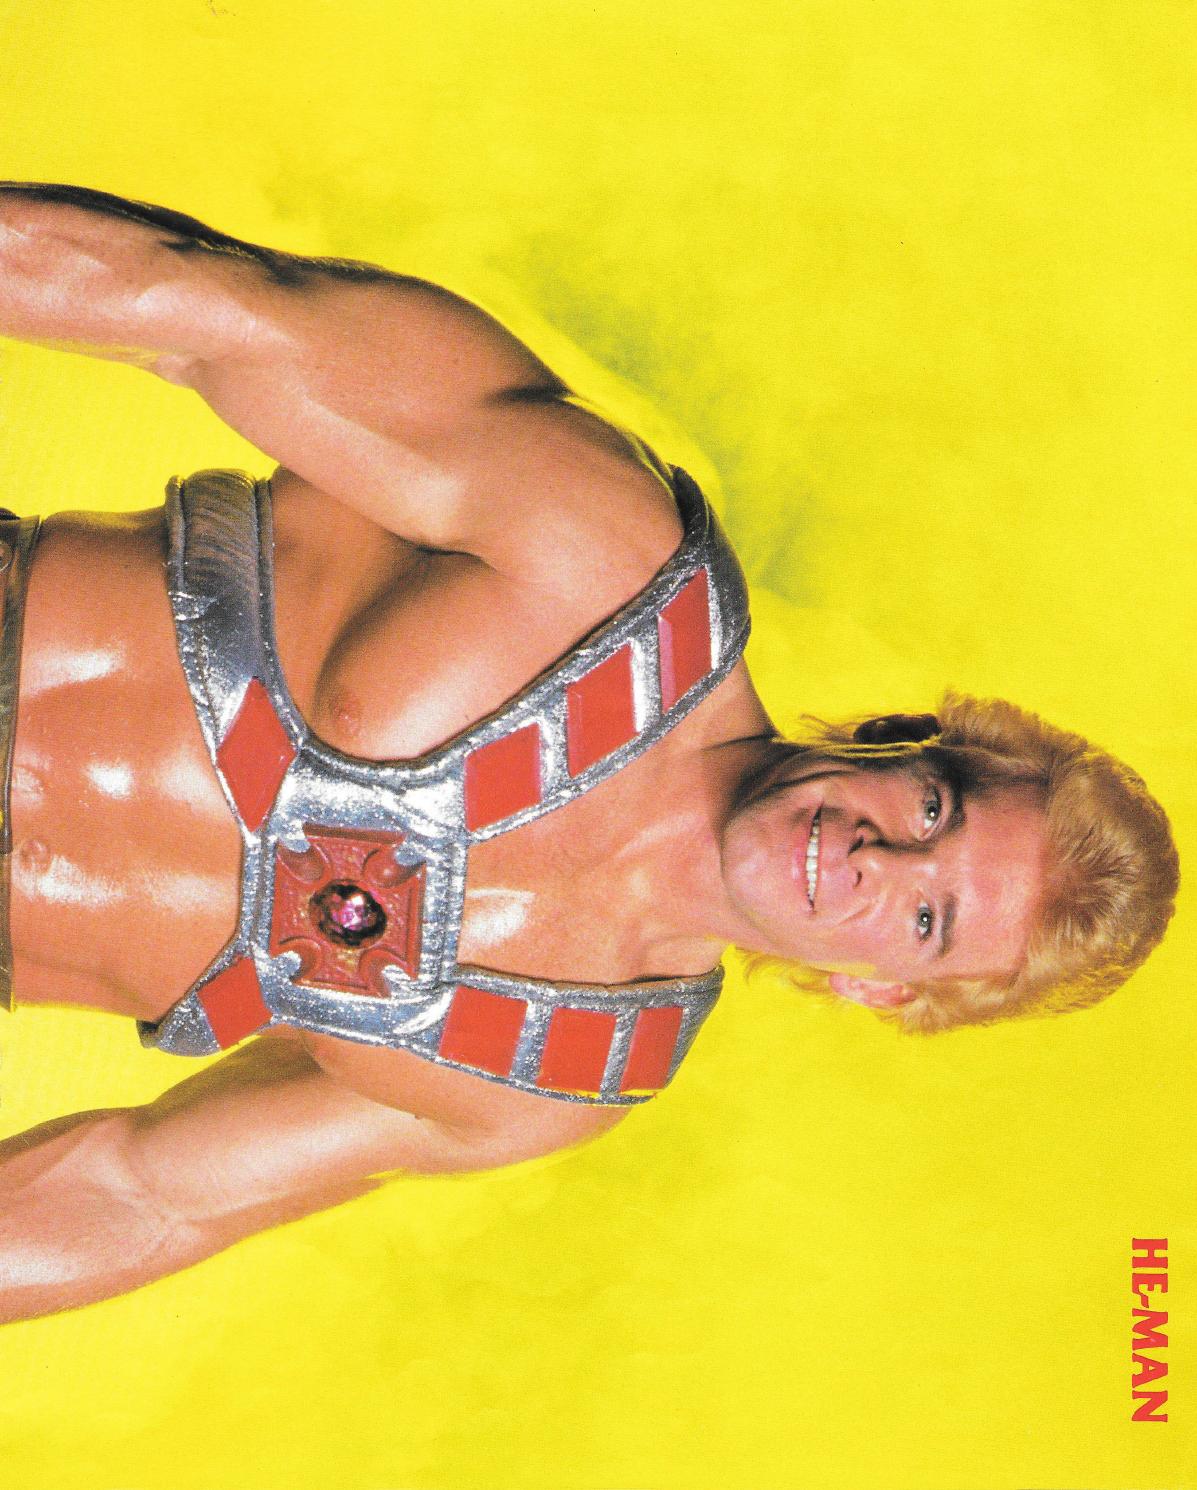
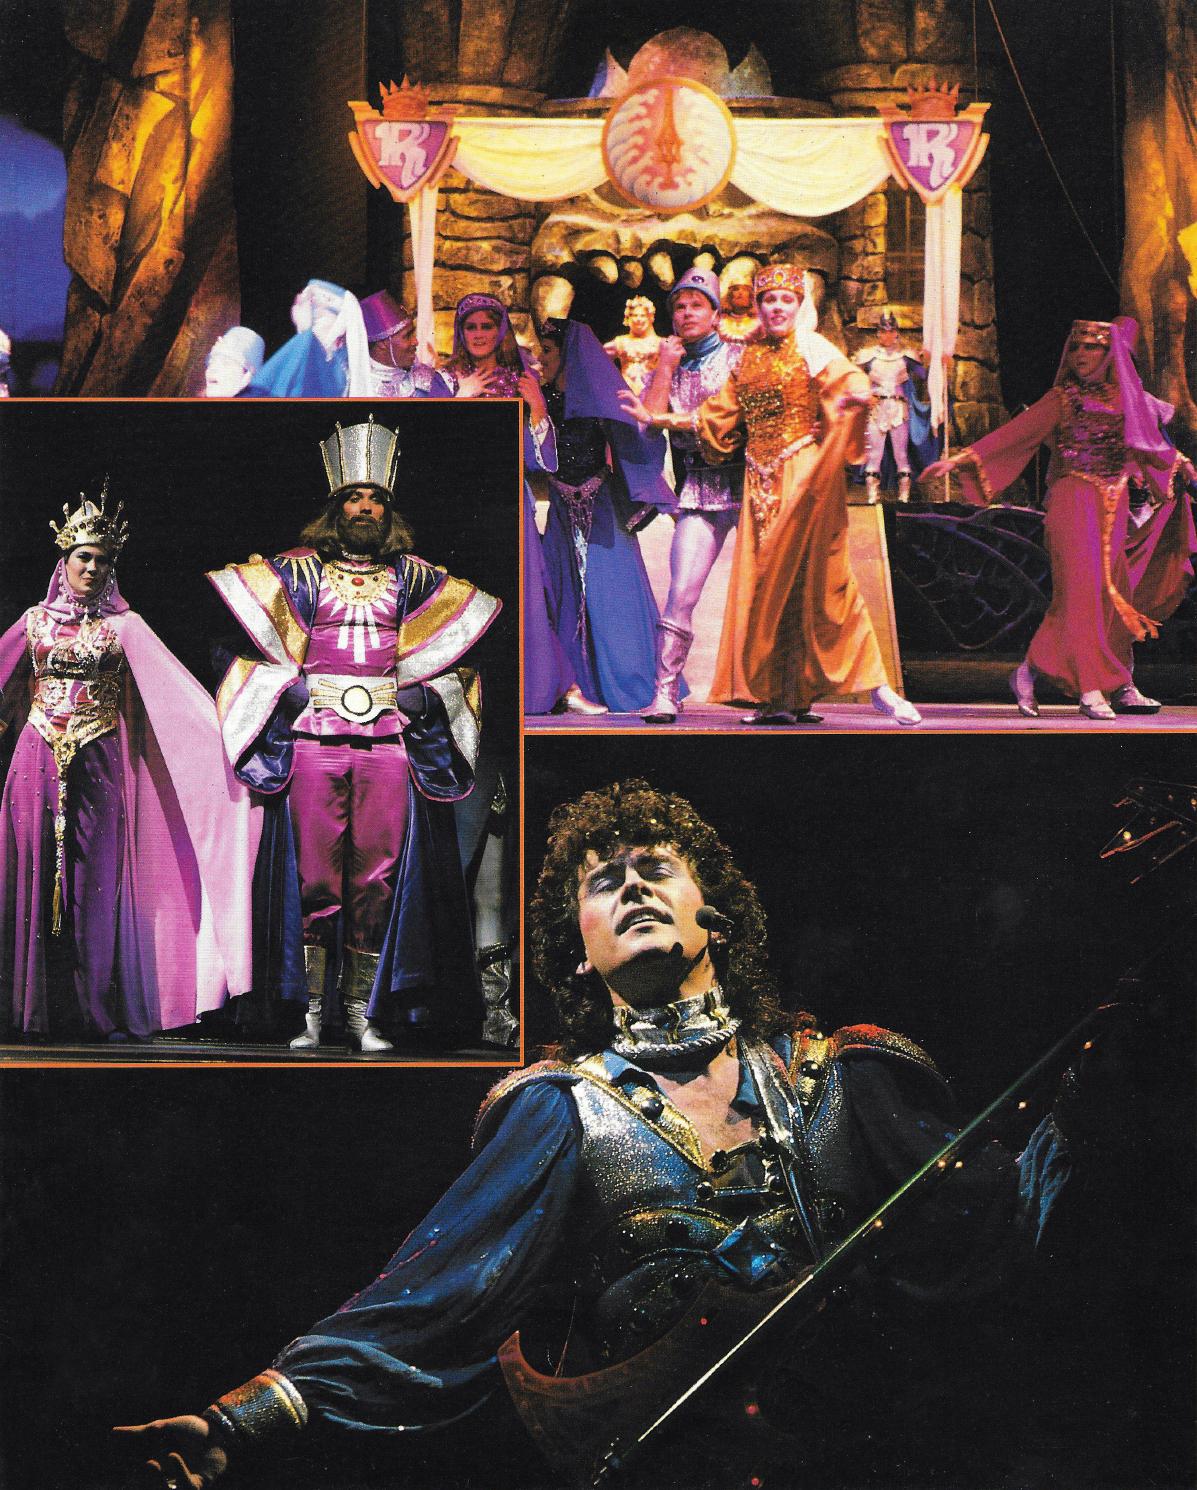
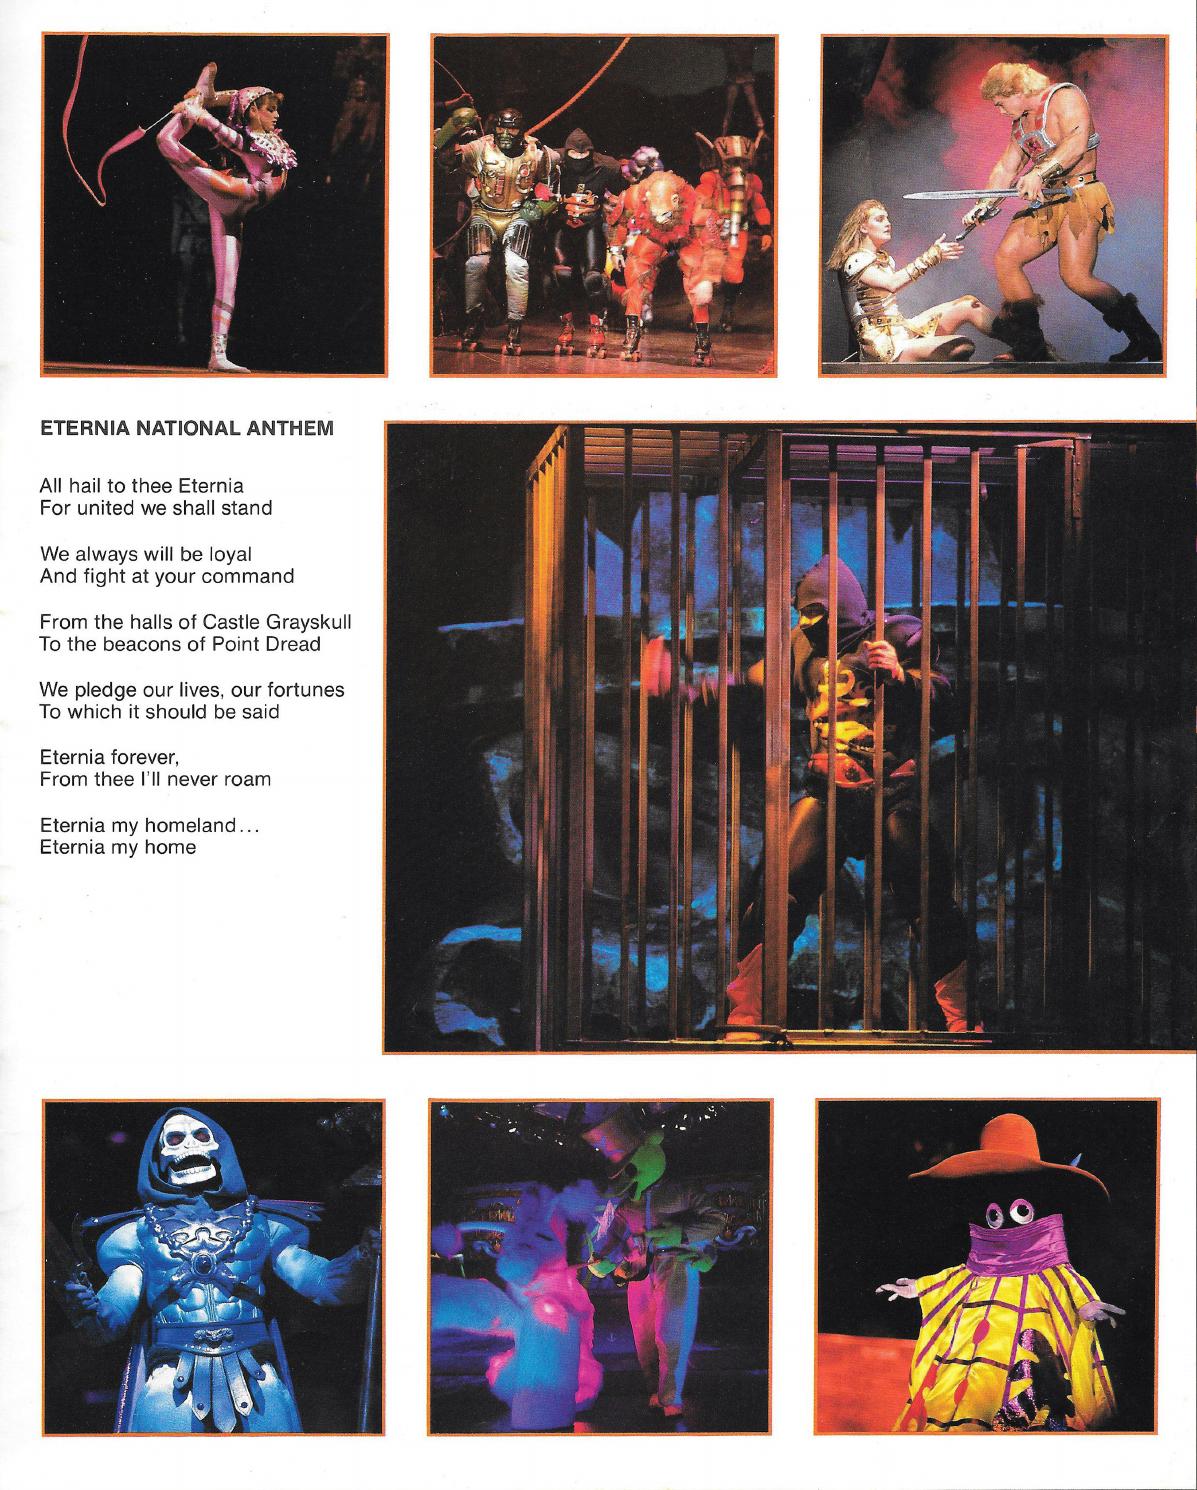
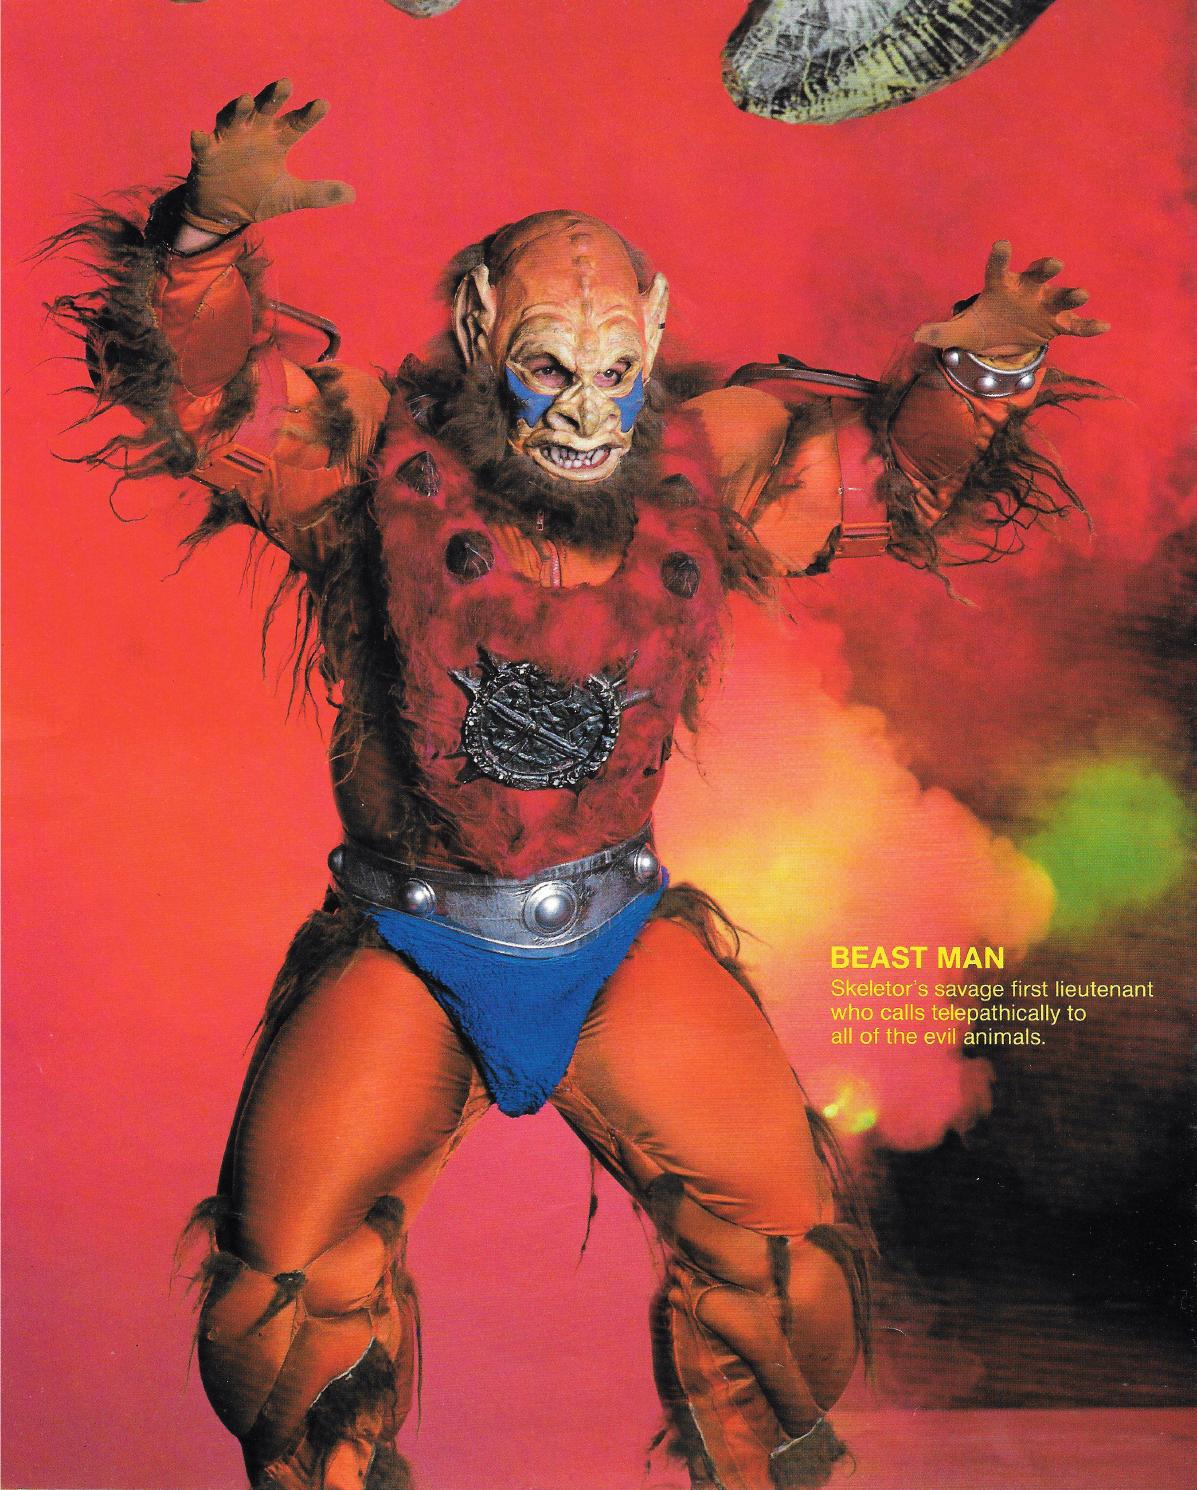
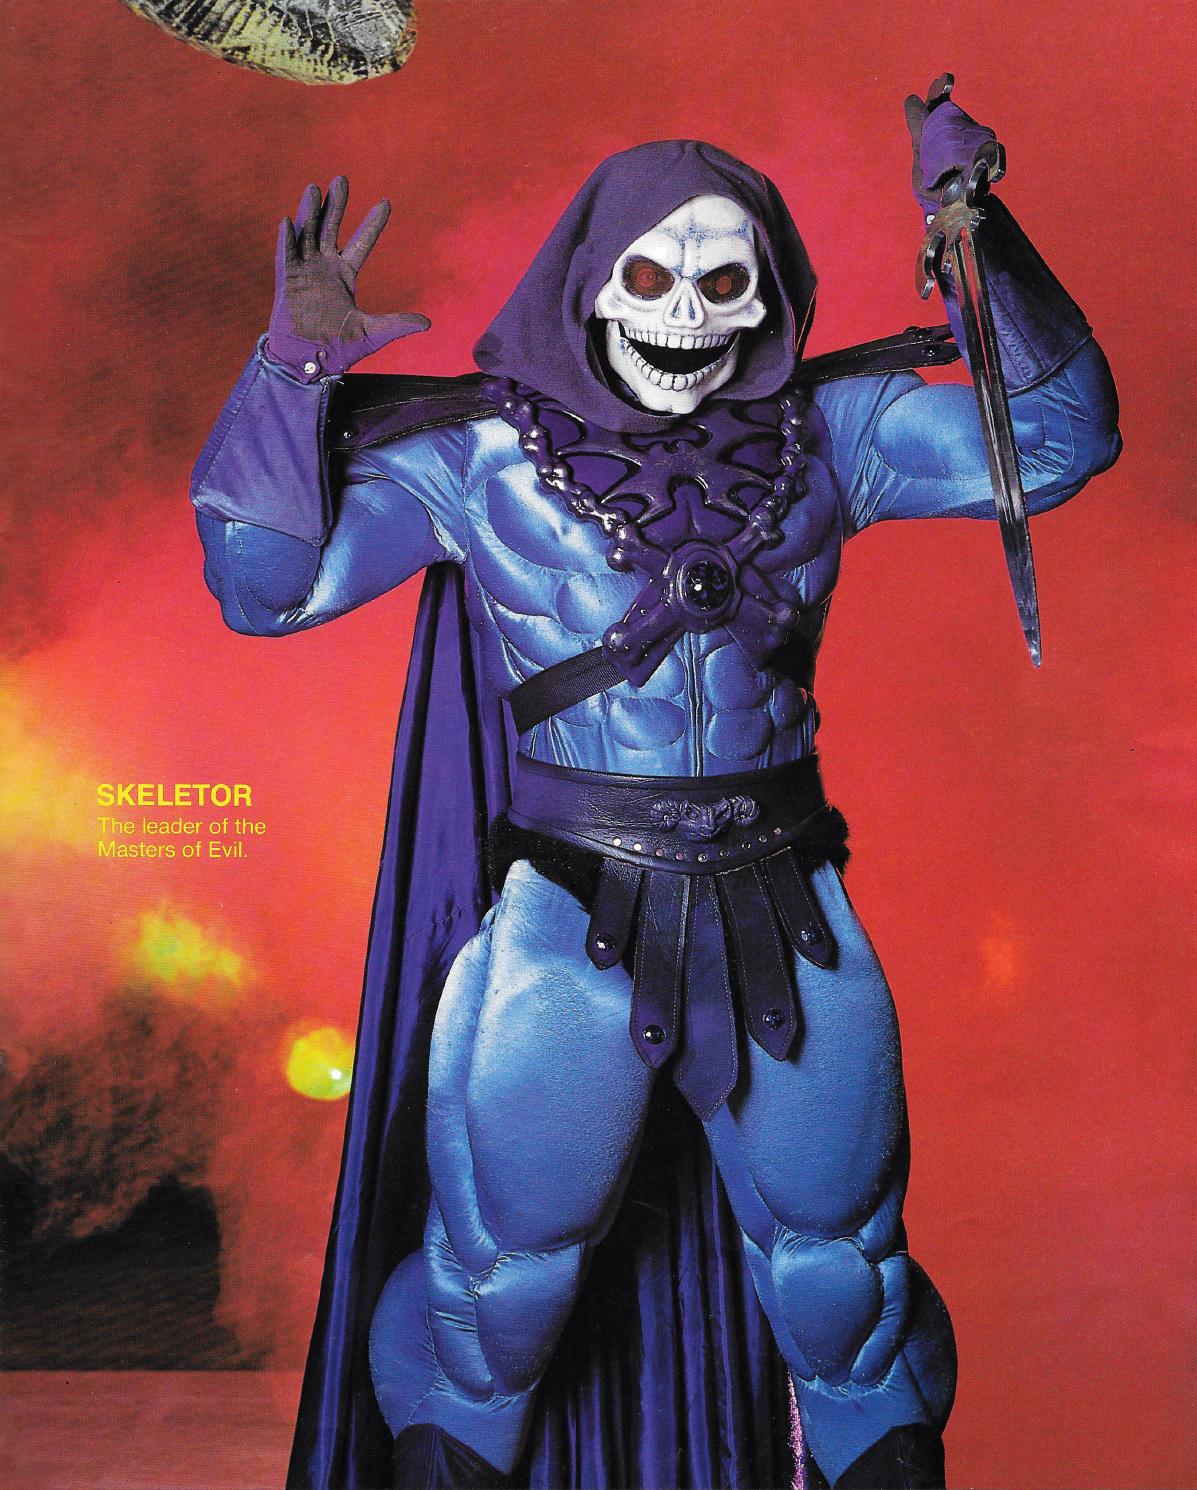
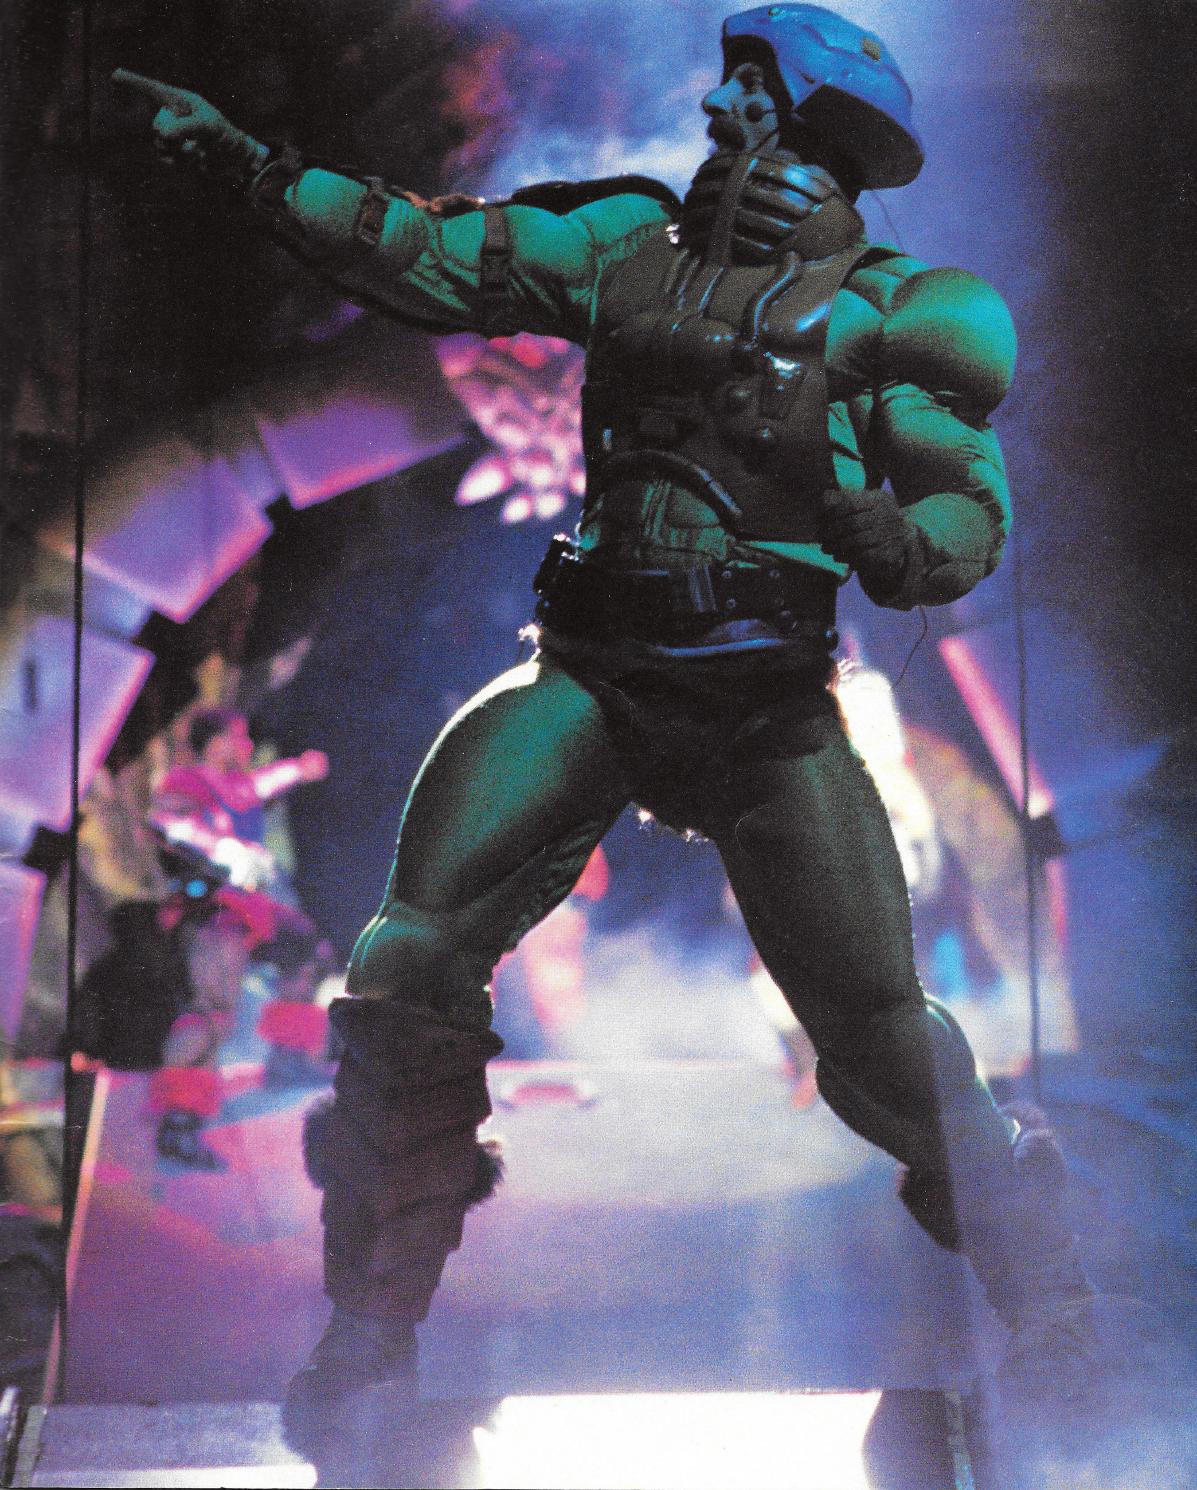
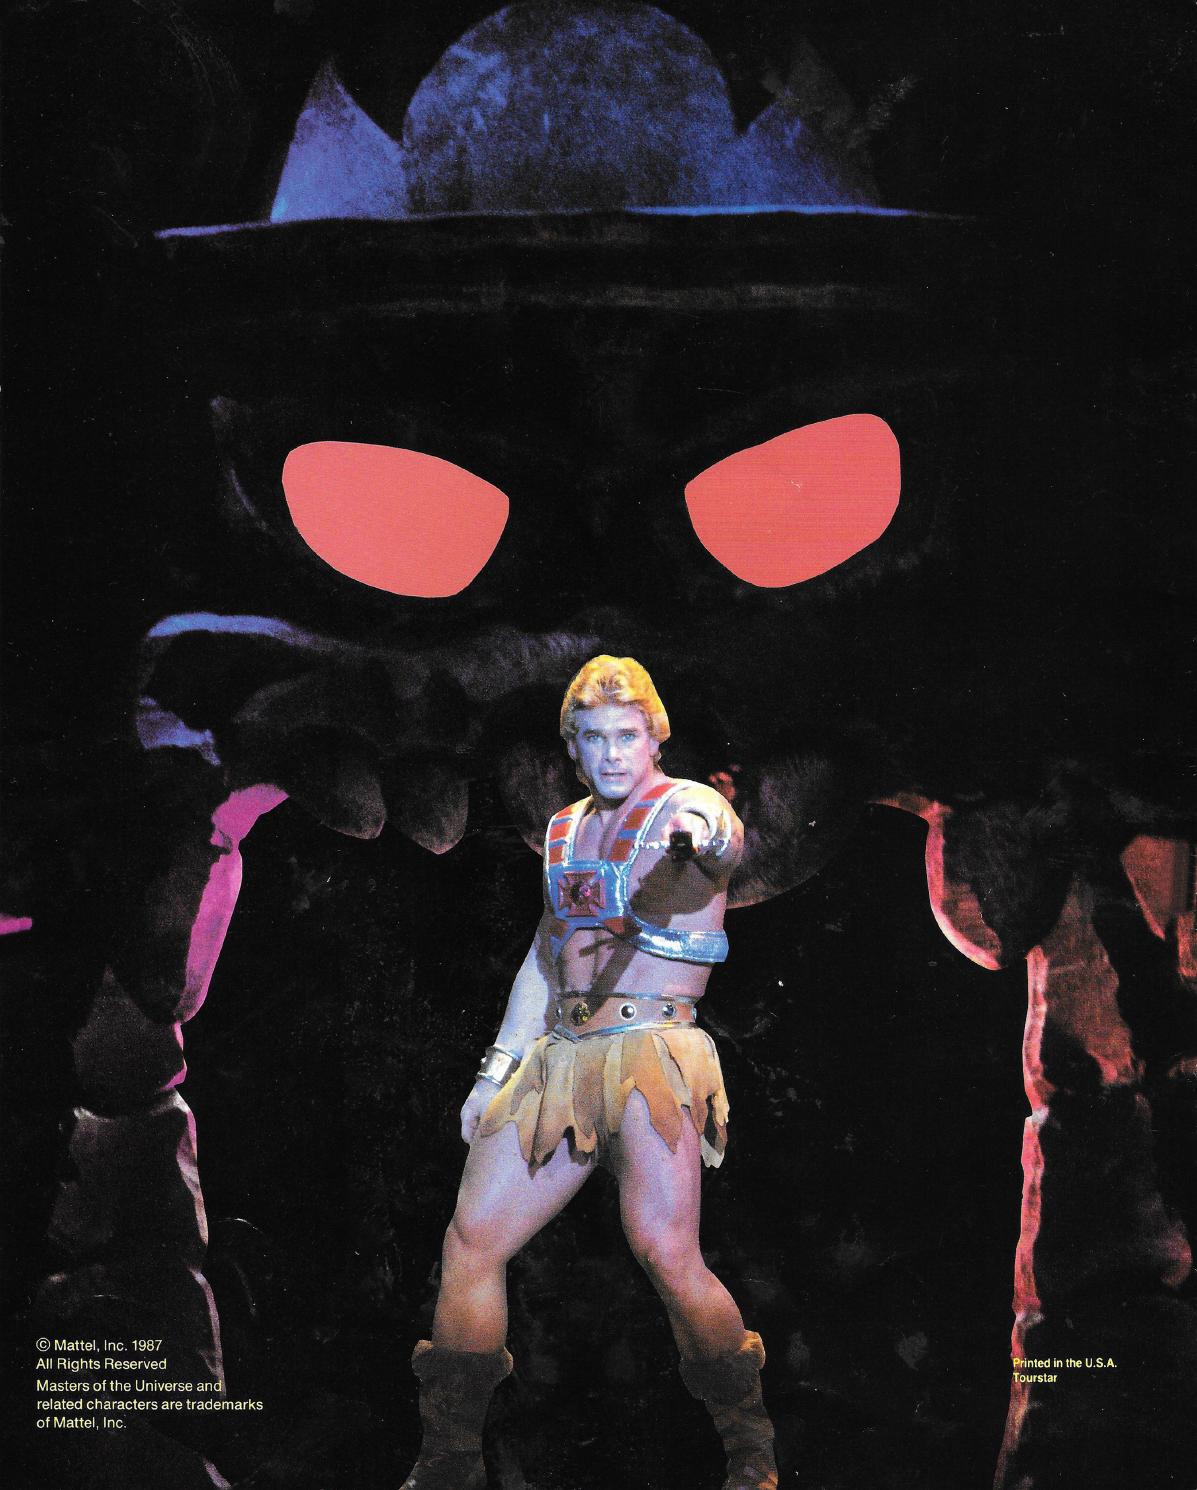
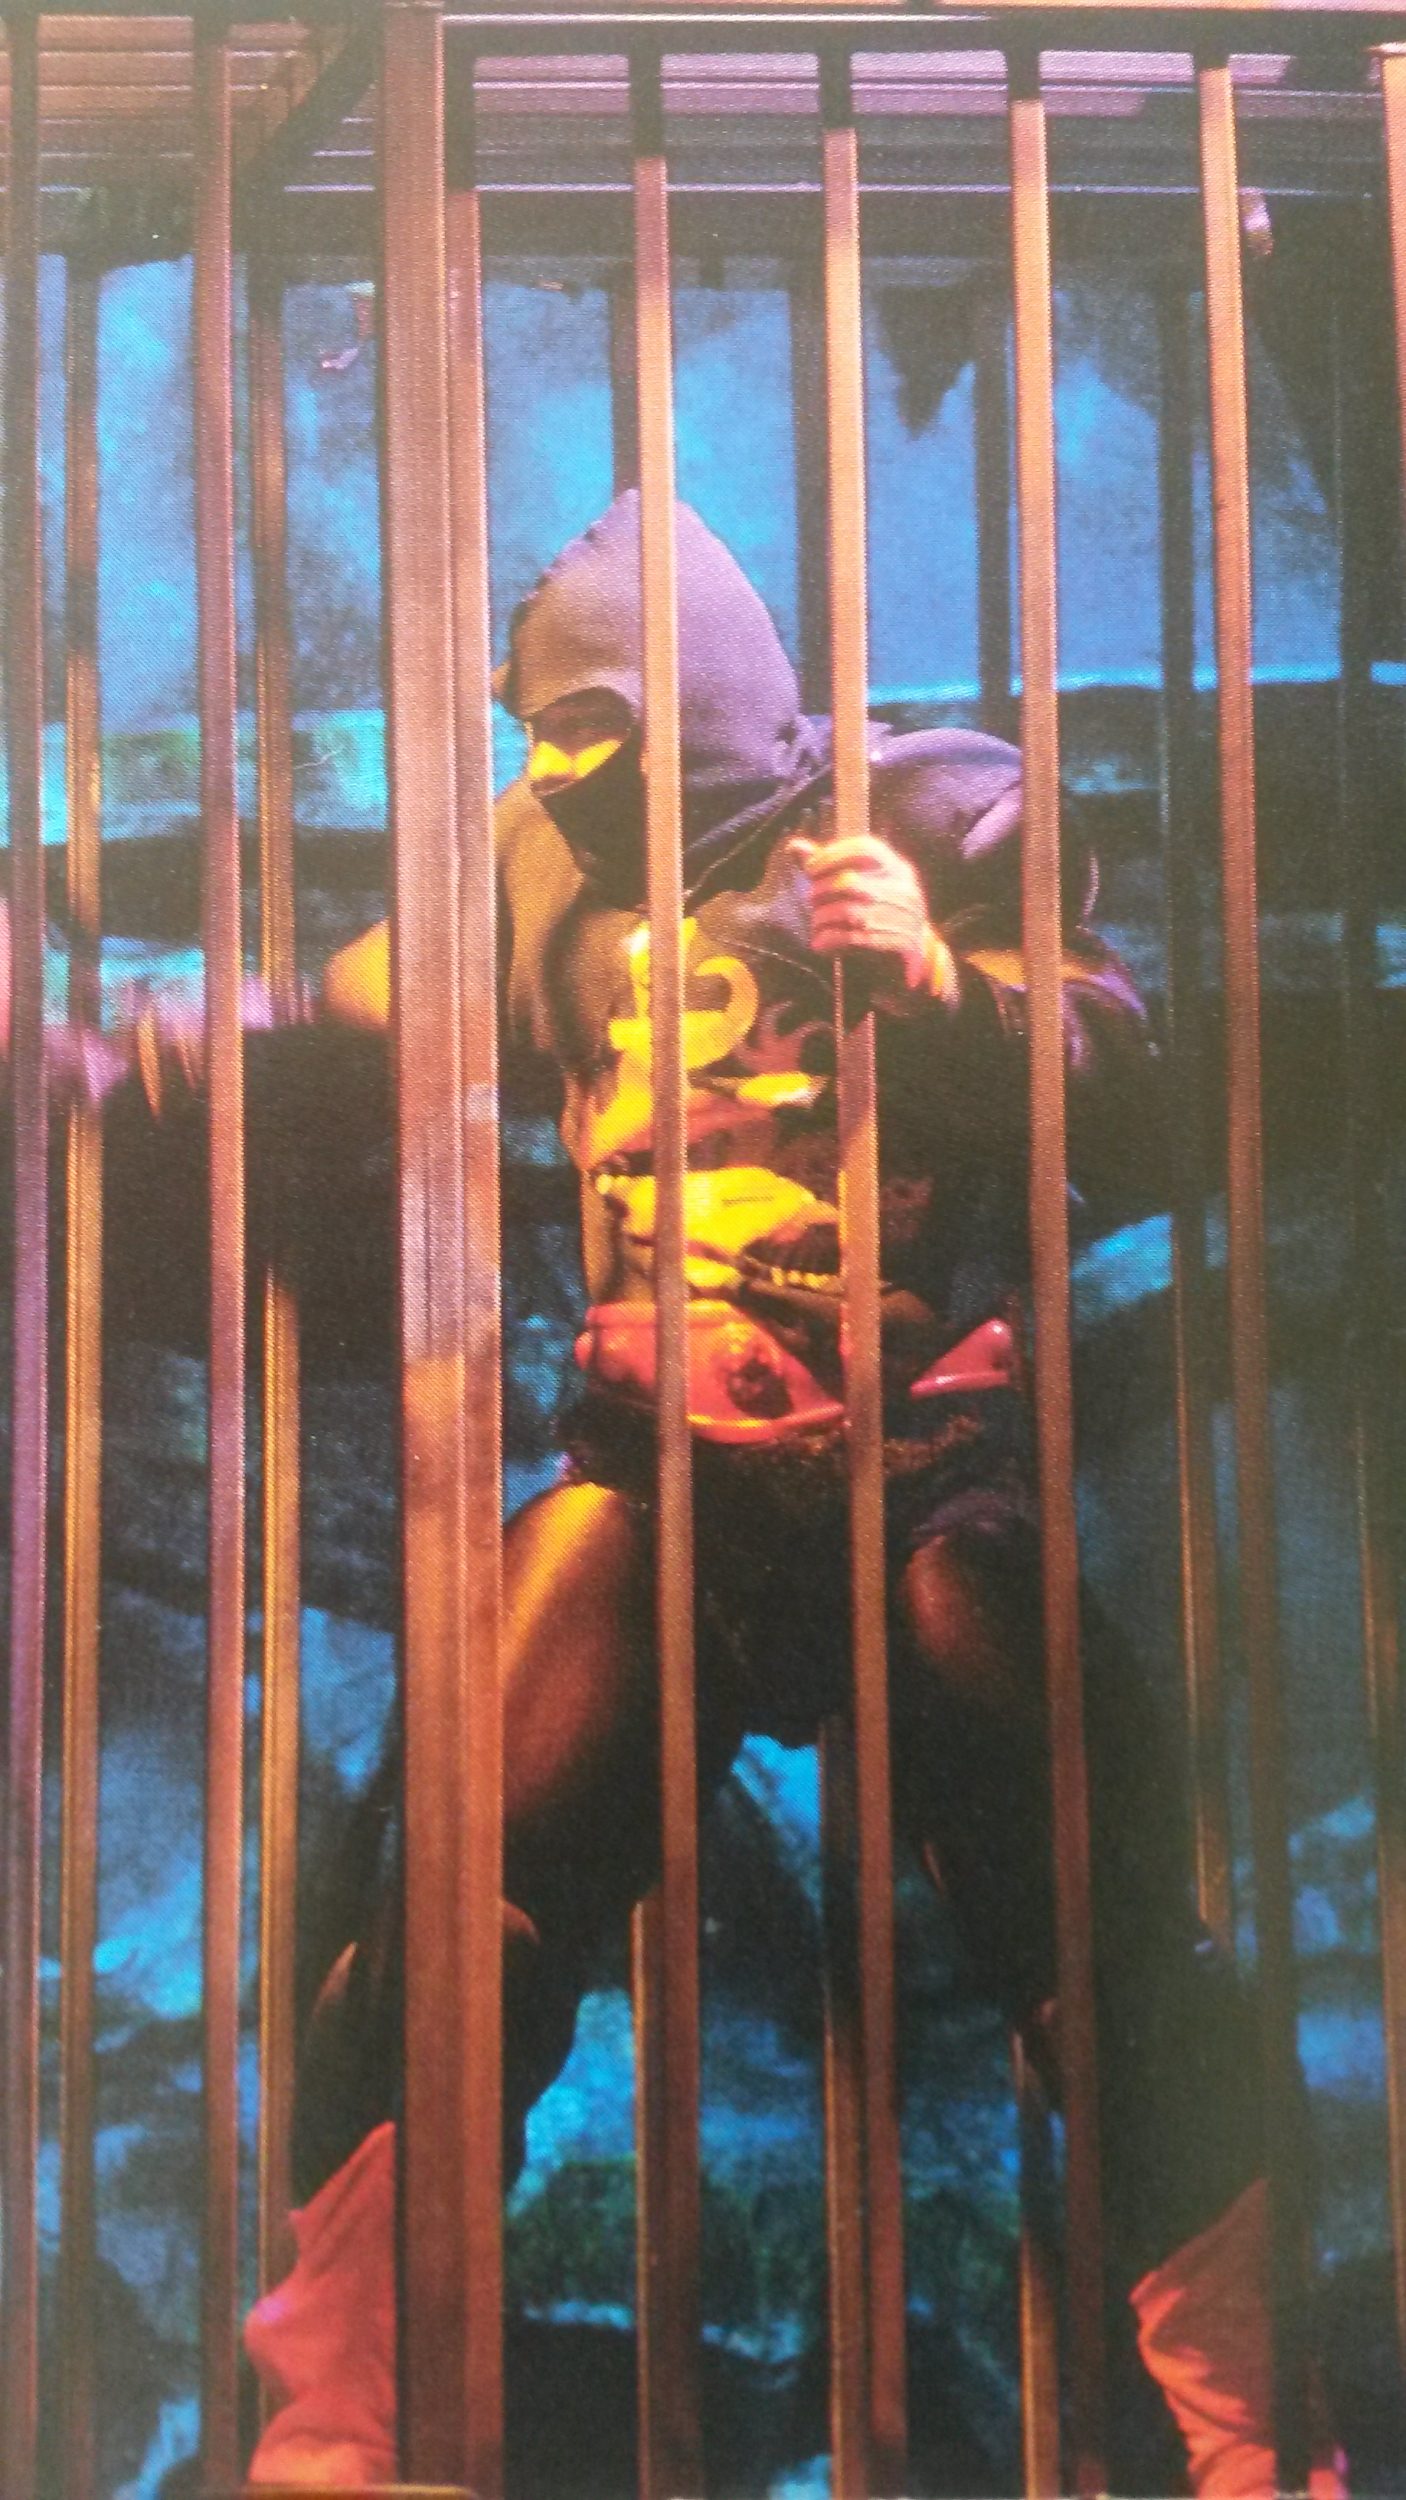
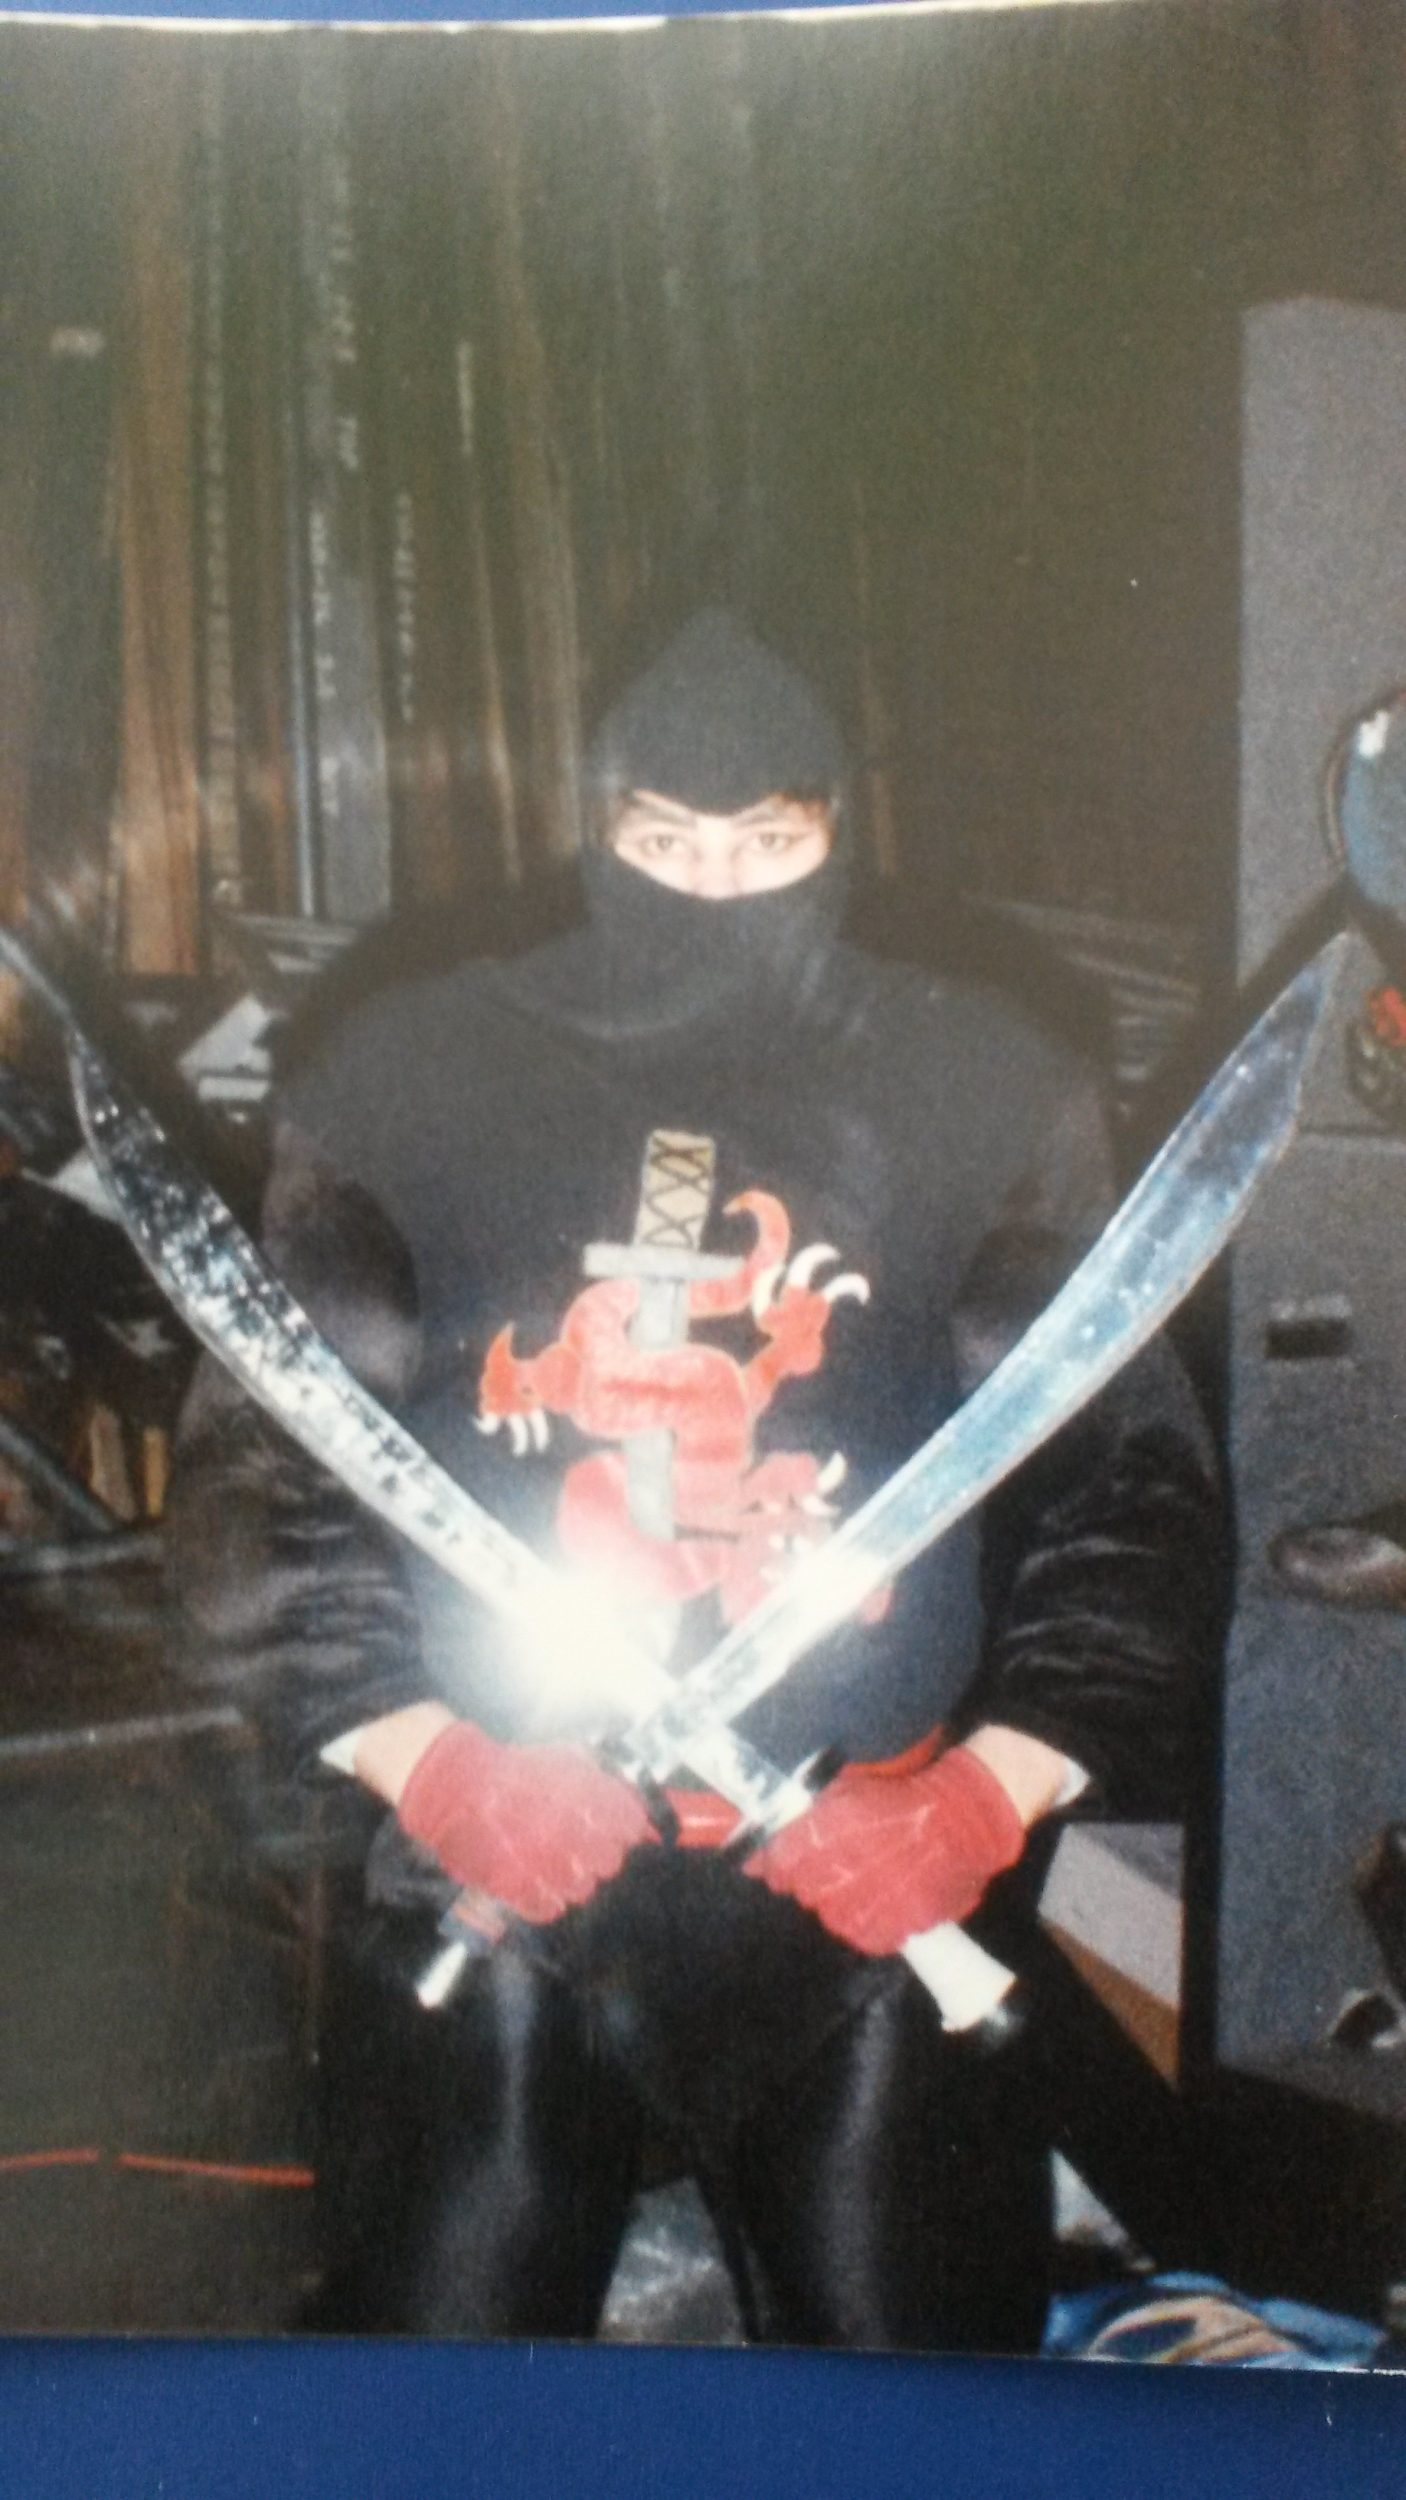
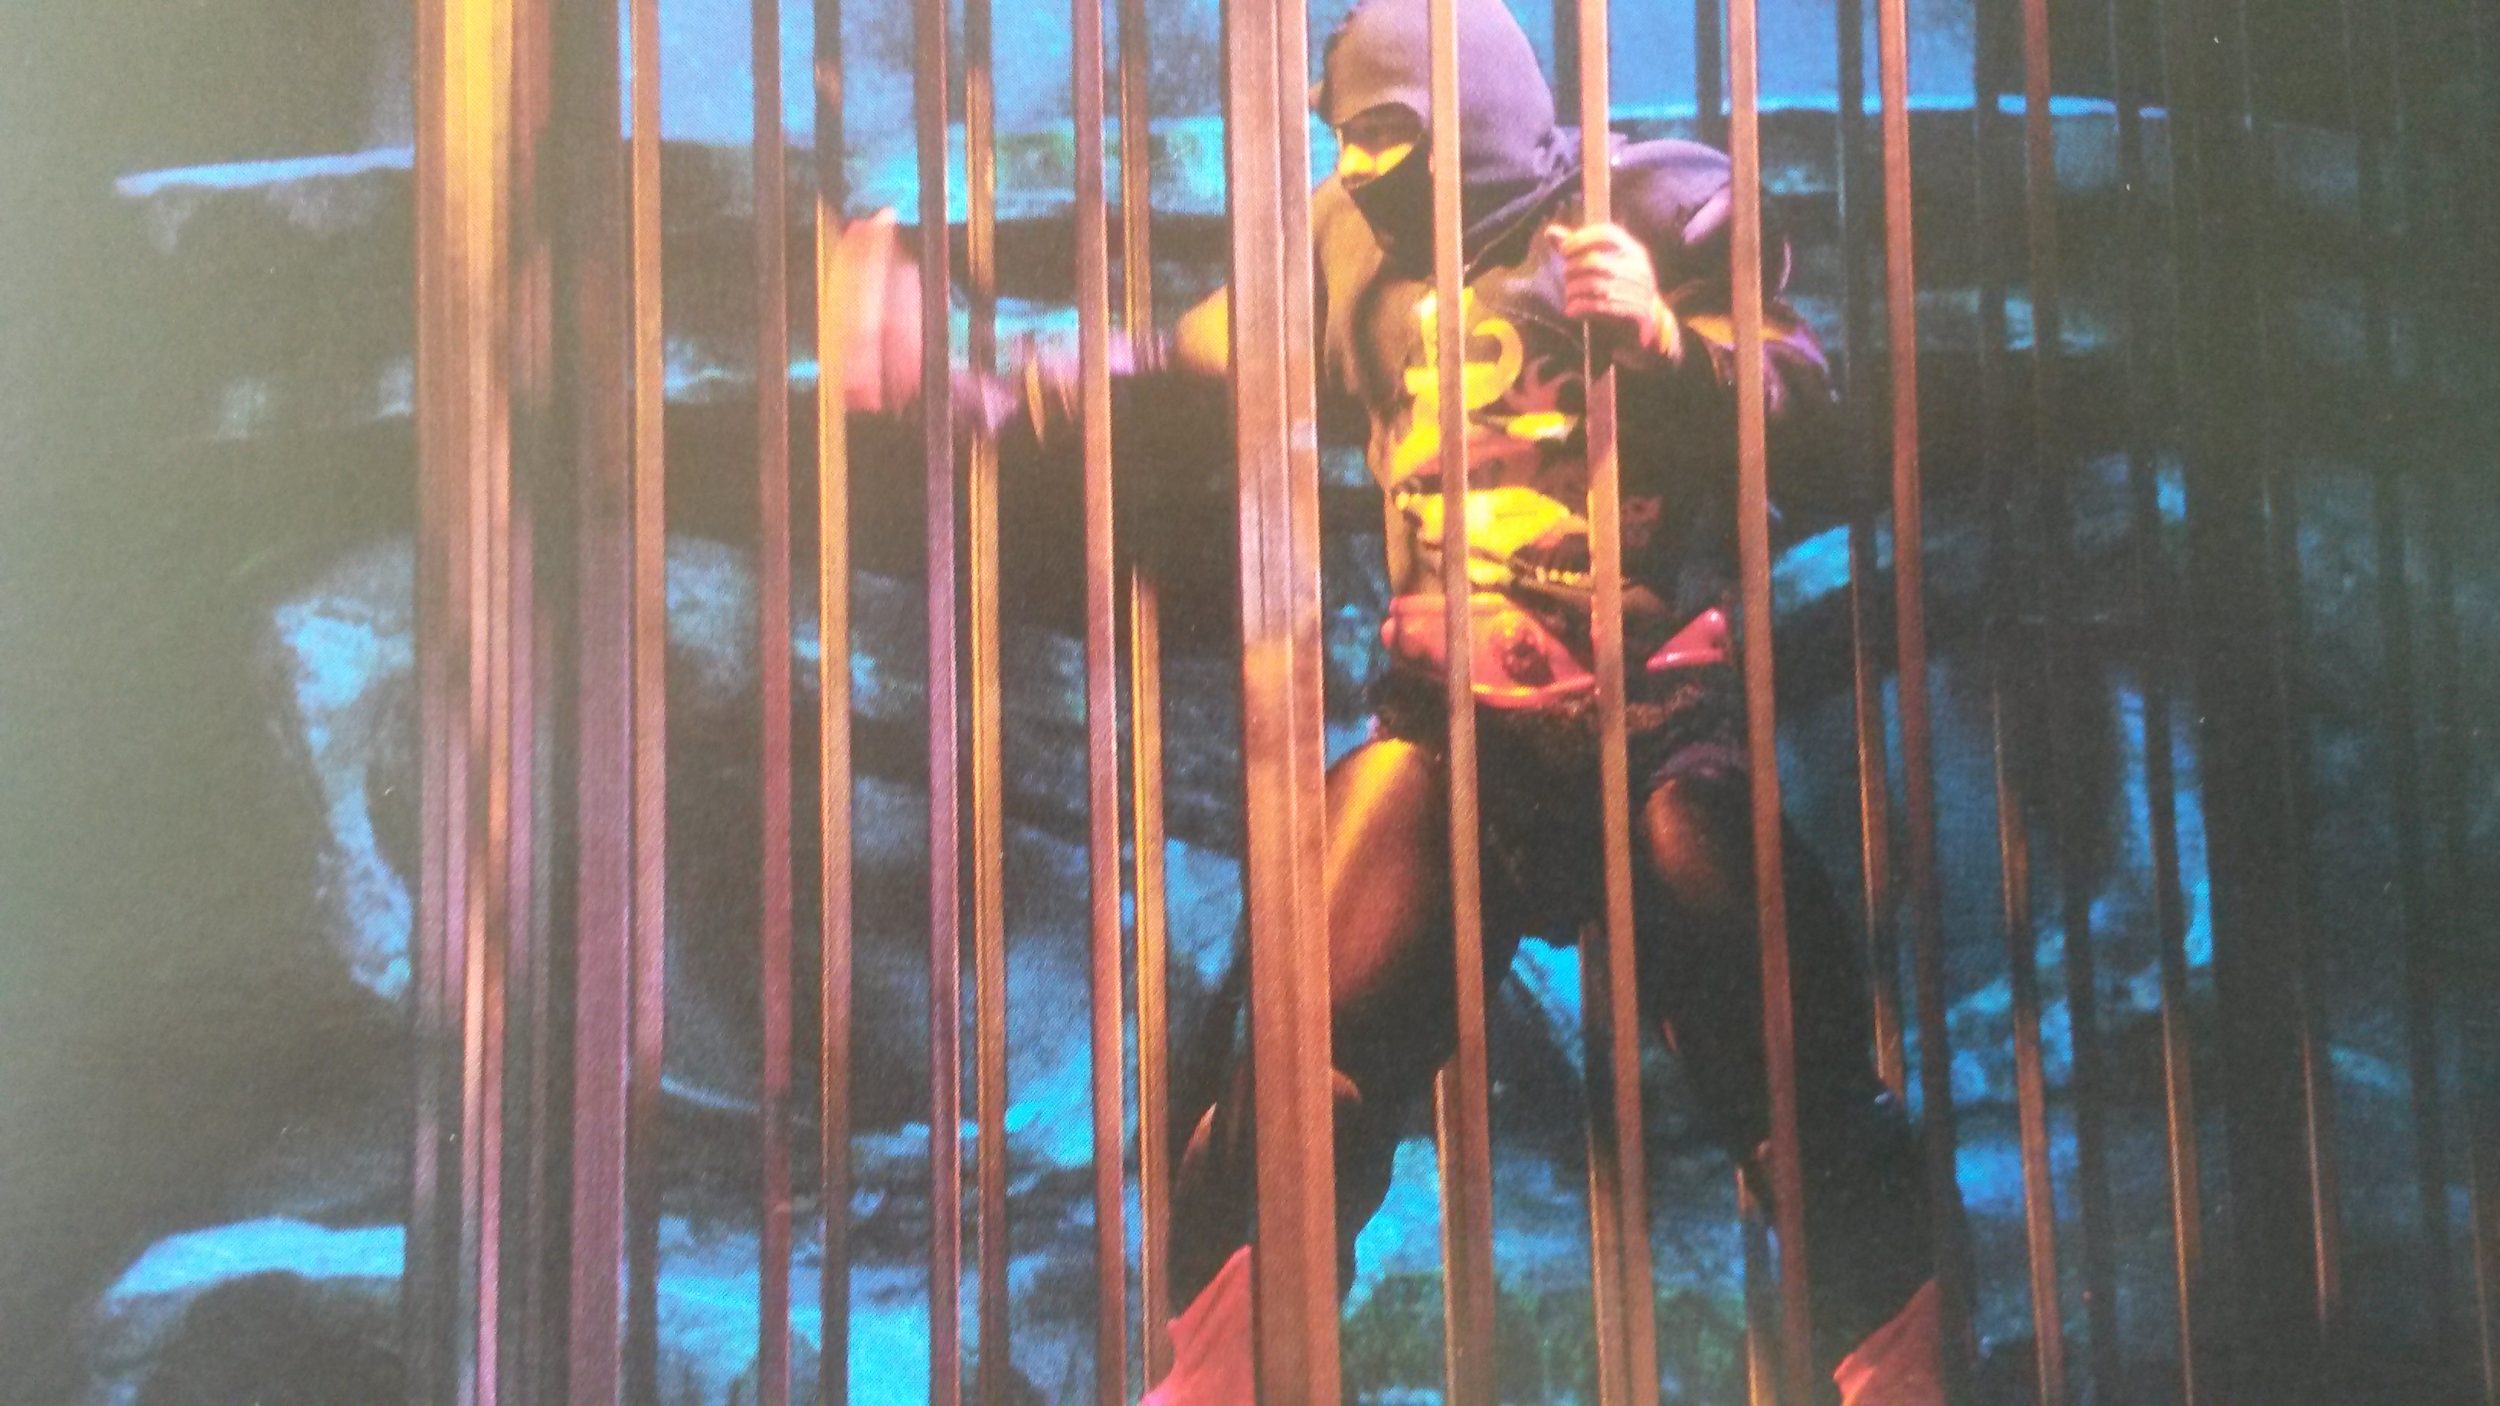
Danielle sent a folder with the Power Tour/MOTU logo on the front. Inside was a flyer advertising the event, some promo photos, and a press packet. I’ll start with the flyer and the photos. You can click on each photo in the galleries below to enlarge them.
Flyer frontFlyer back
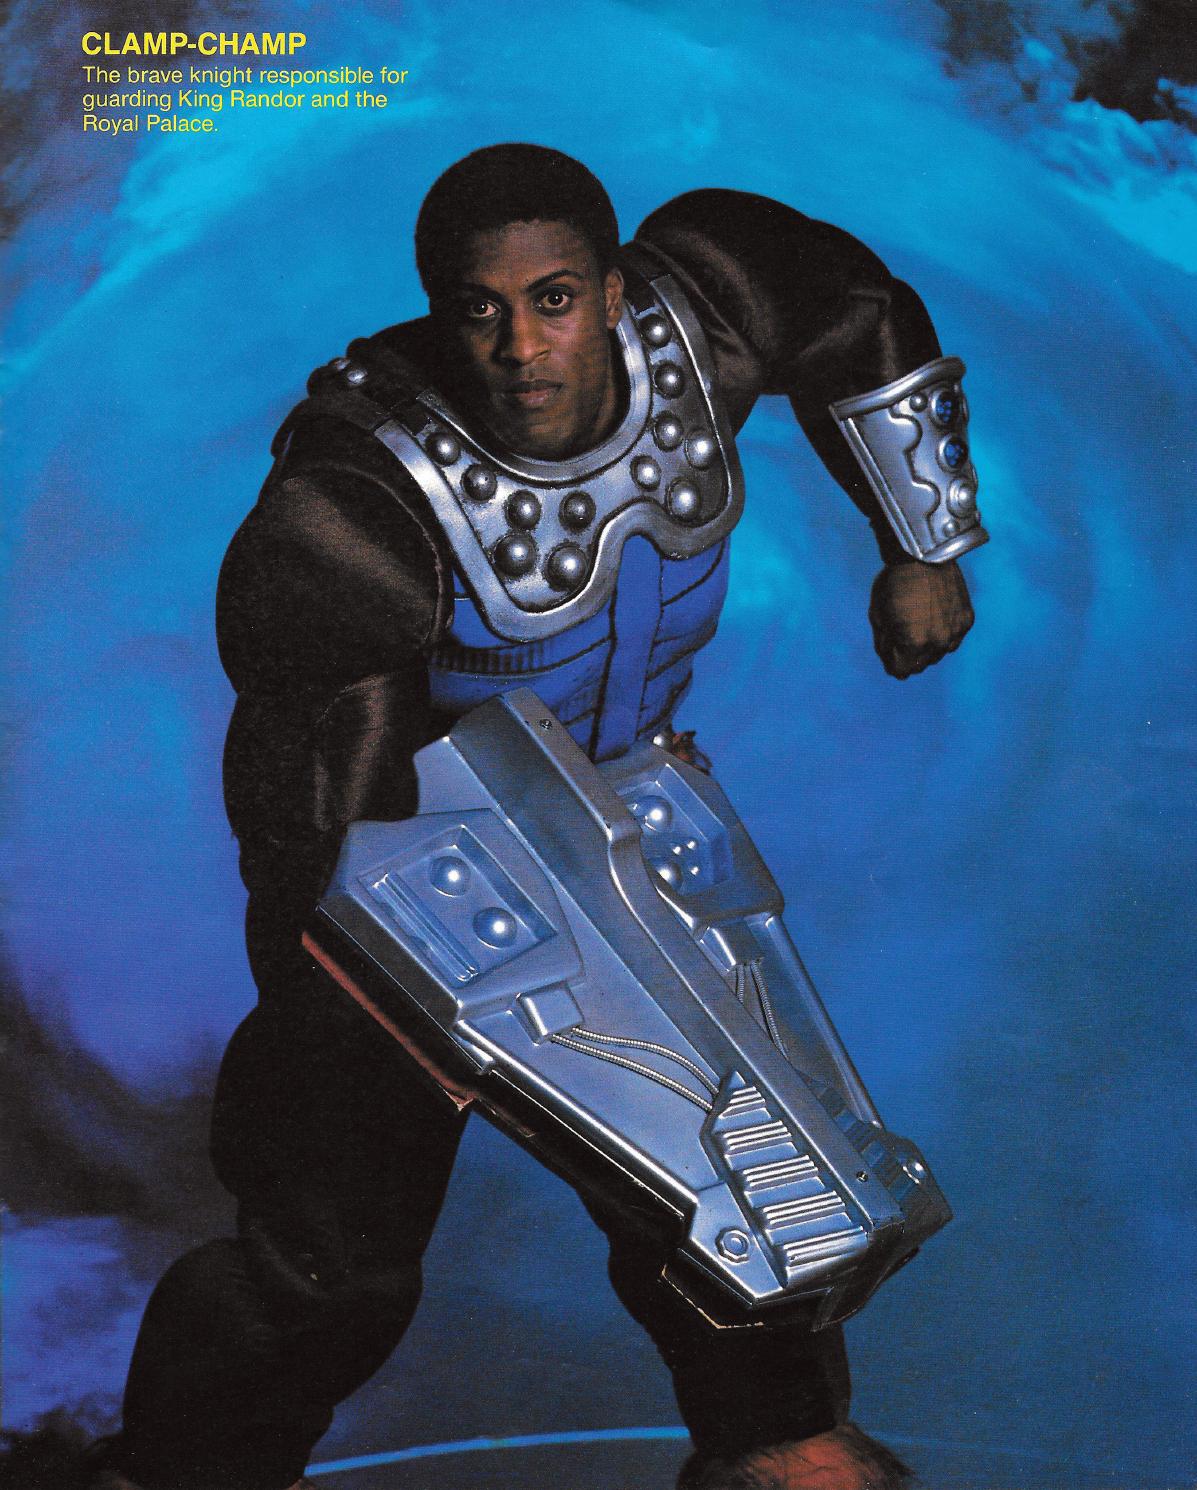
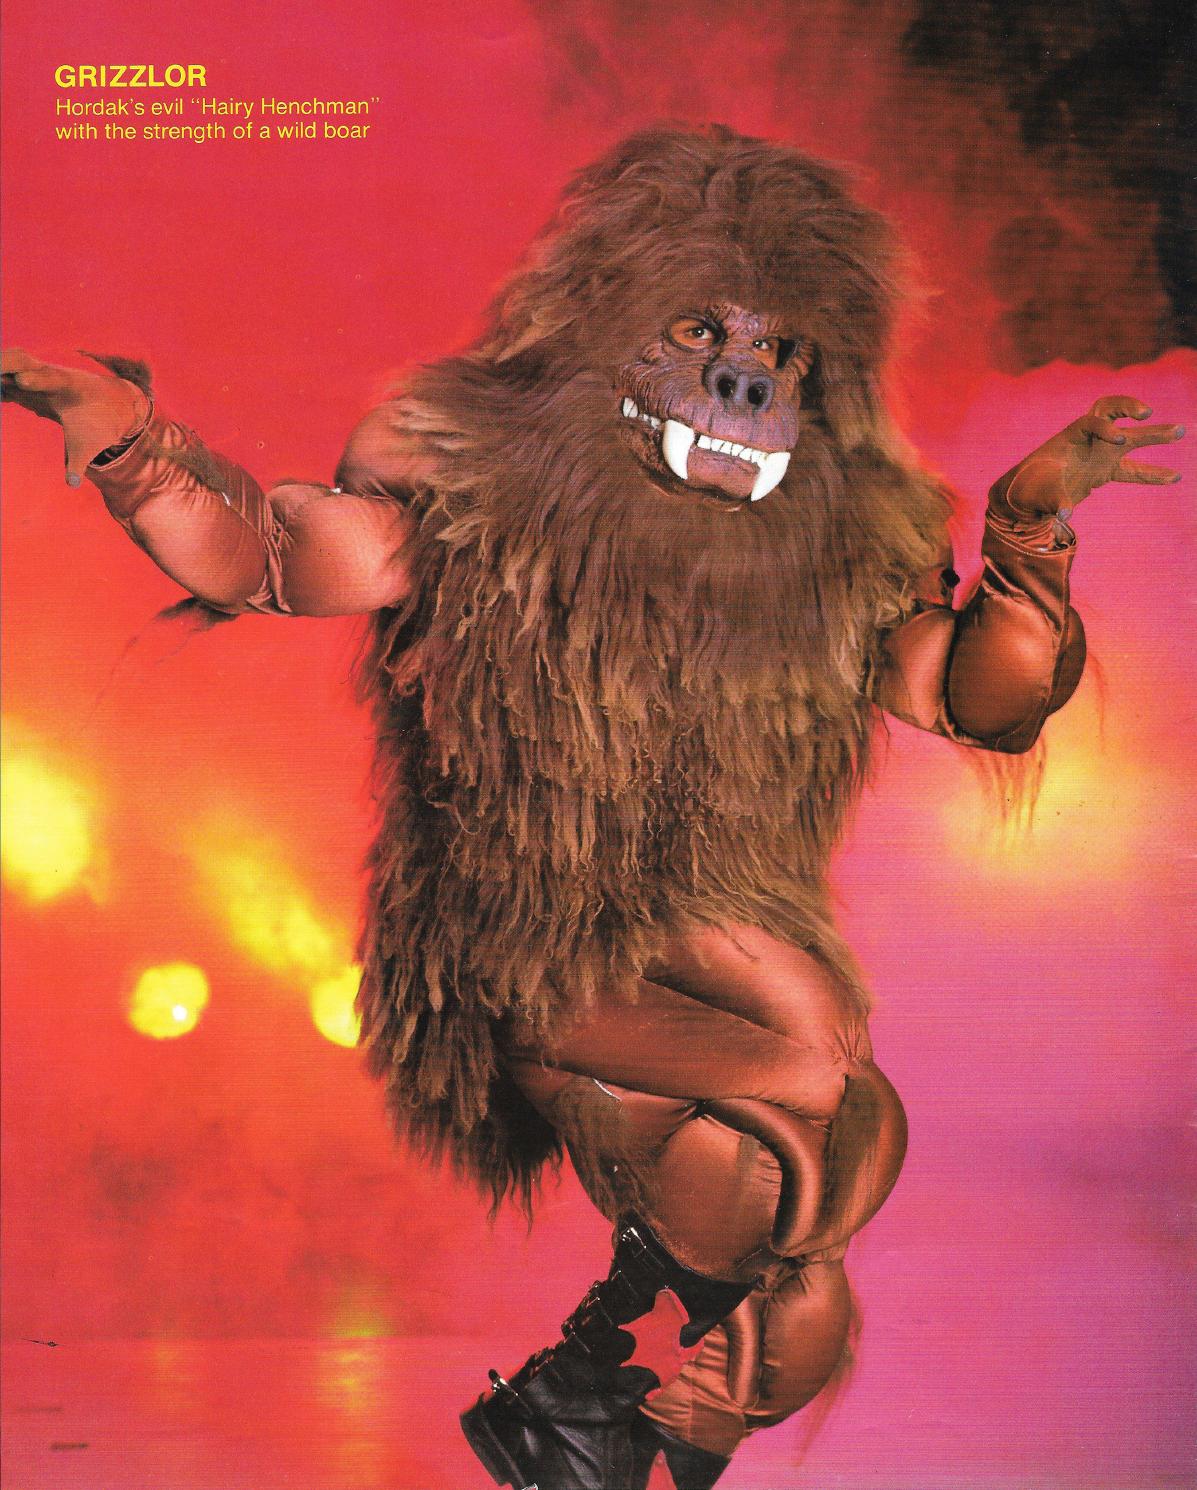
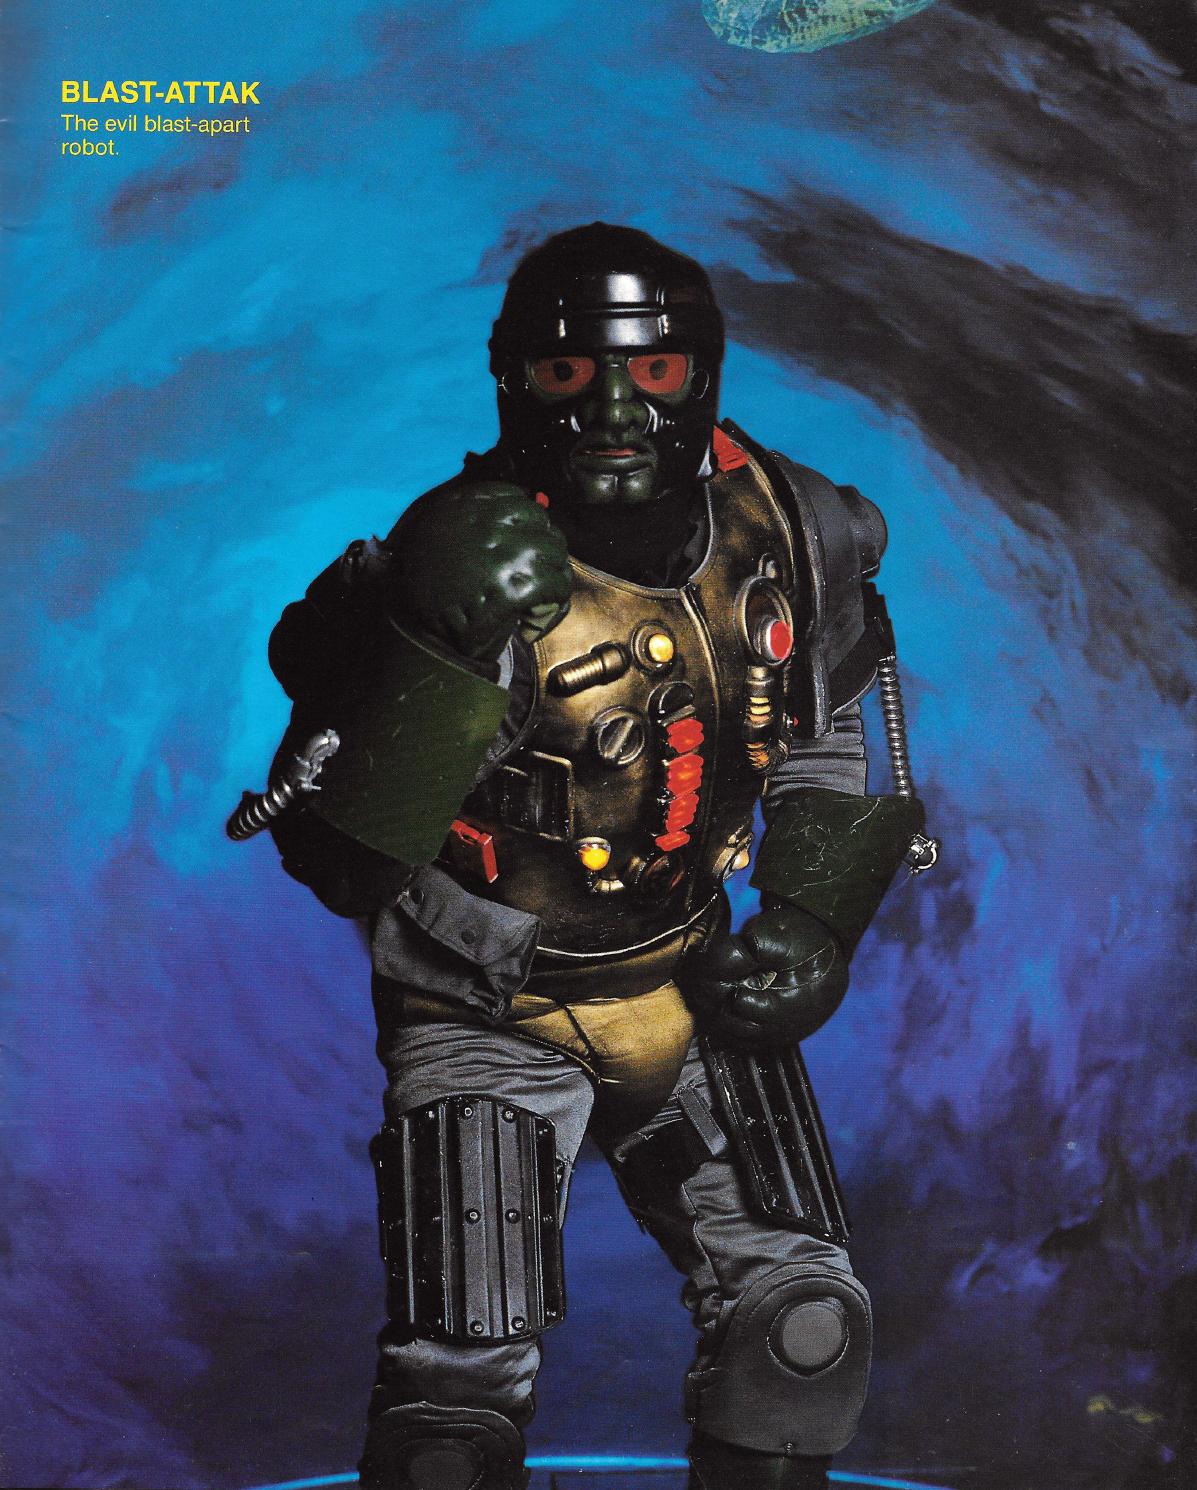
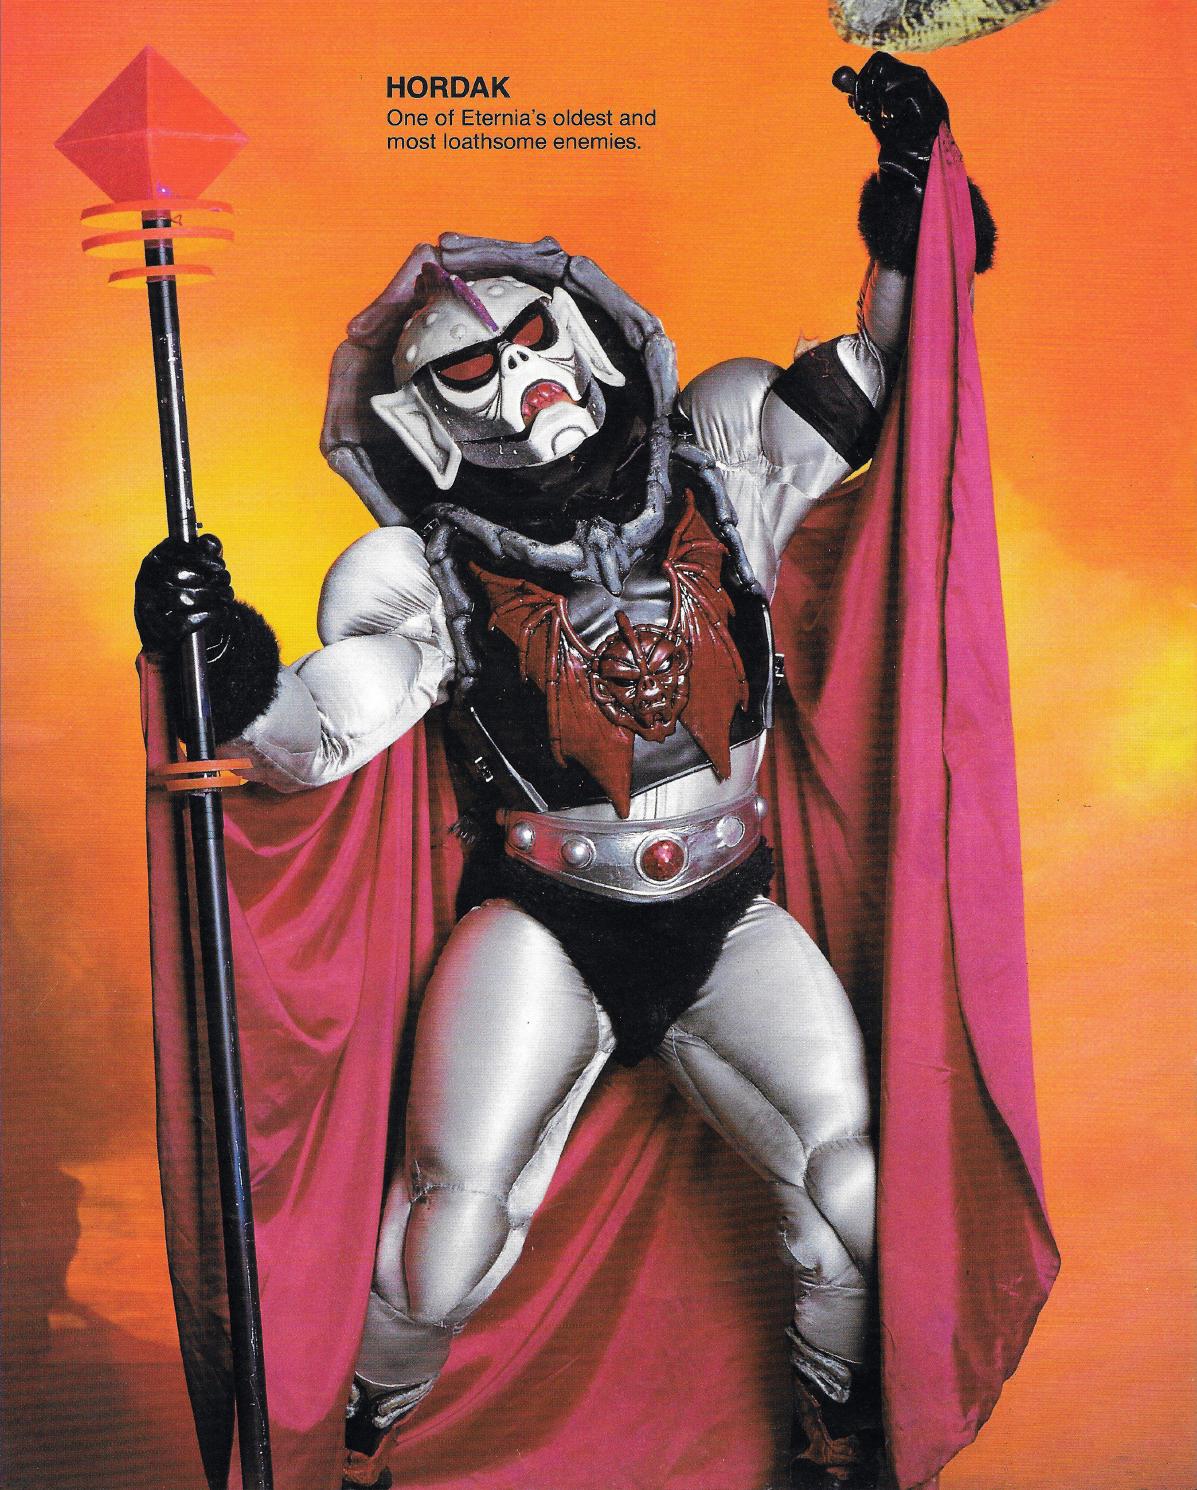
Here are the individual photos:
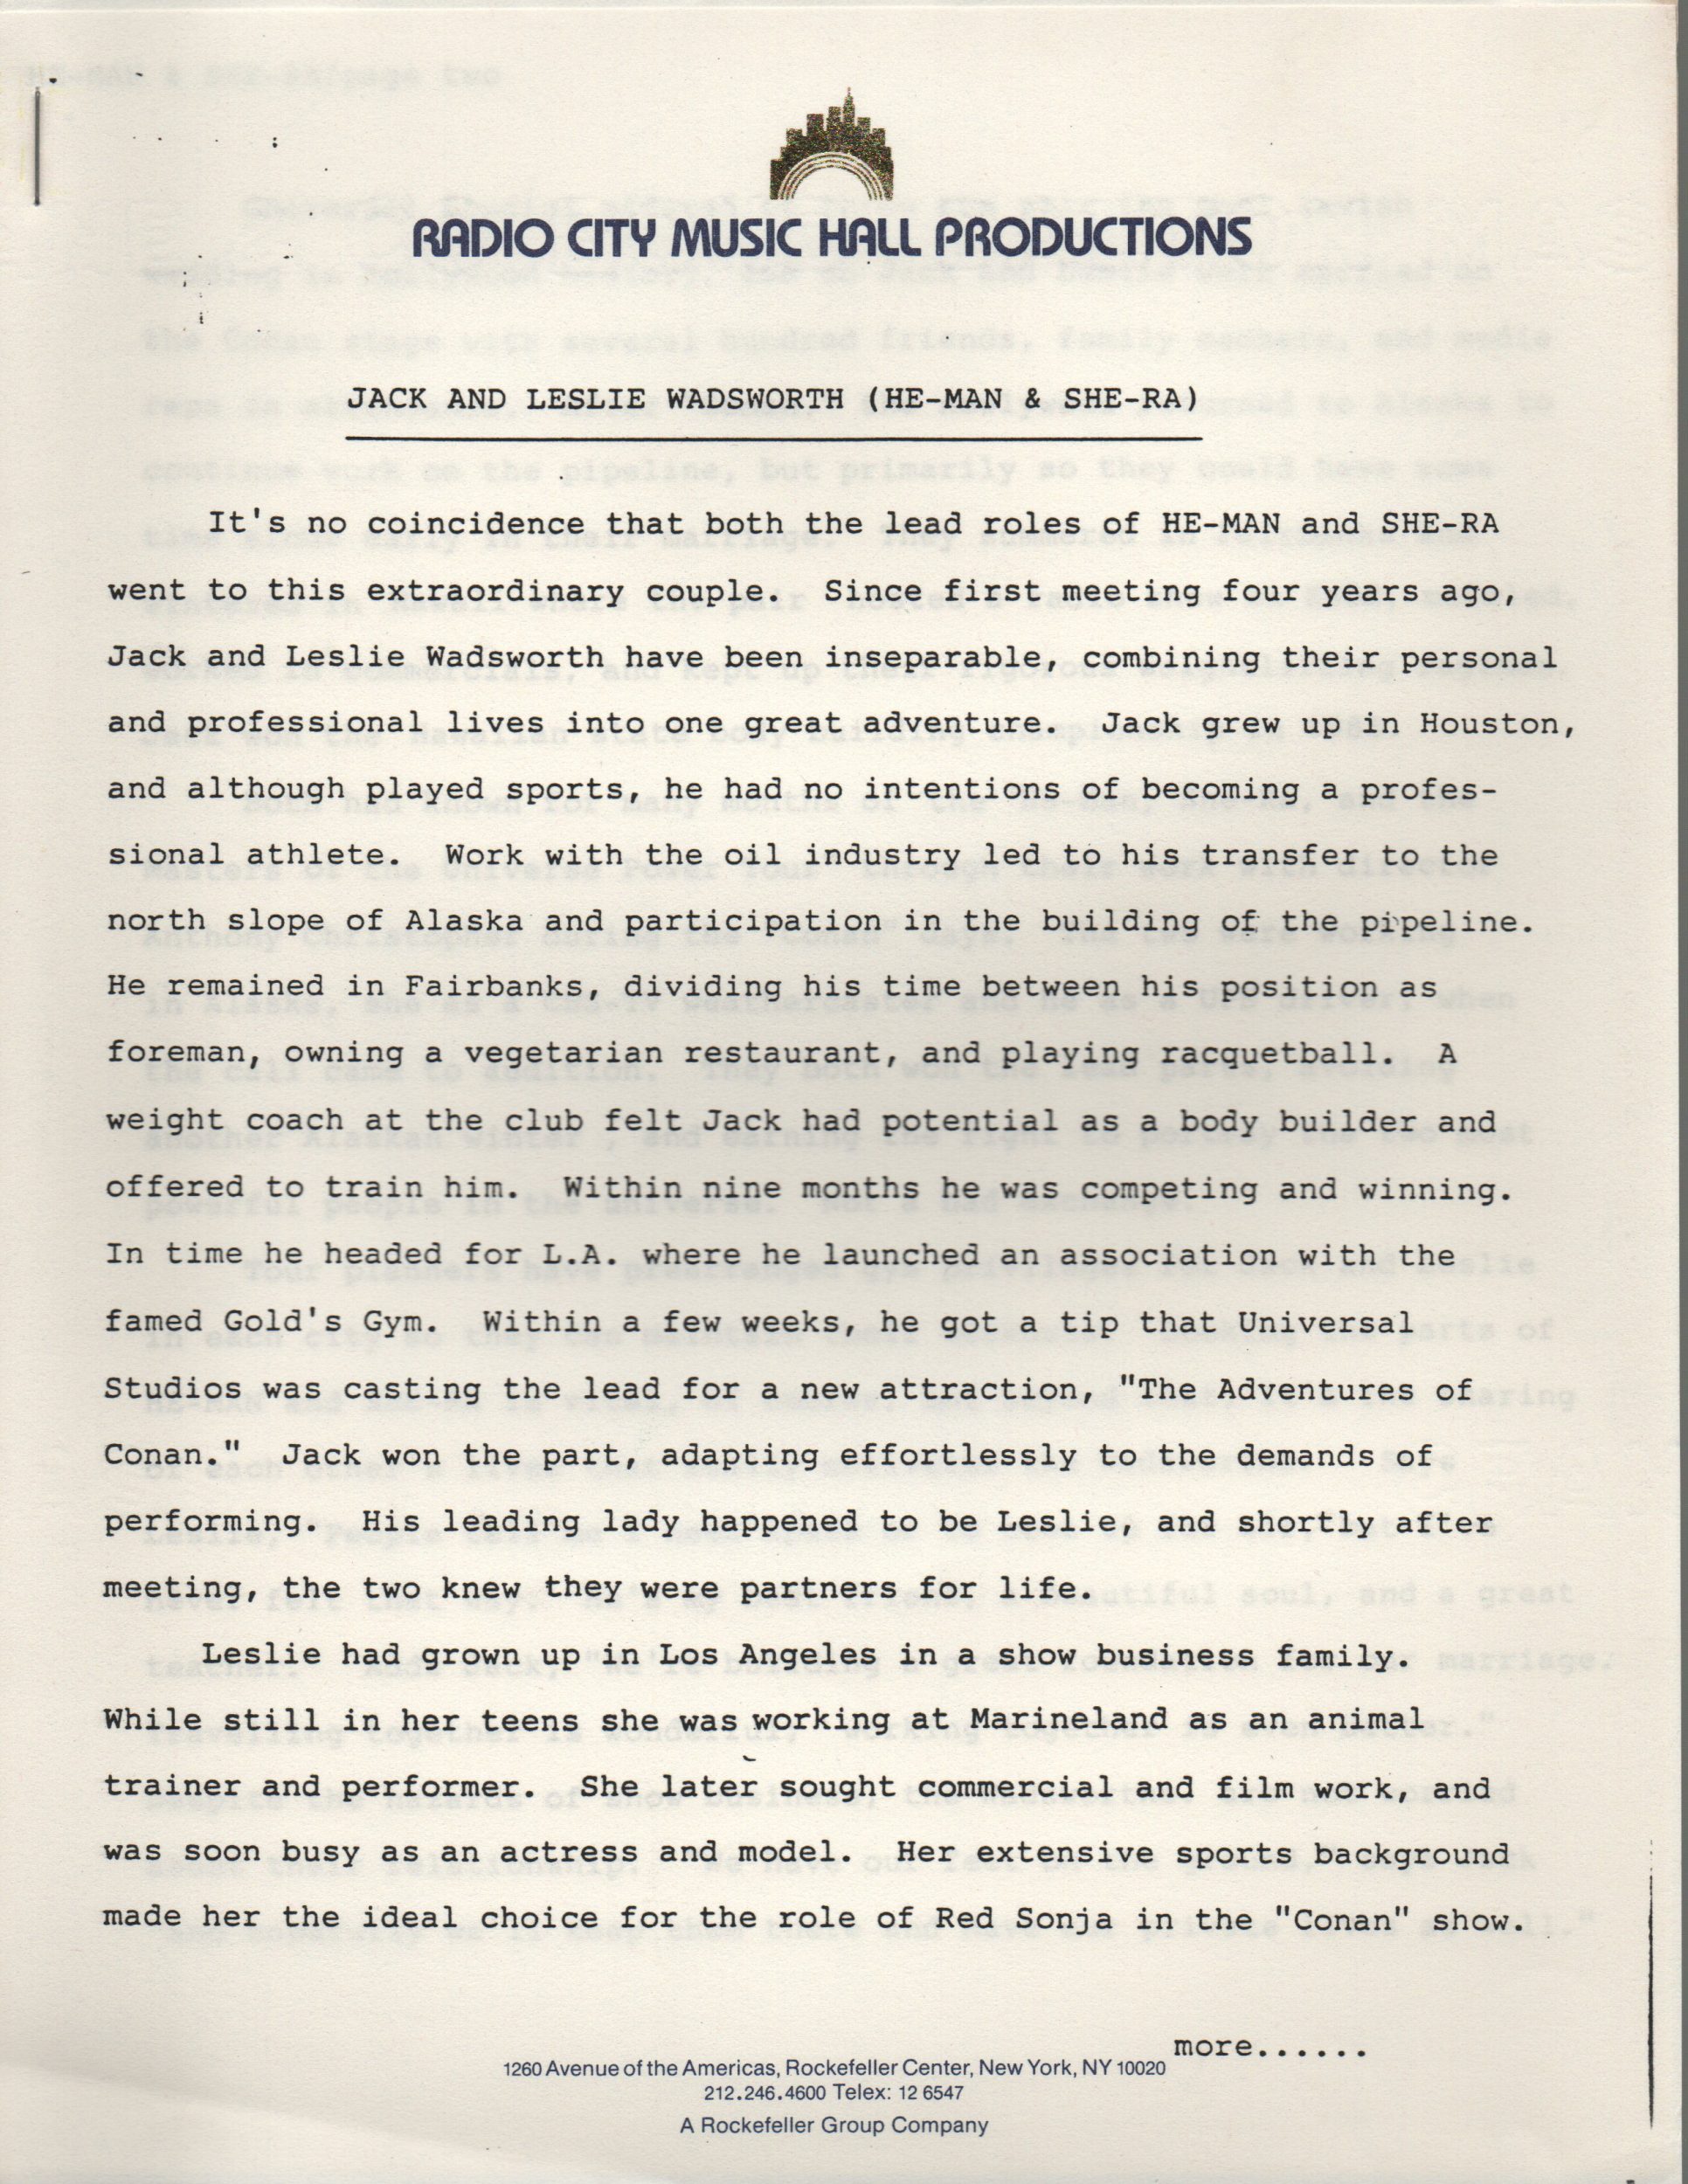
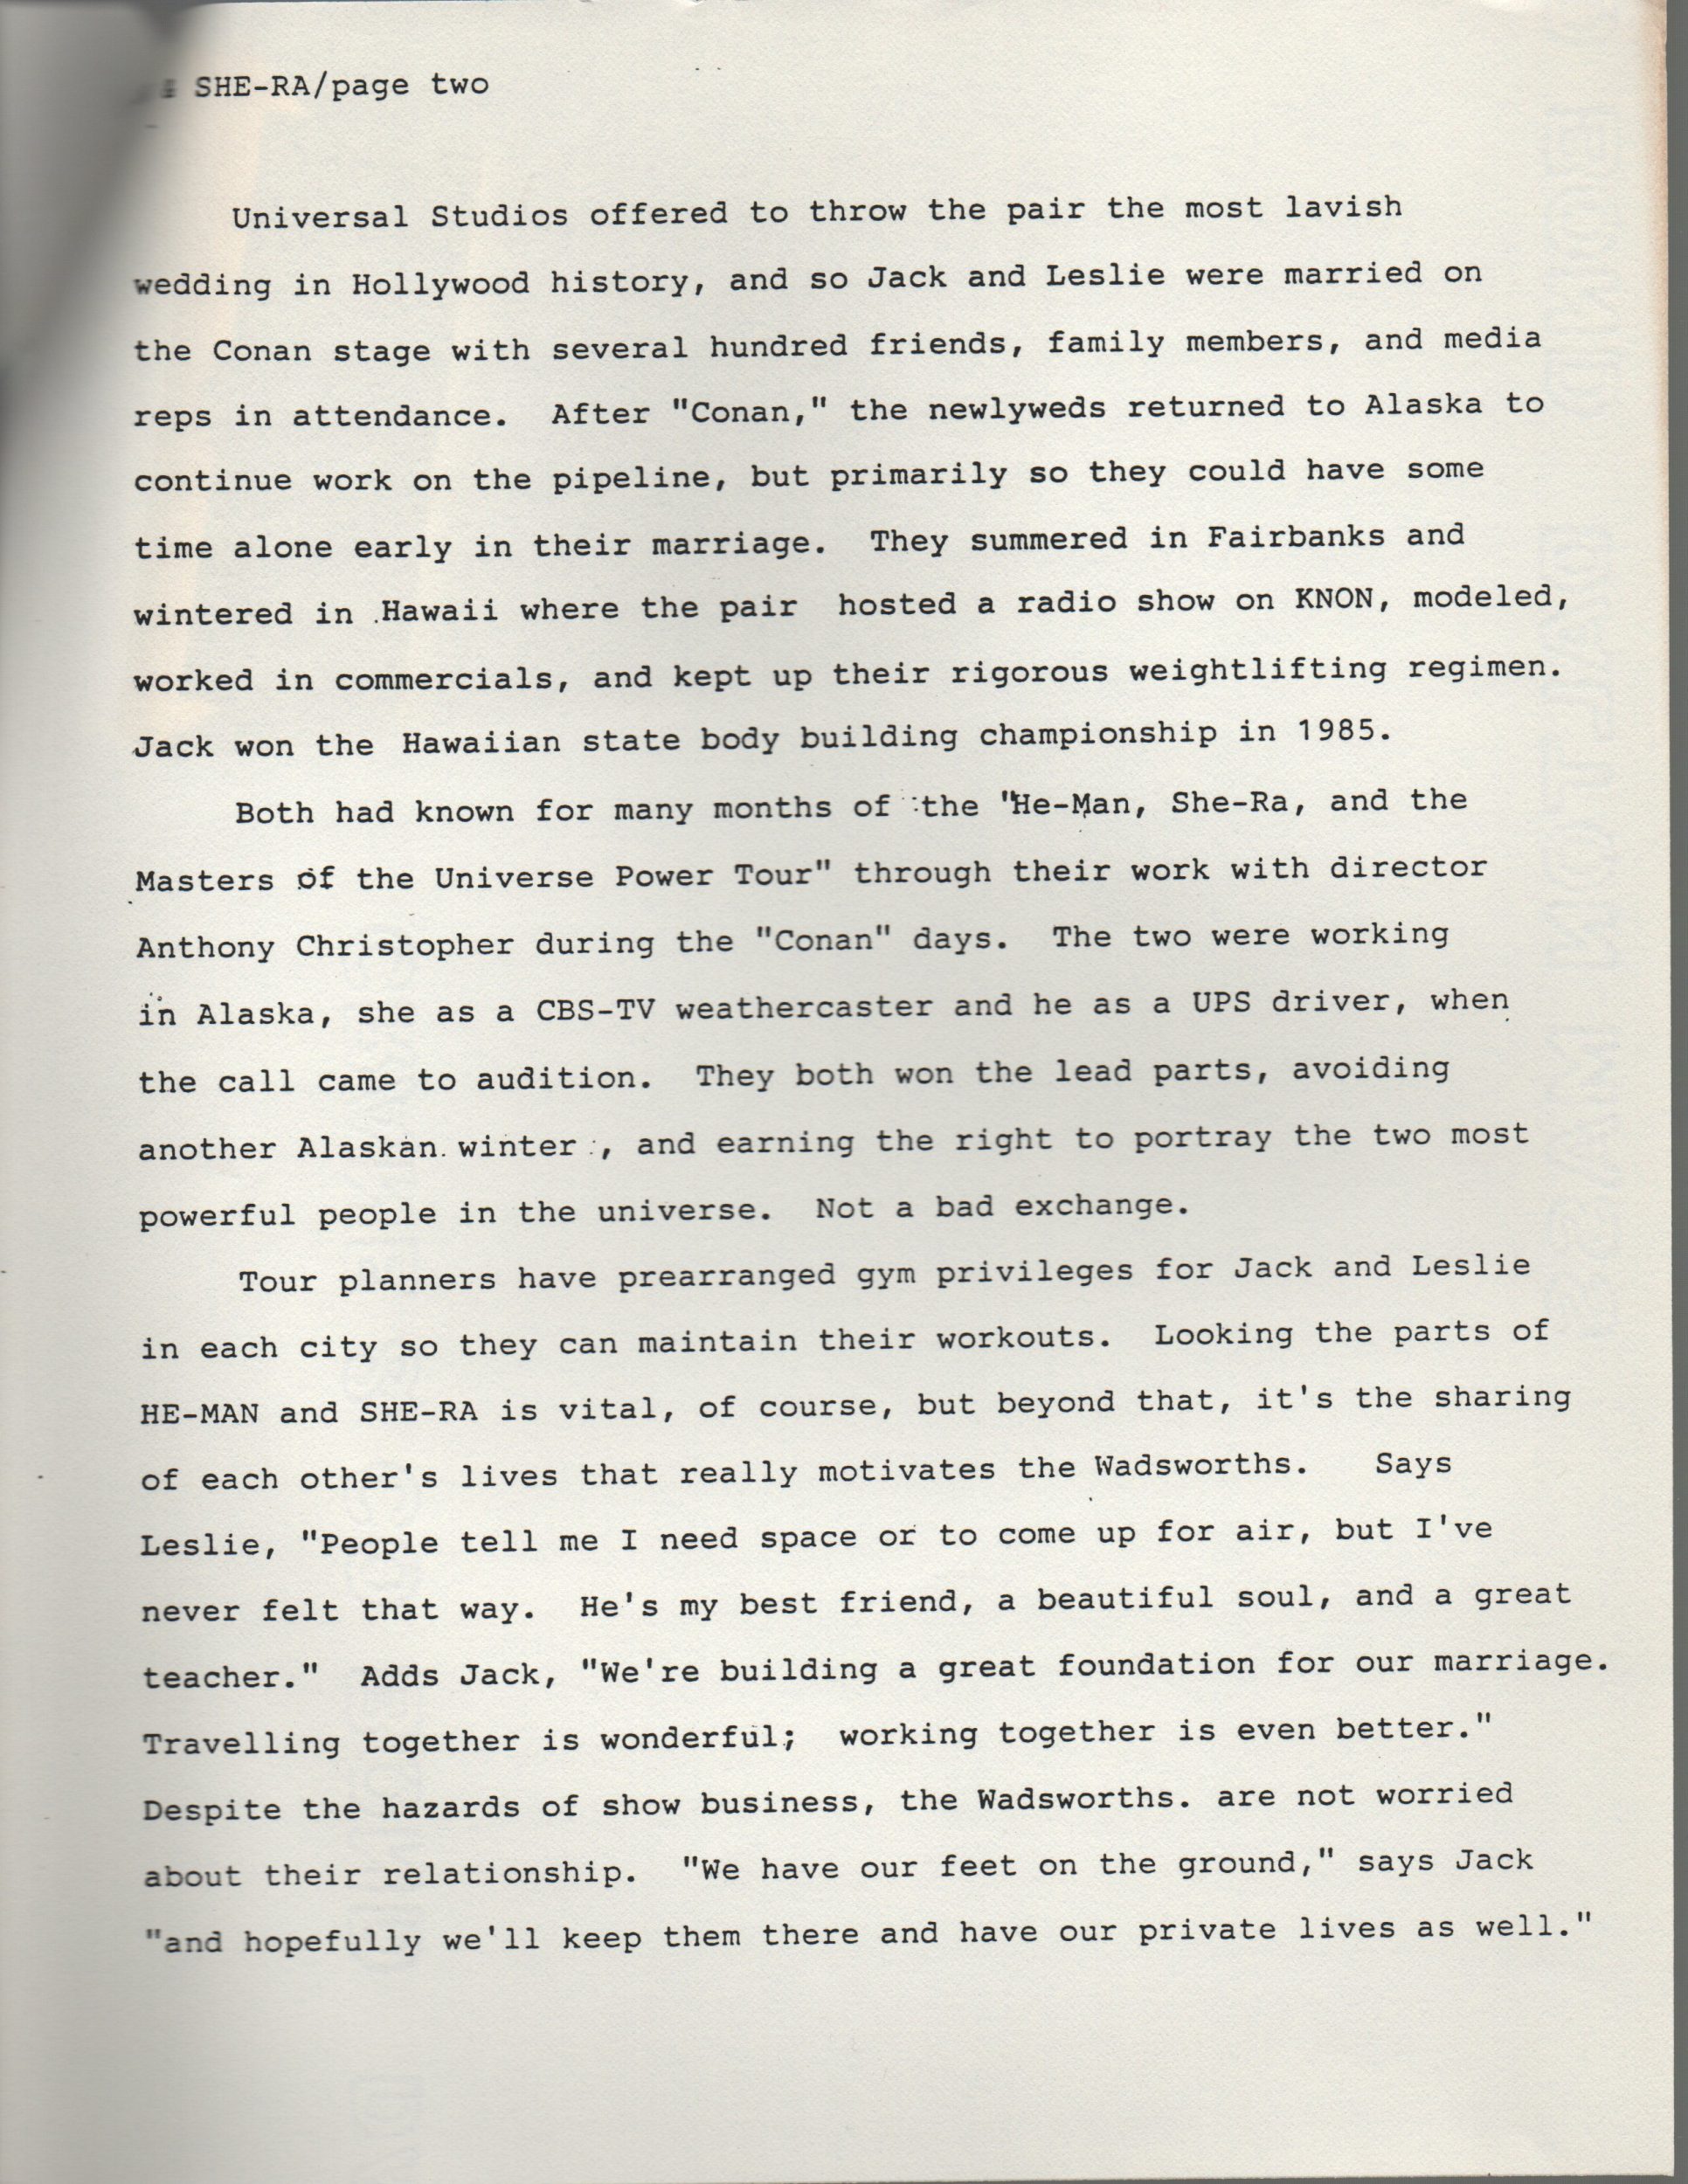
The press materials provide a bio for Jack and Leslie Wadsworth, who played He-Man and She-Ra, respectively. However the other cast members were not mentioned. According to the Power Tour fan site, the full cast included:
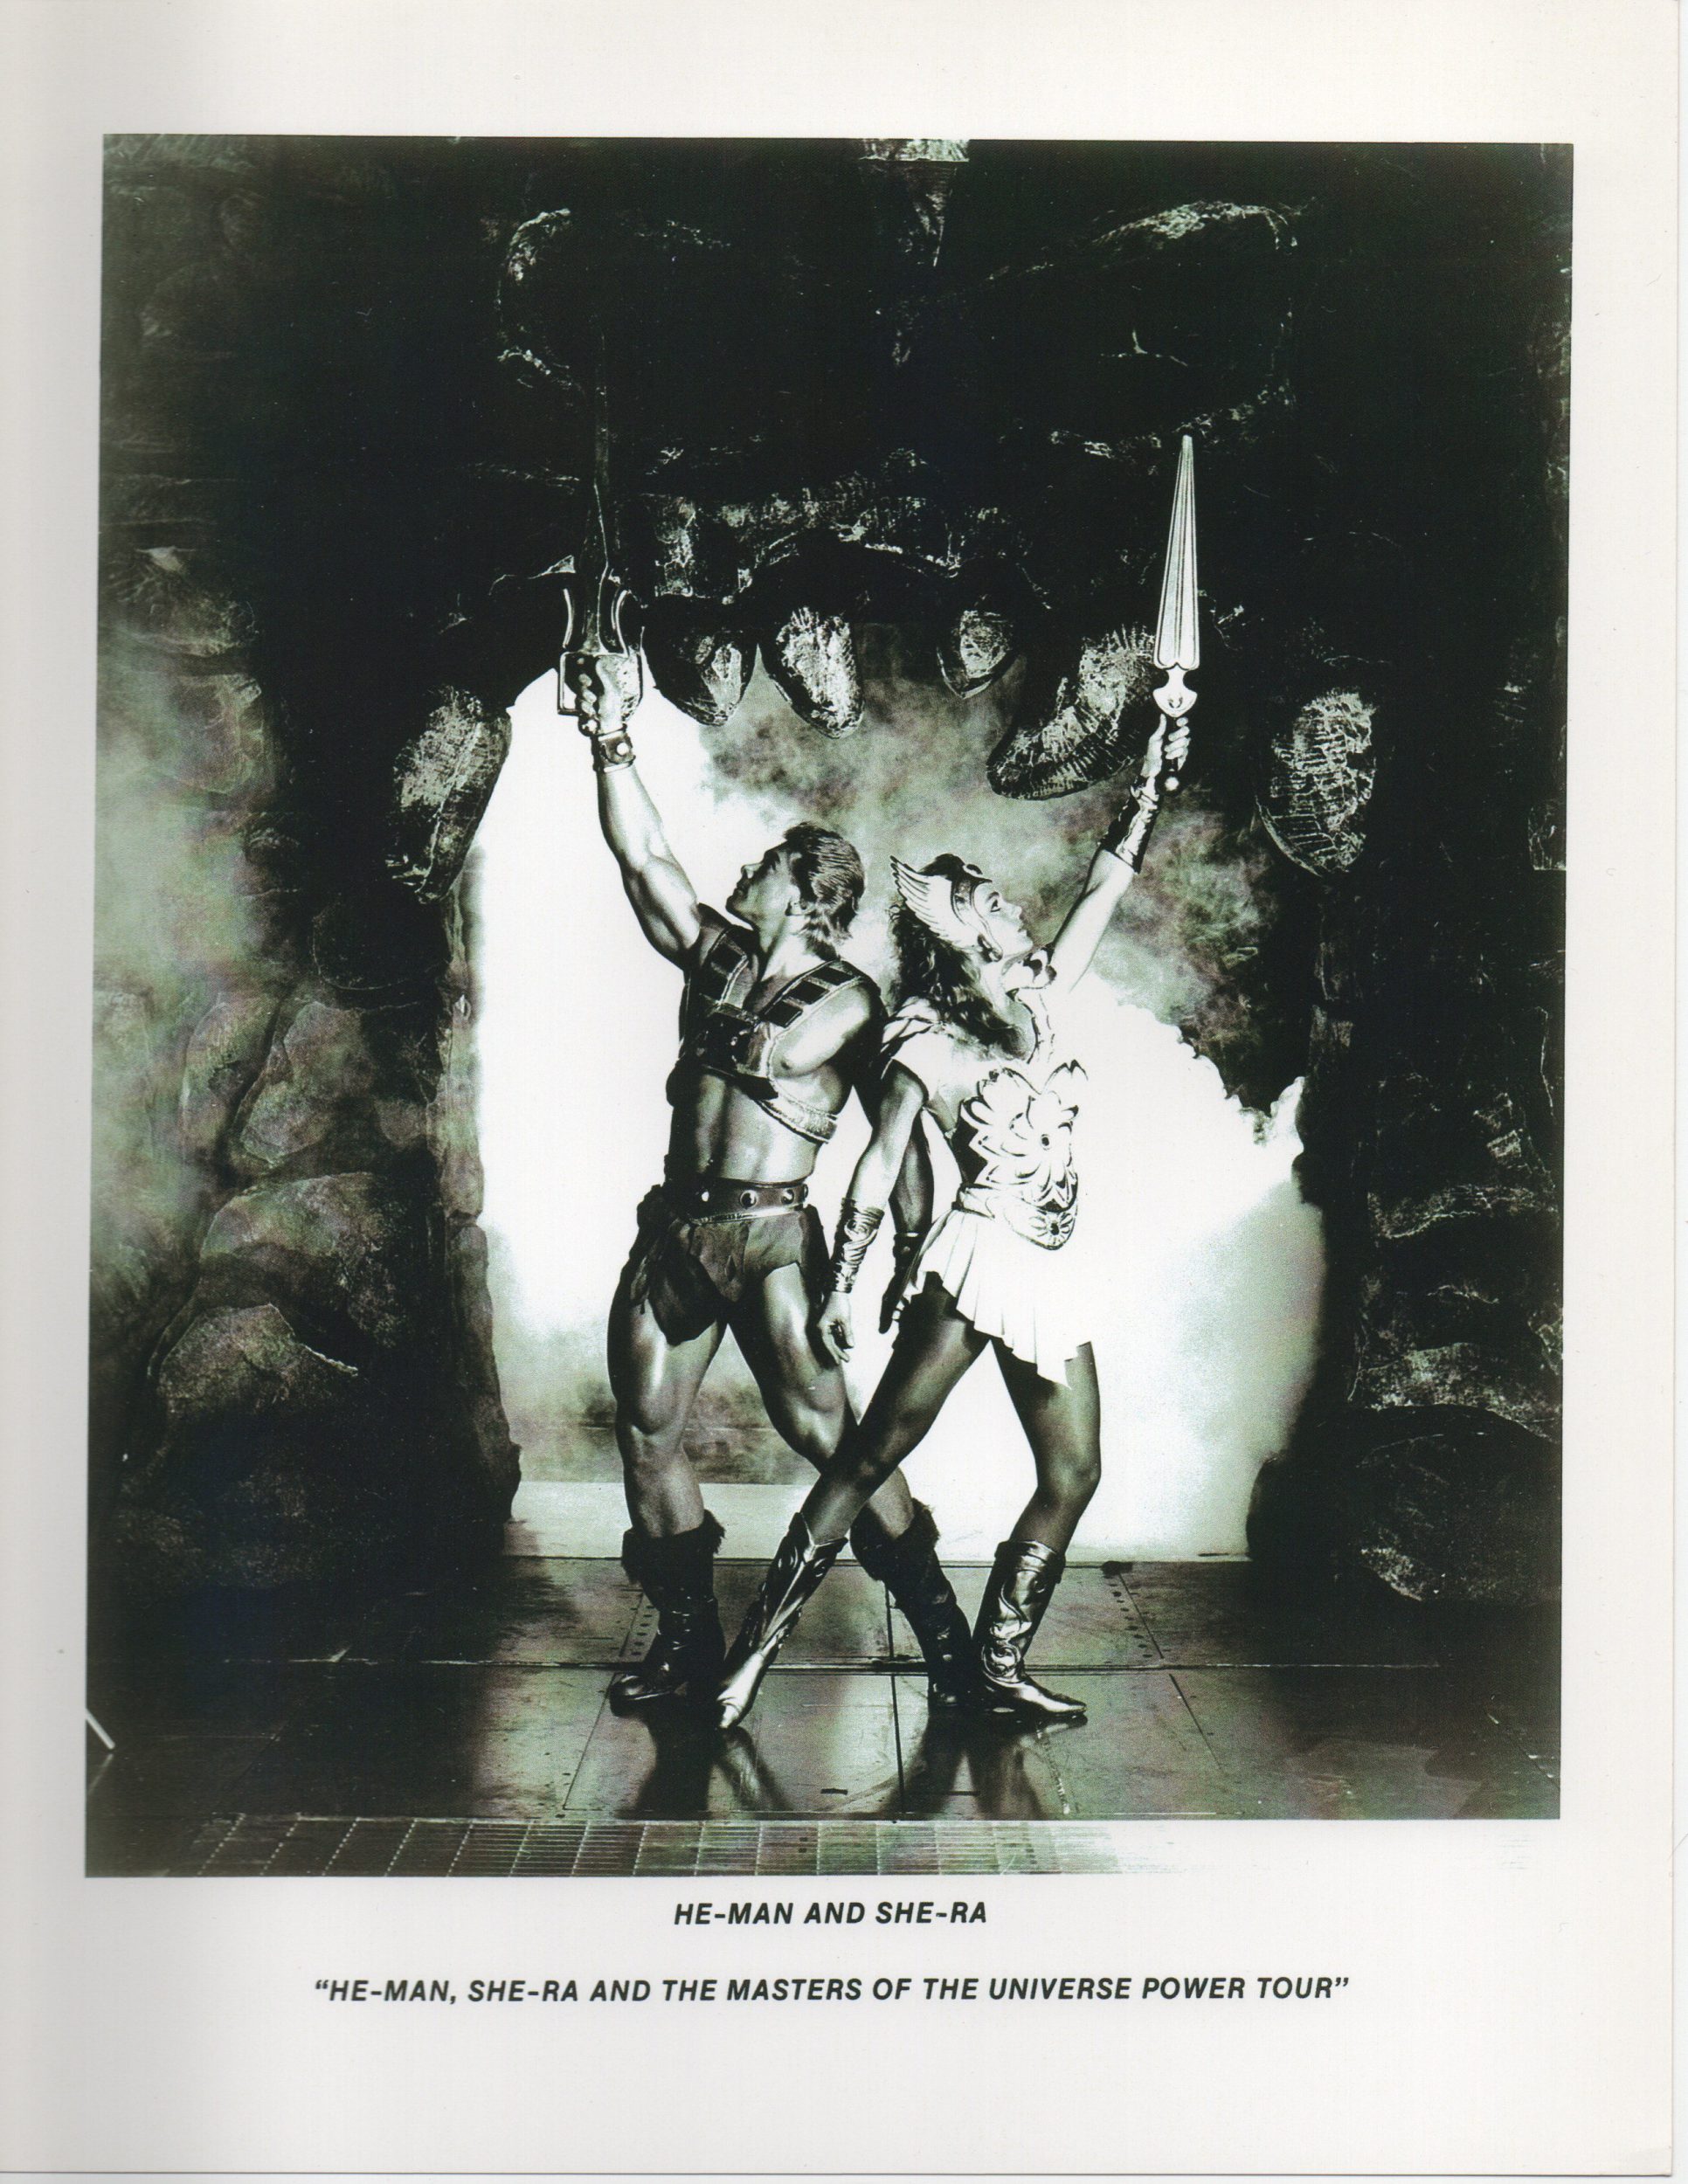
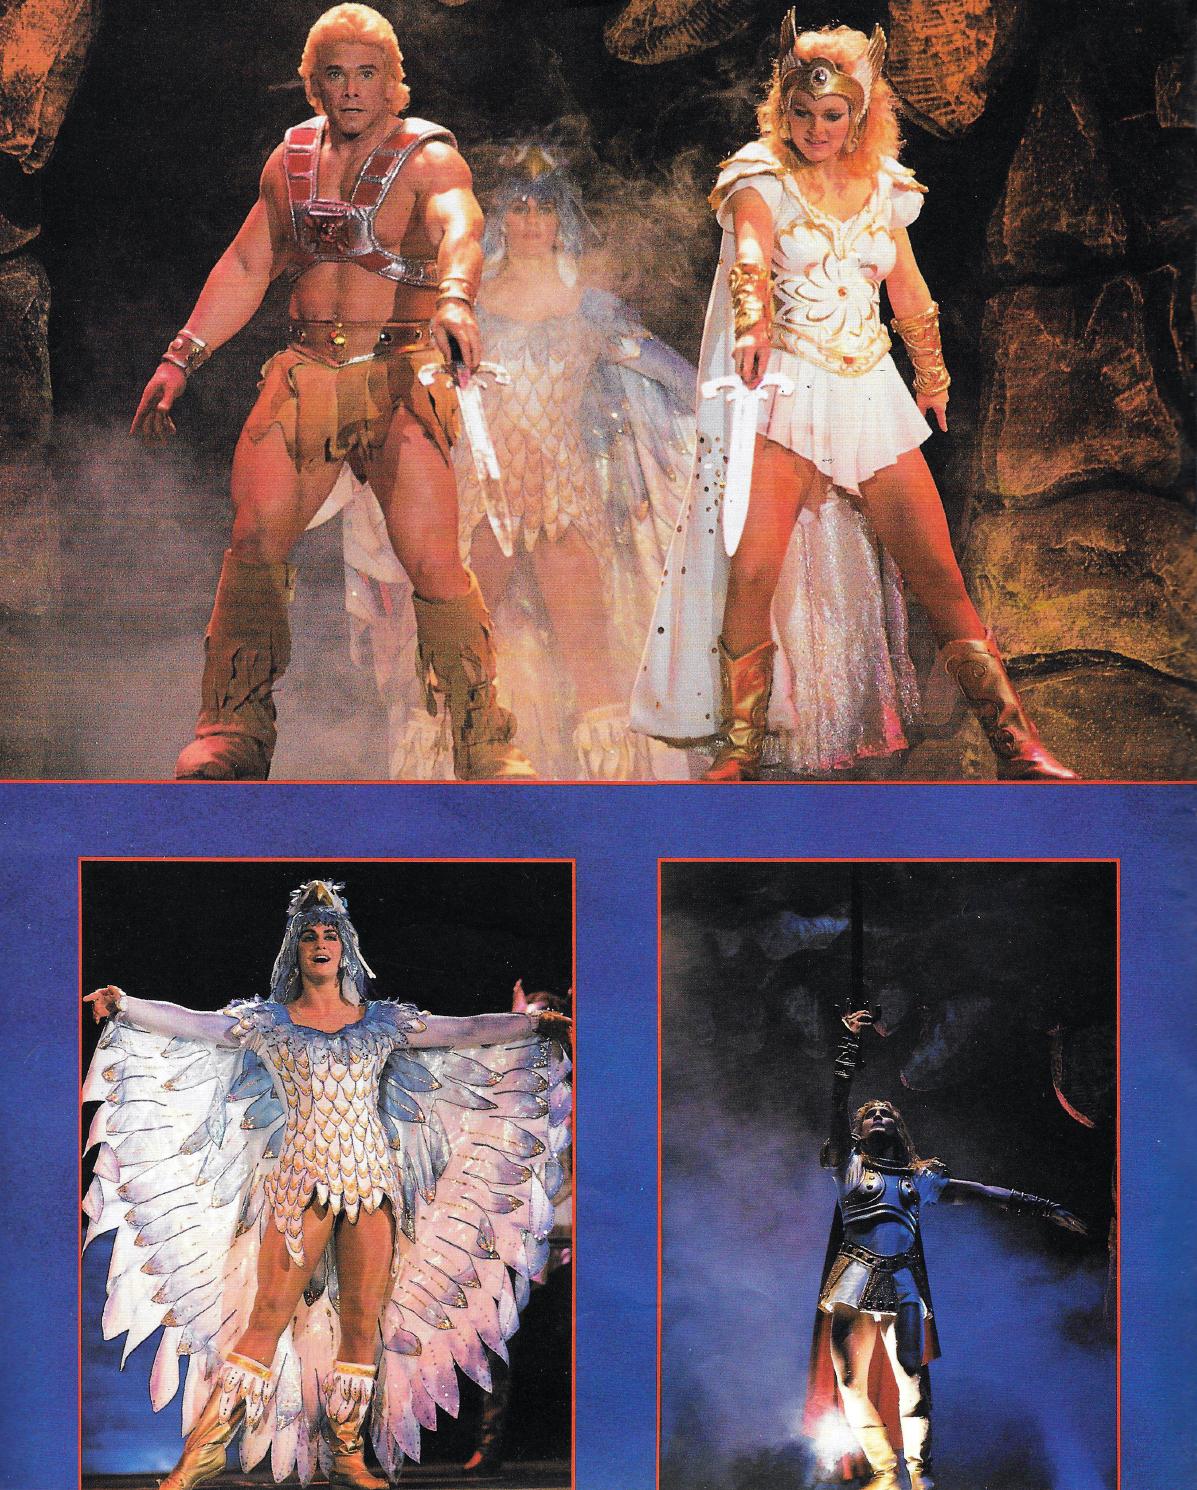
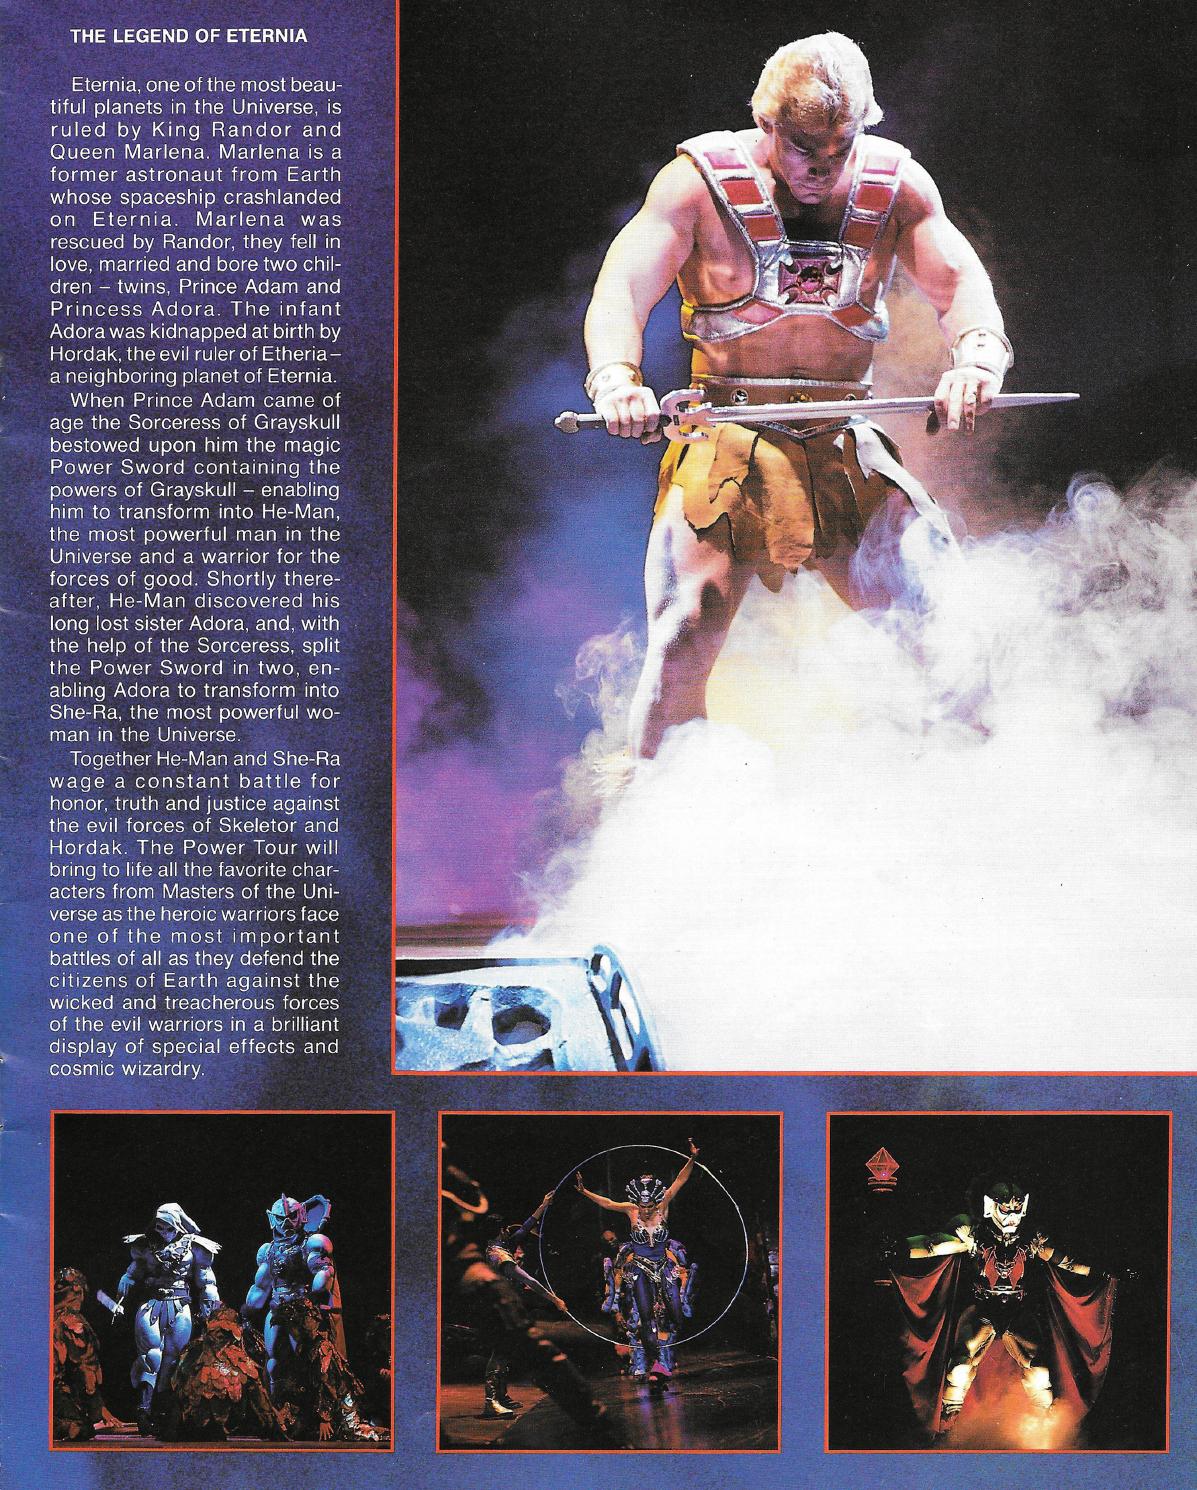
He-Man: Jack Wadsworth
She-Ra: Leslie Wadsworth
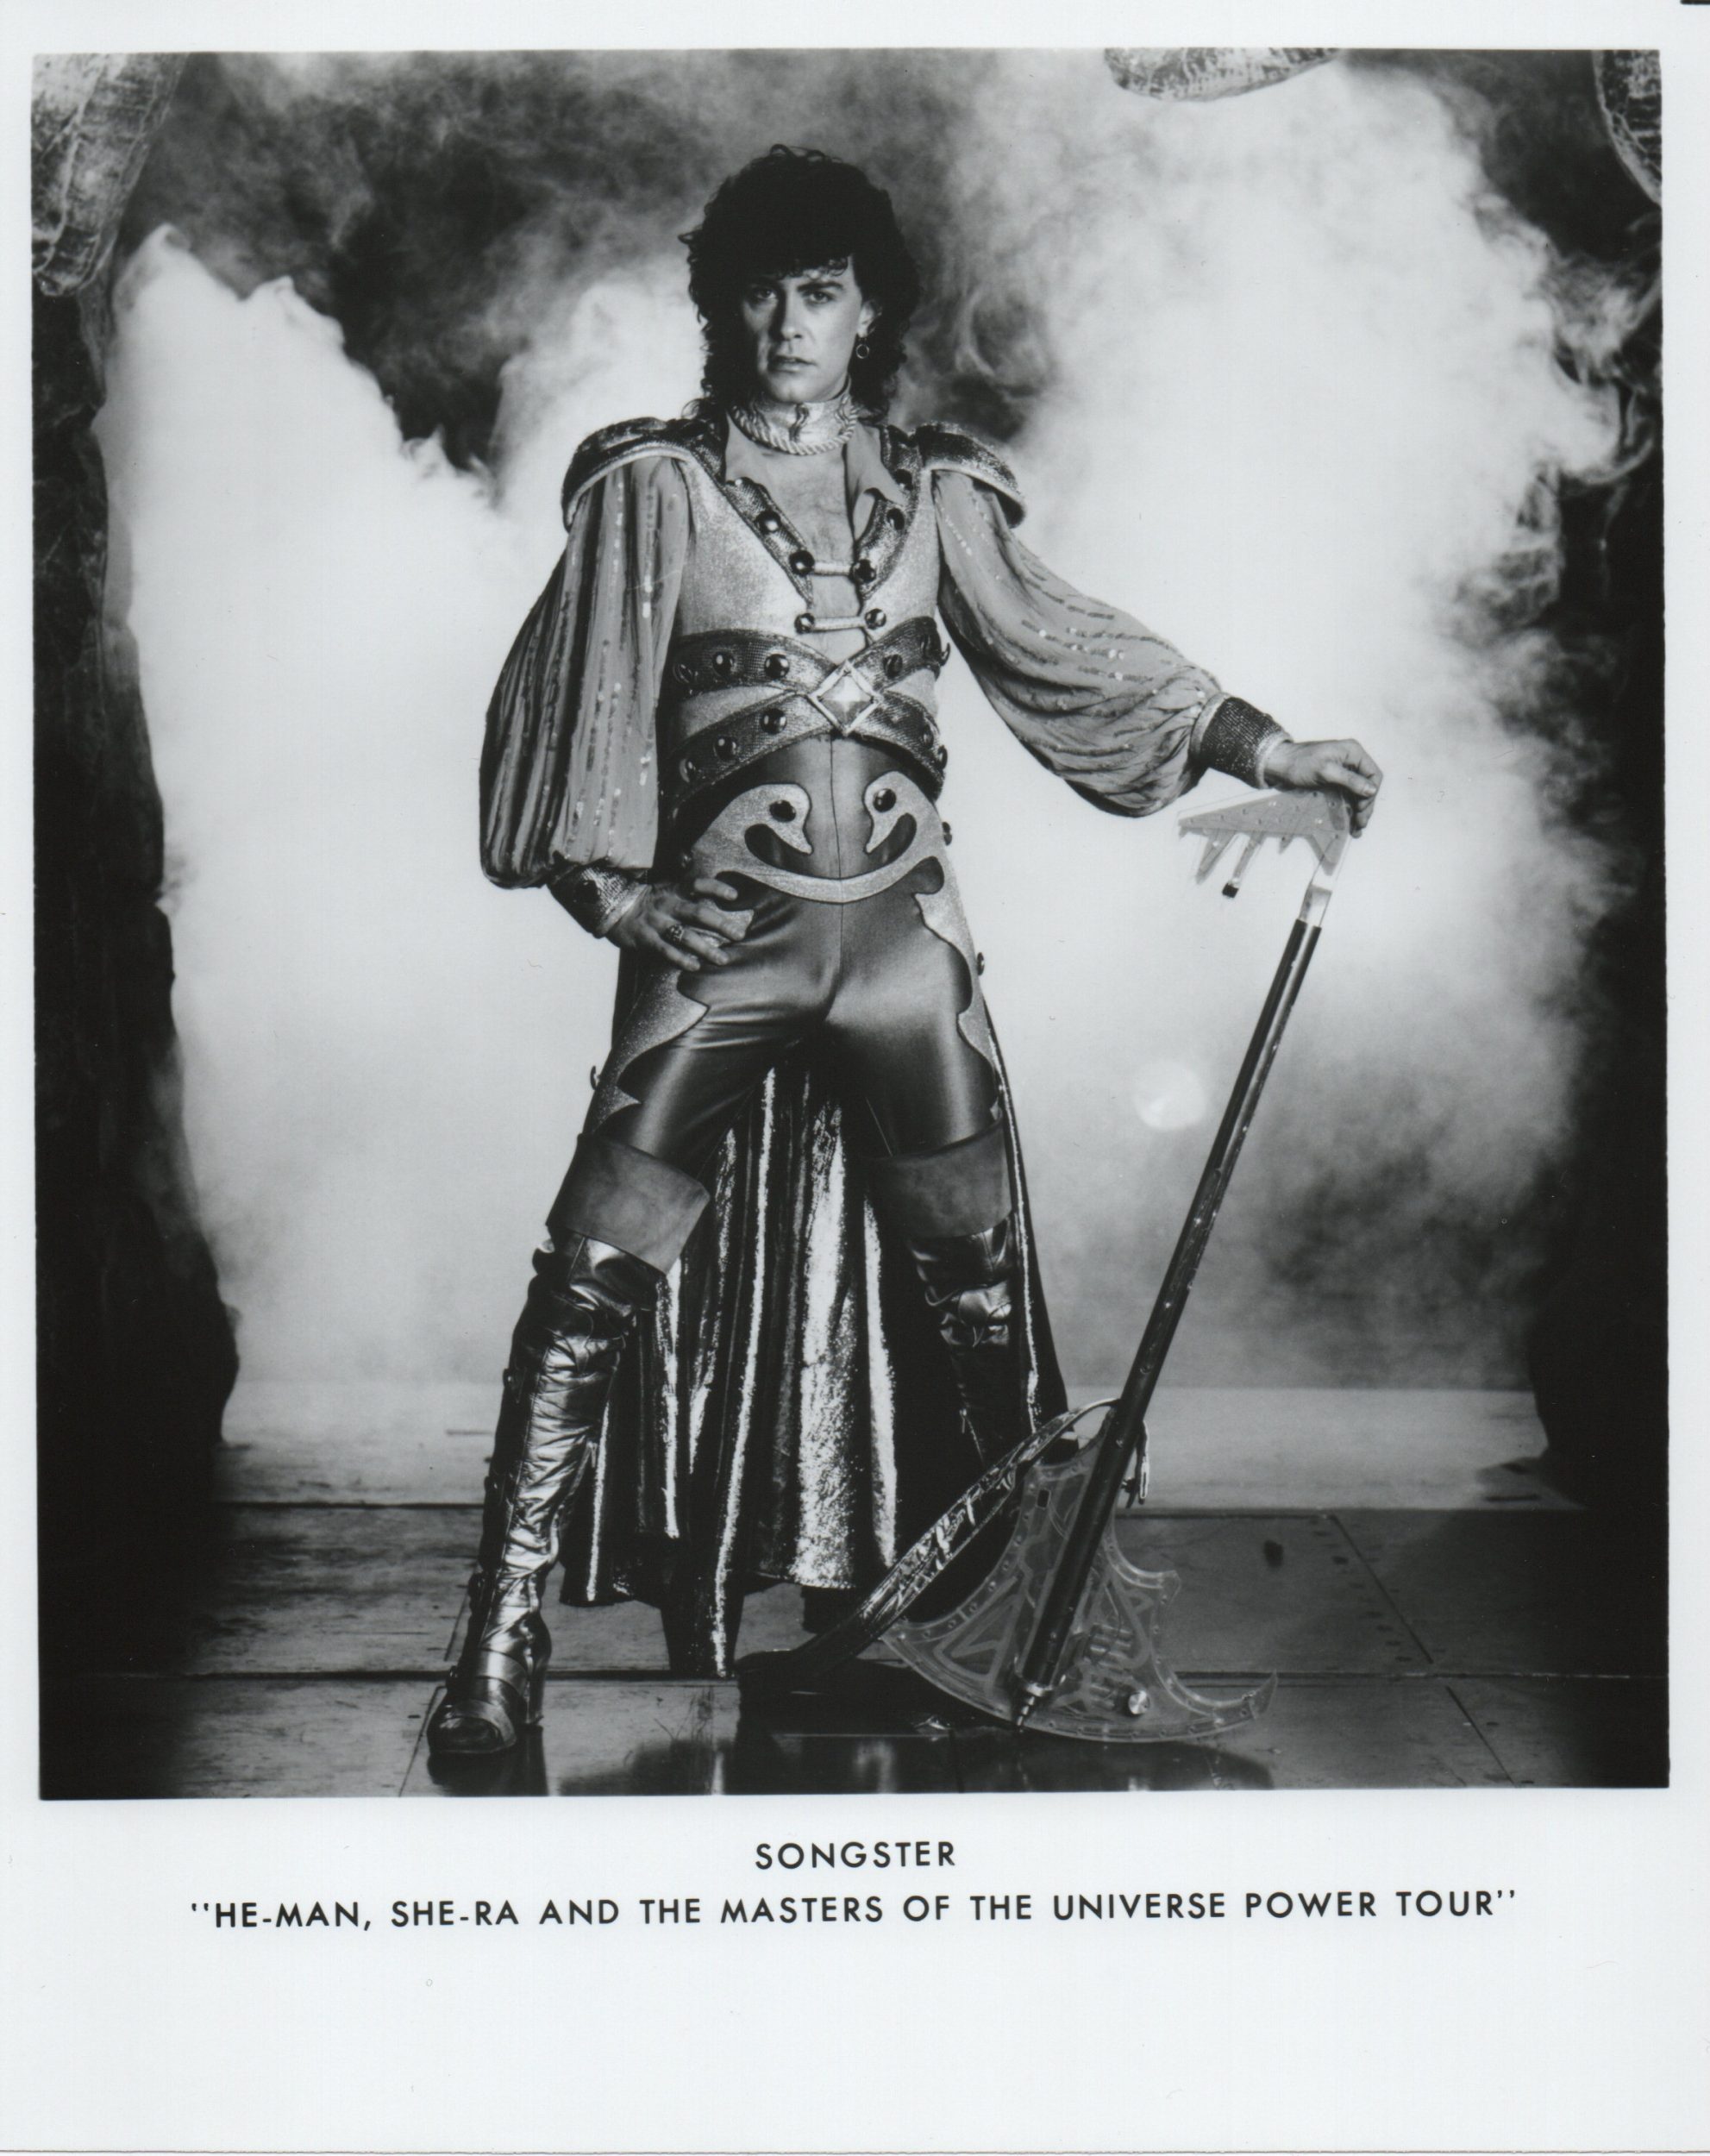
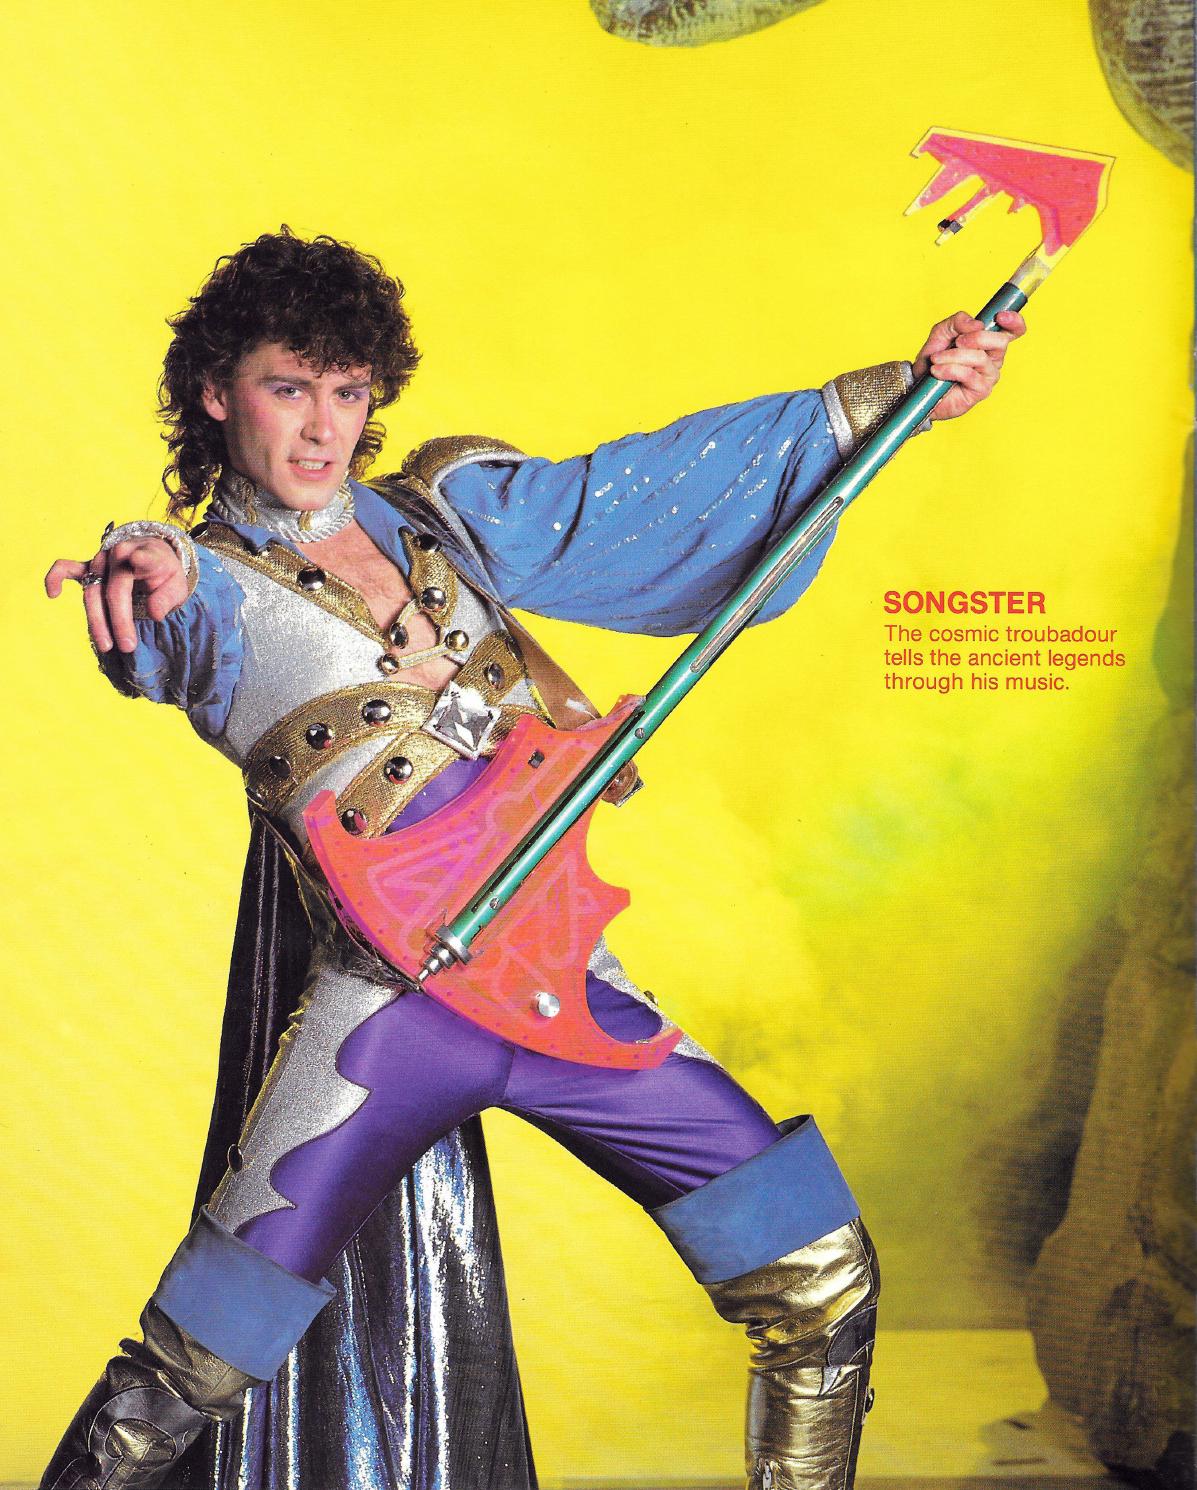
Songster: Doug Howard
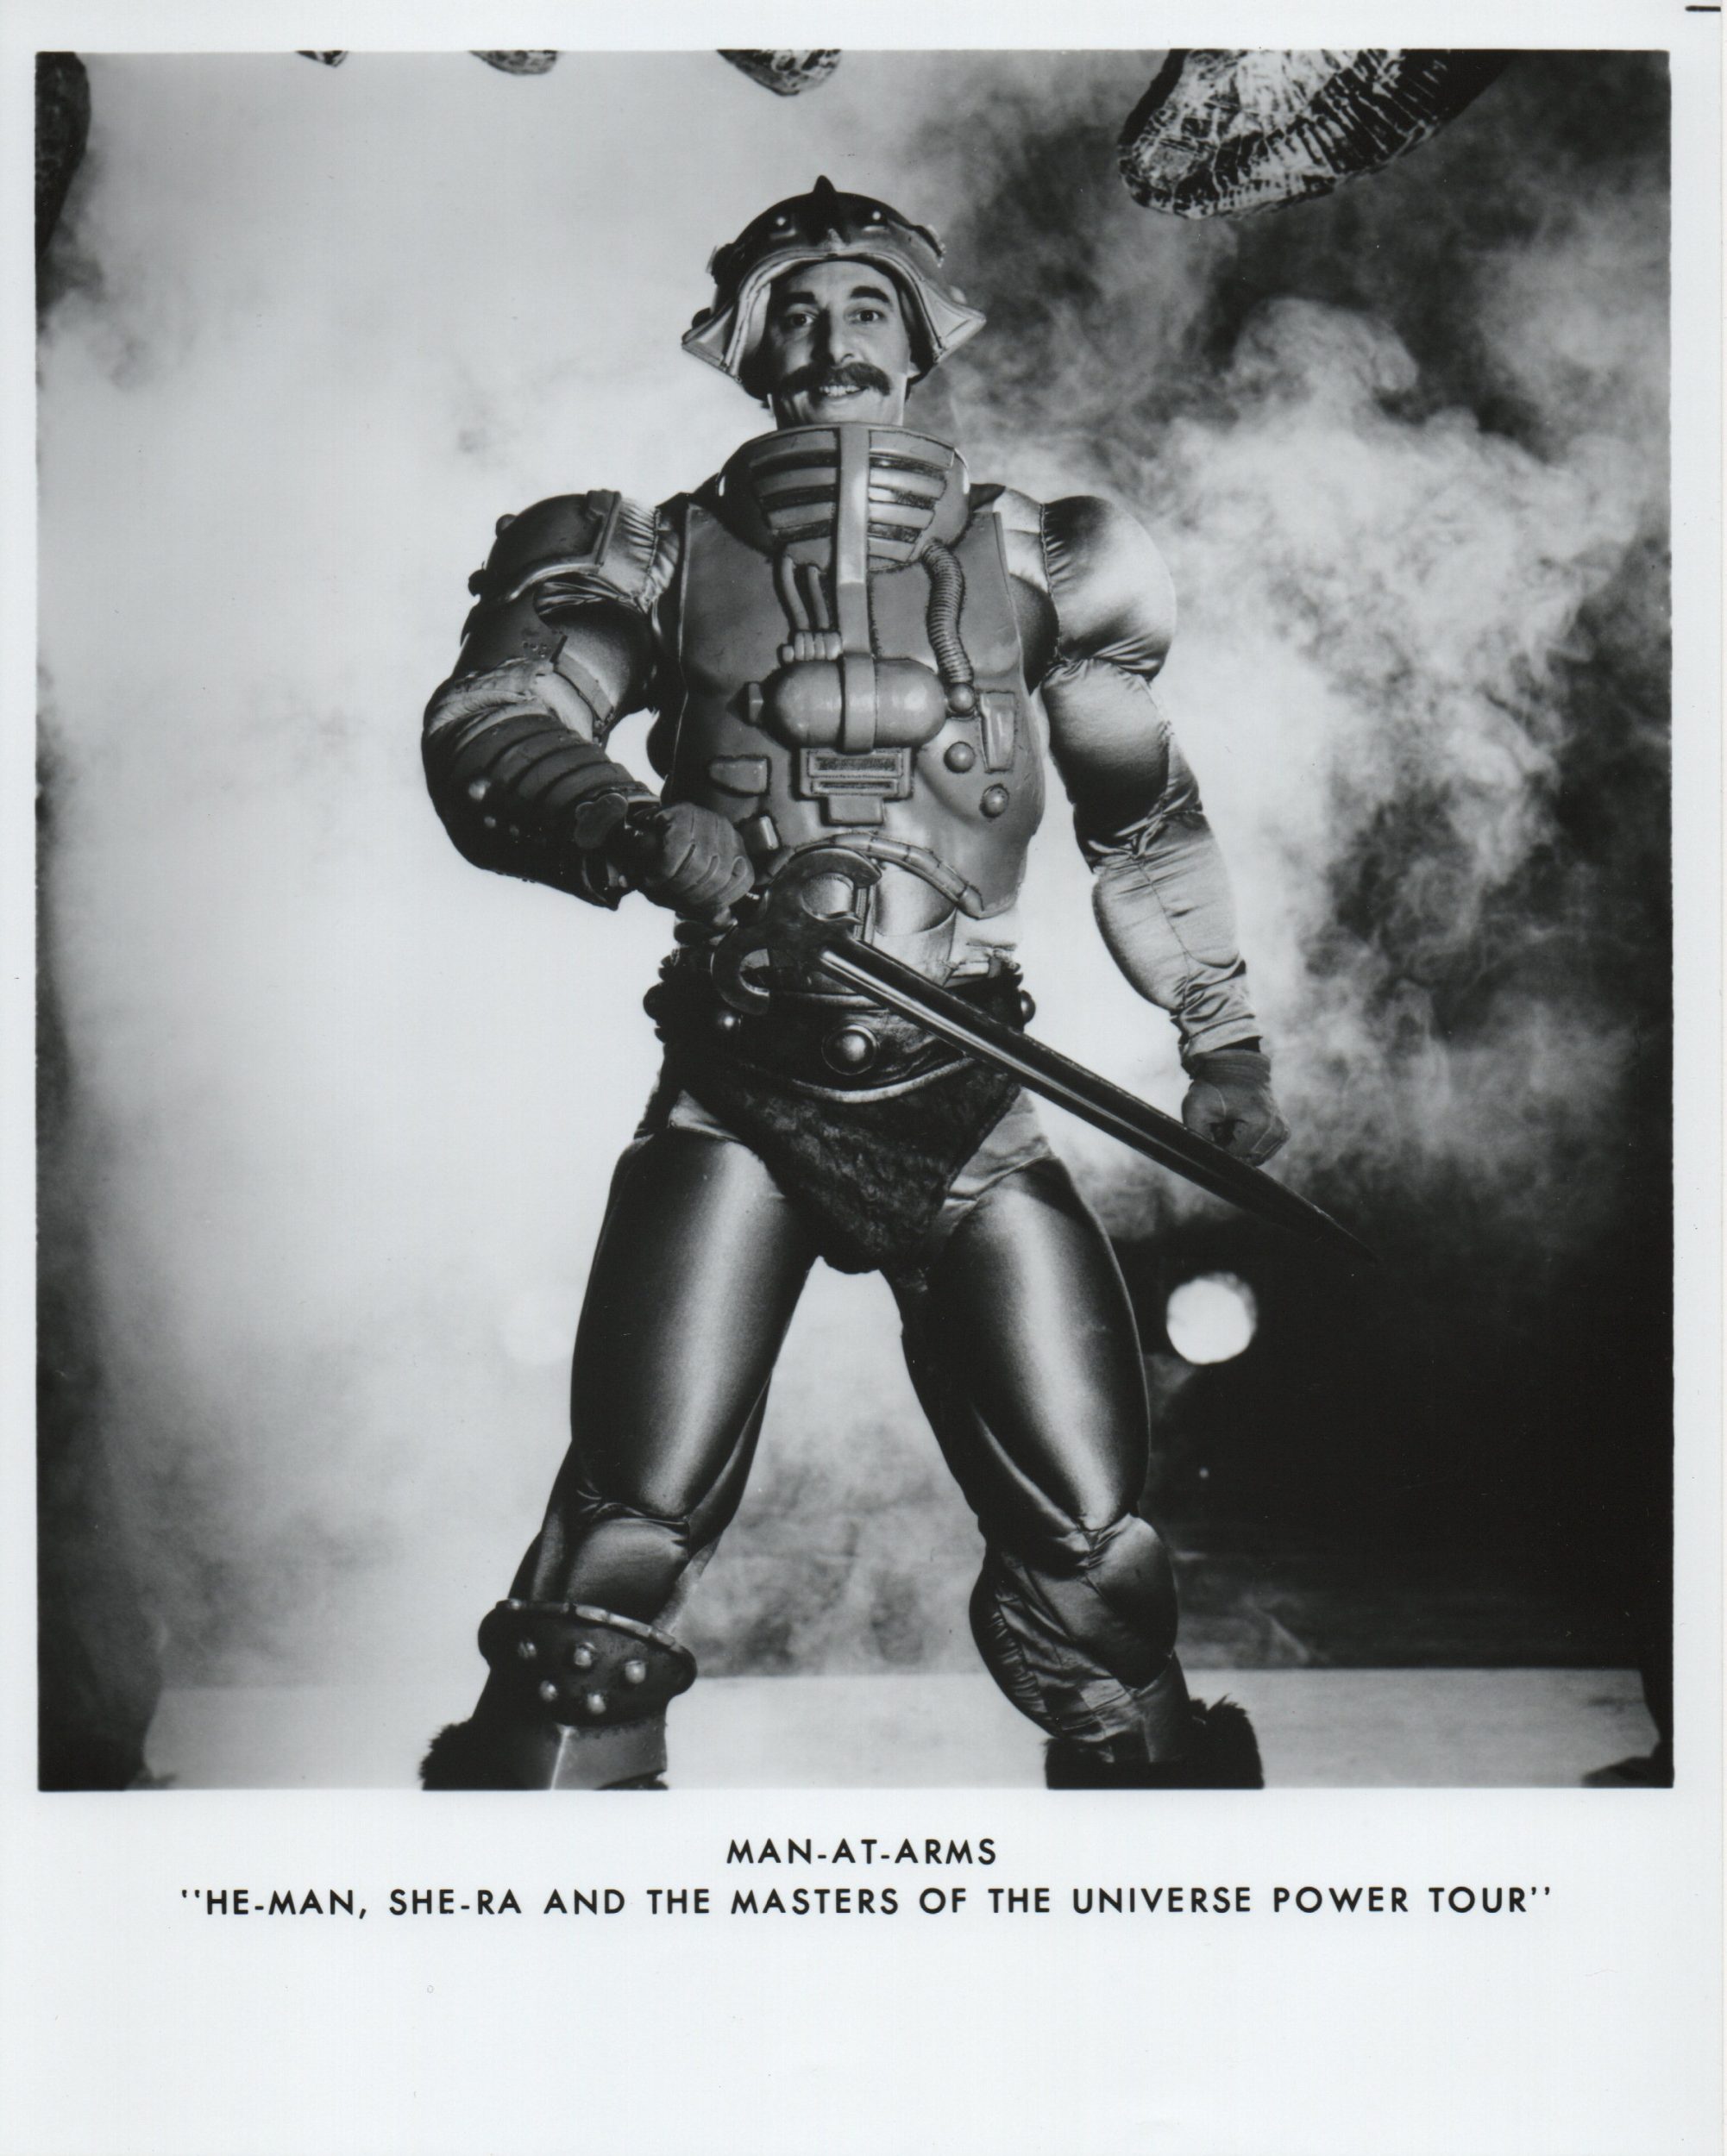
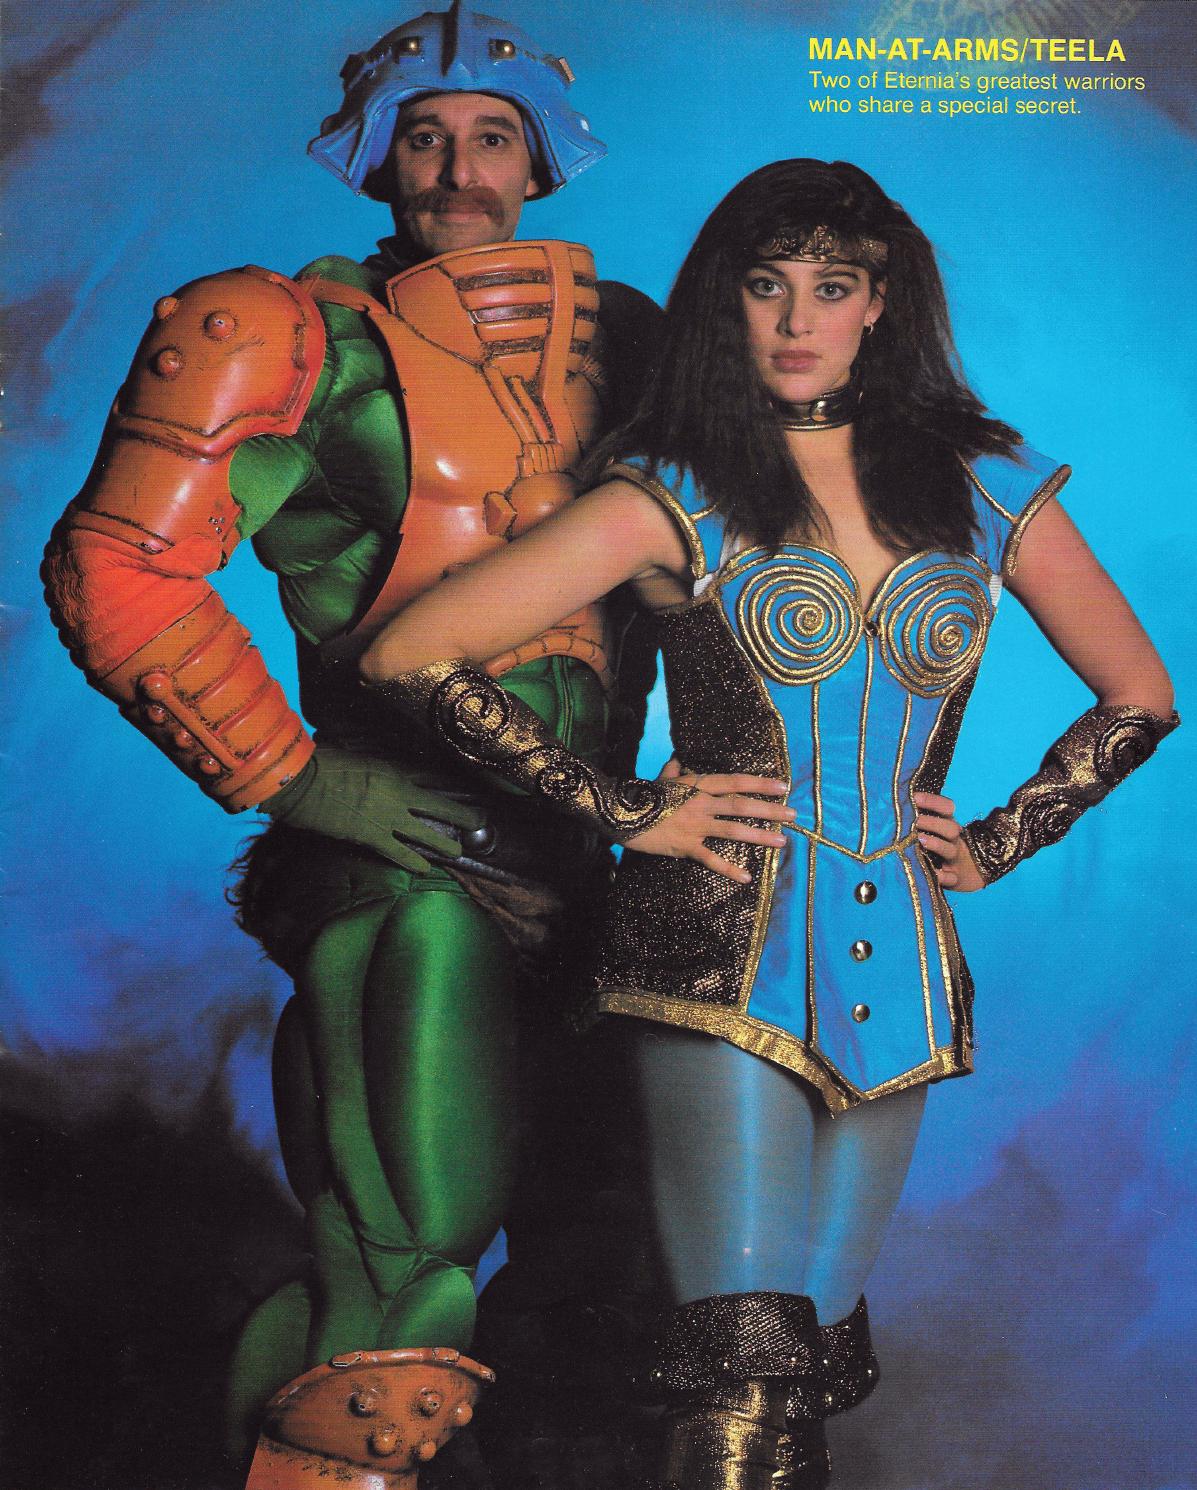
Man-At-Arms: Zack Hoffman
Sorceress and Adora: Sally Ann Bartunek
Beast Man: Jeff Biggs
Rio Blast: Darrin Clubb
King Randor: Joseph Davis
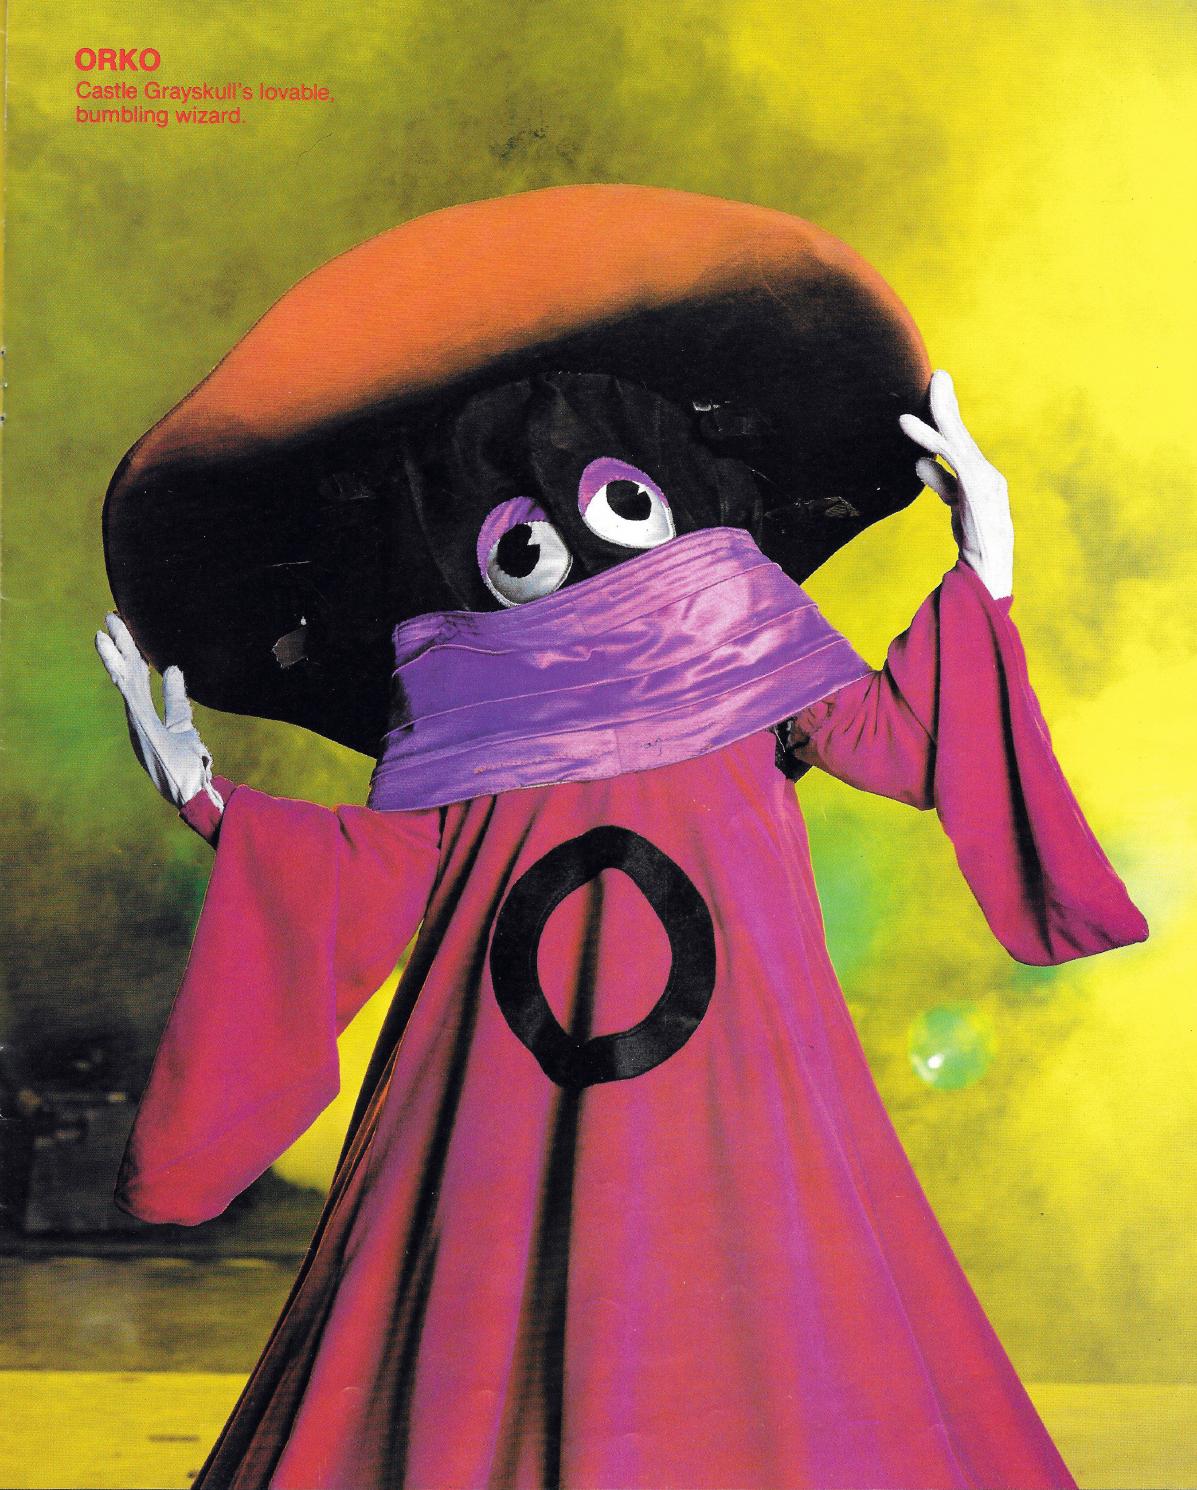
Orko: Marcie Dinardo
Clamp Champ: Michael Jefferson
Rokkon: Kevin Langston
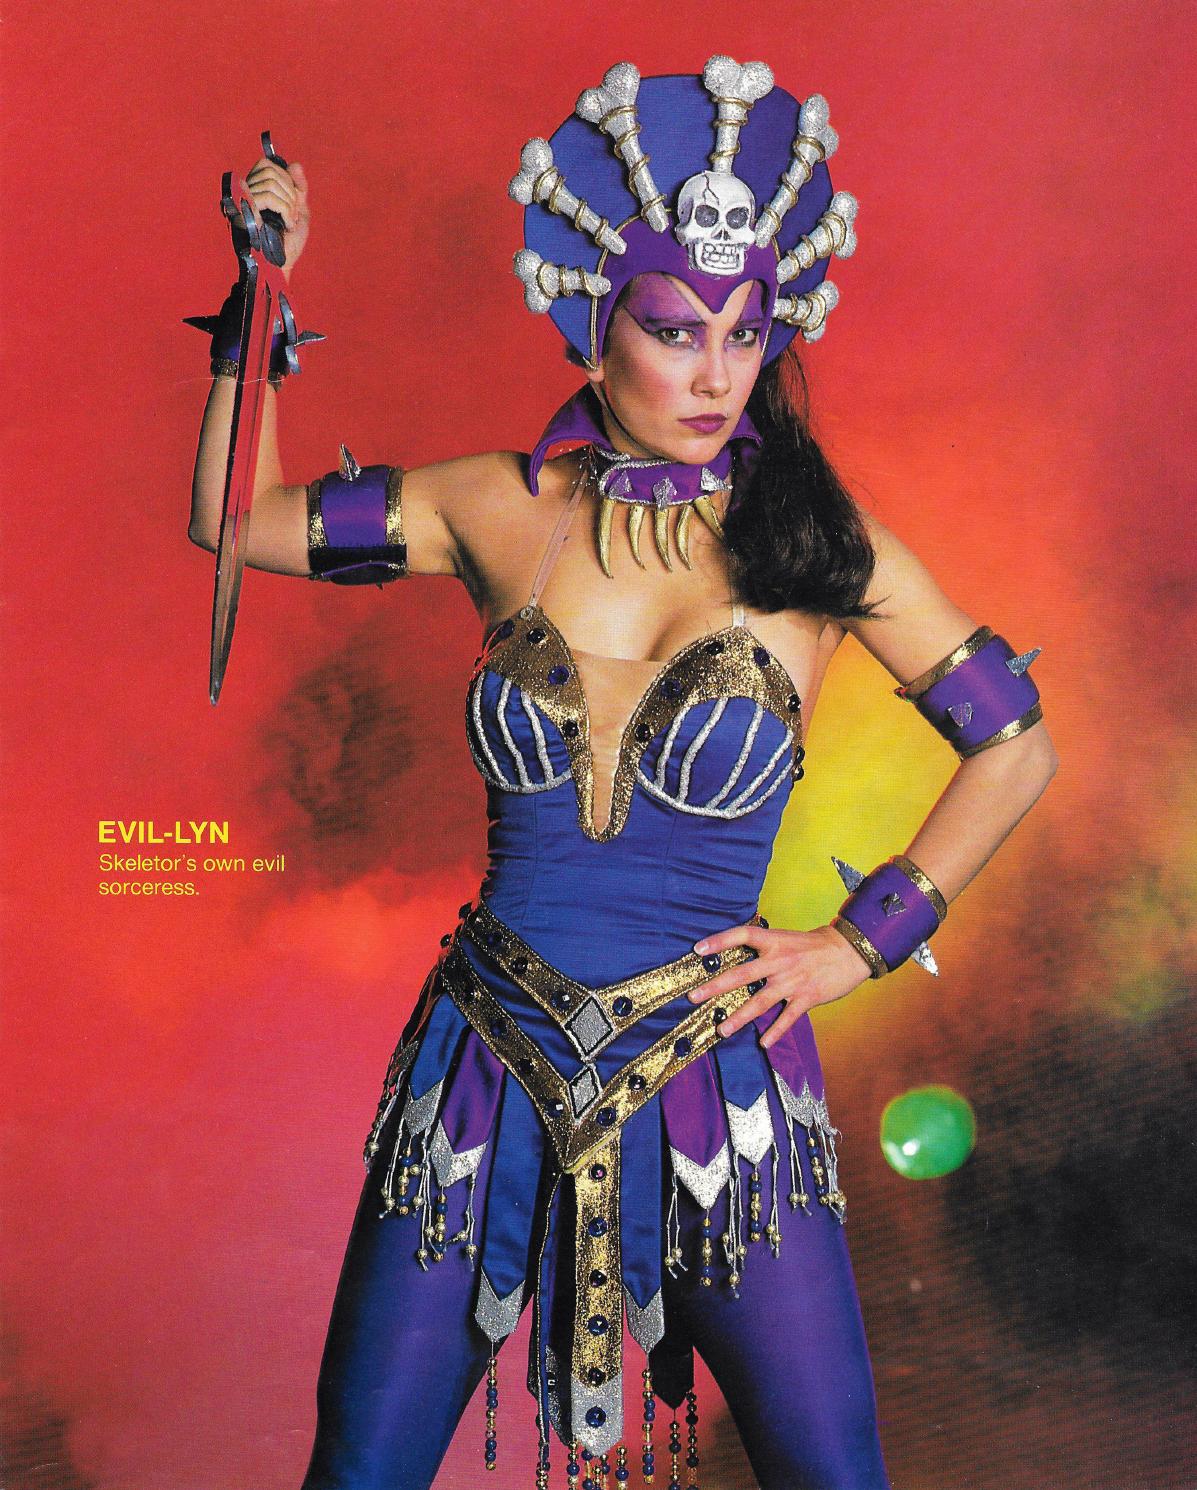
Evil-Lyn and Queen Marlena: Michelle Nevidomsky
Teela and Jeweled Toy: Stacy Oversier
Ninjor: August “Gus” Park
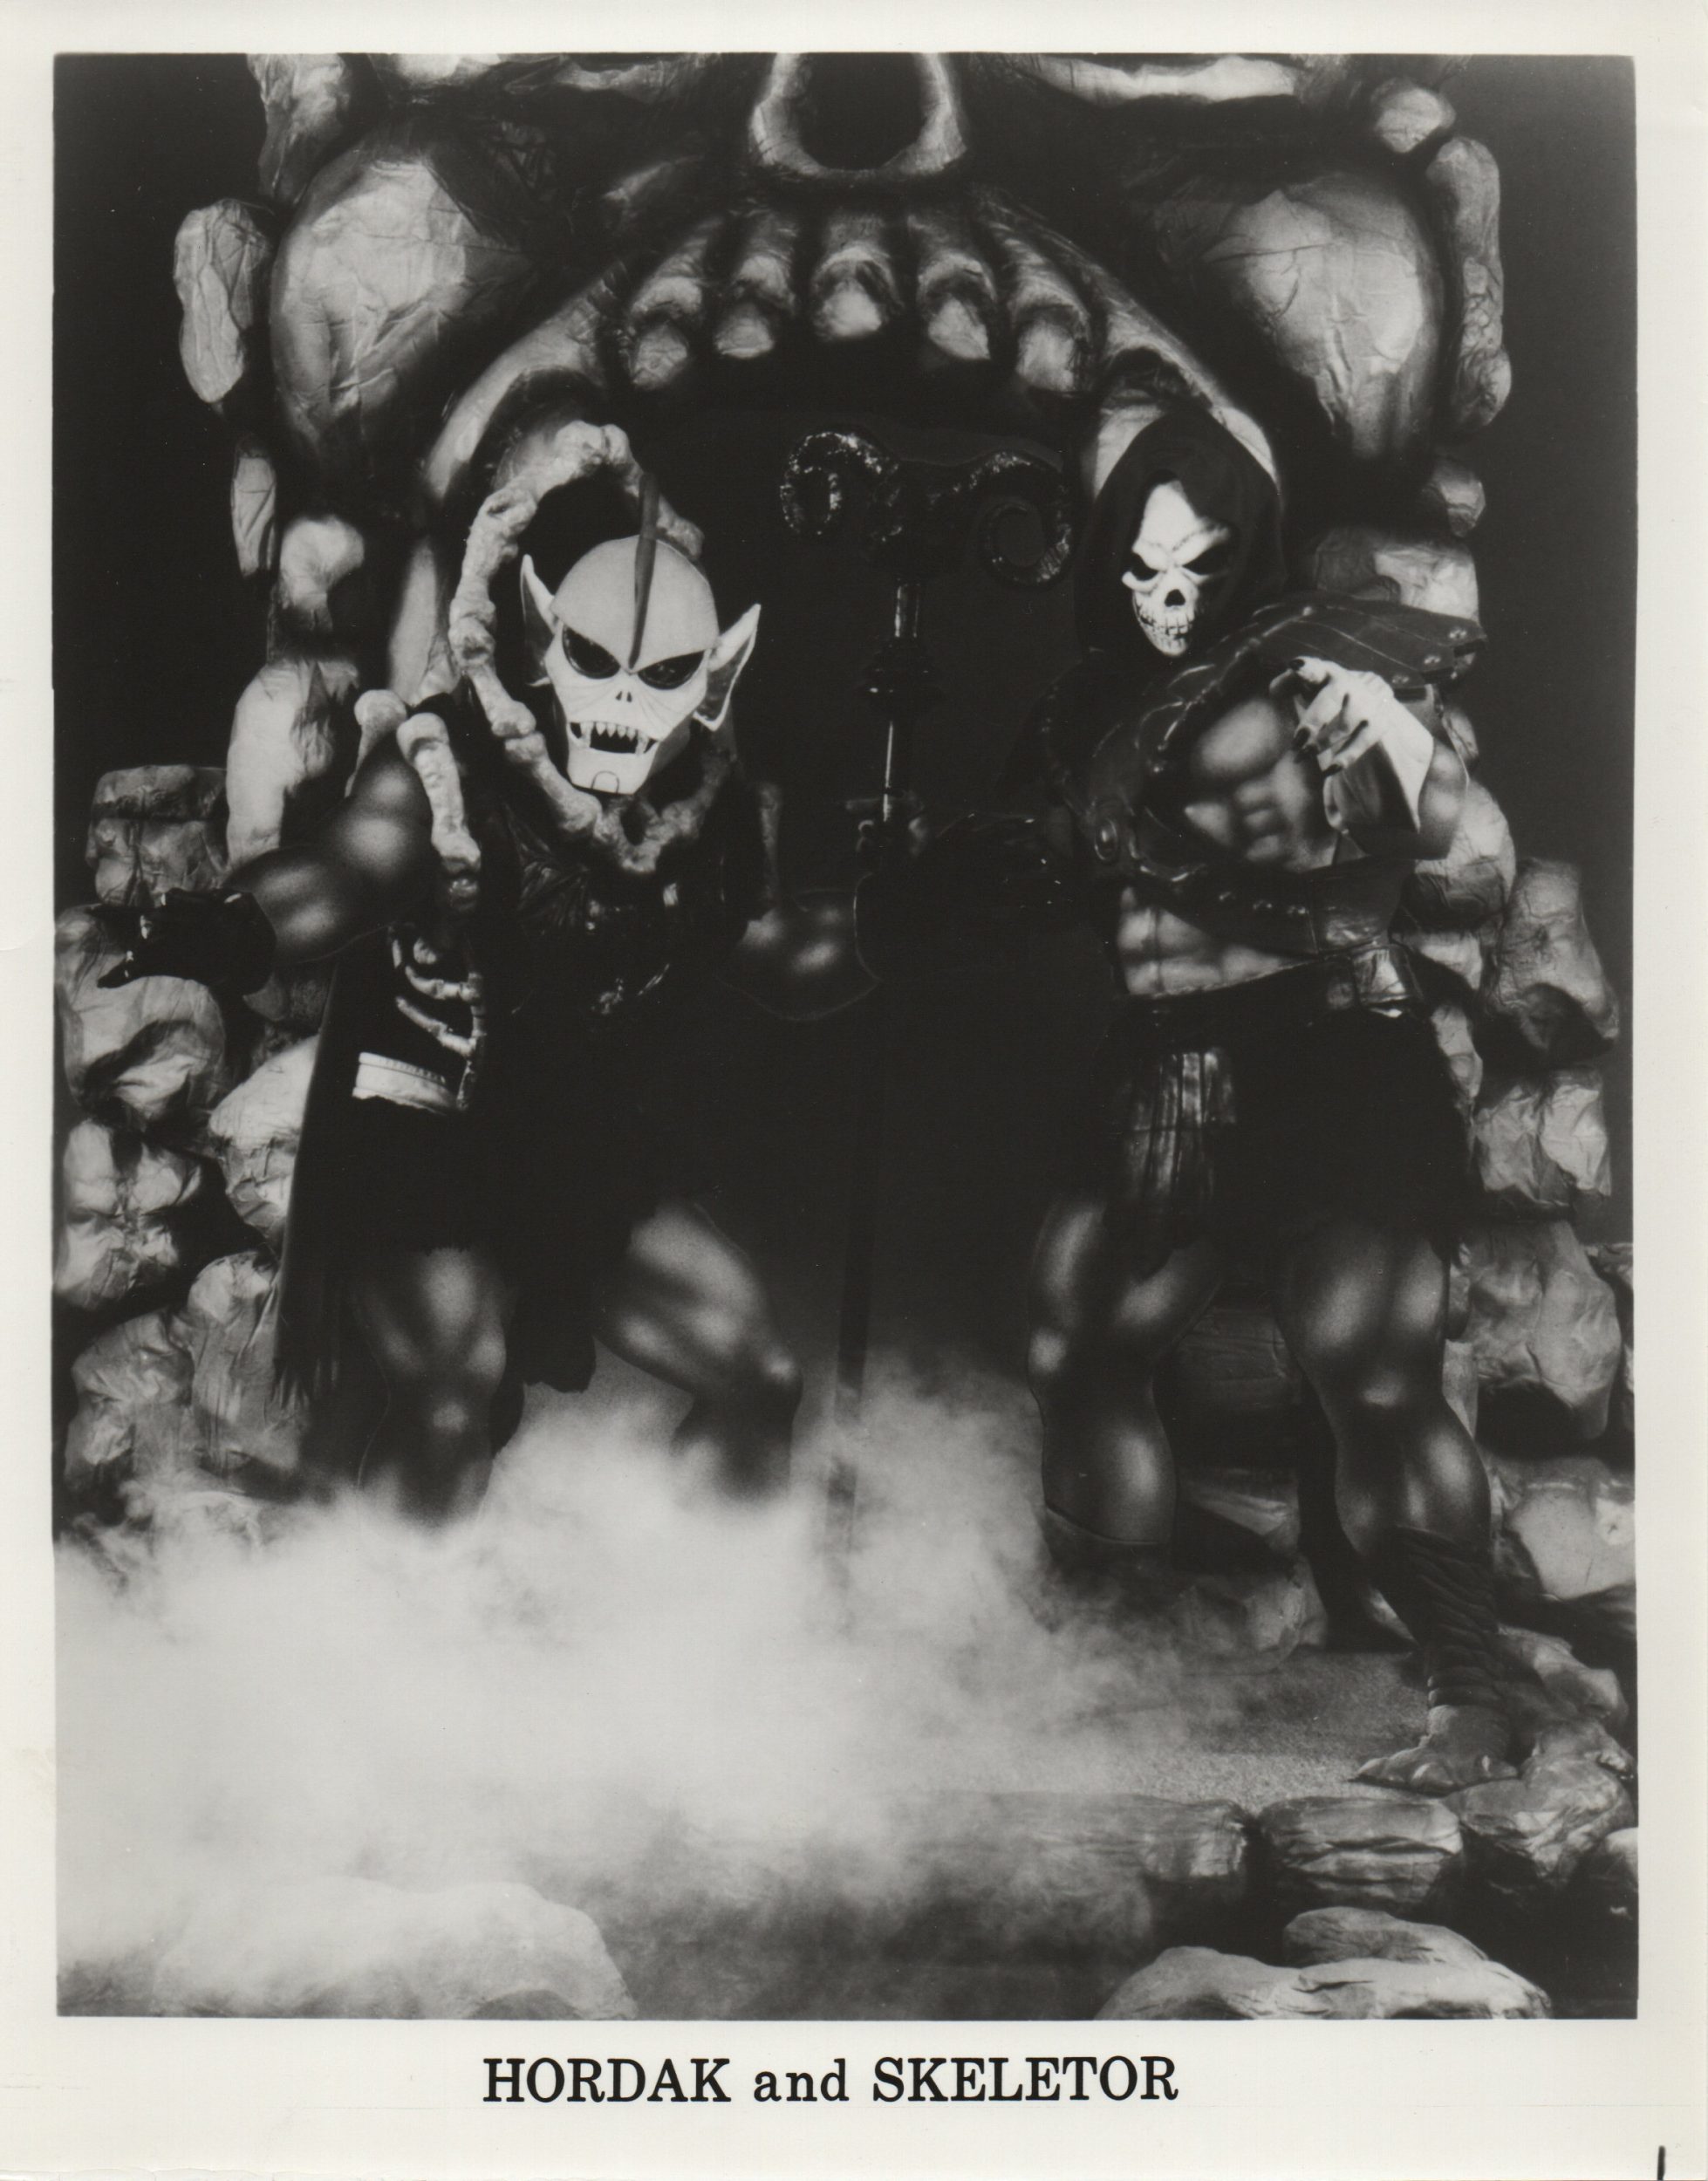
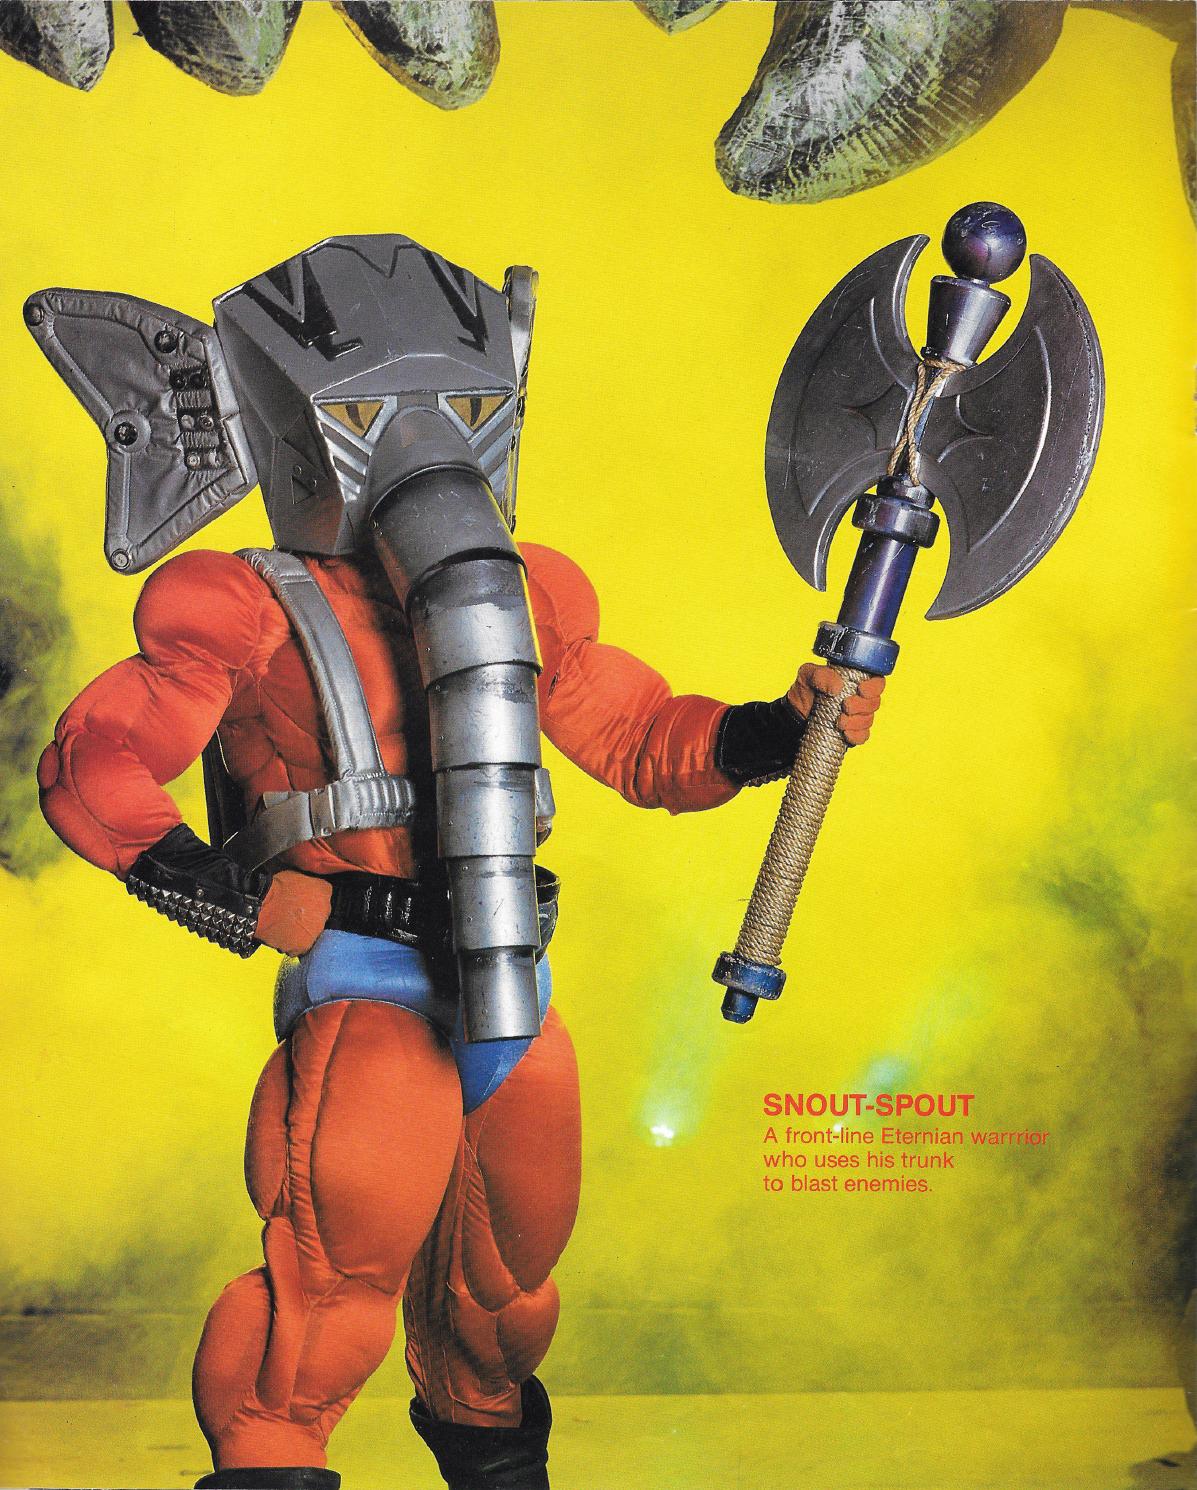
Hordak and Snout Spout: Khalos Planchart
Skeletor: Eric Van Baars
Captain Morrison: Richard Hoag
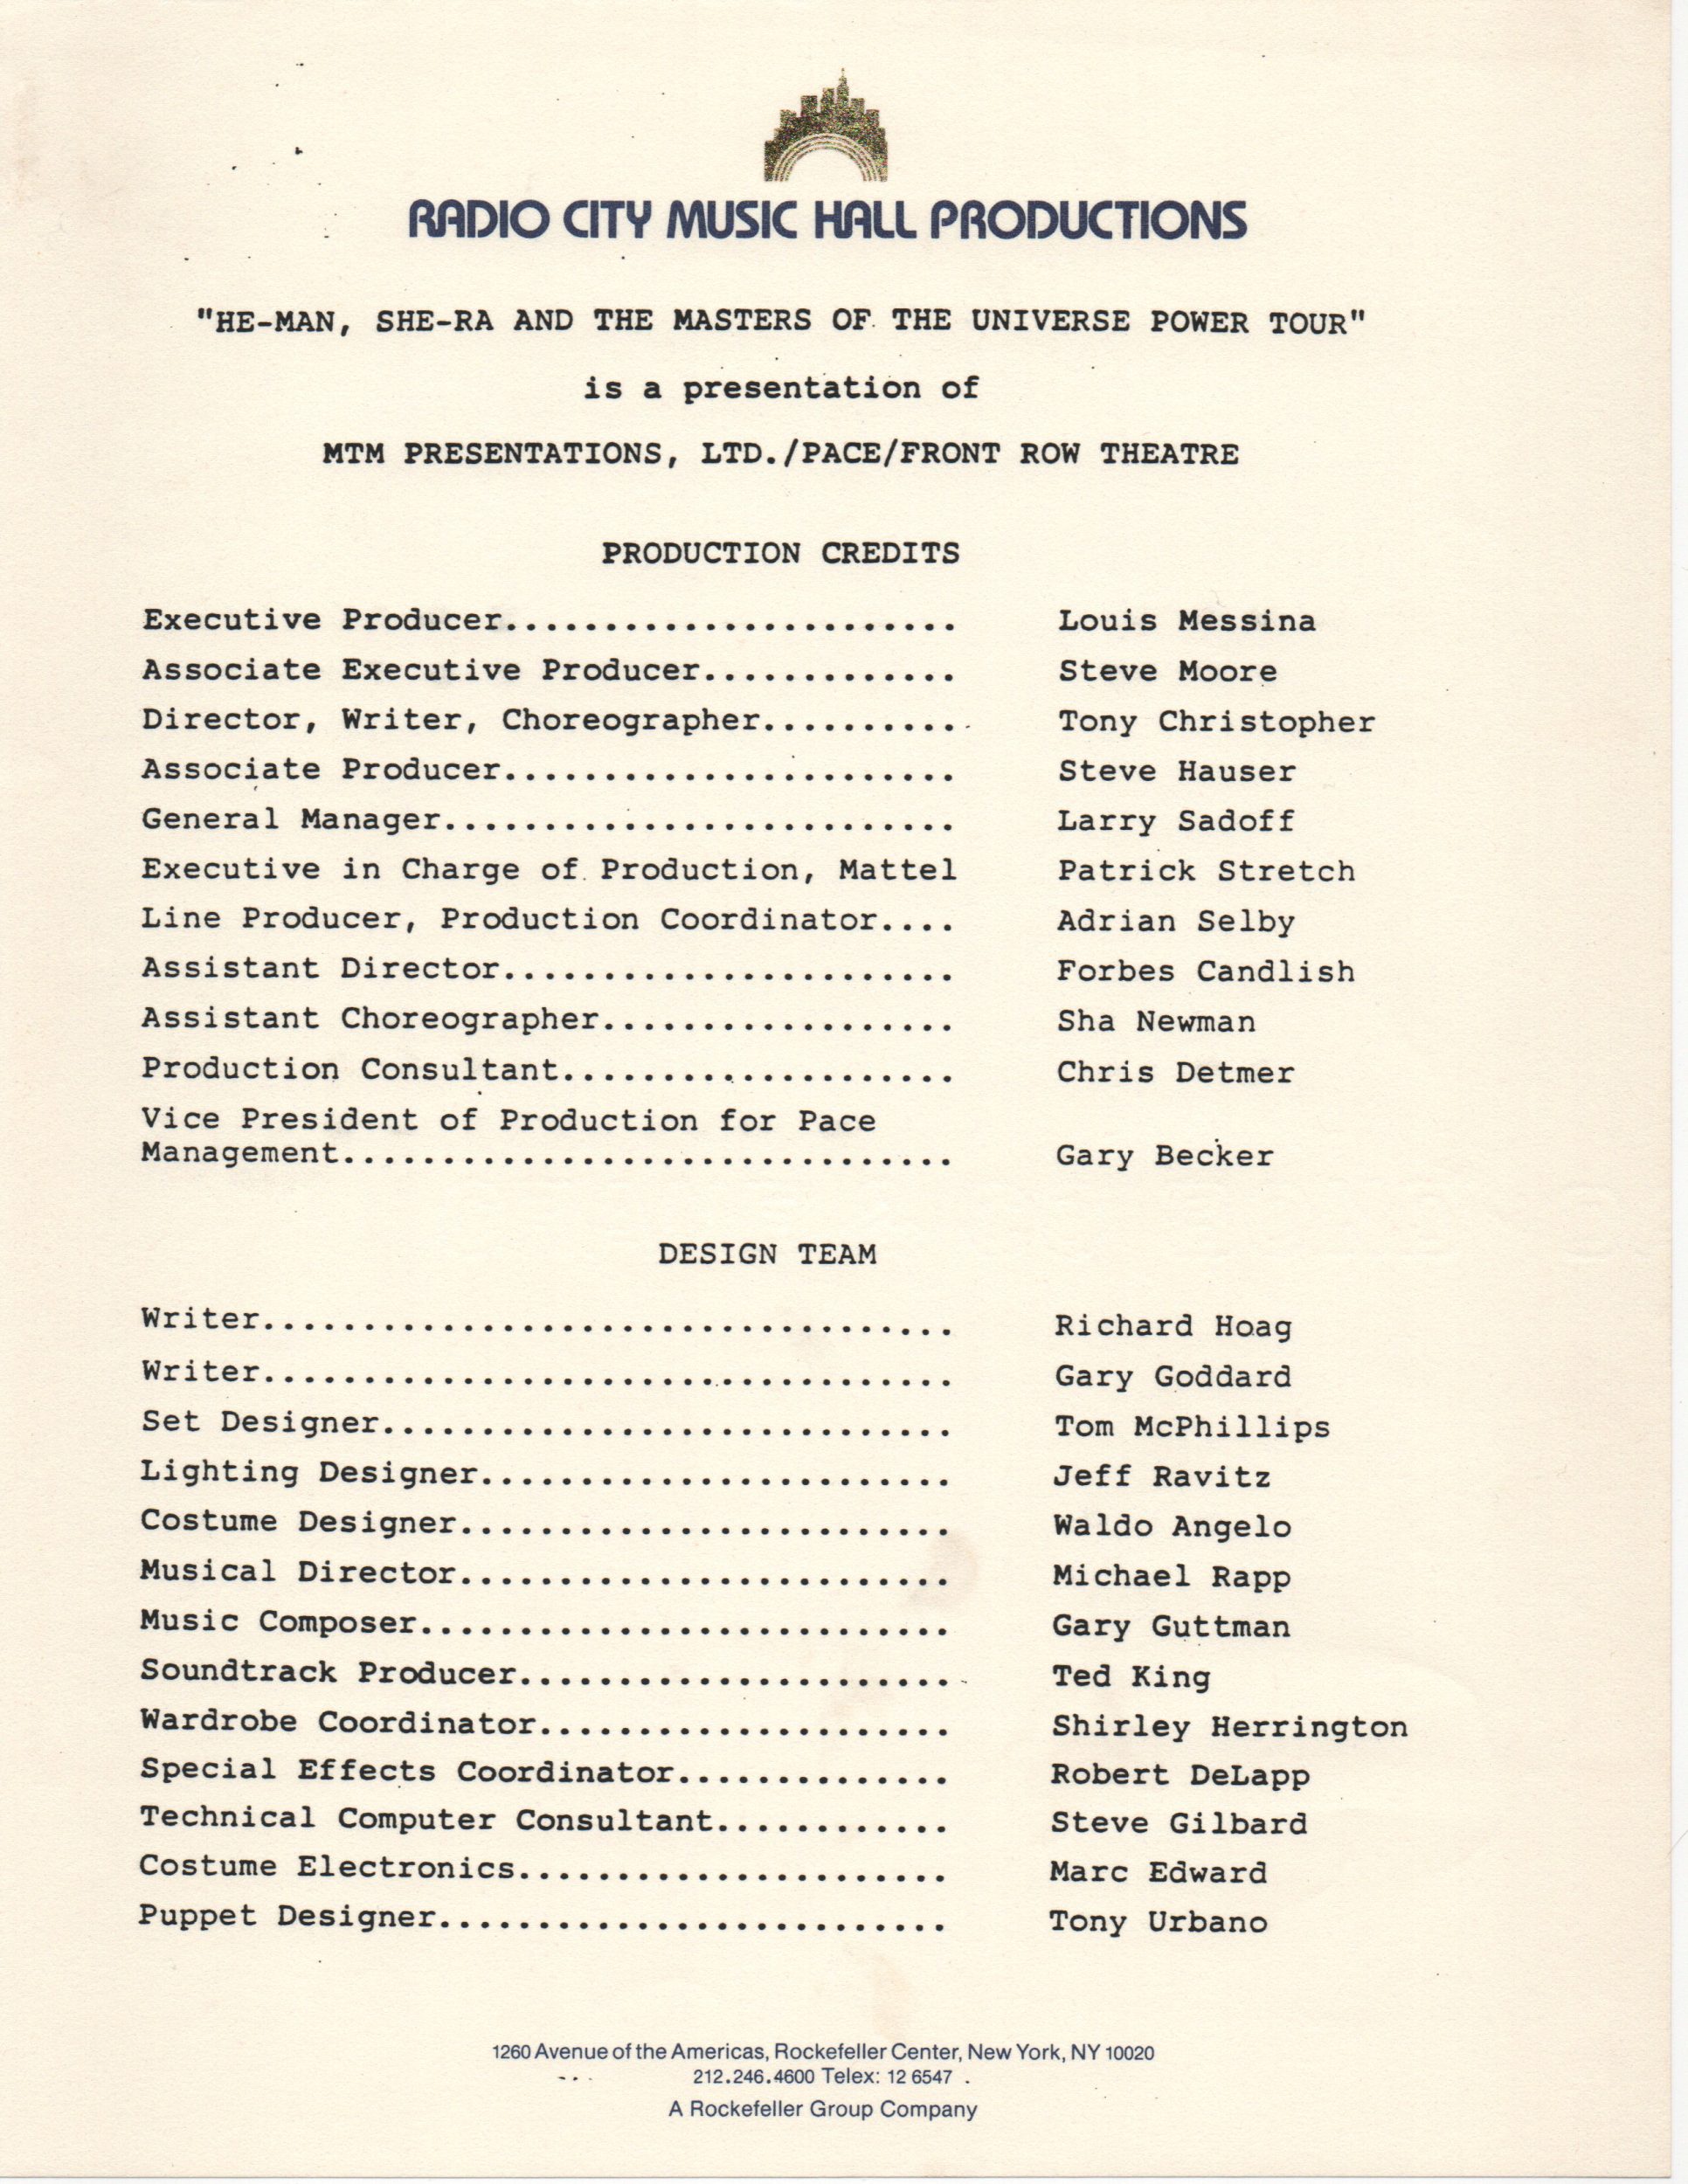
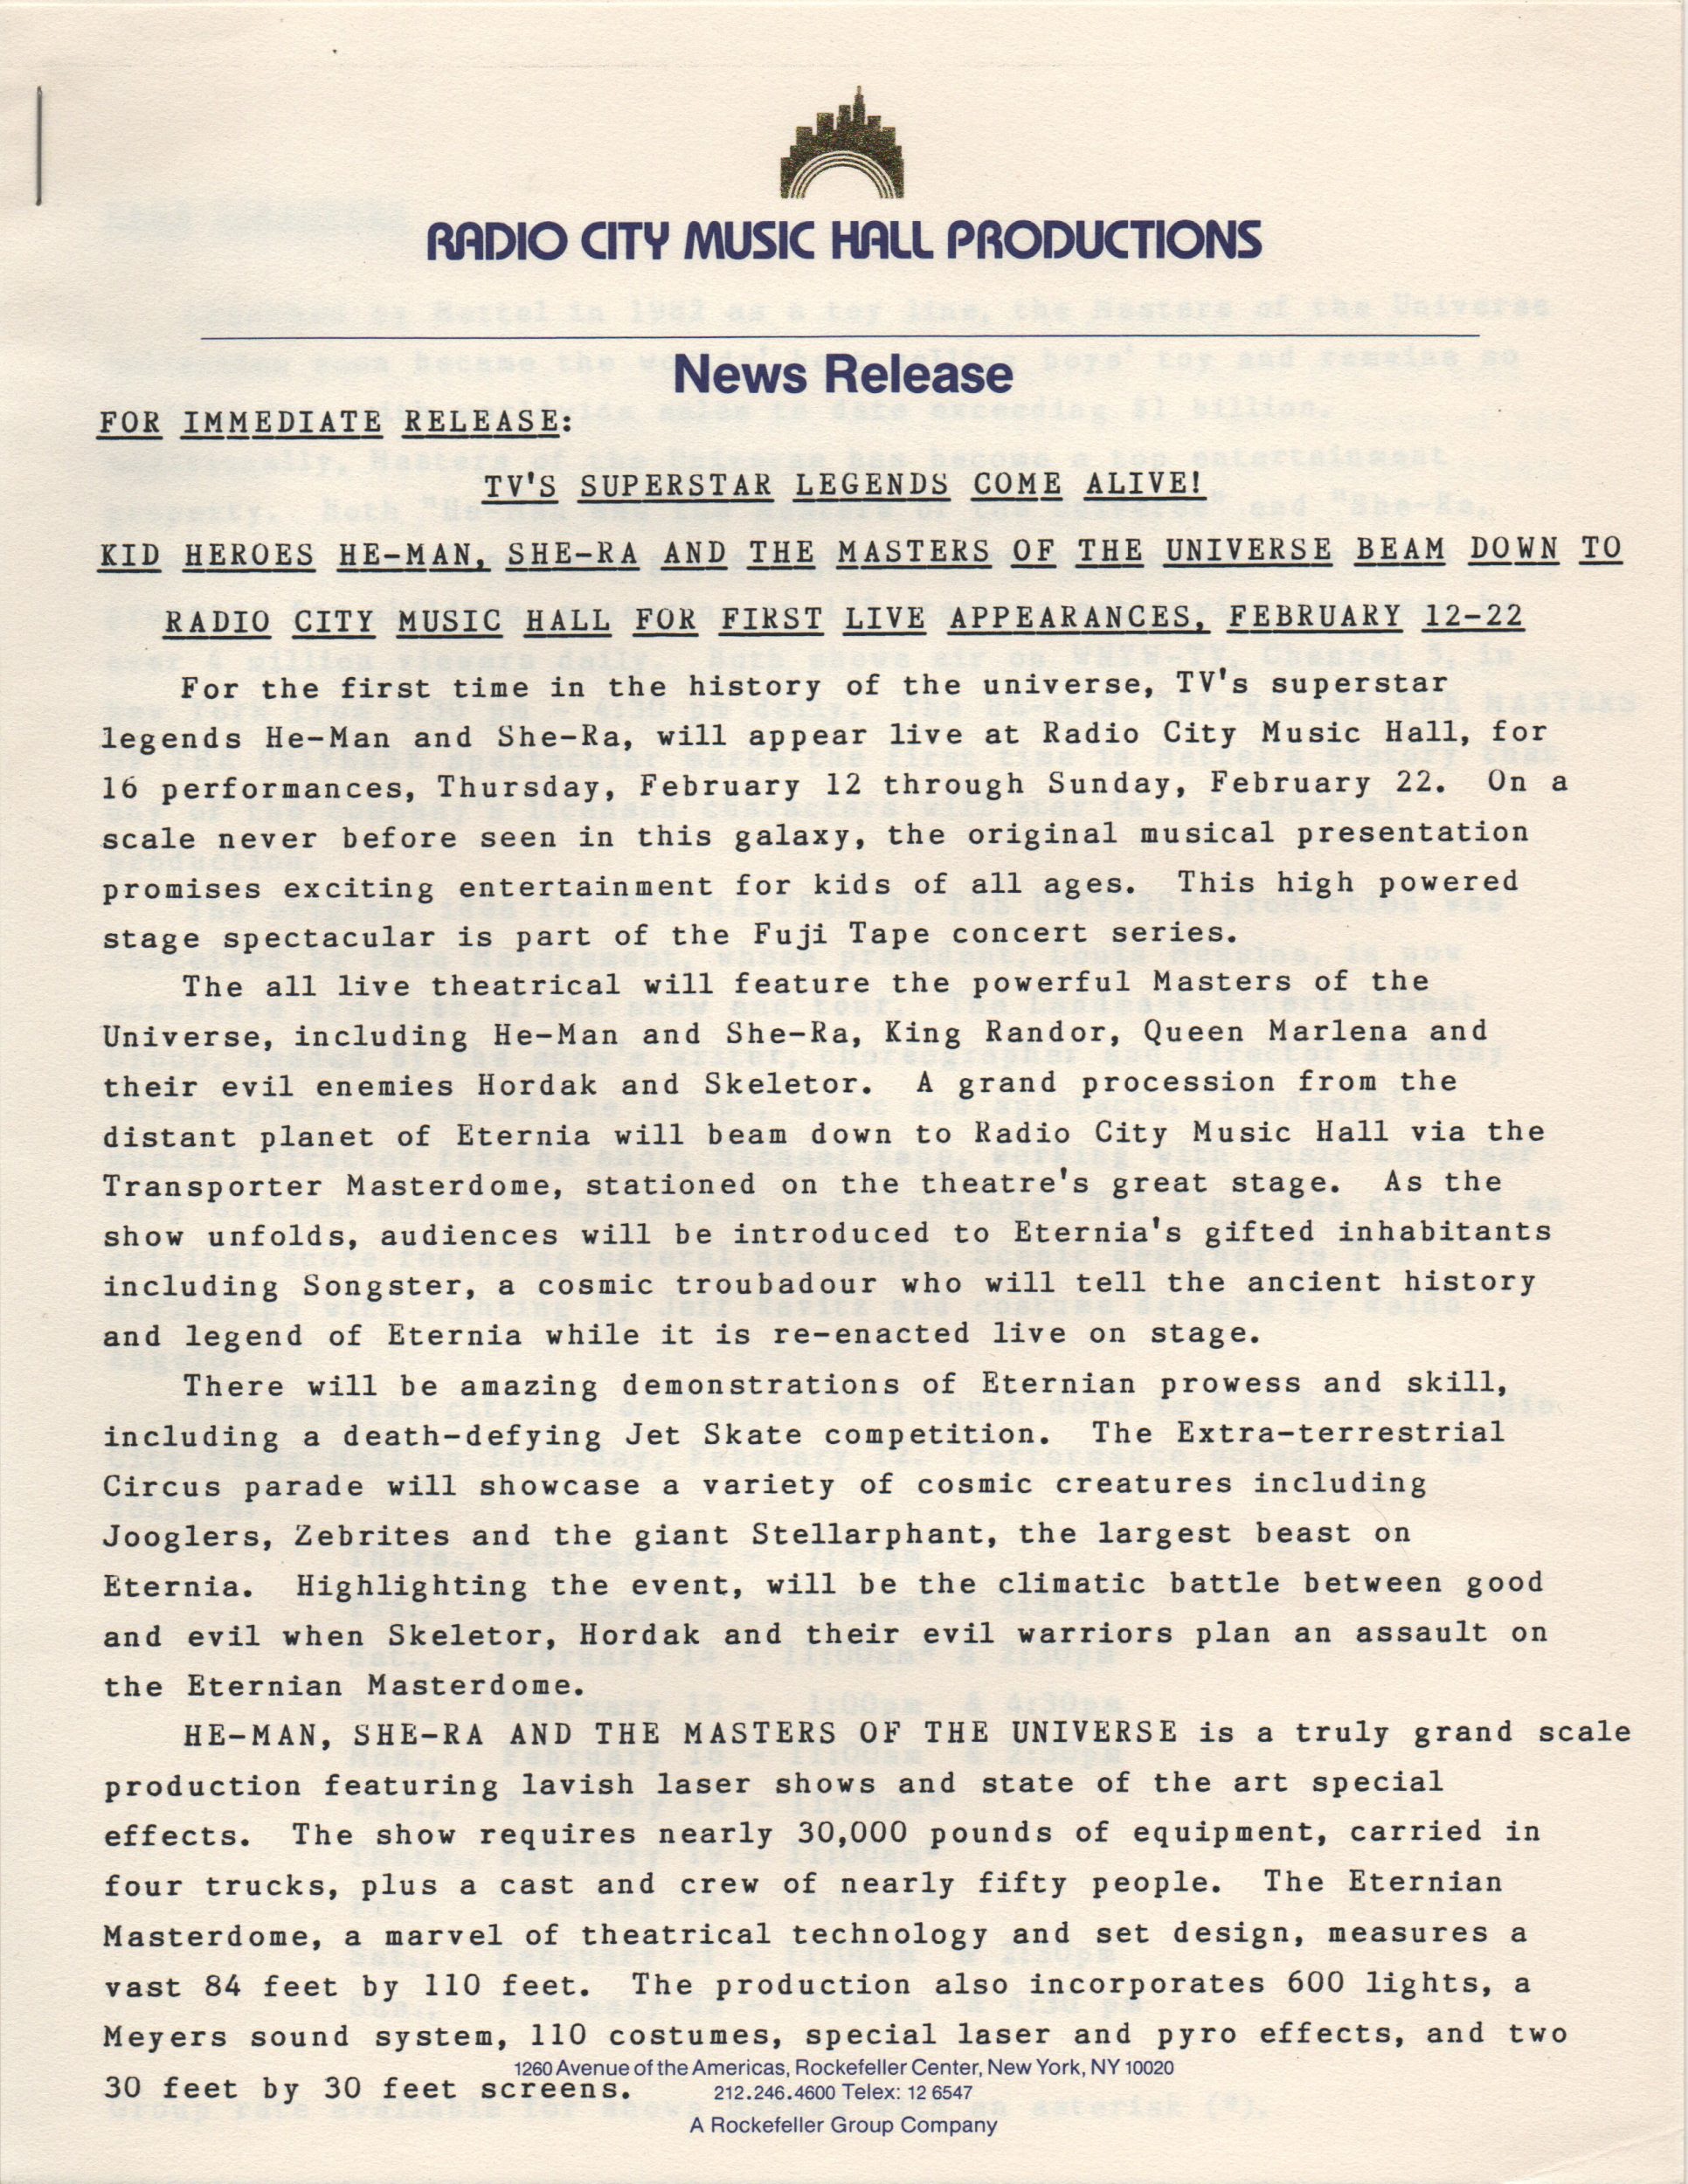
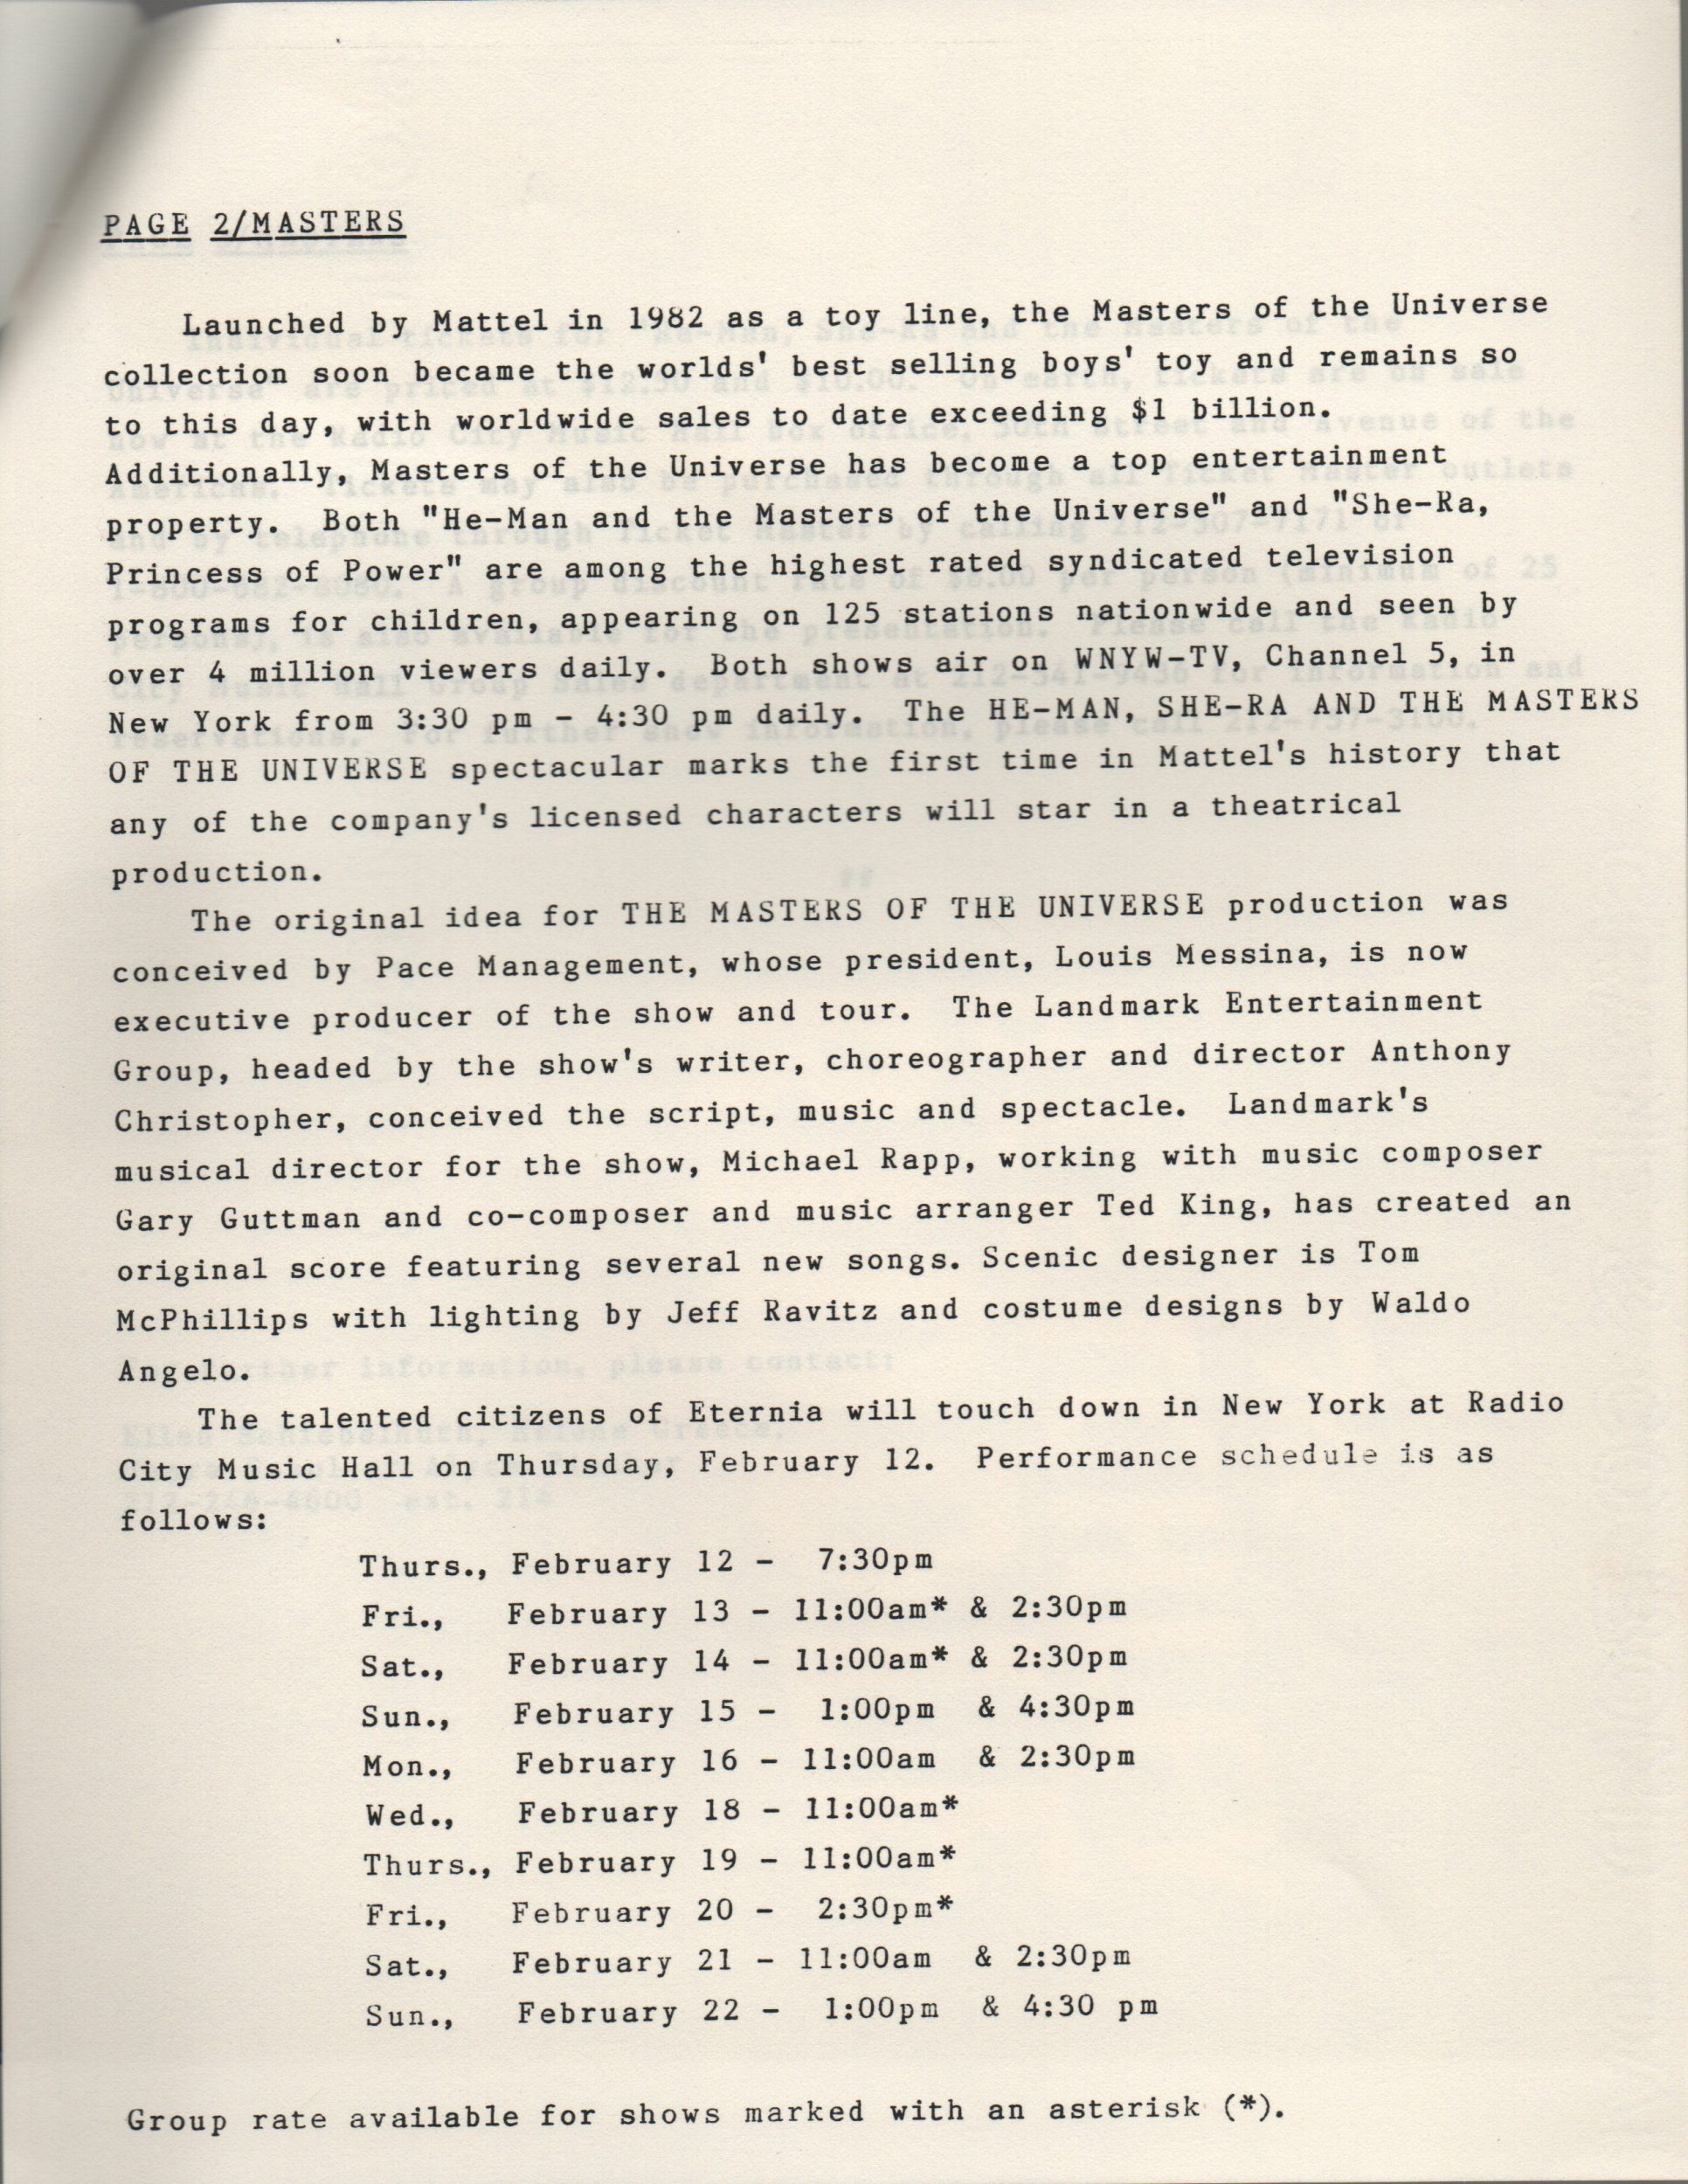
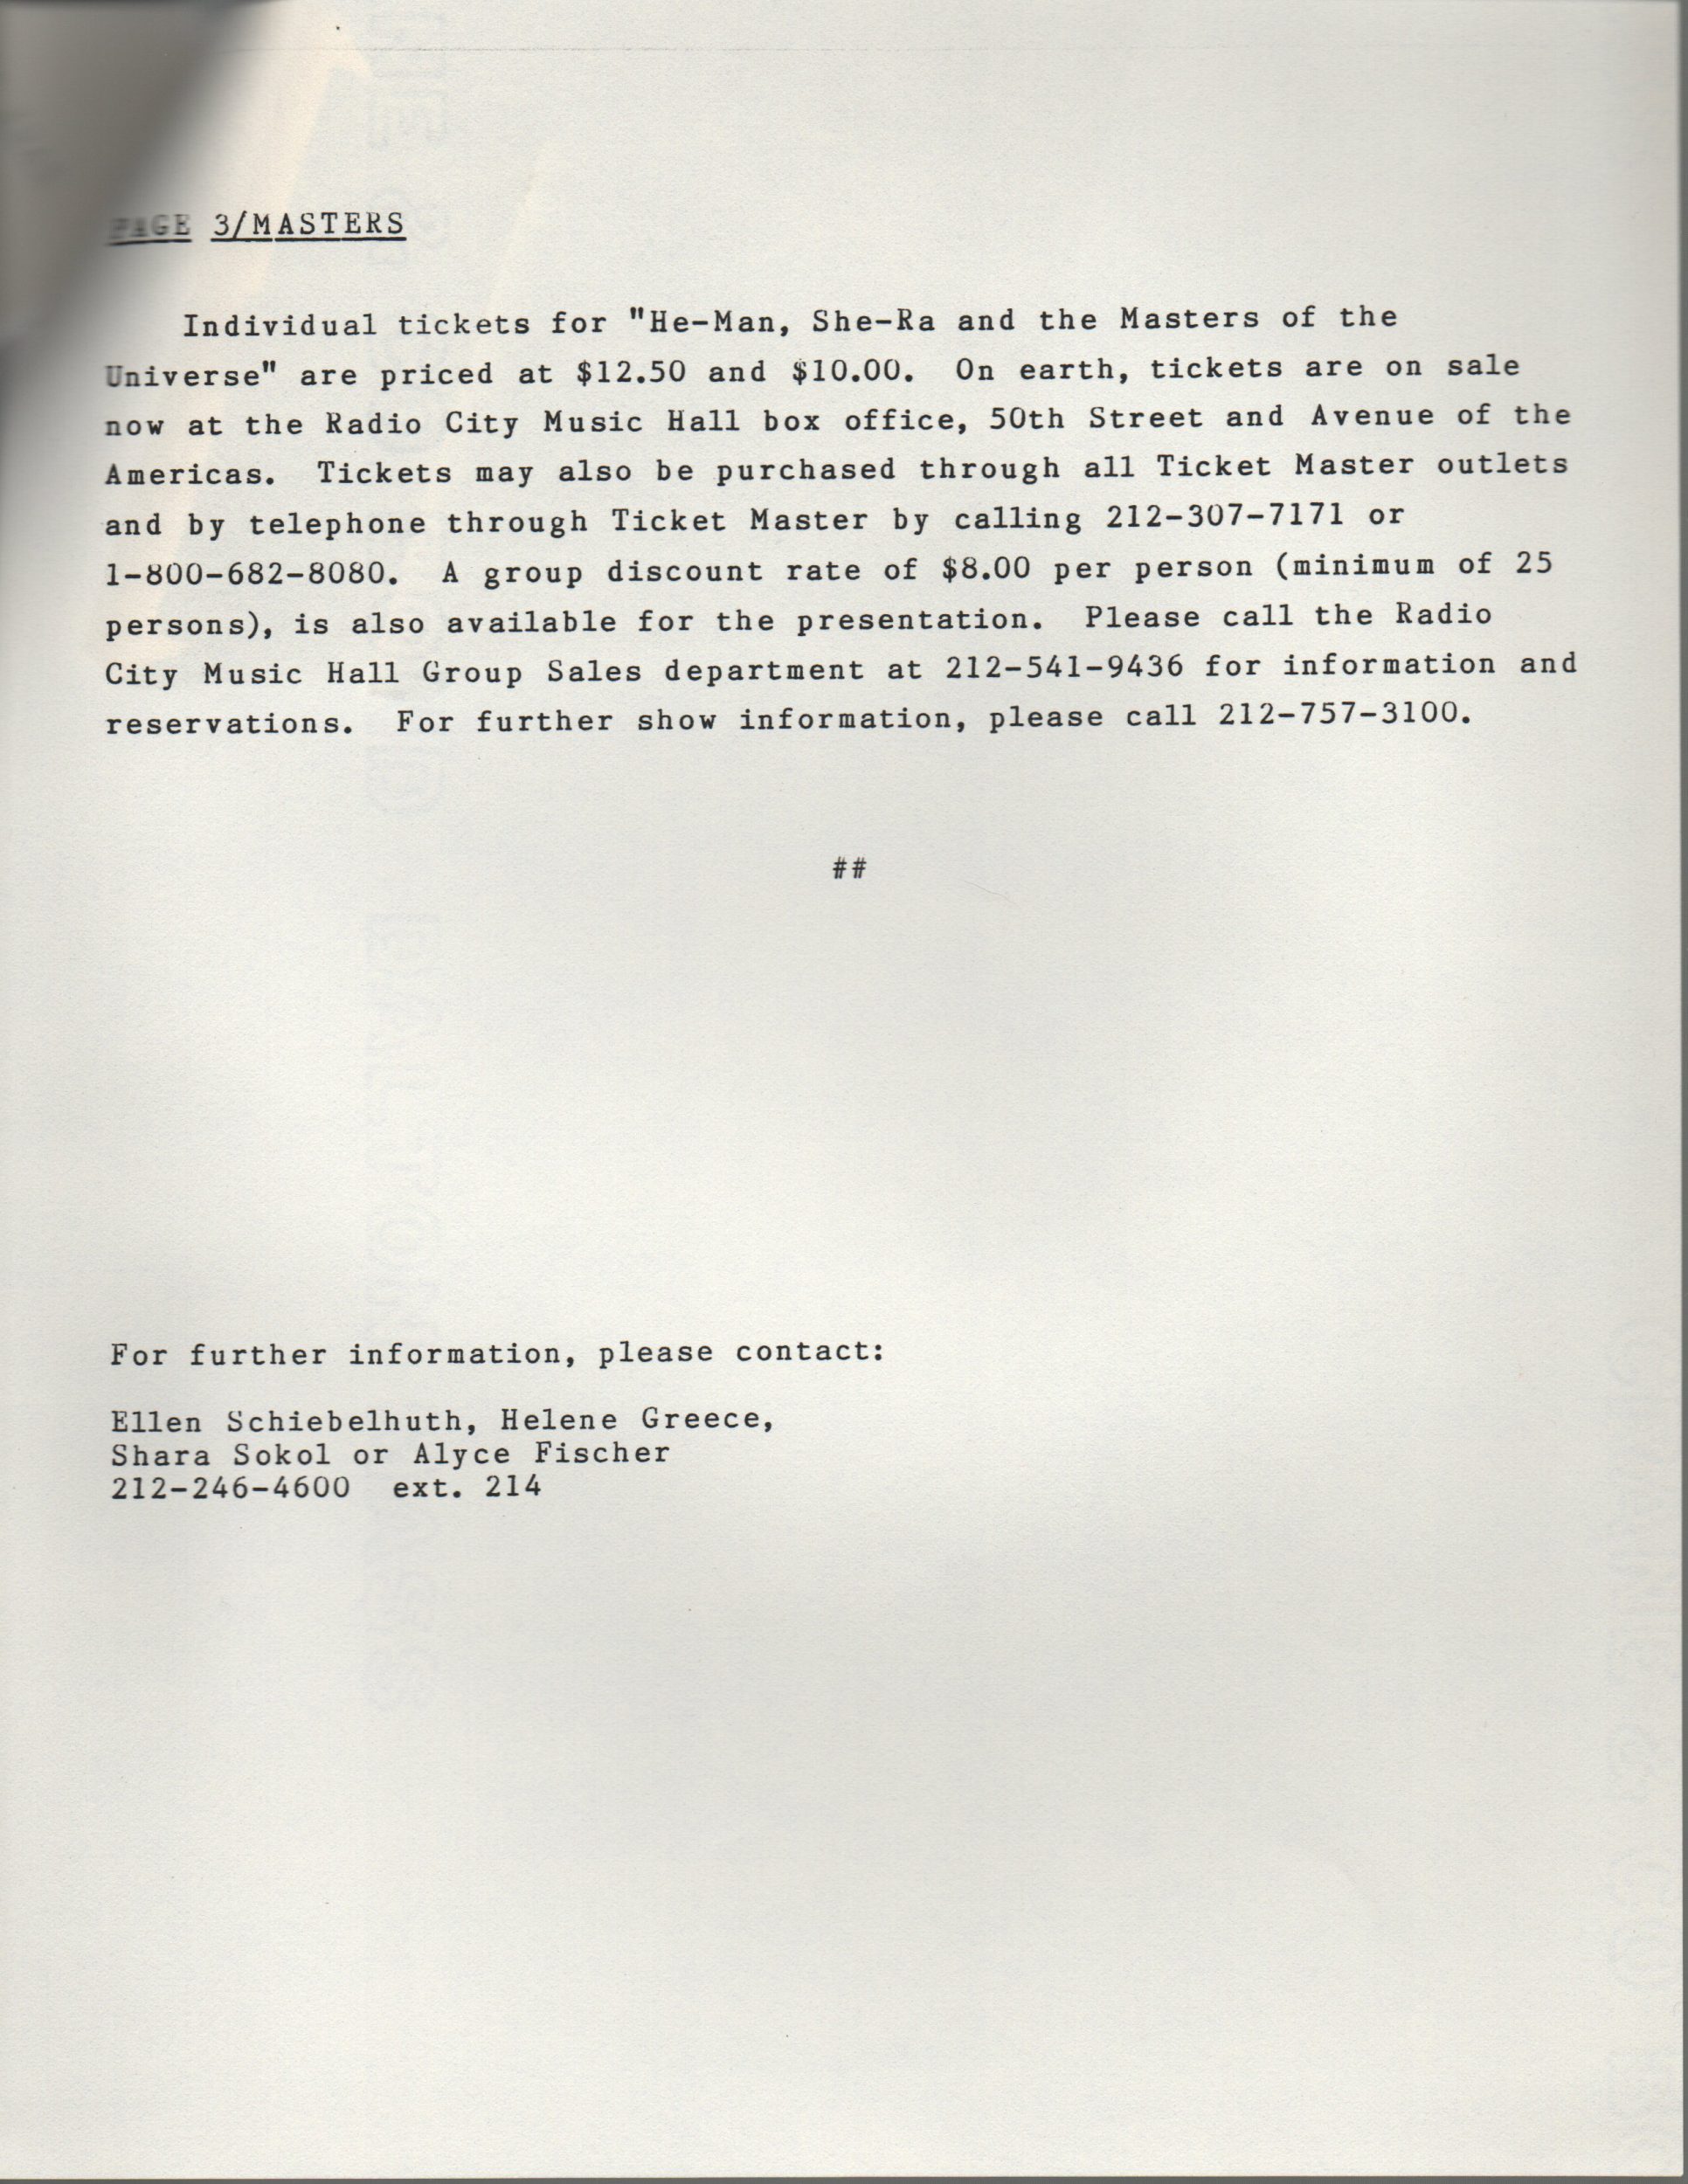
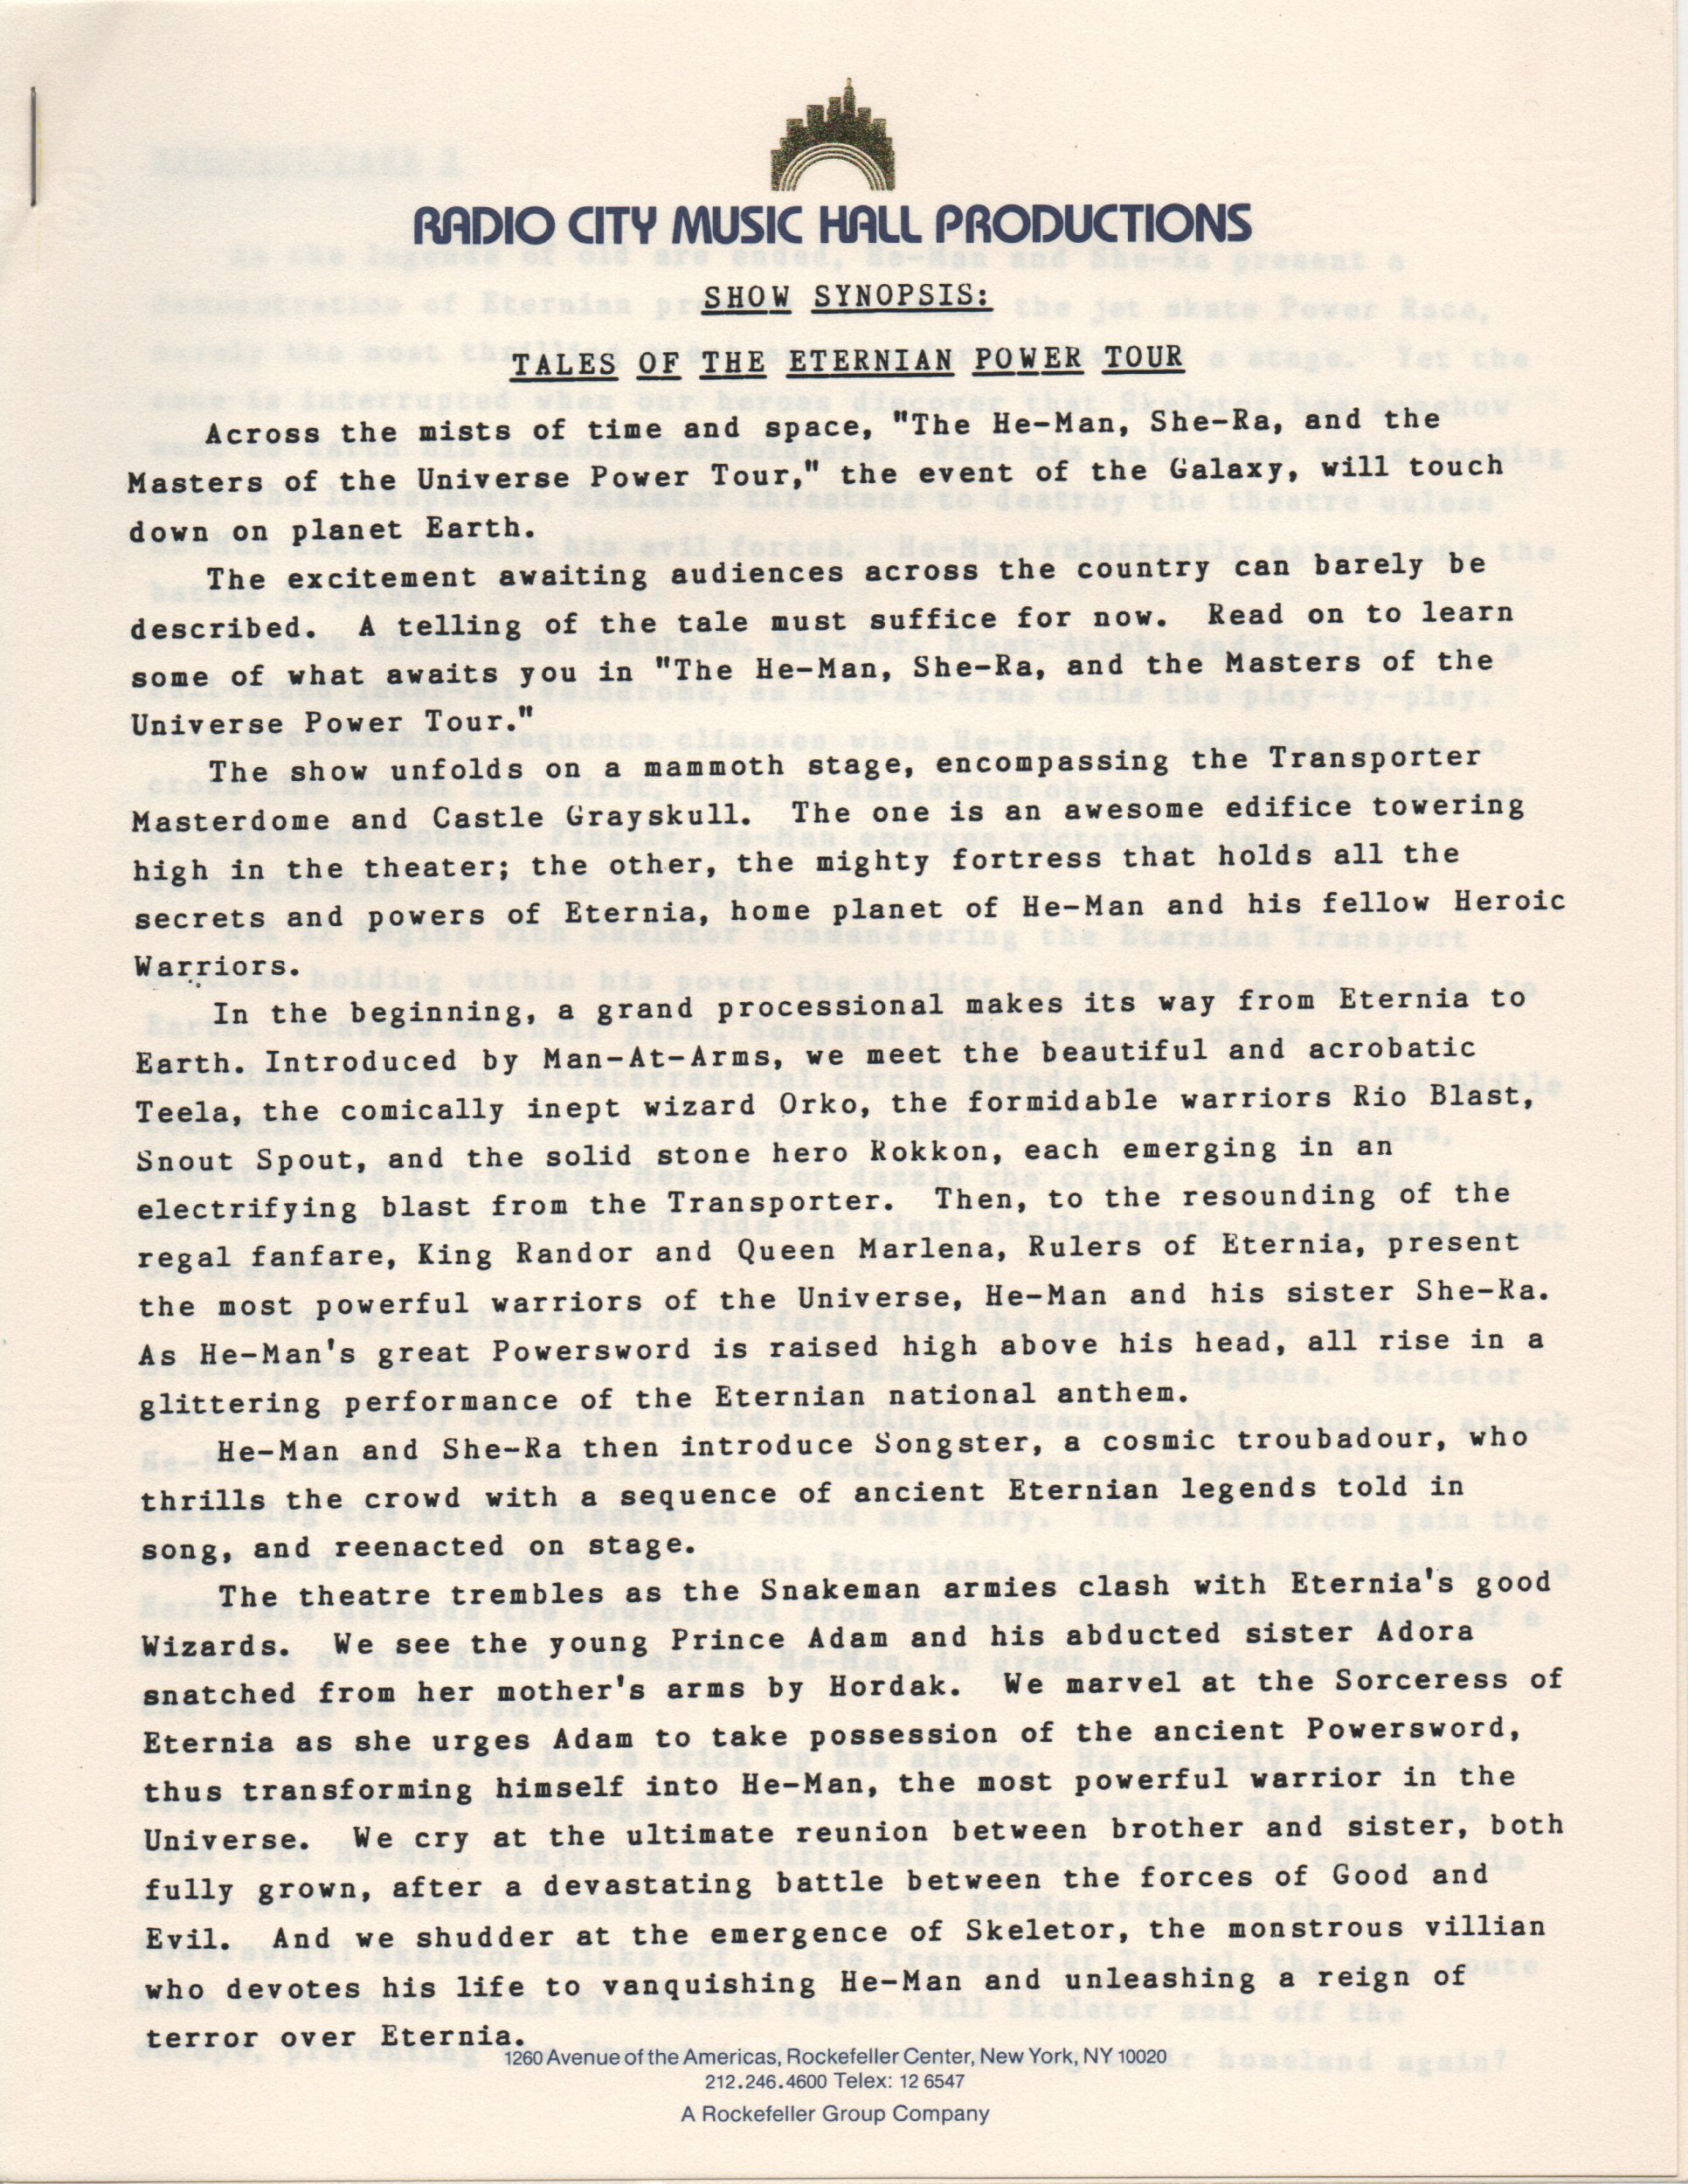
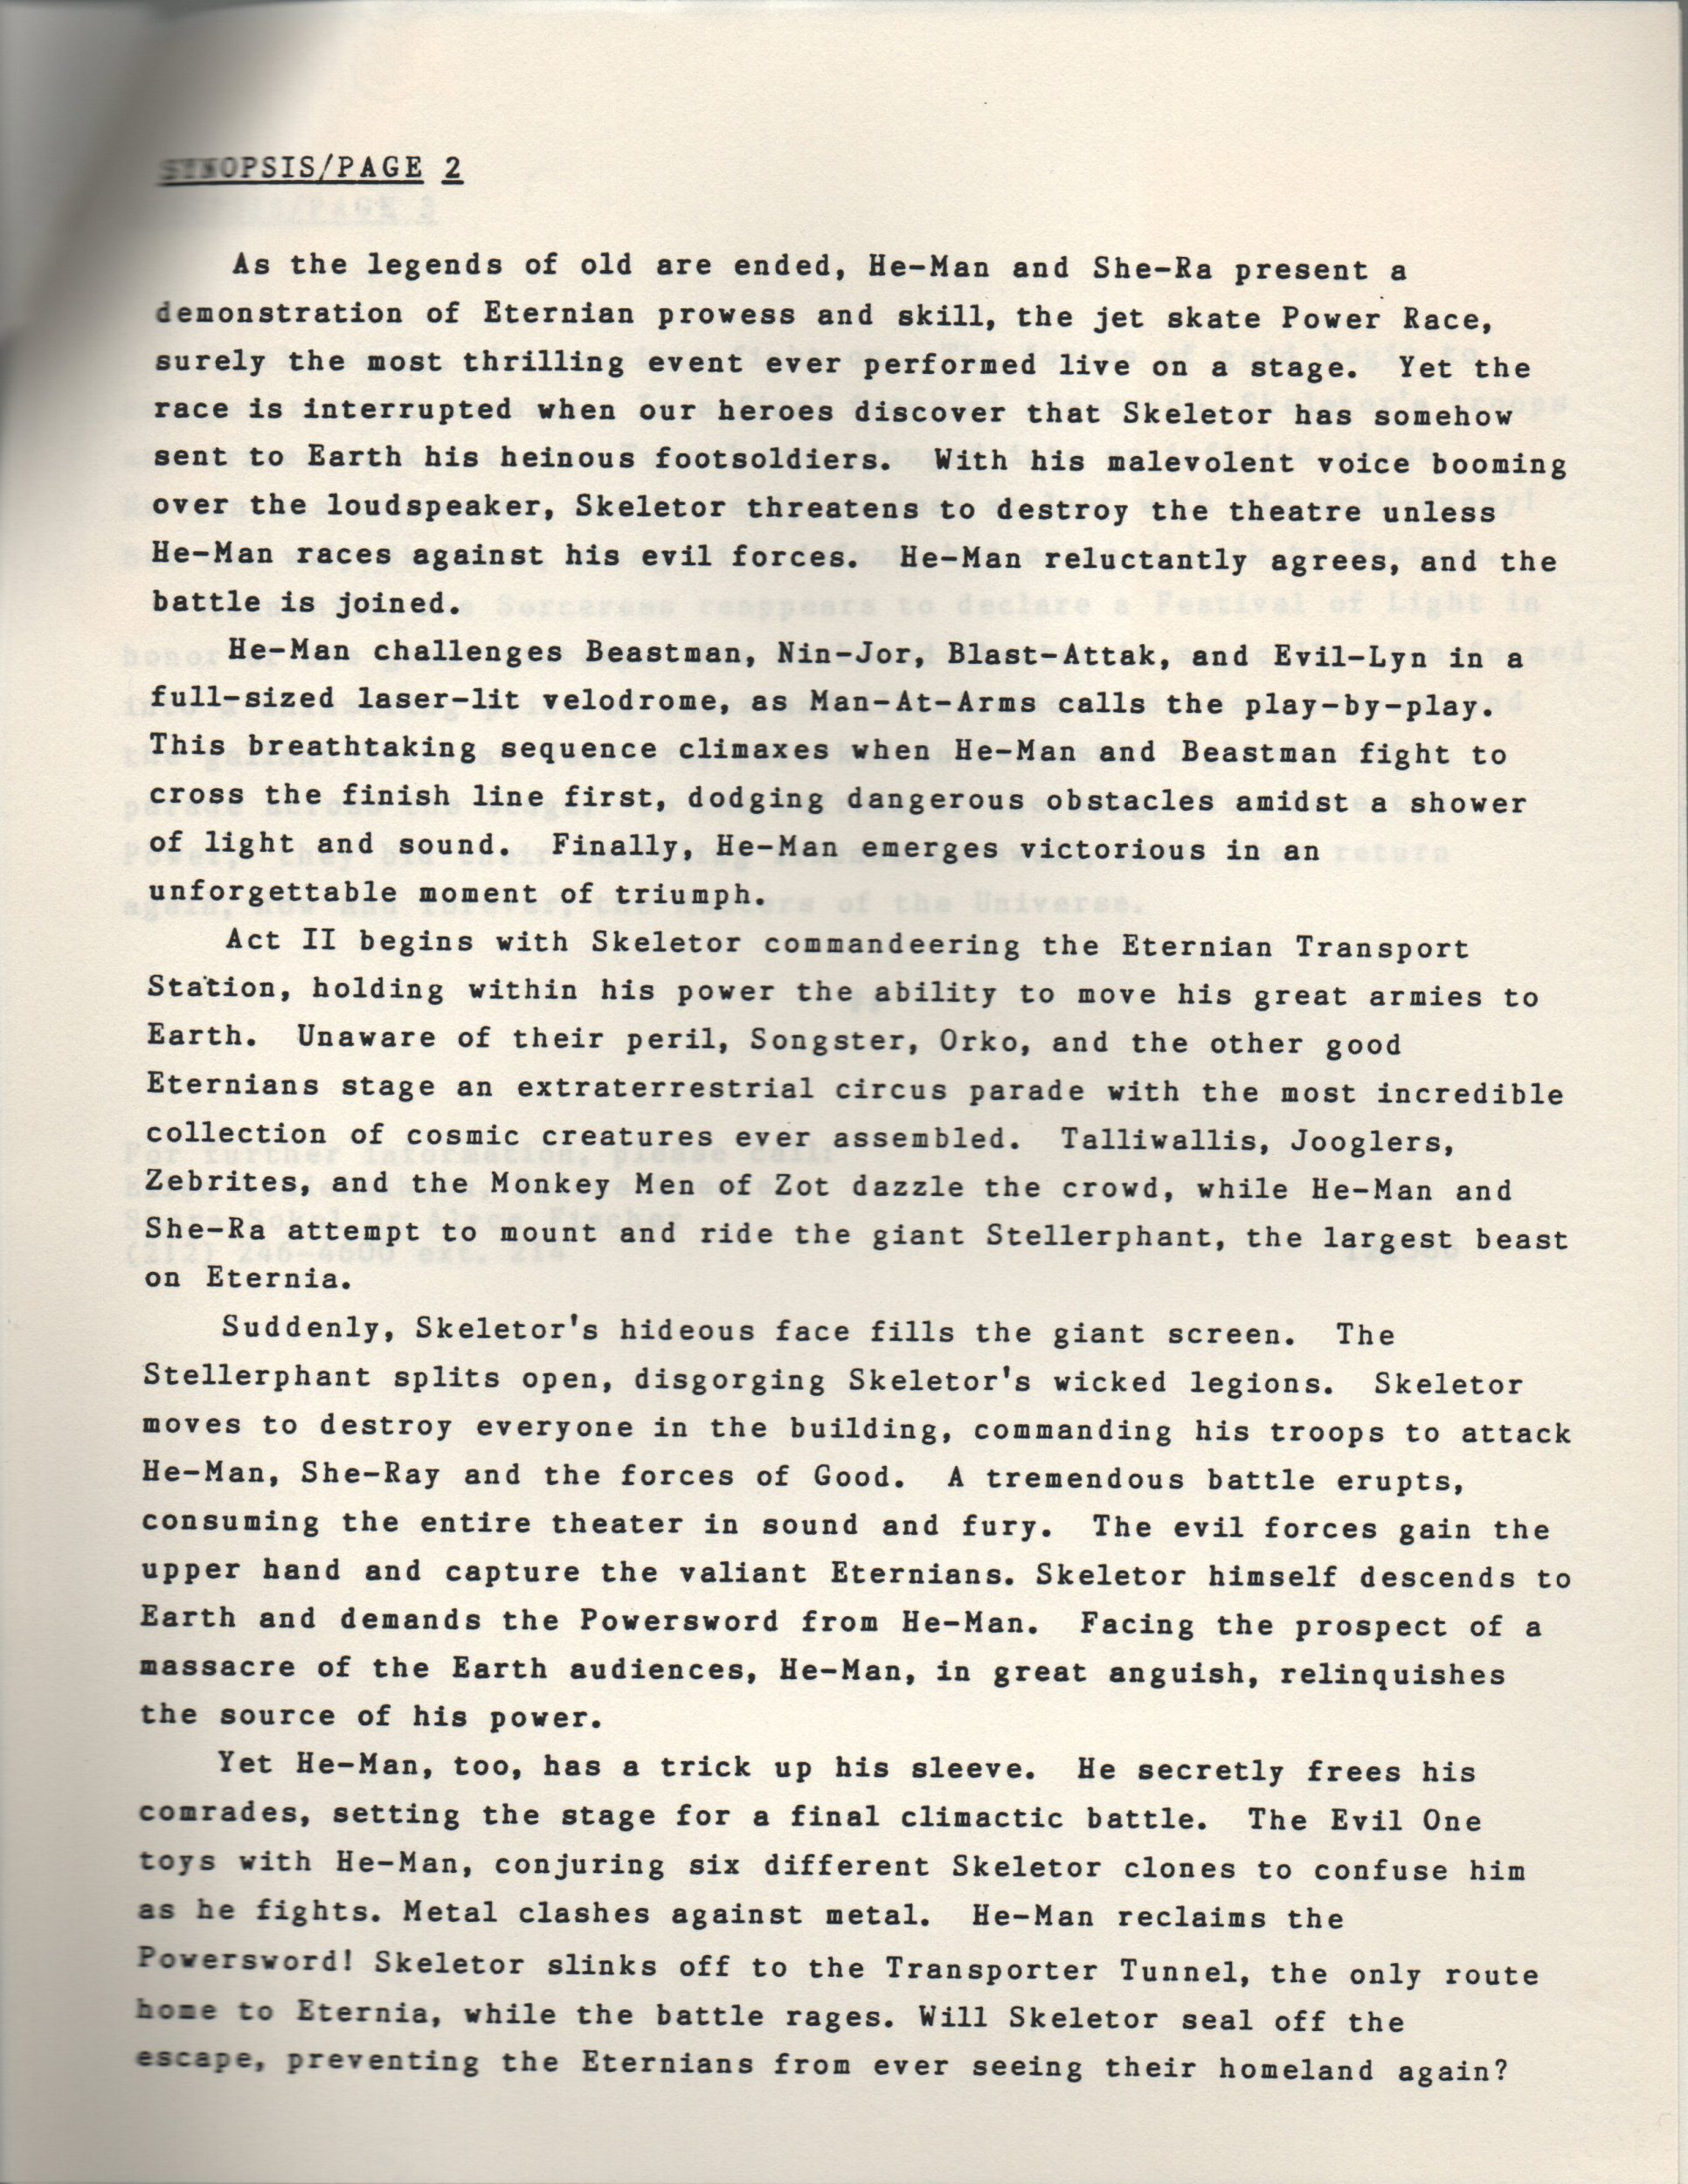
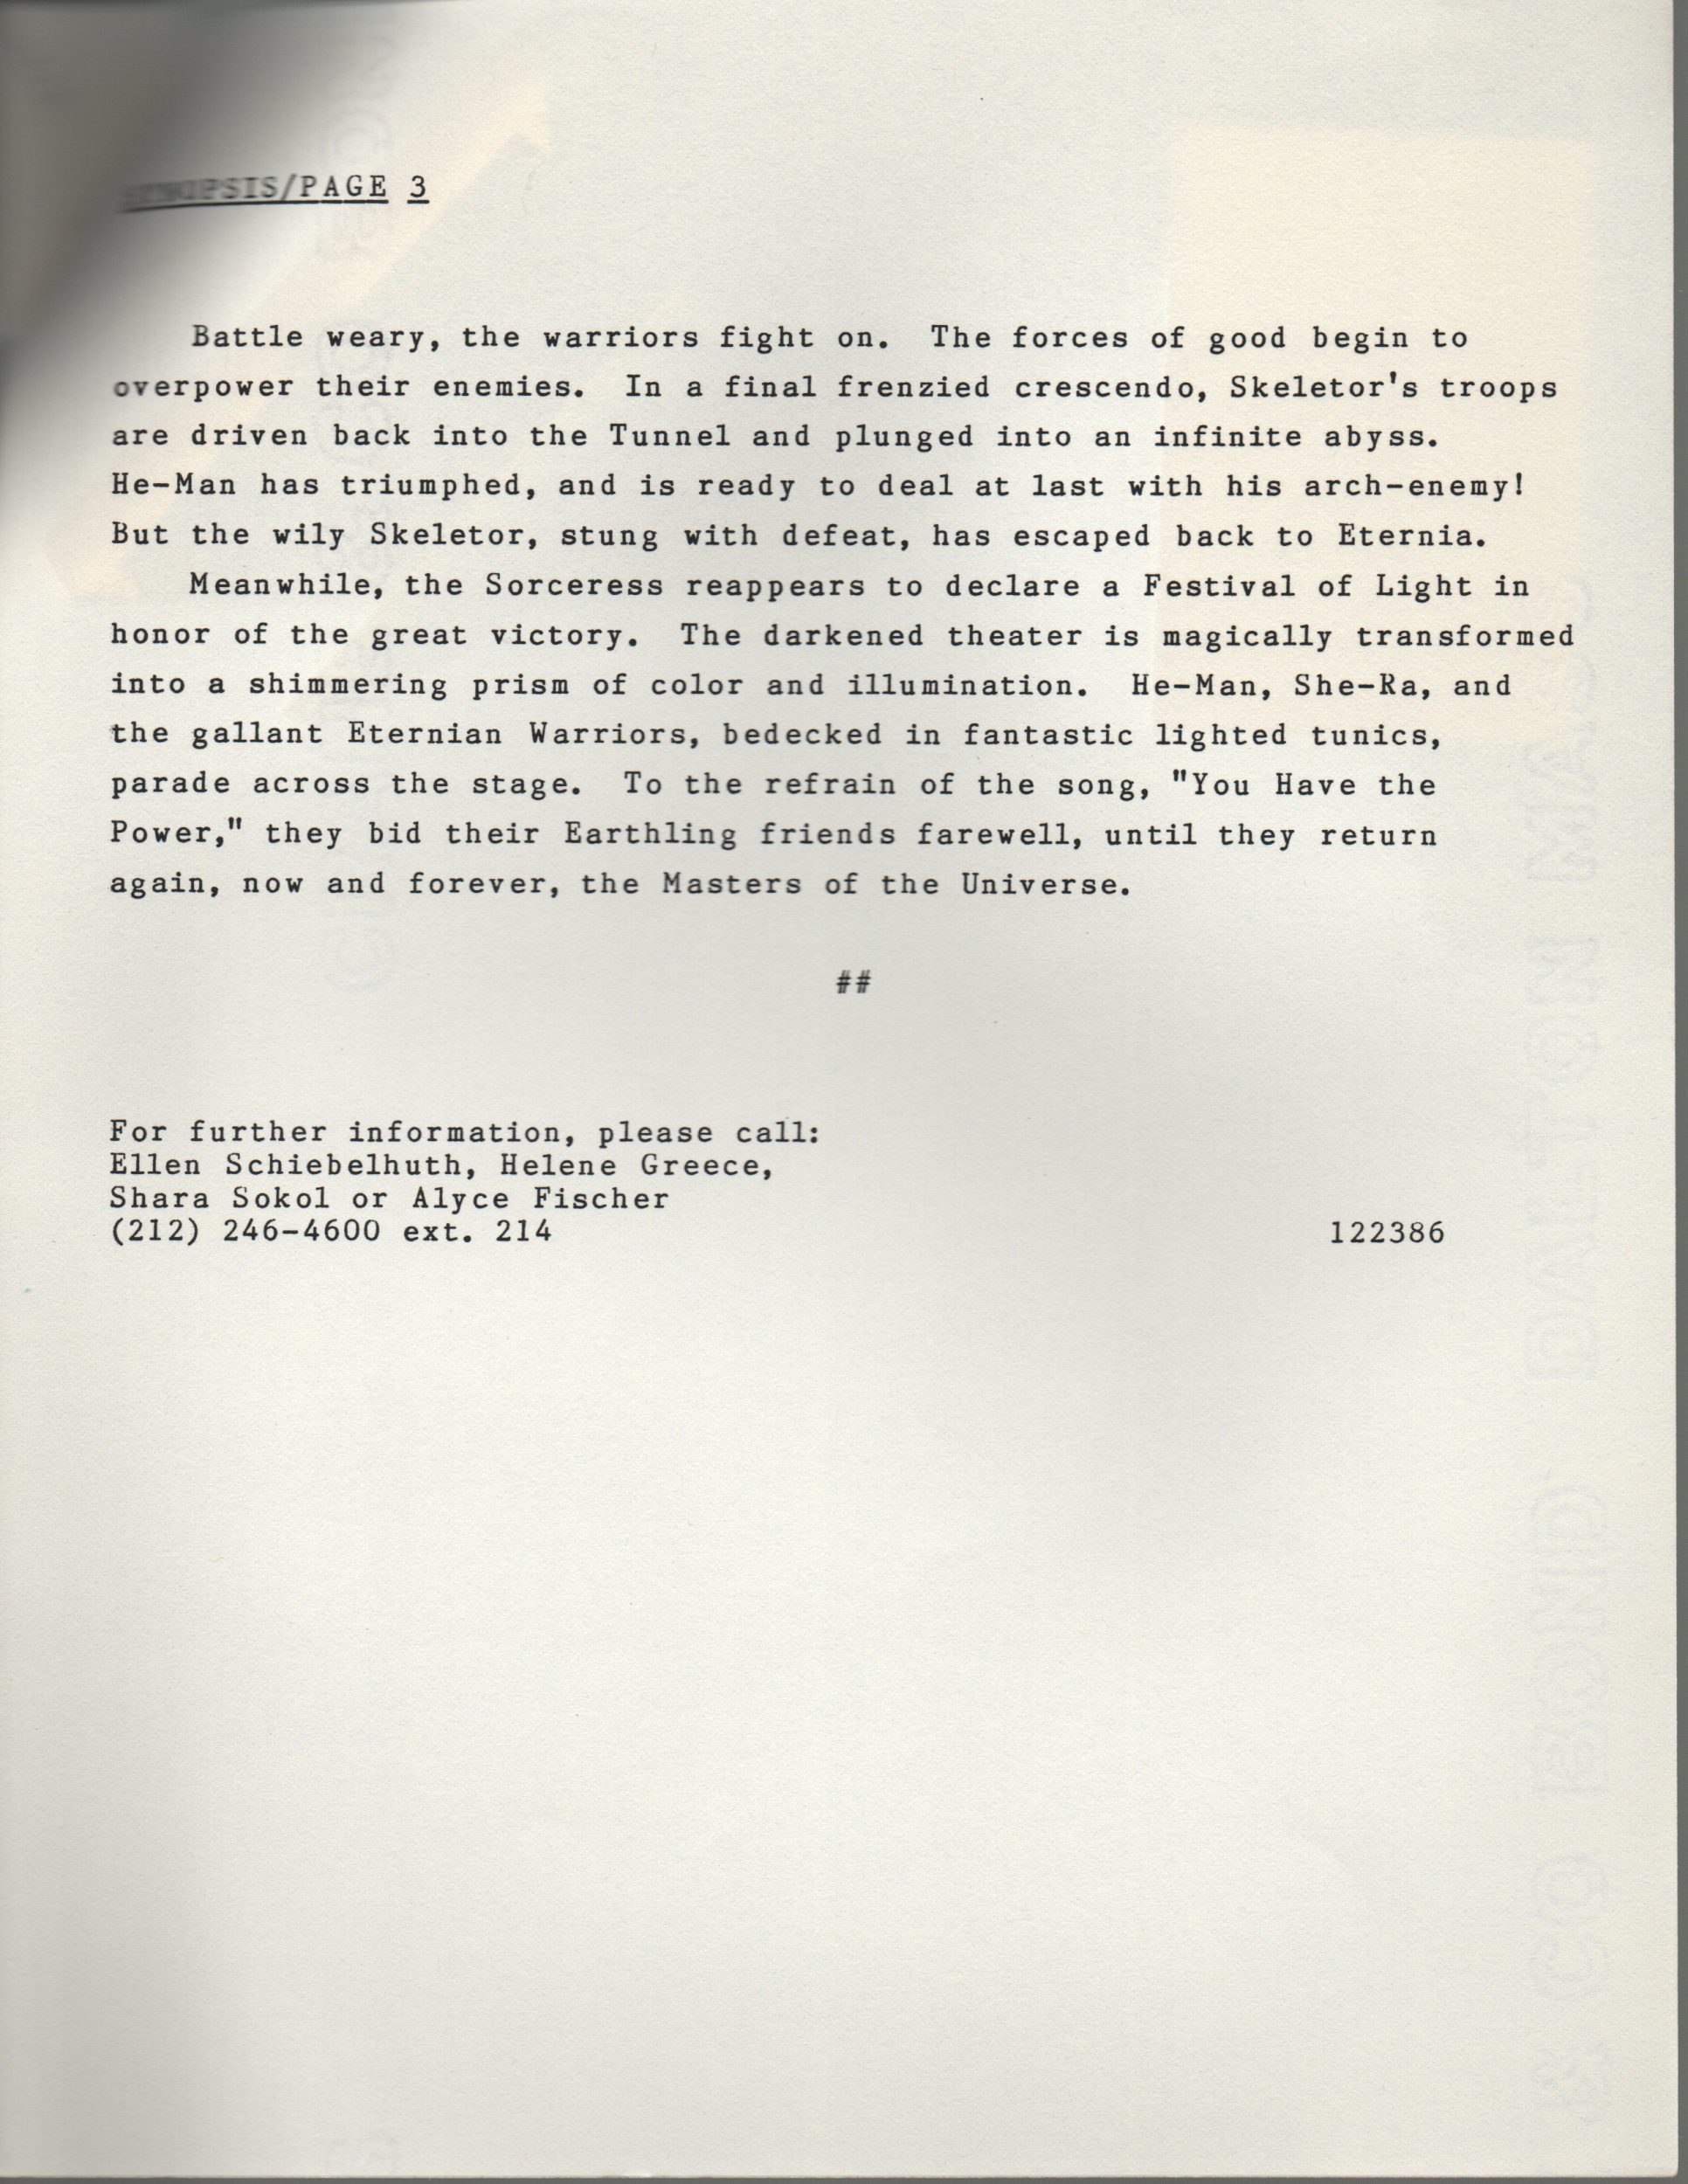
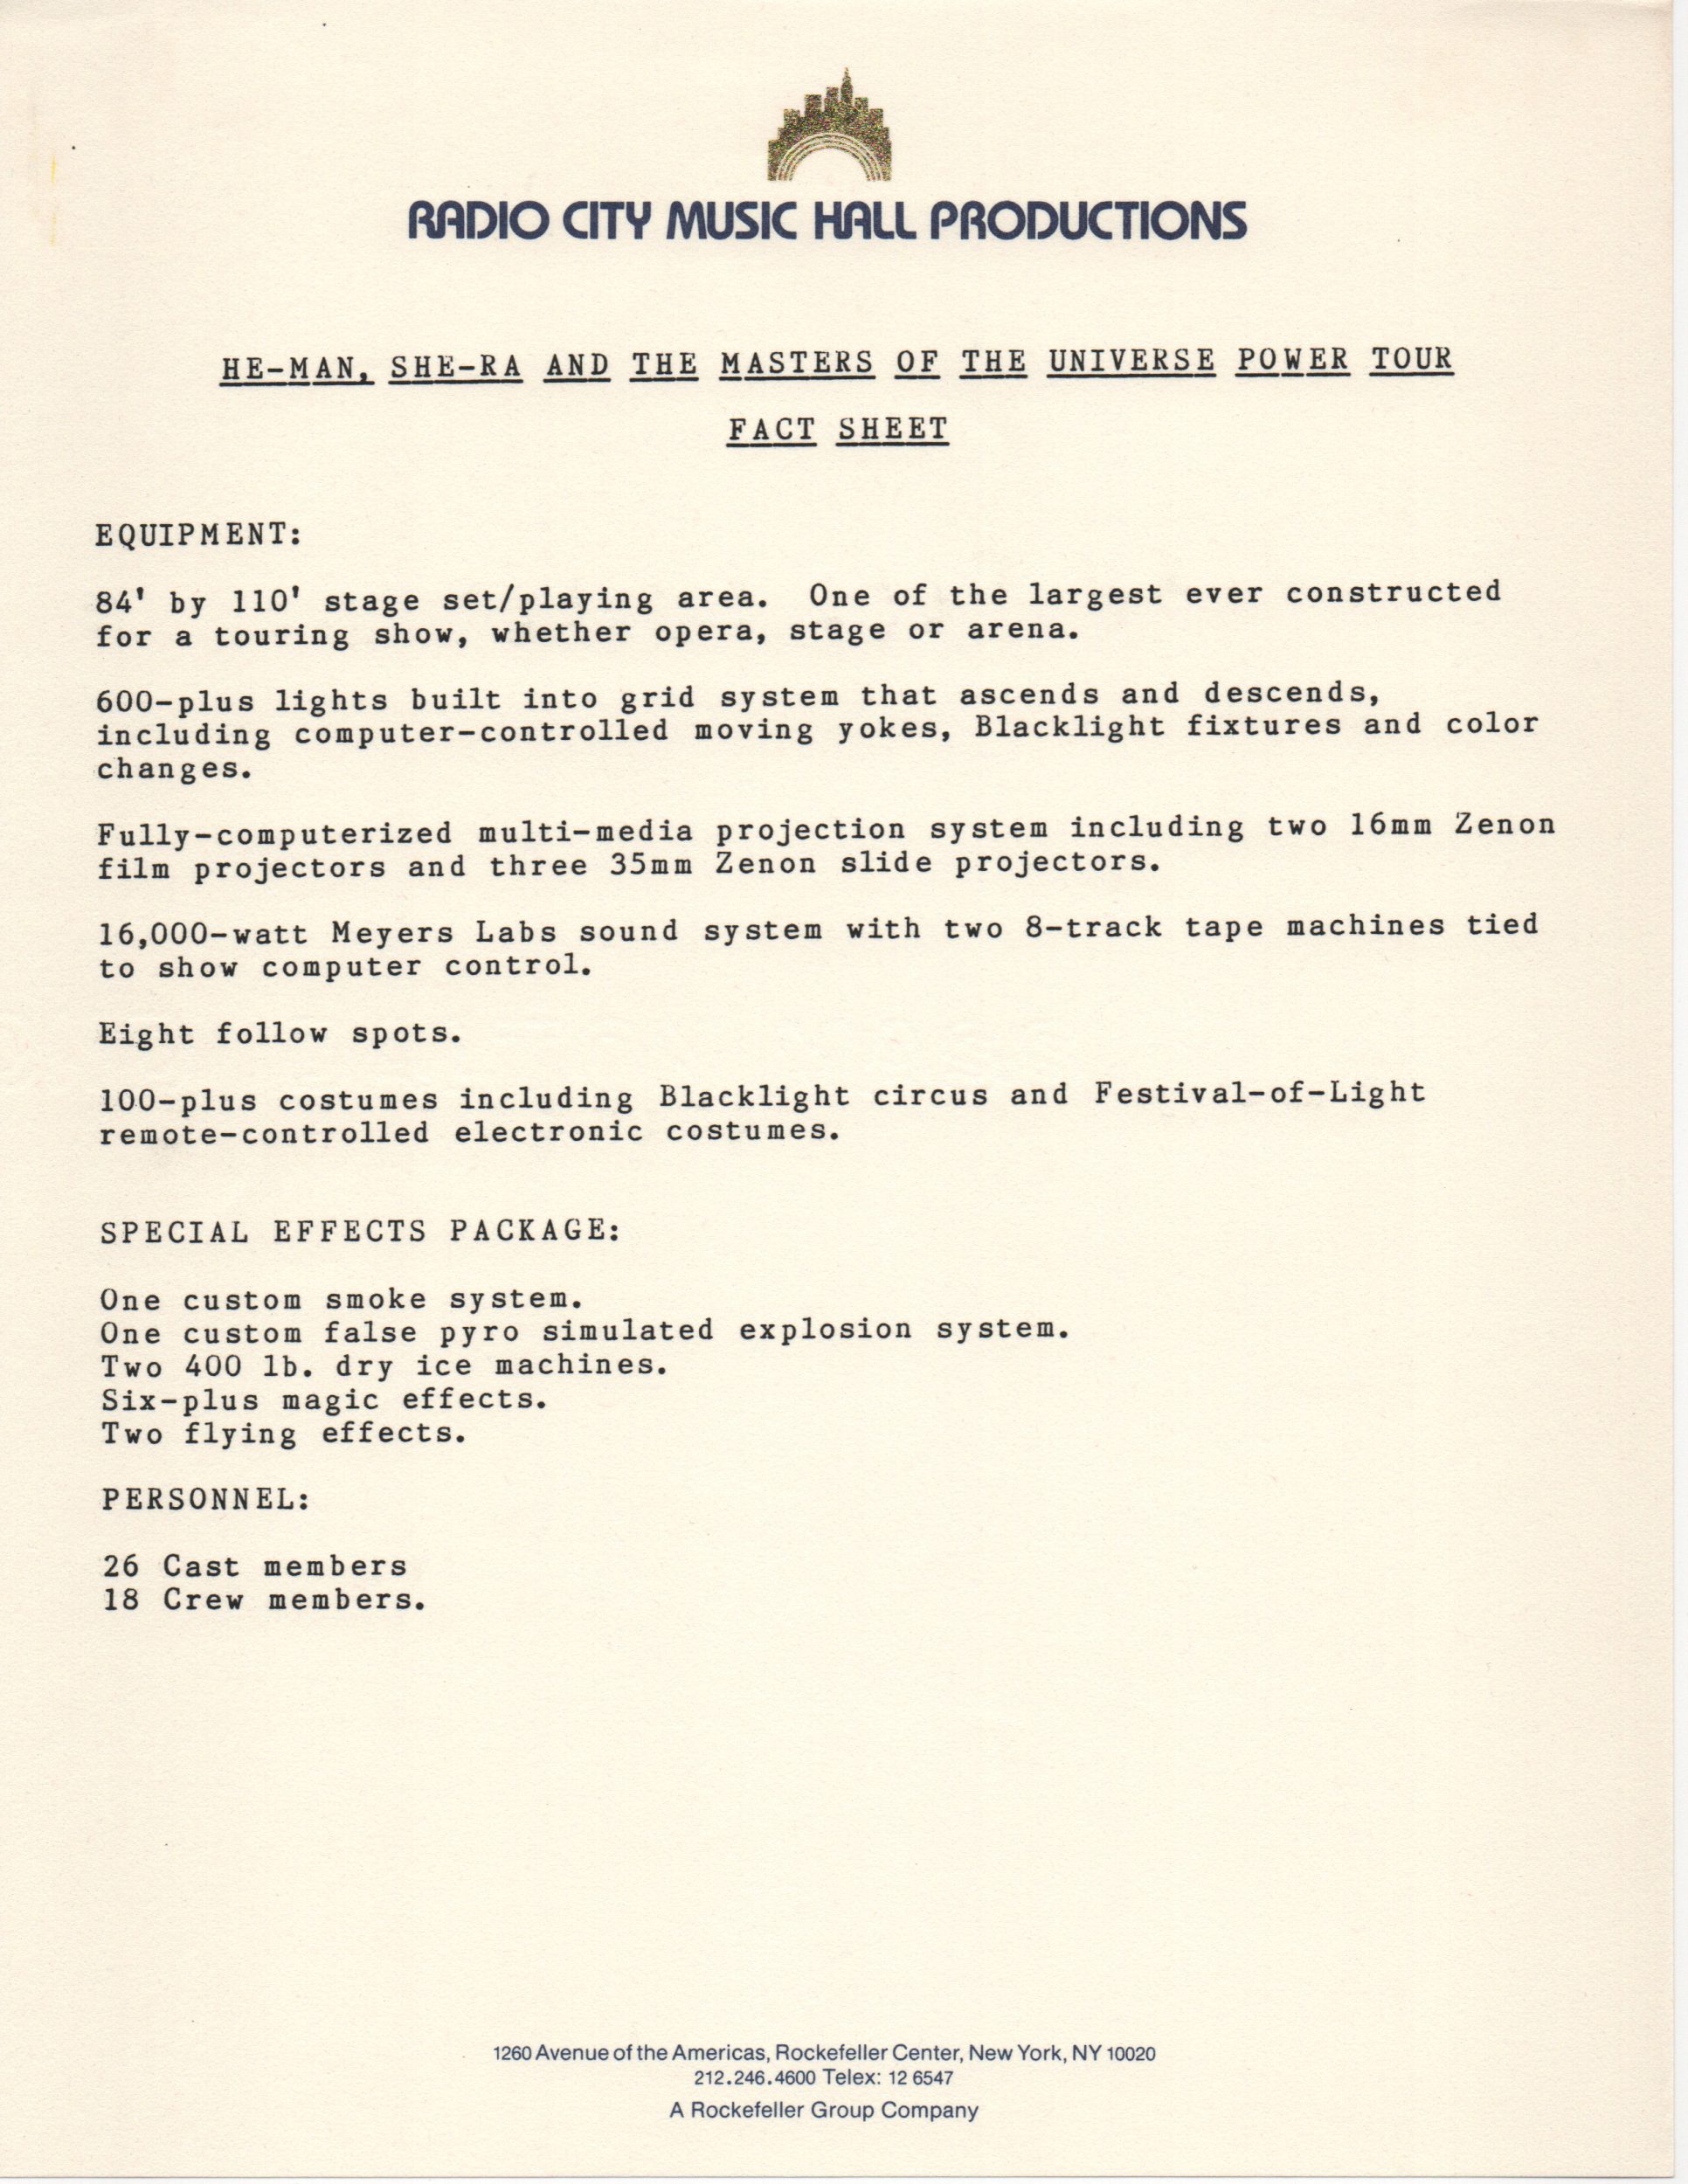
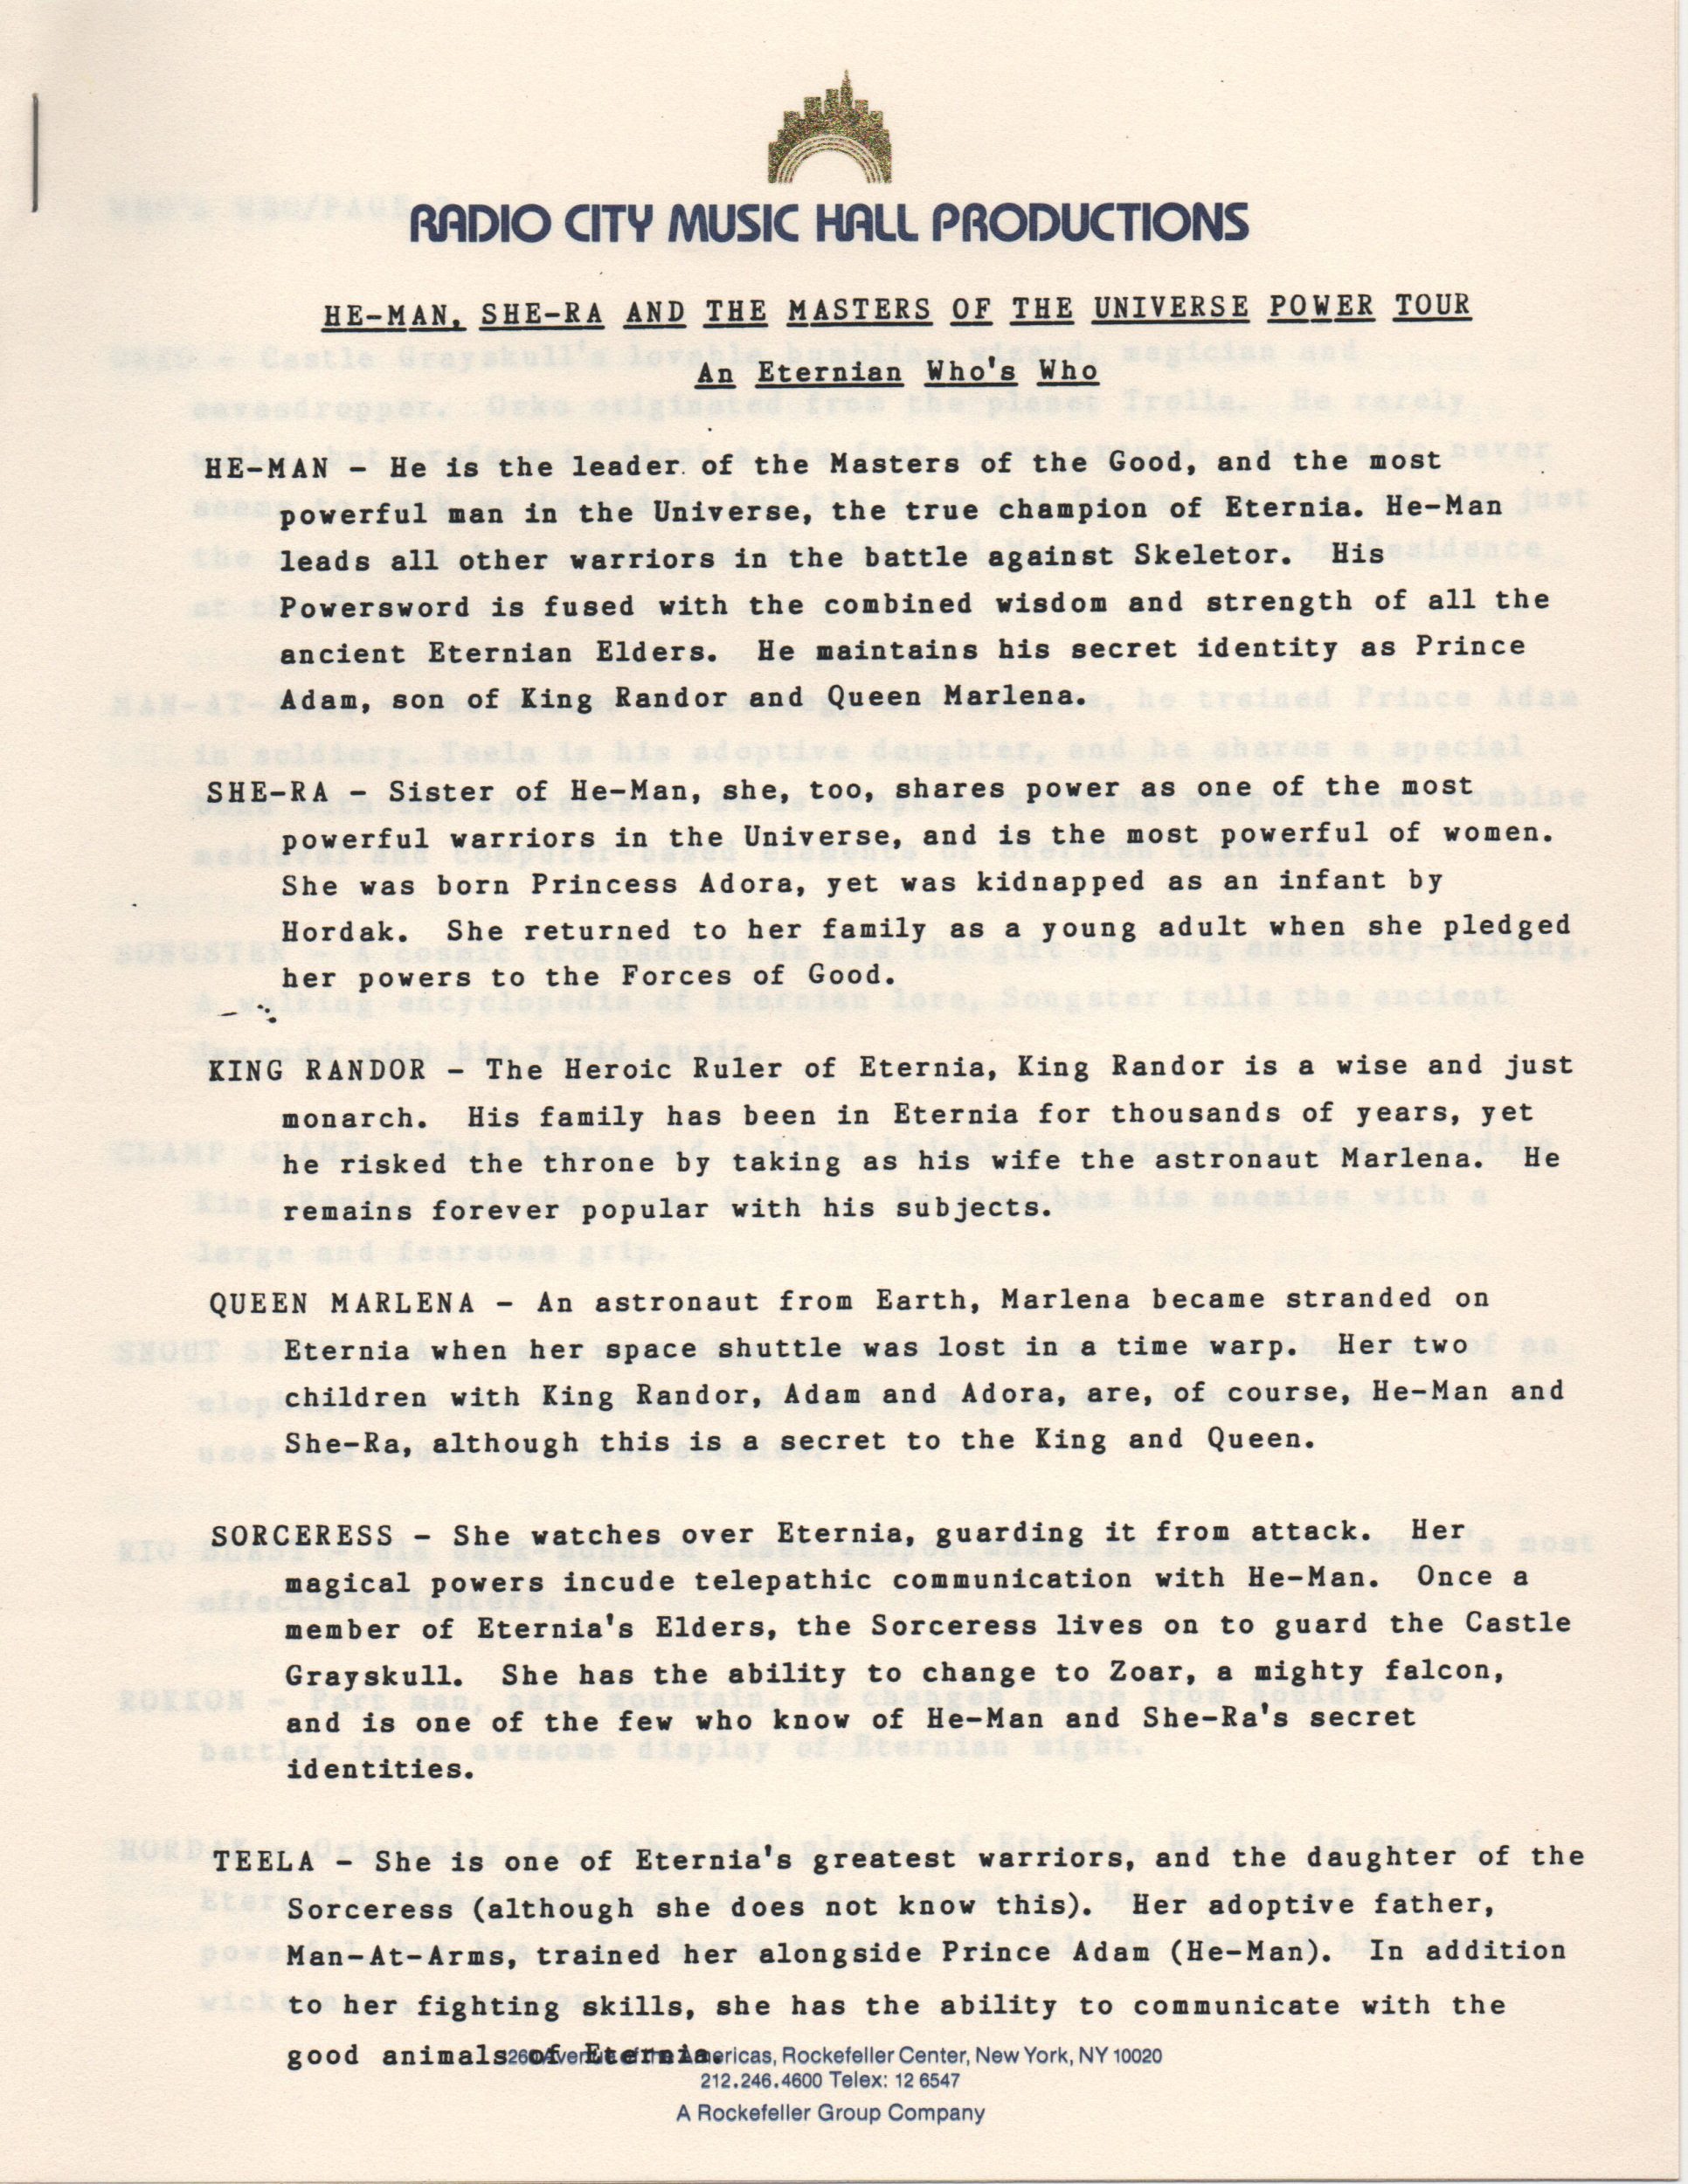
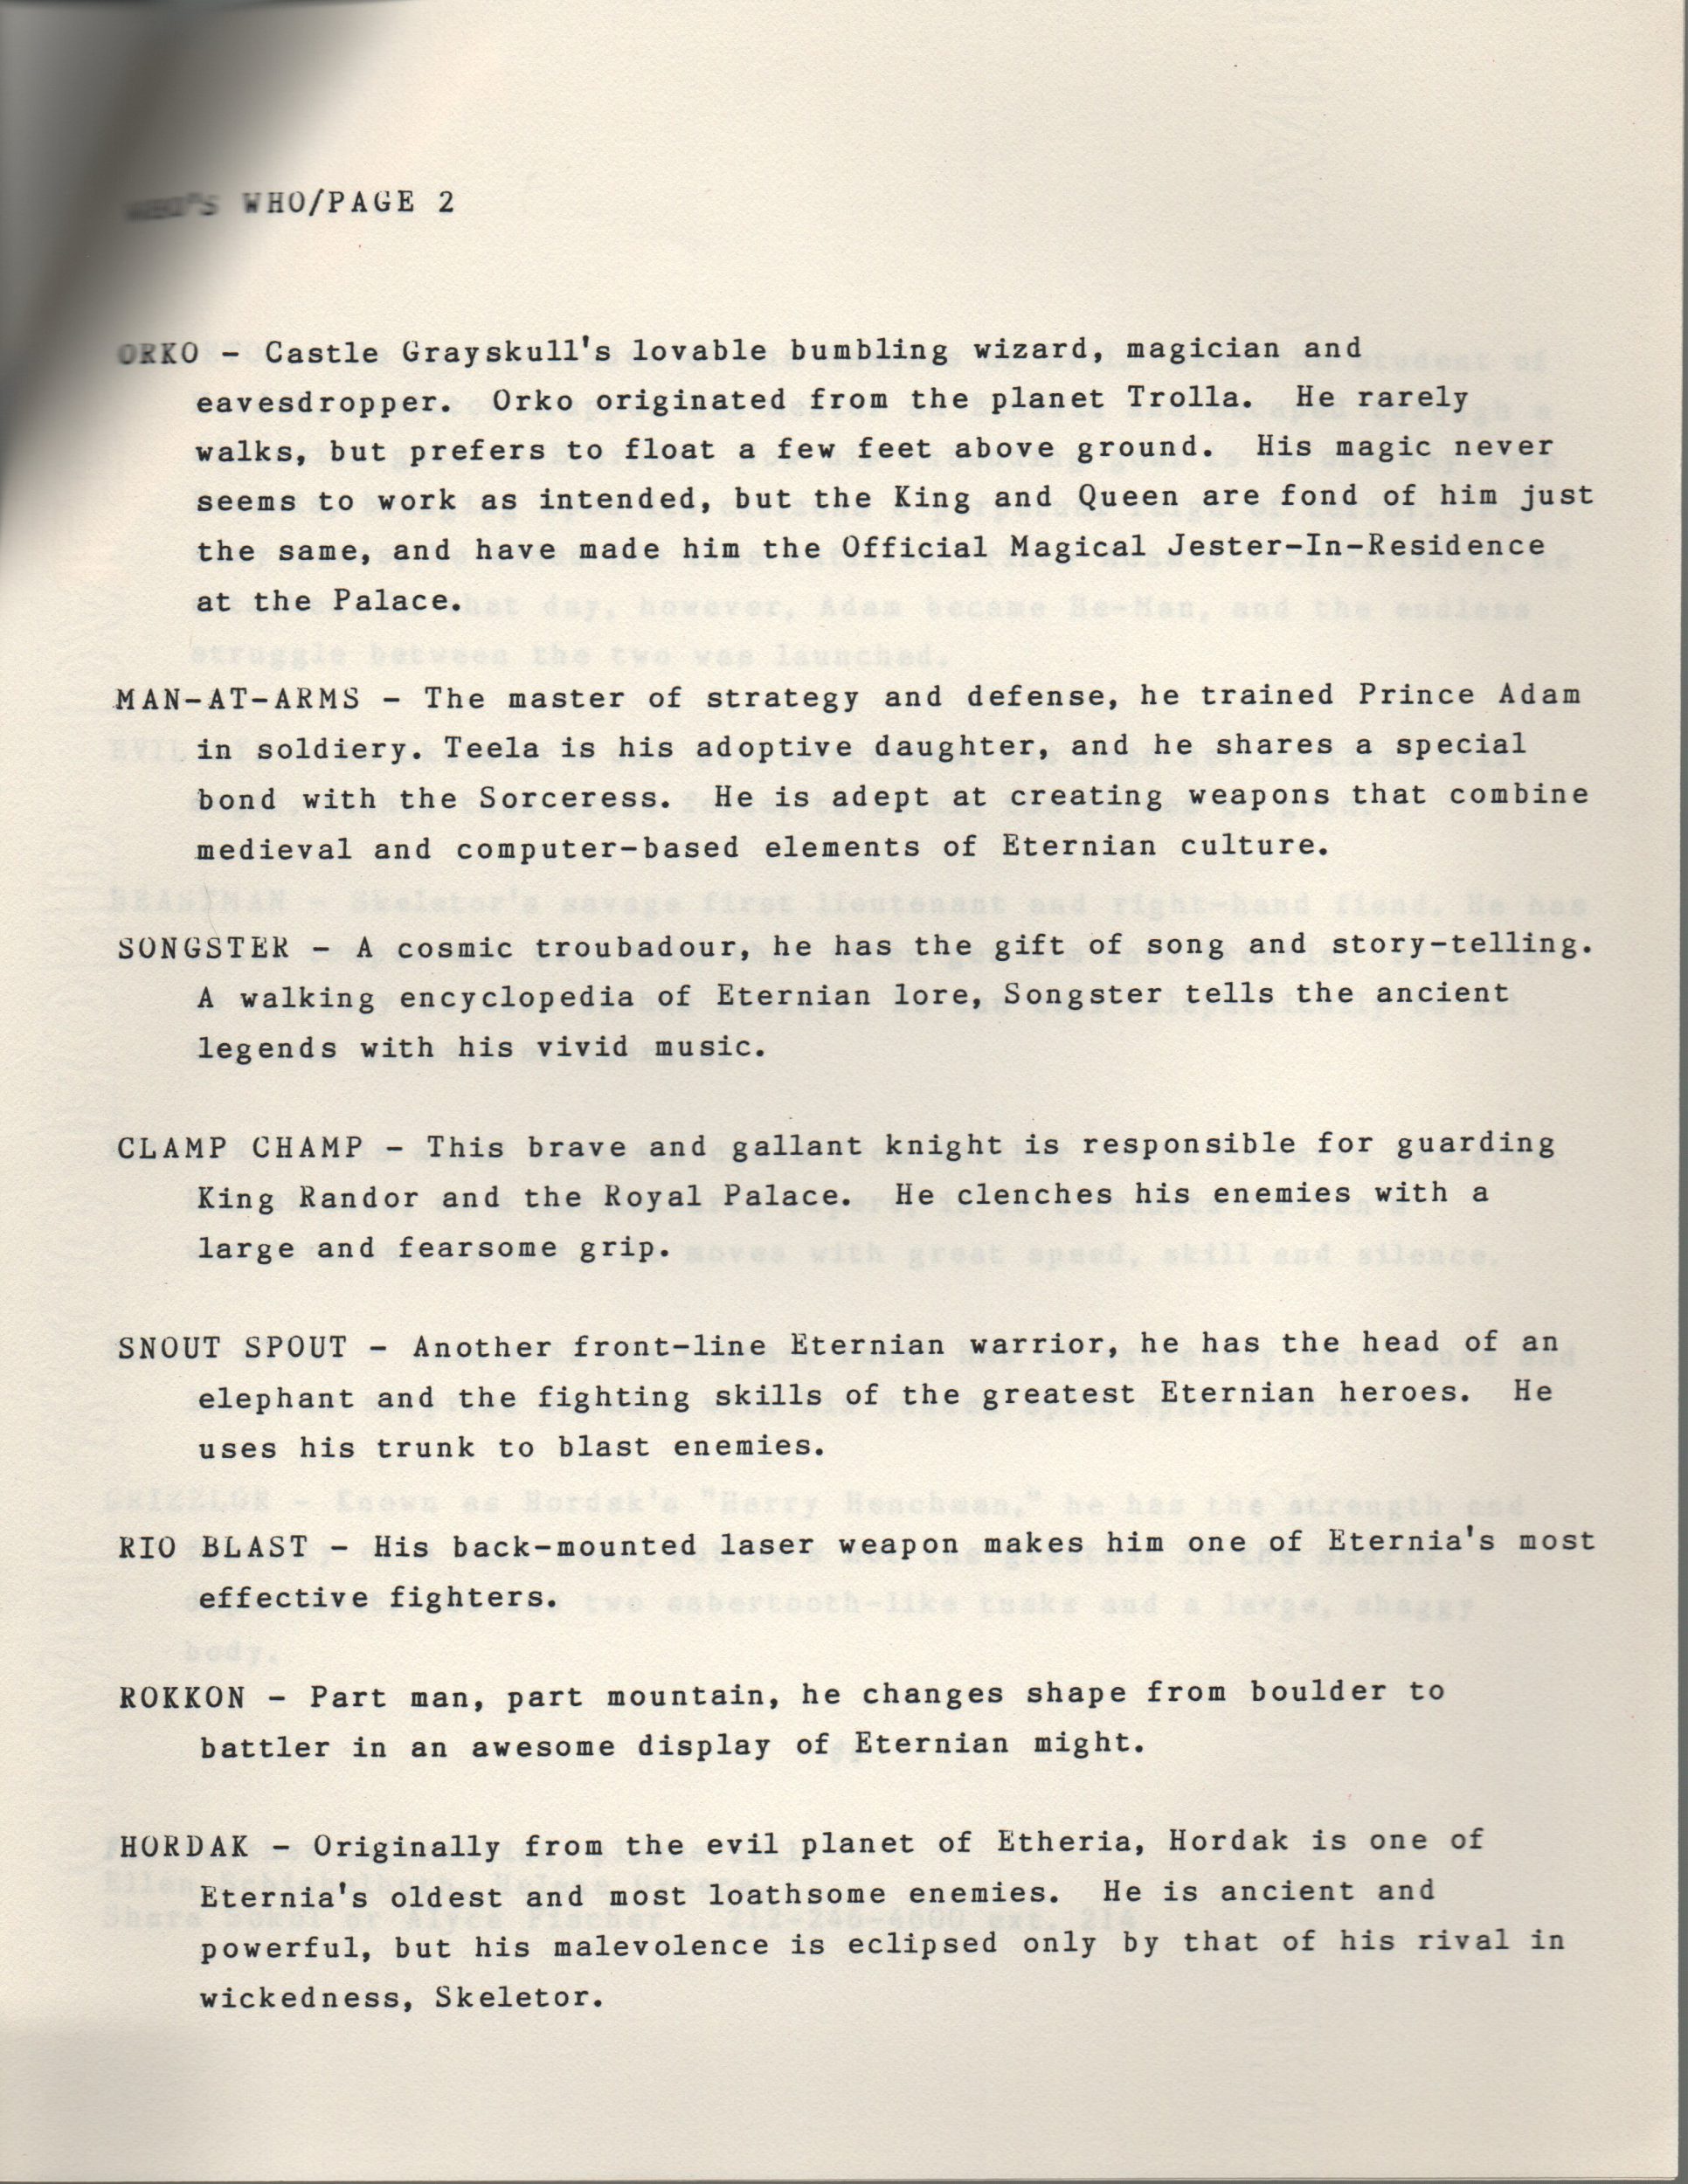
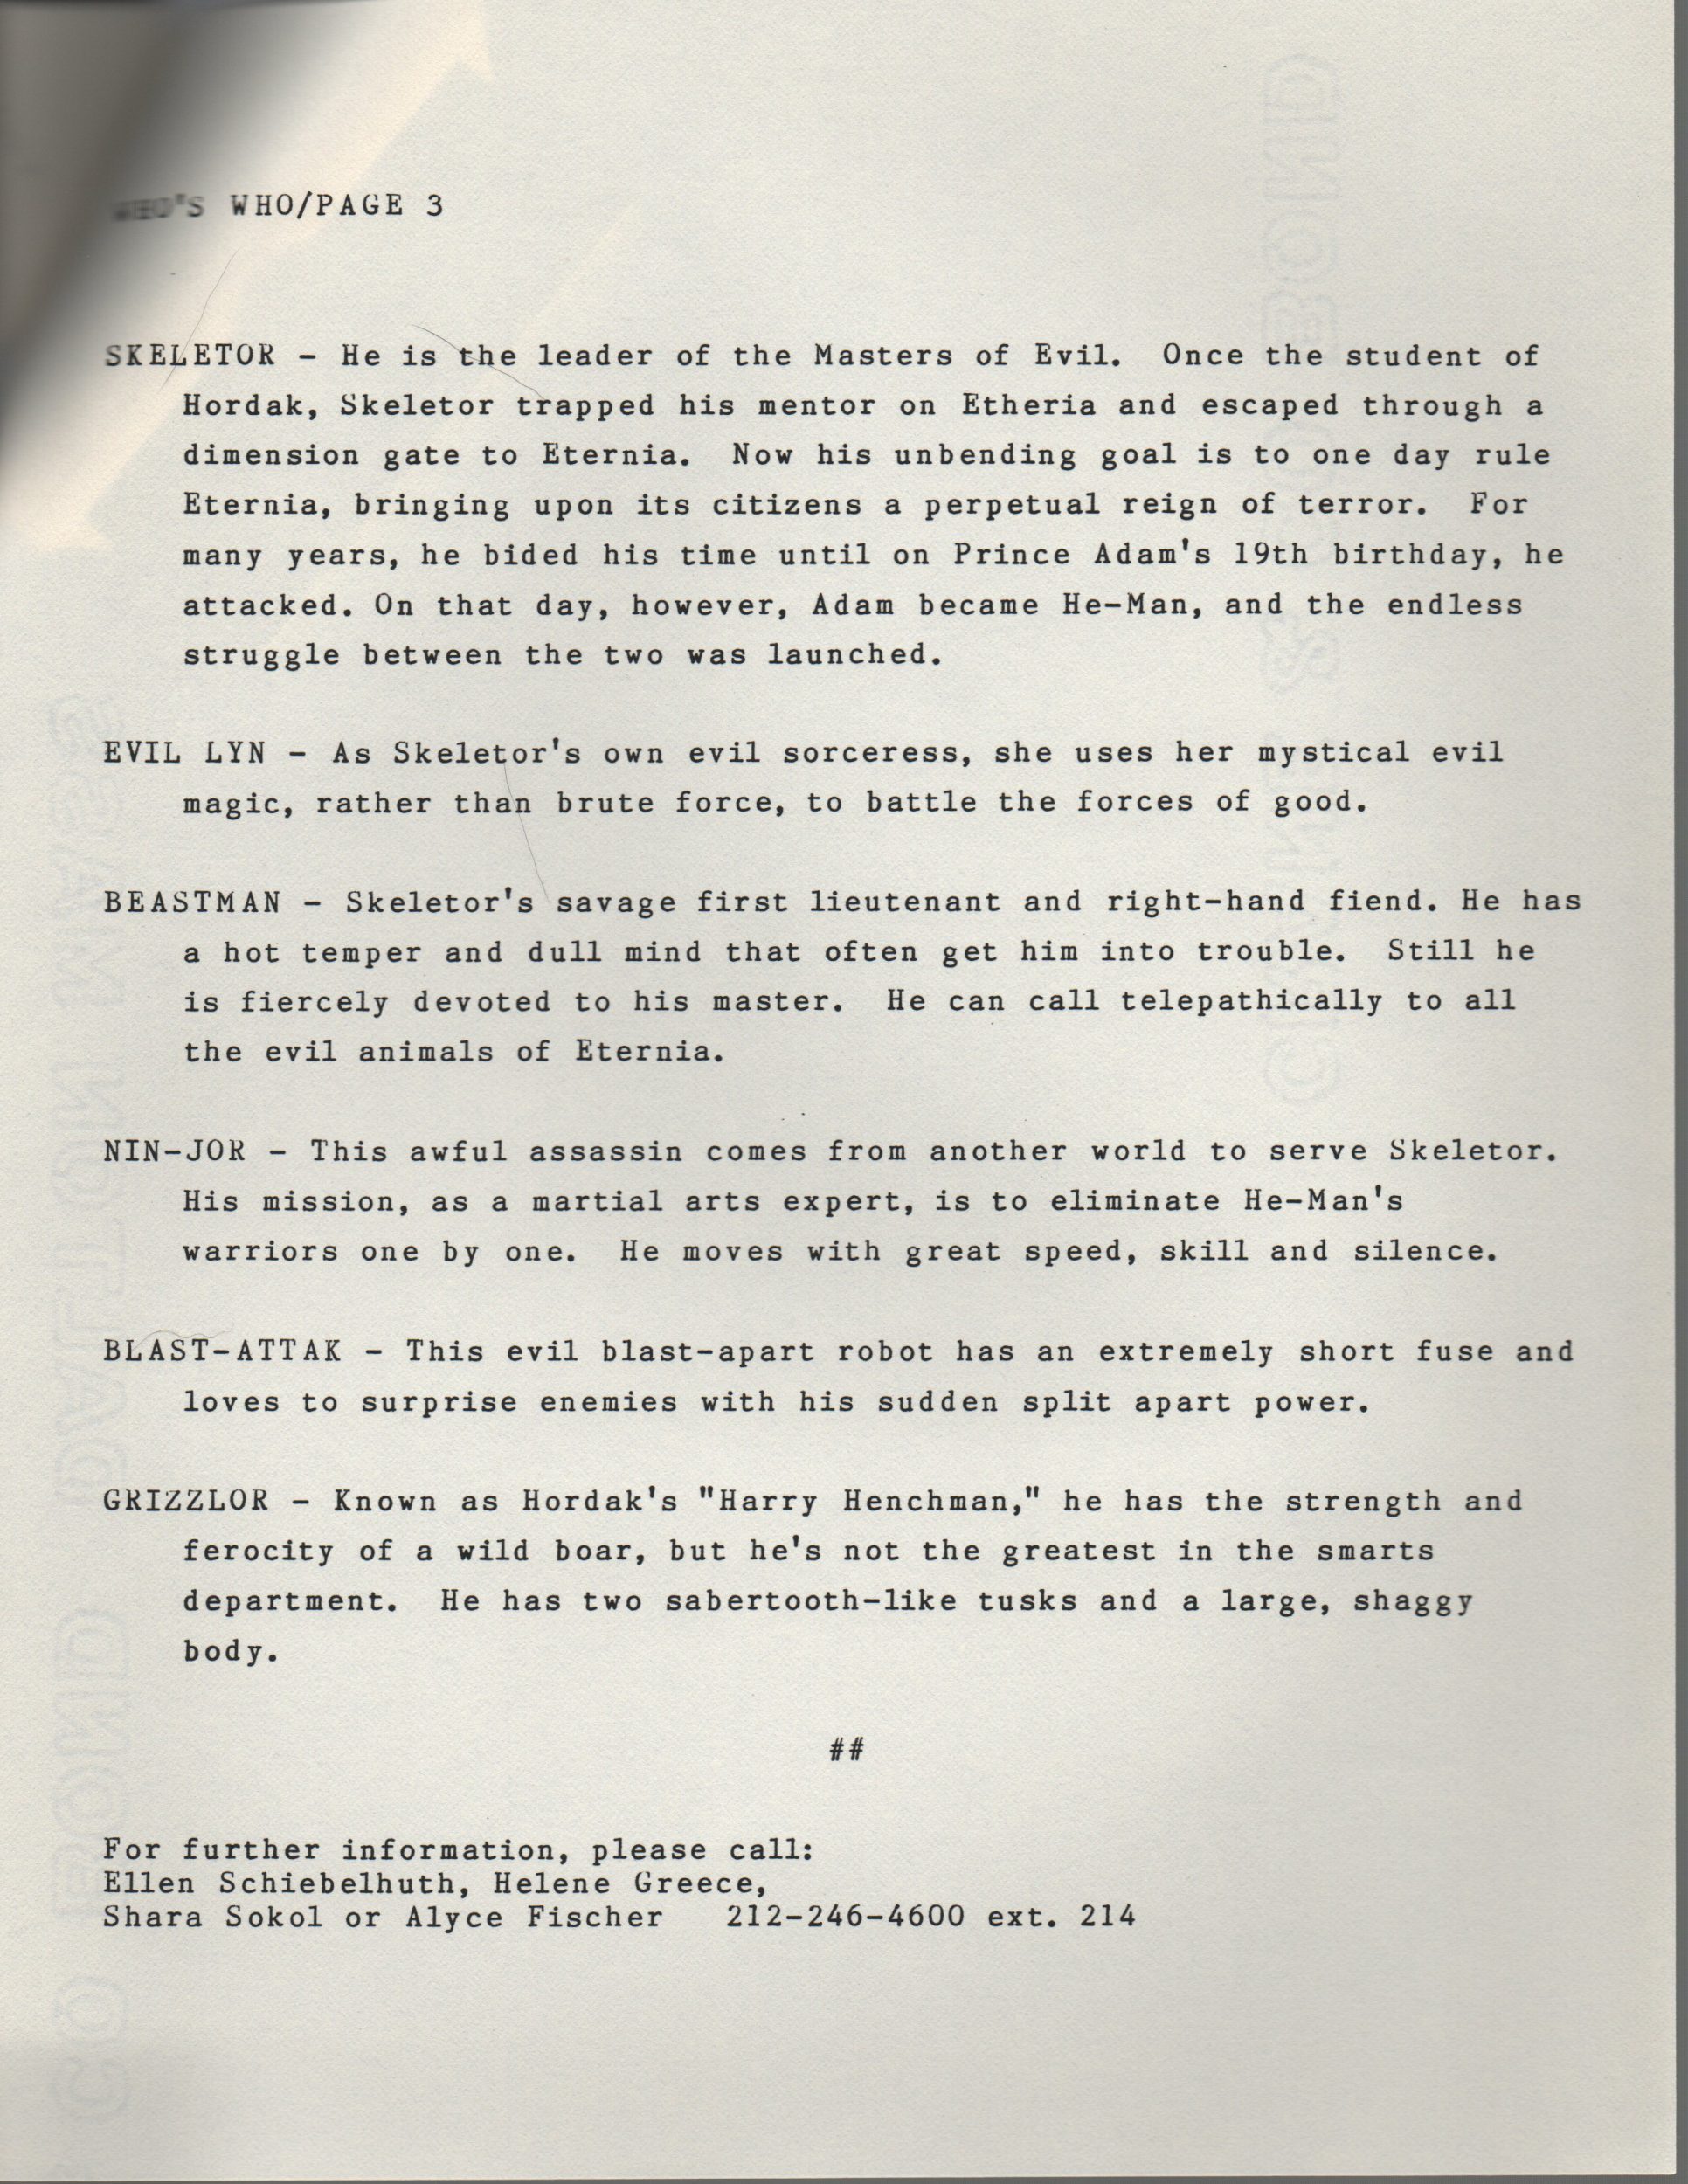
Here are the press releases and various written materials included in the folder. Click each image to enlarge:
Years ago someone uploaded a copy of the actual program to Issuu, which I am also including below:
Here are some miscellaneous materials that were sent to Danielle by cast member Gus Park, who played Ninjor:
And finally, courtesy of Elsmasef, here is the actual script for the Power Tour stage play! You can download it as a PDF here.
Many thanks to Danielle and Elsmasef for sharing this material with the rest of the world!
Thank you to the following individuals who are current Patreon supporters or Facebook subscribers!
Adalberto V.
Adam A.
Allen B.
Allison T.
Andy Y.
badtaste®
Ben M.
Chupakaibra
Cory from Make Shape Create
Dane R.
Eric H.
Erik B.
Garry H.
Gianluca V.
J Man
JackieX
James Z.
João S.
Johnny L.
Jon E.
Kris K.
Lyca
Max I.
Michael M.
Mike G.
MotuOriginsCork
Nate B.
Orion W.
Ove K.
Øyvind M. (Patreon & Facebook)
Patrick F.
Philip O.
Rich S.
Robert B.
Scott B.
Steven K.
Tate W.
Todd G.
tupalev
Want to support the blog? Consider becoming a Patreon supporter or Facebook subscriber. You’ll also gain access to exclusive content and early access to posts on the blog. Thank you!
Written by Adam McCombs. All game images courtesy of Øyvind Meisfjord
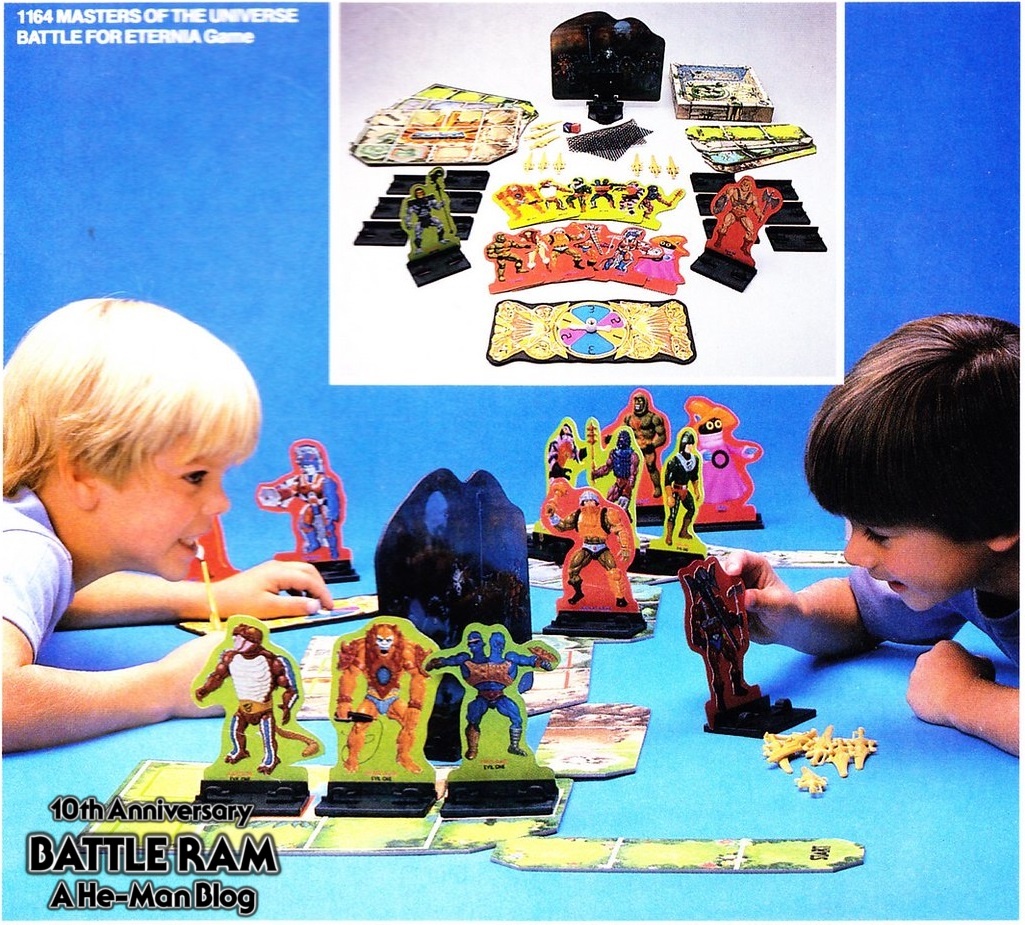
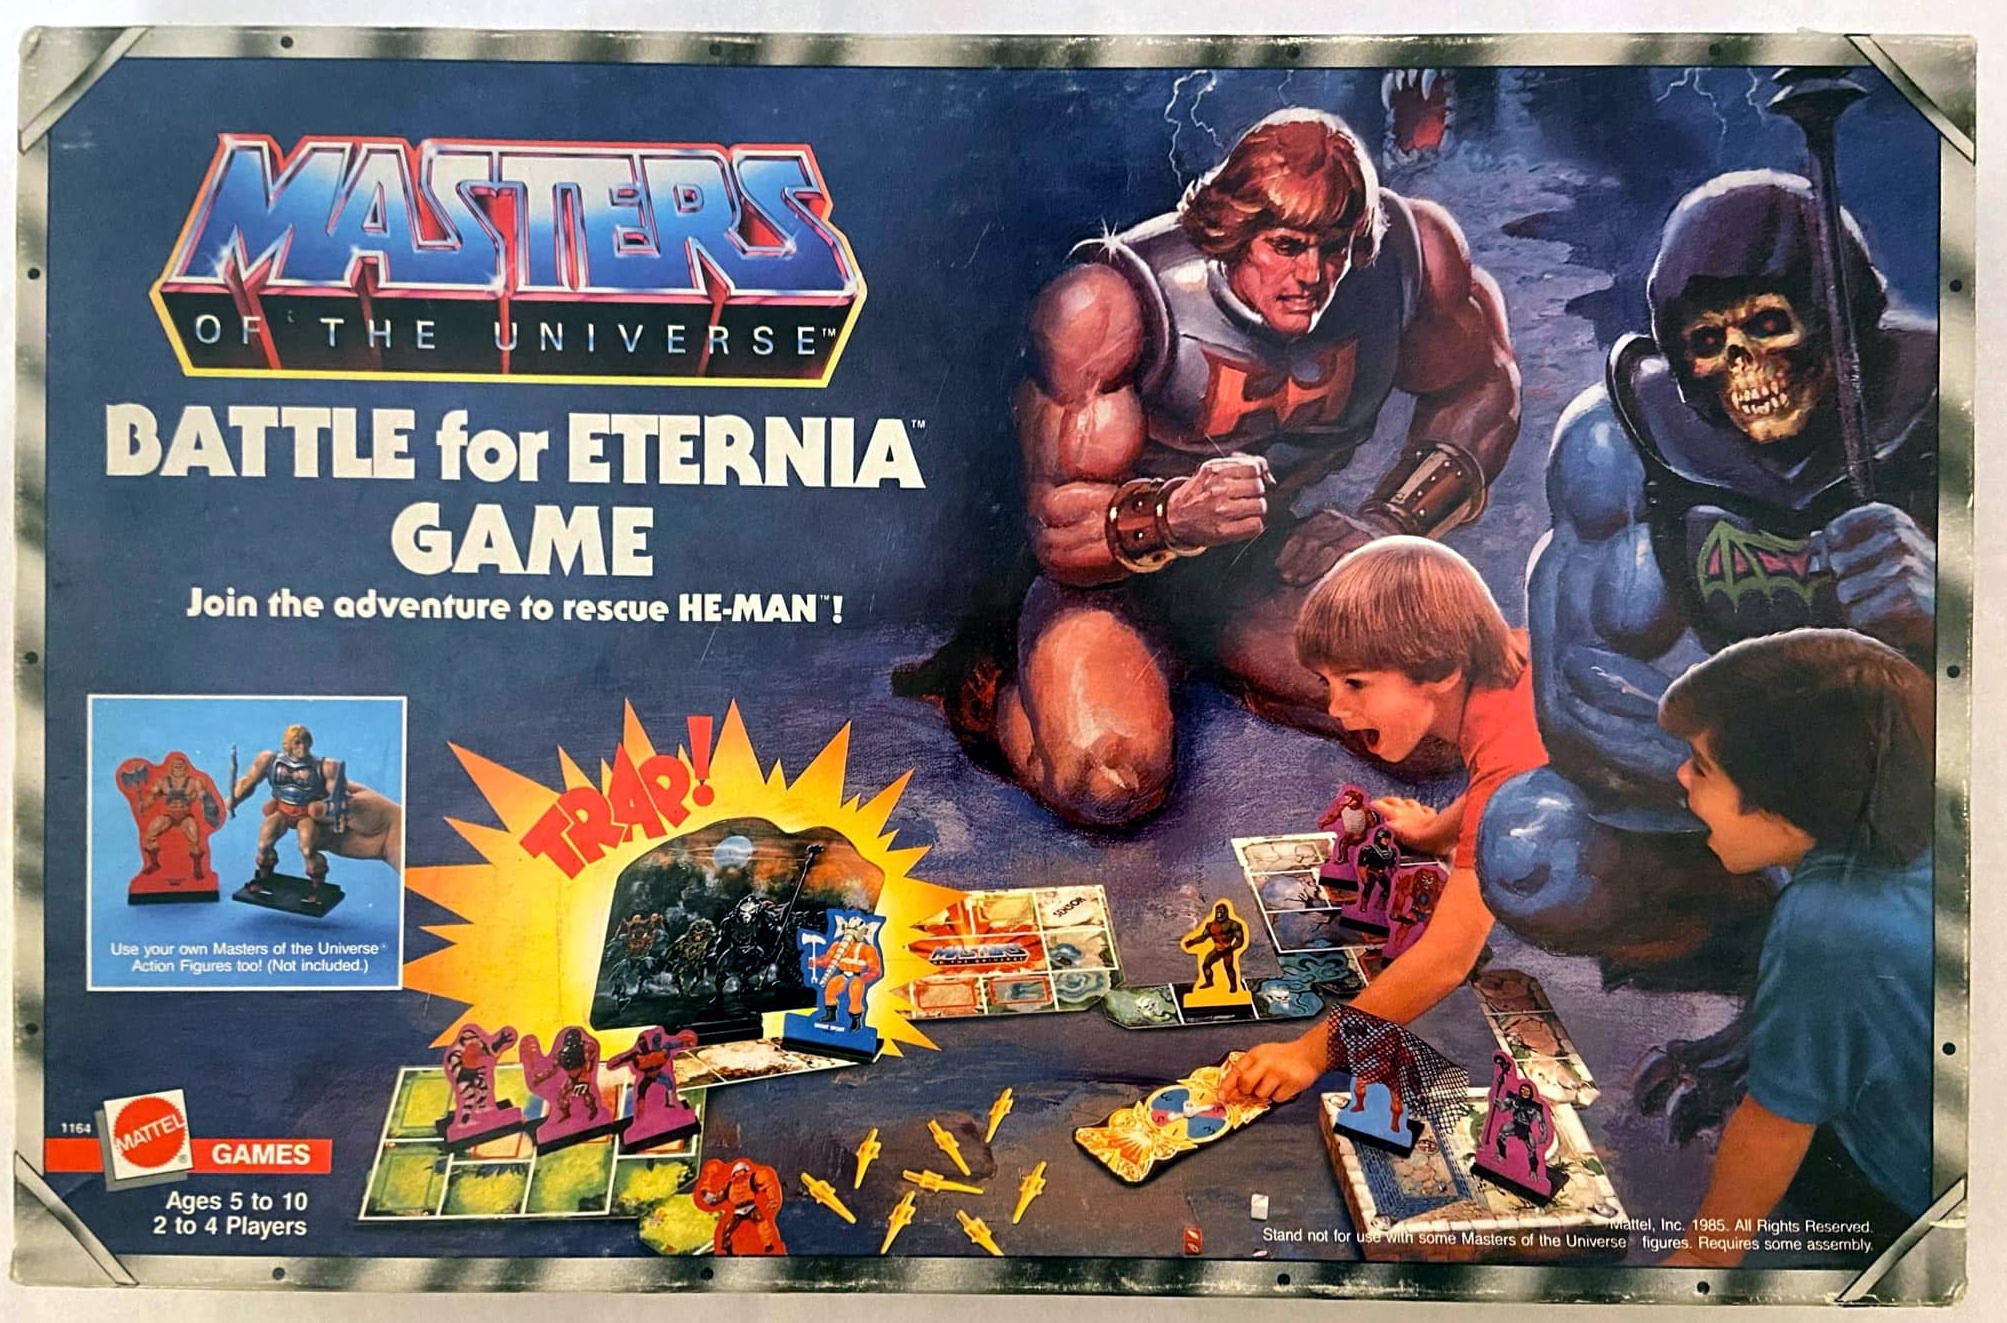
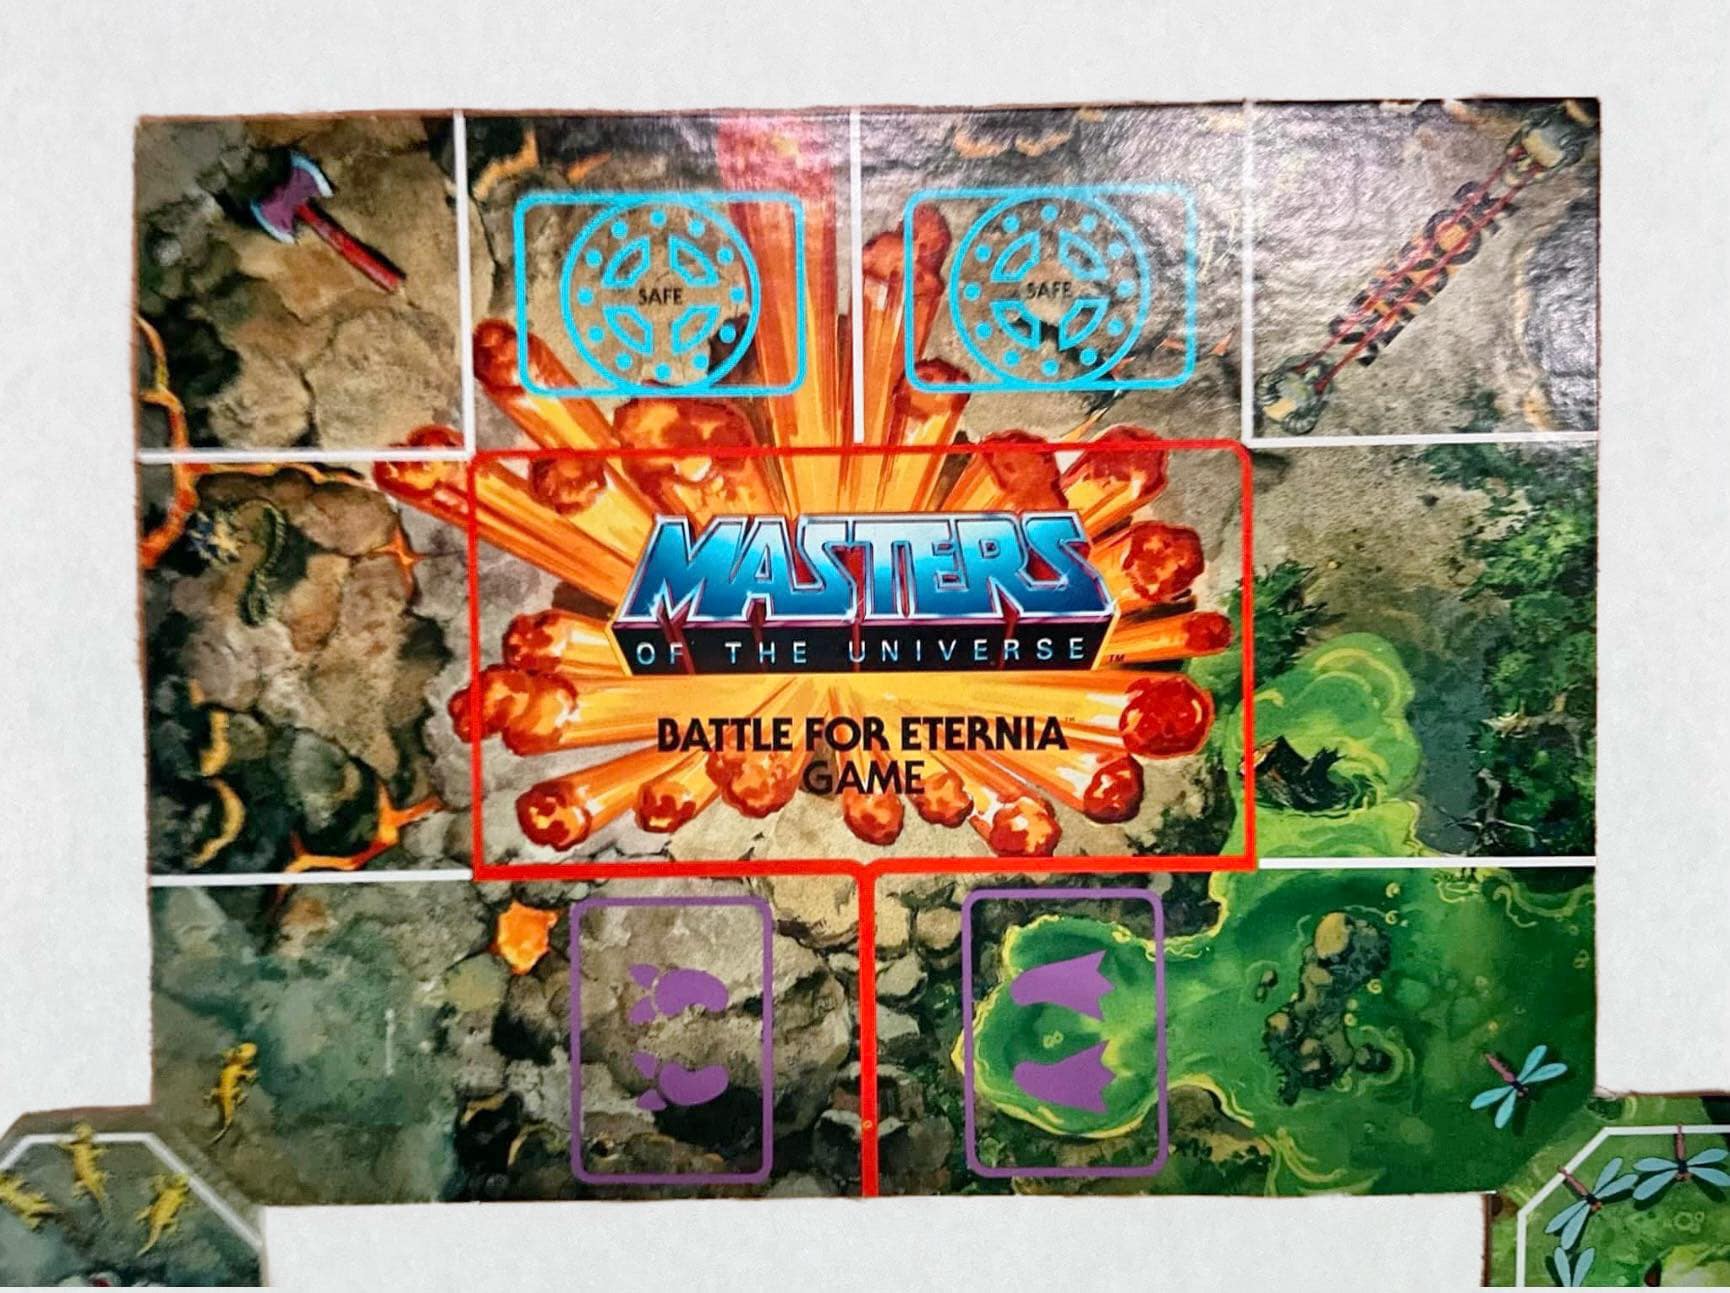
The Battle For Eternia board game was released in 1986. Unlike many Masters of the Universe board games, it was created in-house at Mattel, and appears in the 1986 Mattel dealer catalog. In fact, the image below seems to show more characters than were actually released in the game:
Image source: Nathalie NHT
The name Battle for Eternia was actually used earlier for a three-figure gift set released in 1983, featuring Man-E-Faces, Panthor and Skeletor:
Internally at Mattel, the toy design team also worked on a Battle For Eternia as a game concept. This July 13, 1984 concept by Ed Watts shows a concept for a game that involved little toy cannons and cardboard dioramas of Snake Mountain and (presumably) Castle Grayskull. It looks like the point was to earn points by shooting projectiles through the holes in your opponent’s diorama.
Image source: The Power and the Honor Foundation Catalog
The actual game (trademarked on March 21, 1986) that Mattel produced really had nothing to do with the Ed Watts concept. Instead it was a more traditional turn based board game with some fun extra elements.
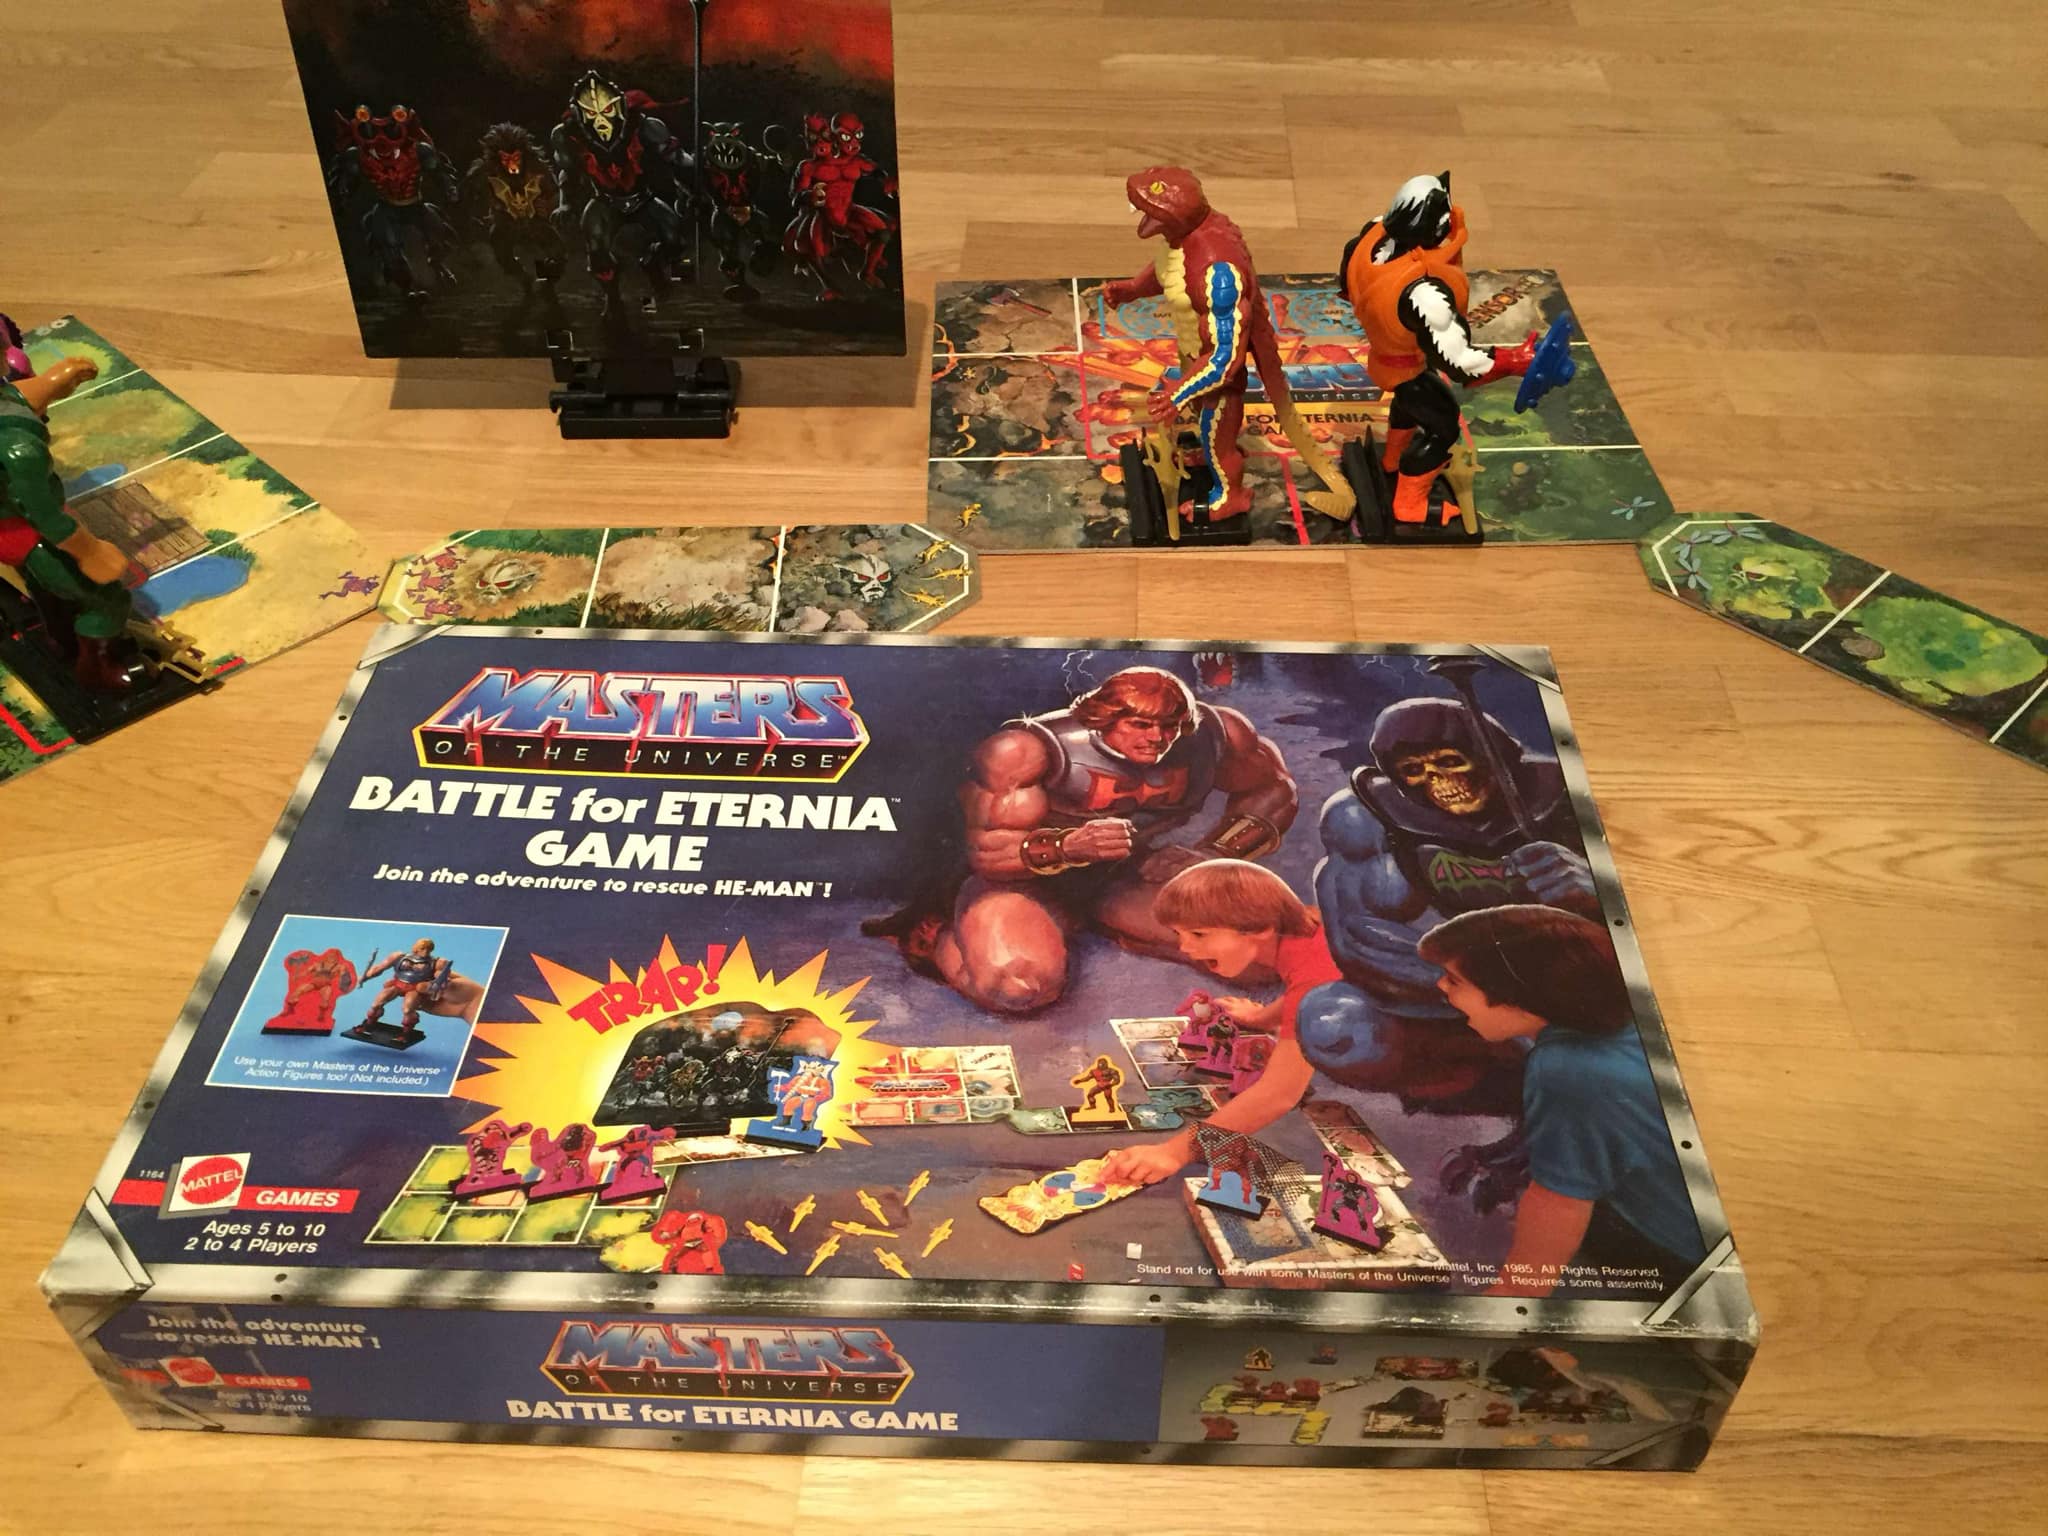
The cover of the board game features some amazing artwork by William George, depicting He-Man and Skeletor (in their Battle Armor costumes) rooting for the kids playing the game. Ultimately the point of the game was to travel on a perilous journey, confront Skeletor, defeat him, and rescue He-Man.
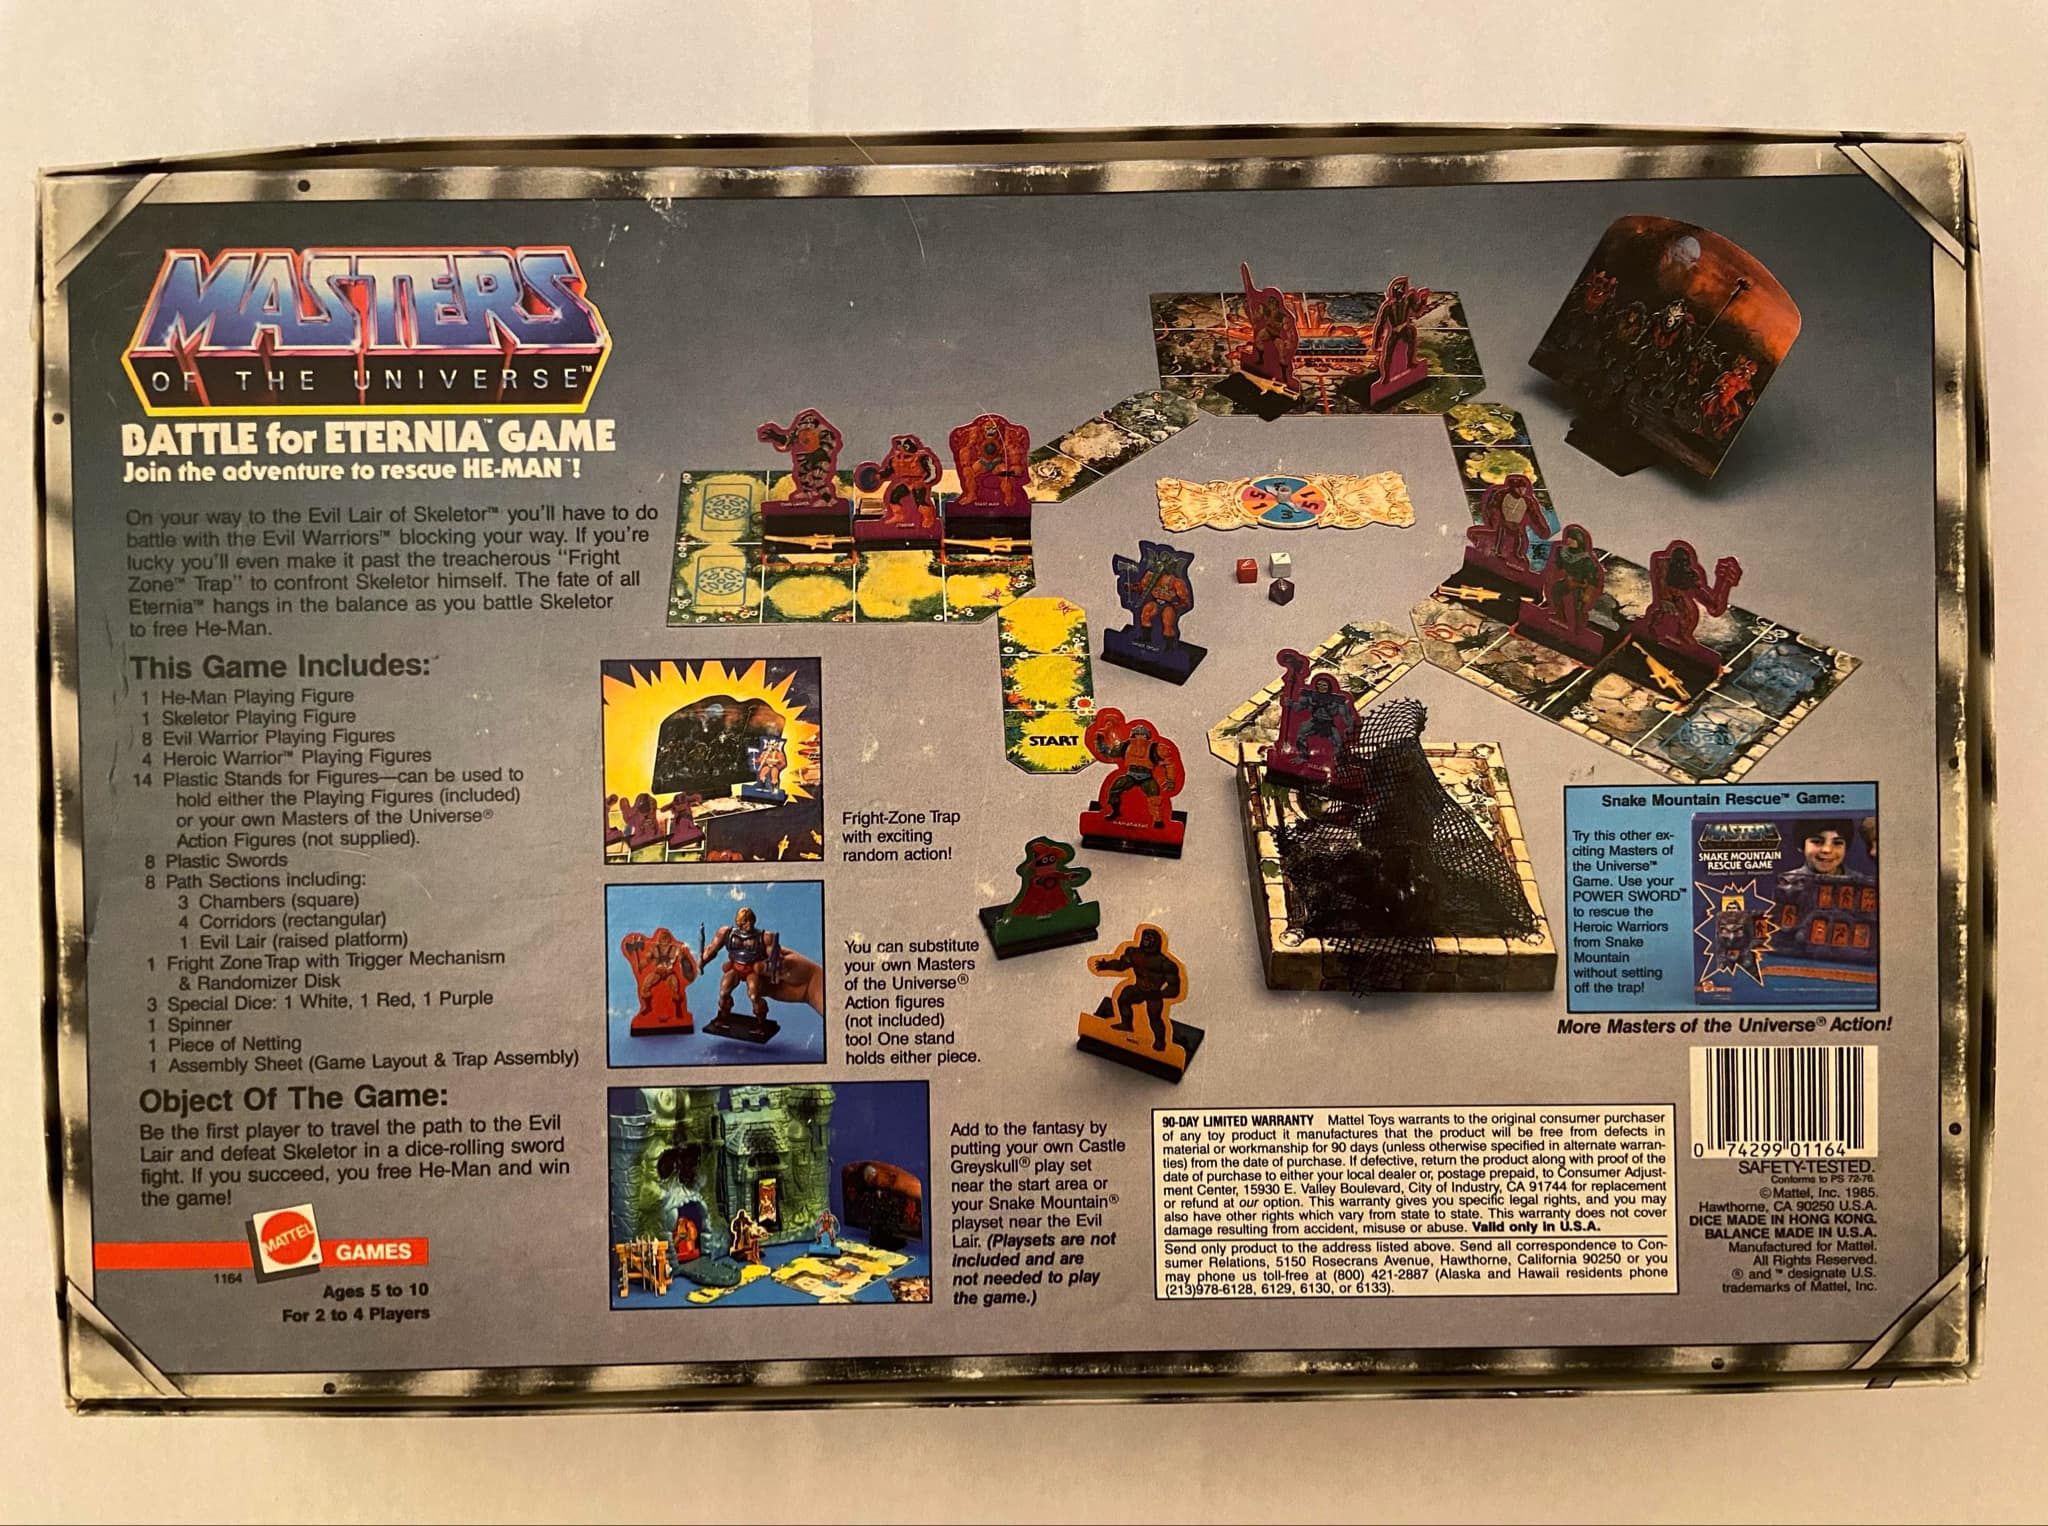
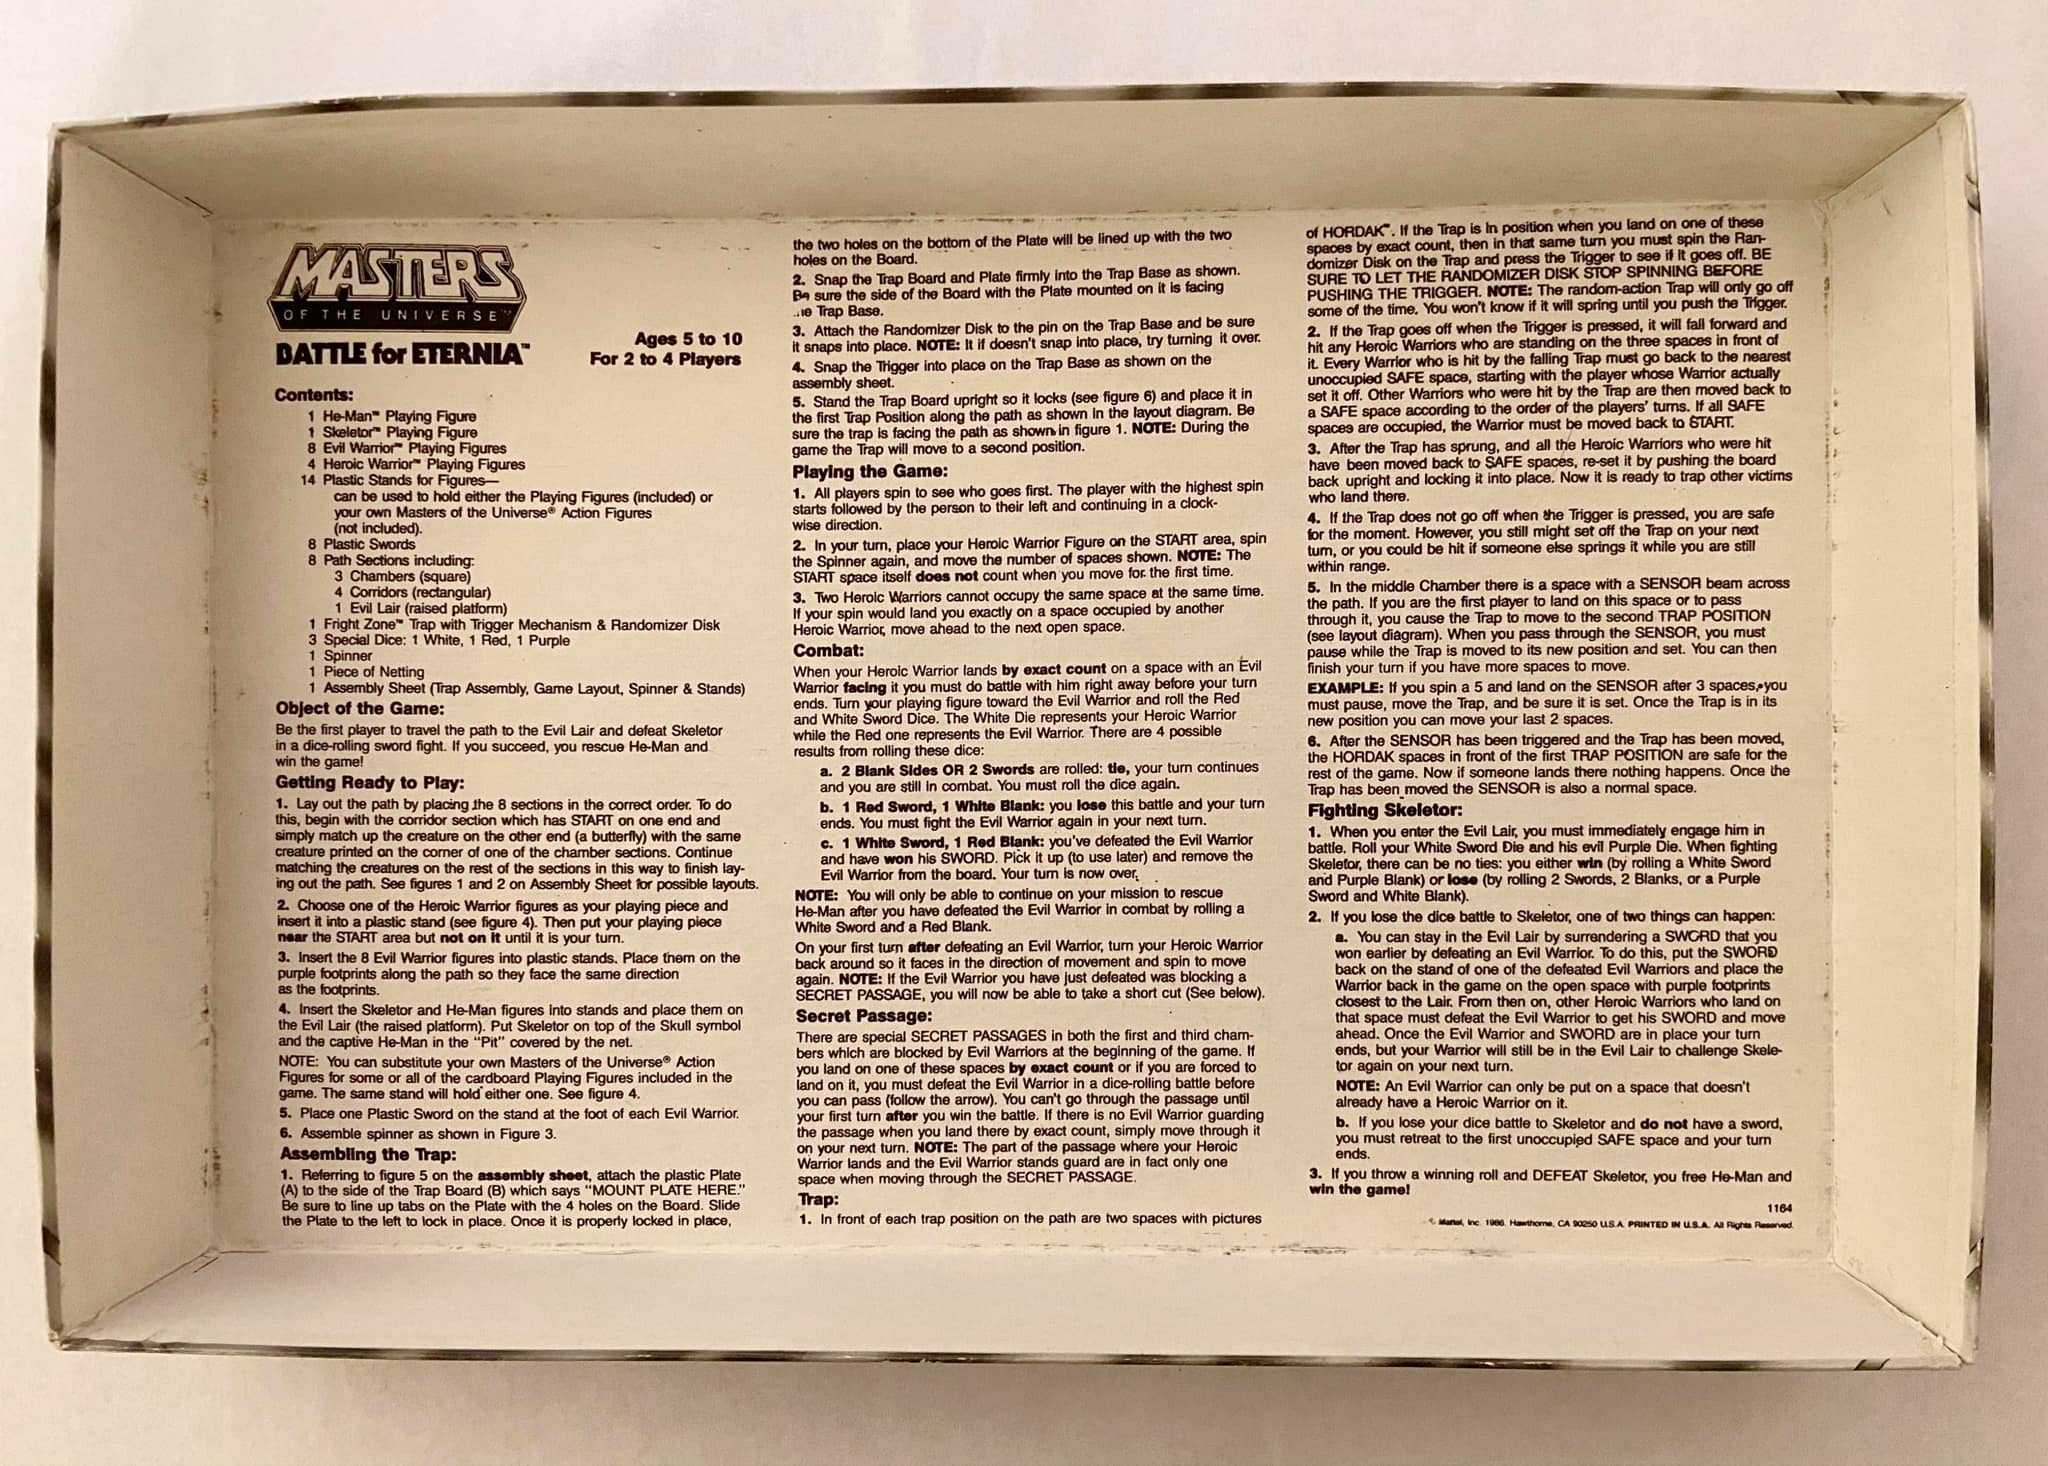
Here is the text version of the above instructions, which were printed on the underside of the lid:
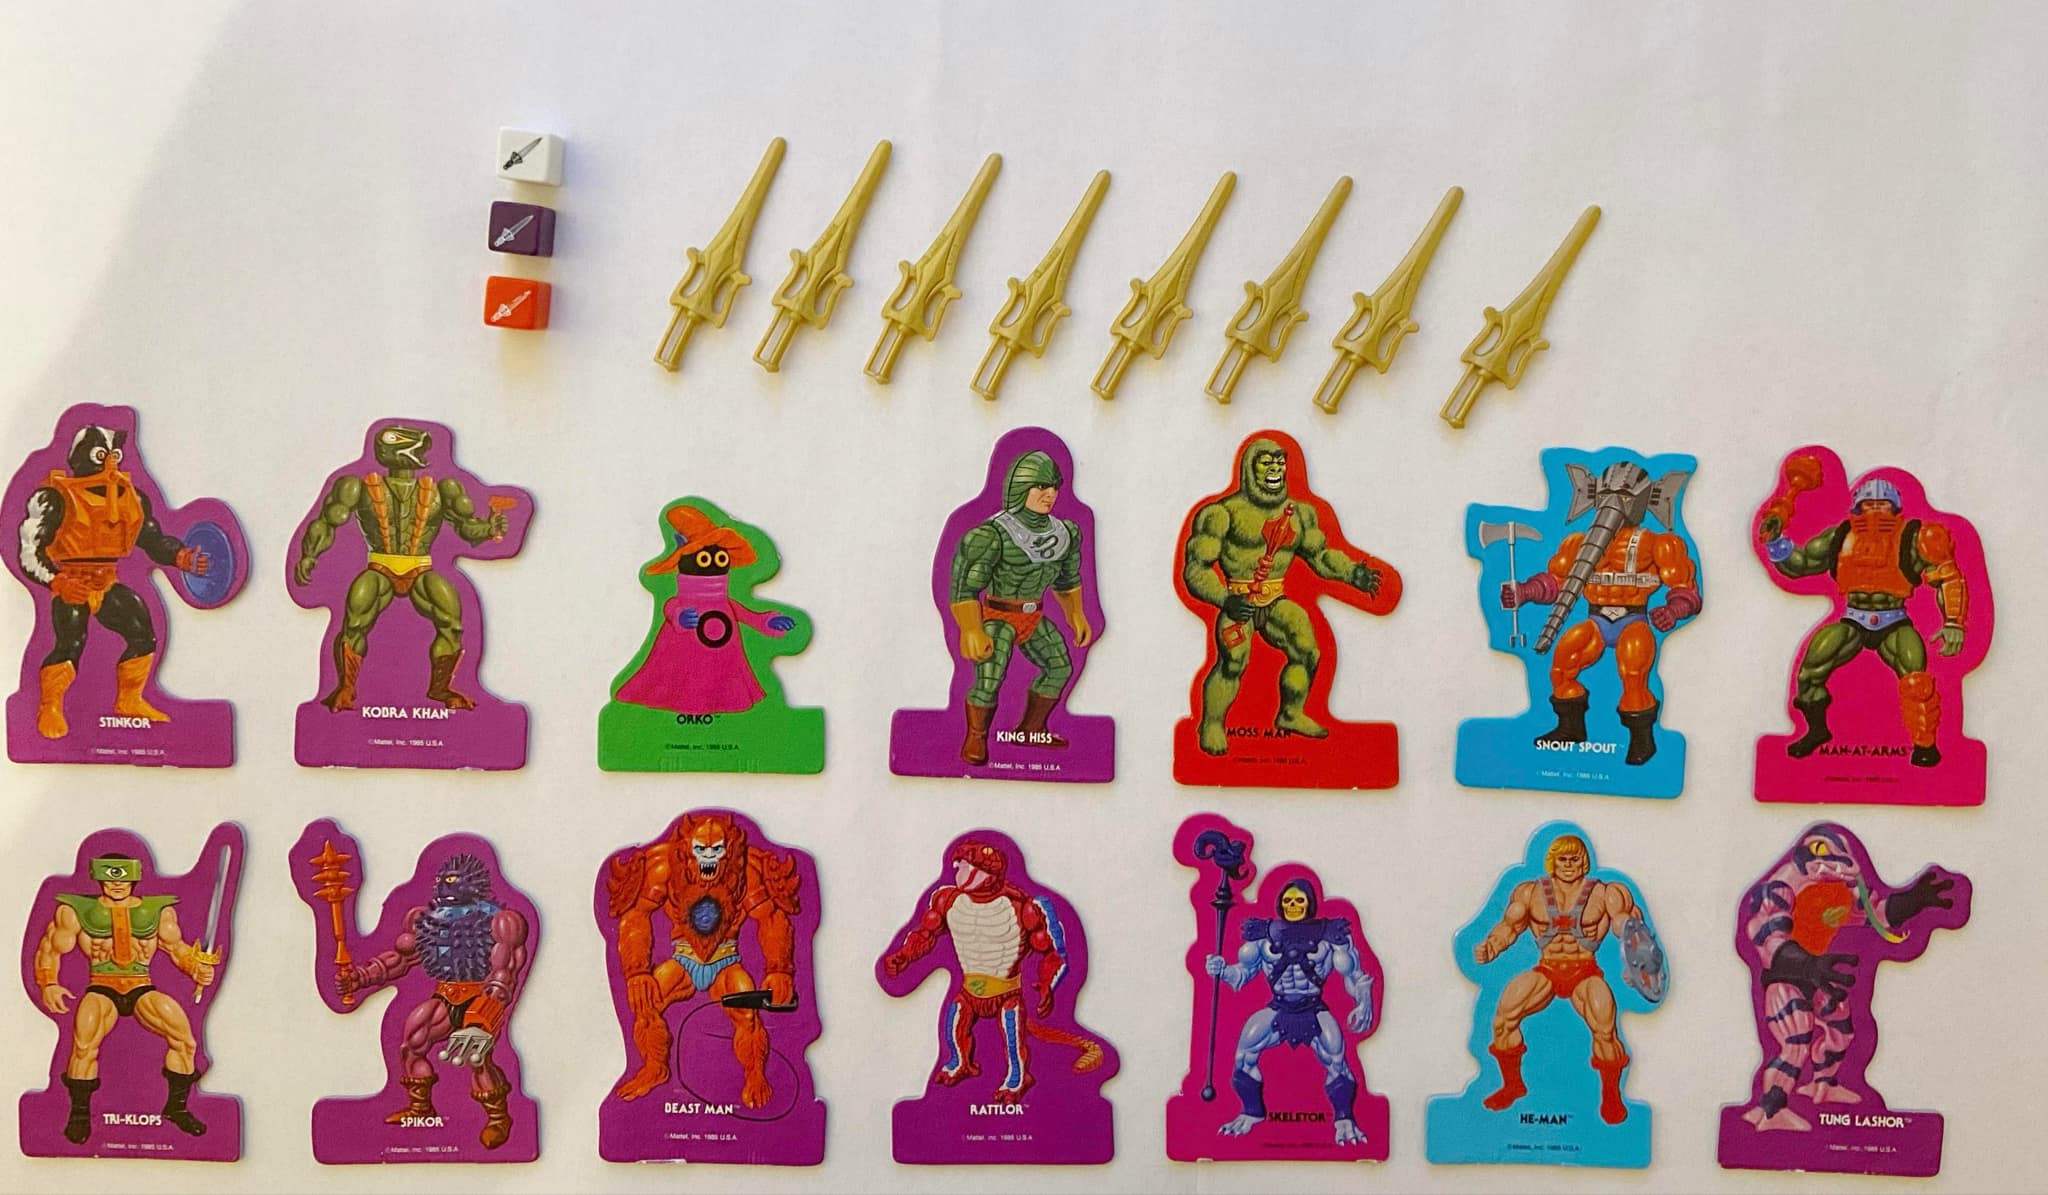
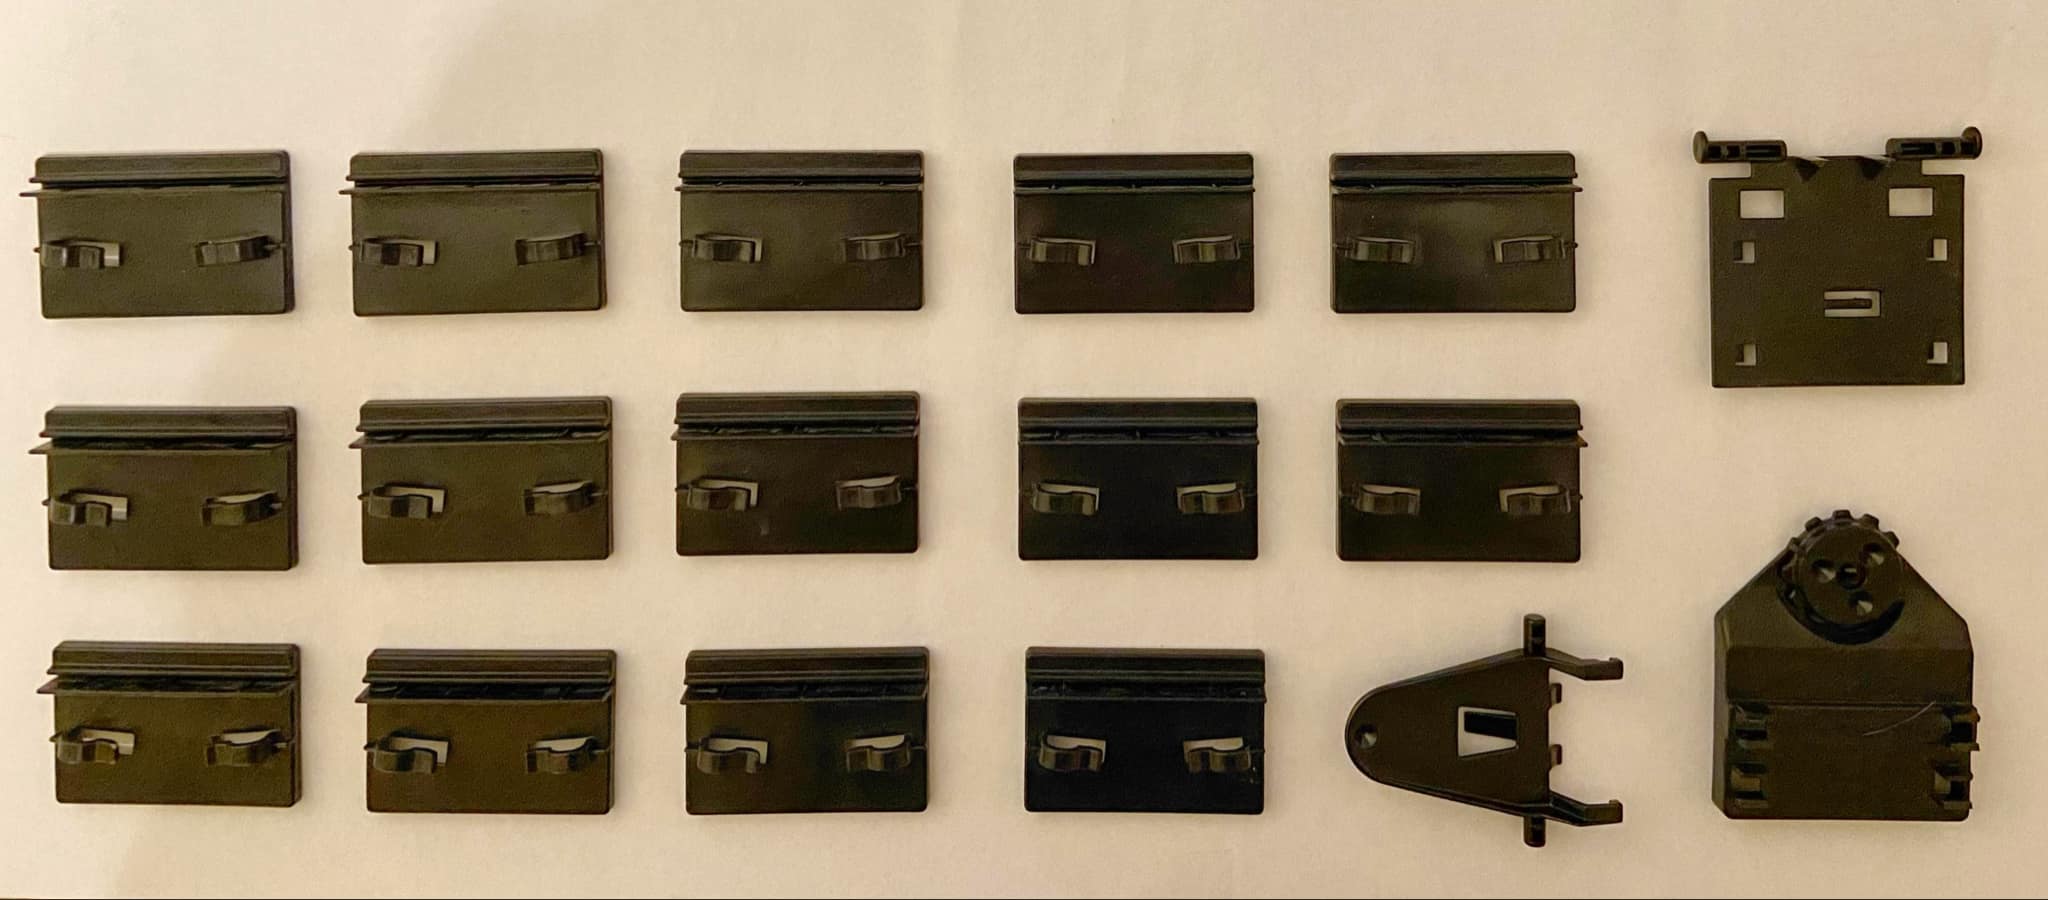
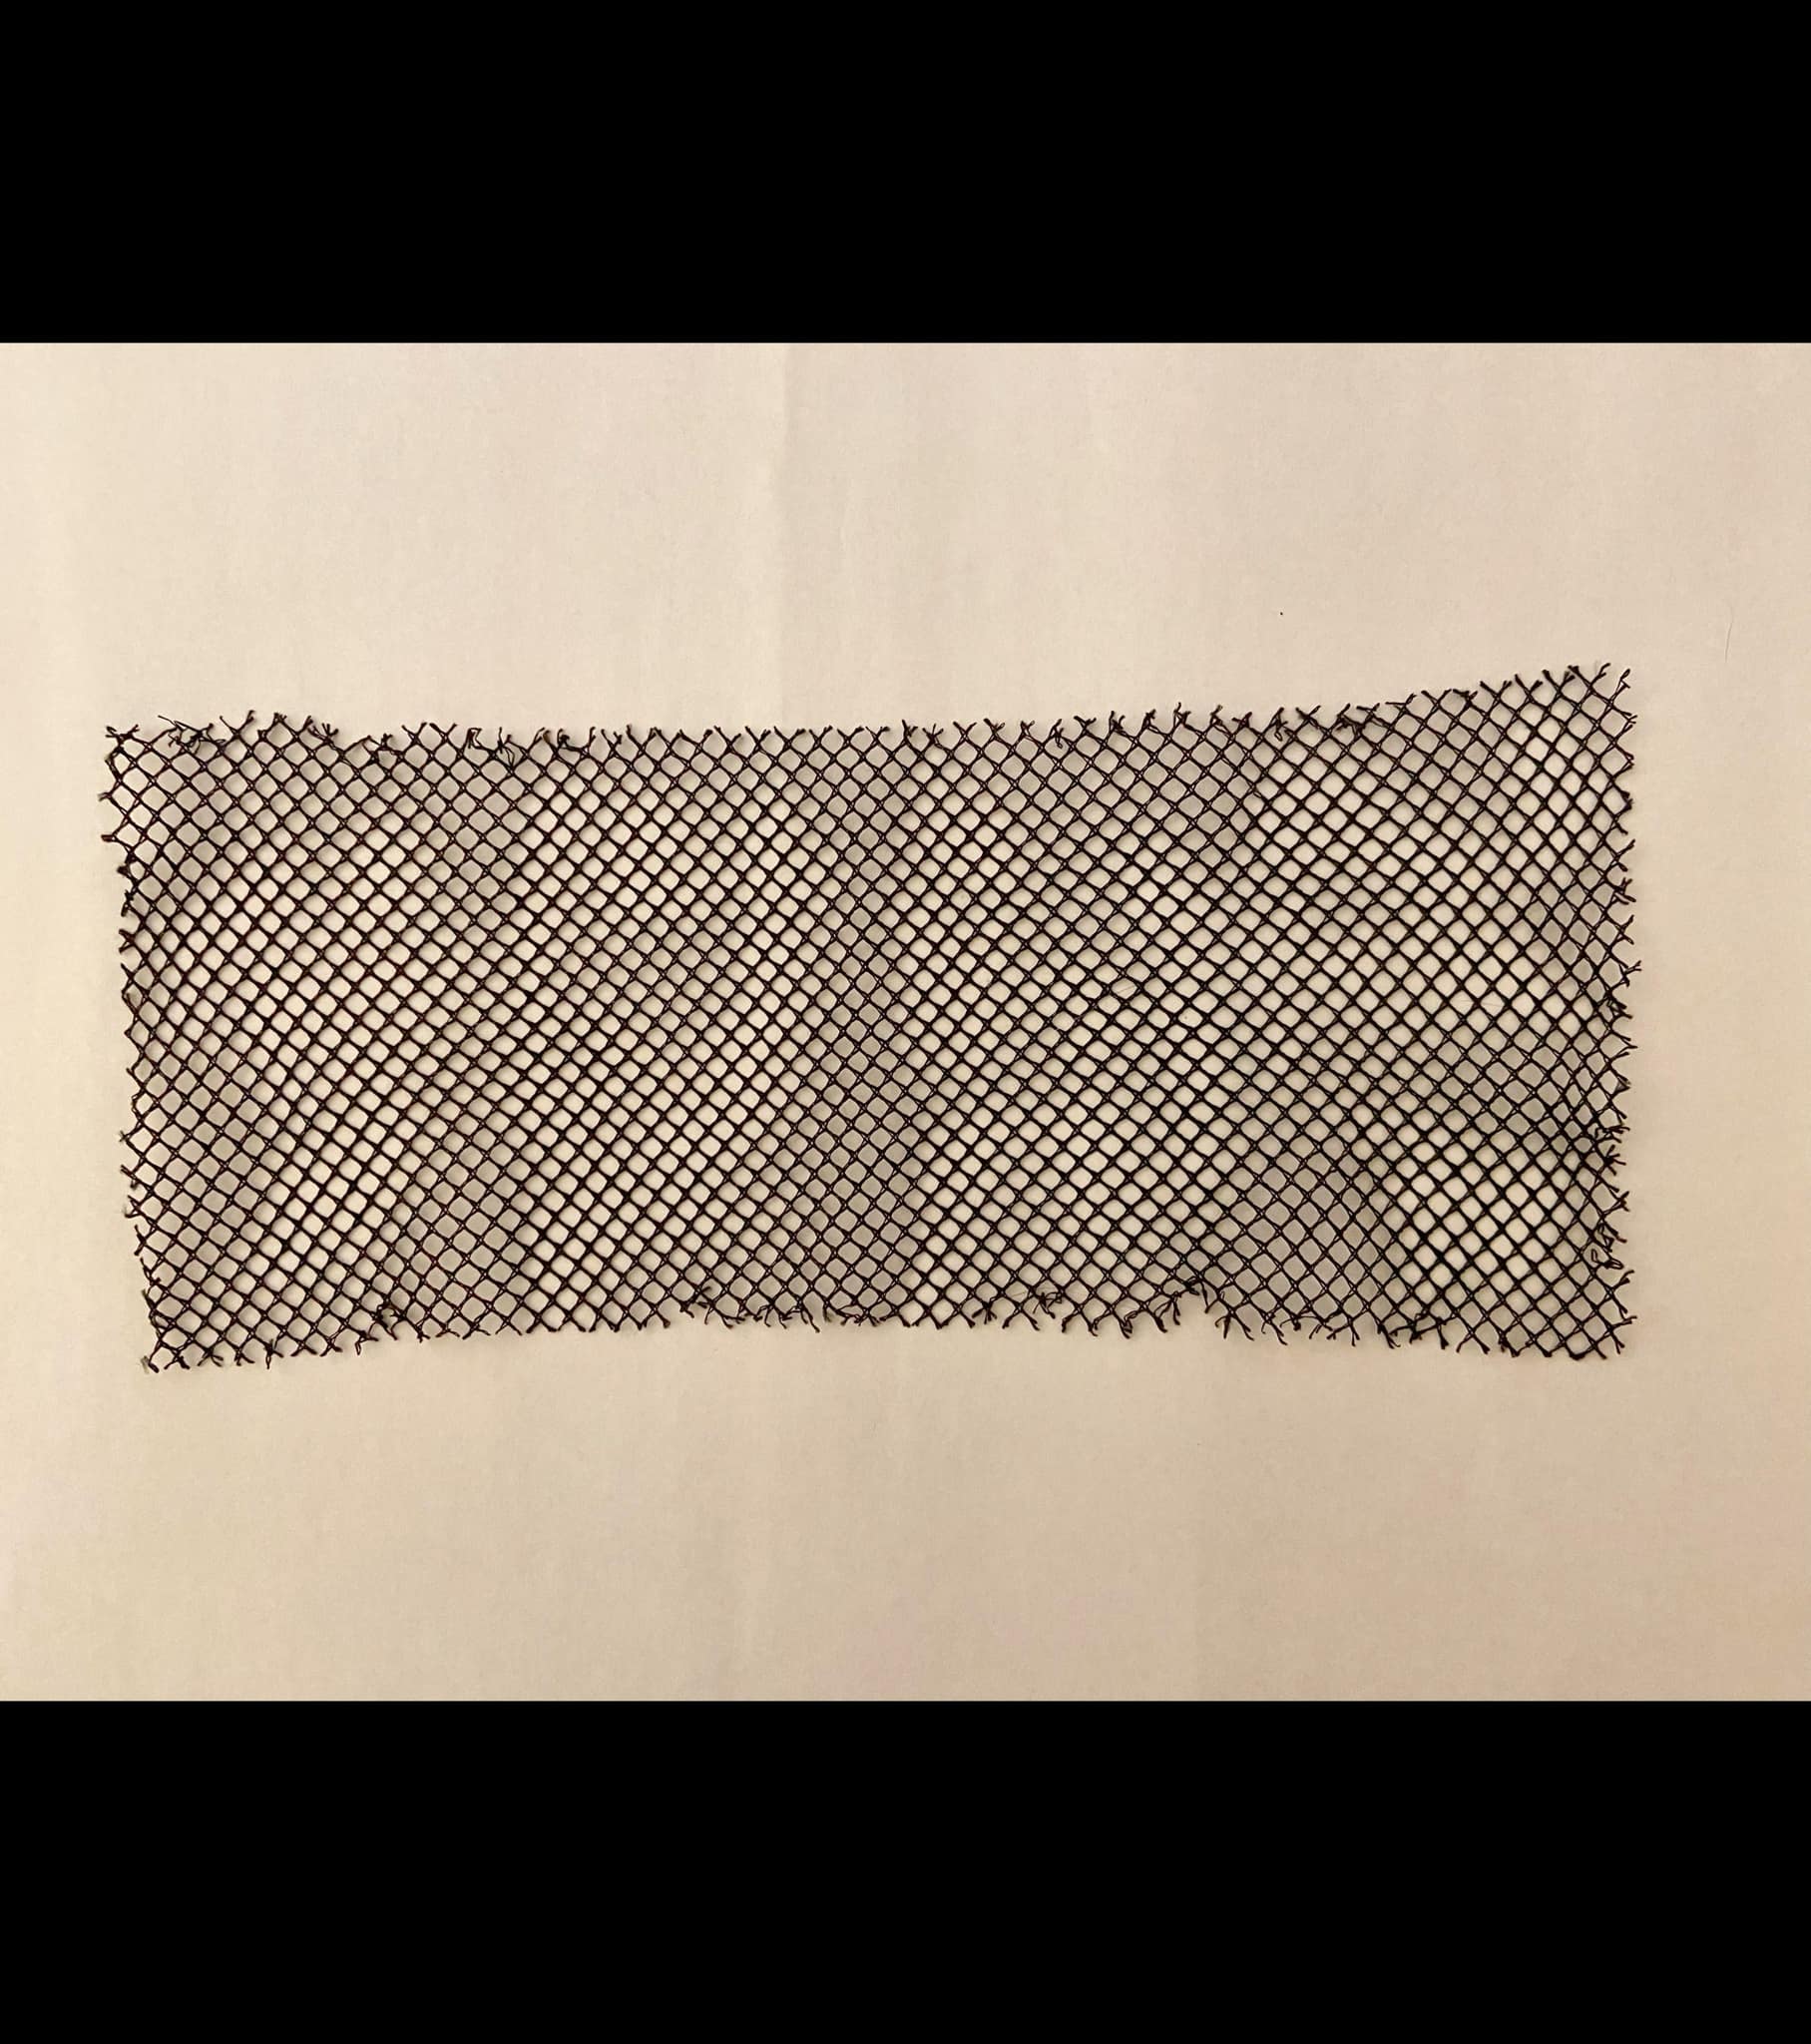
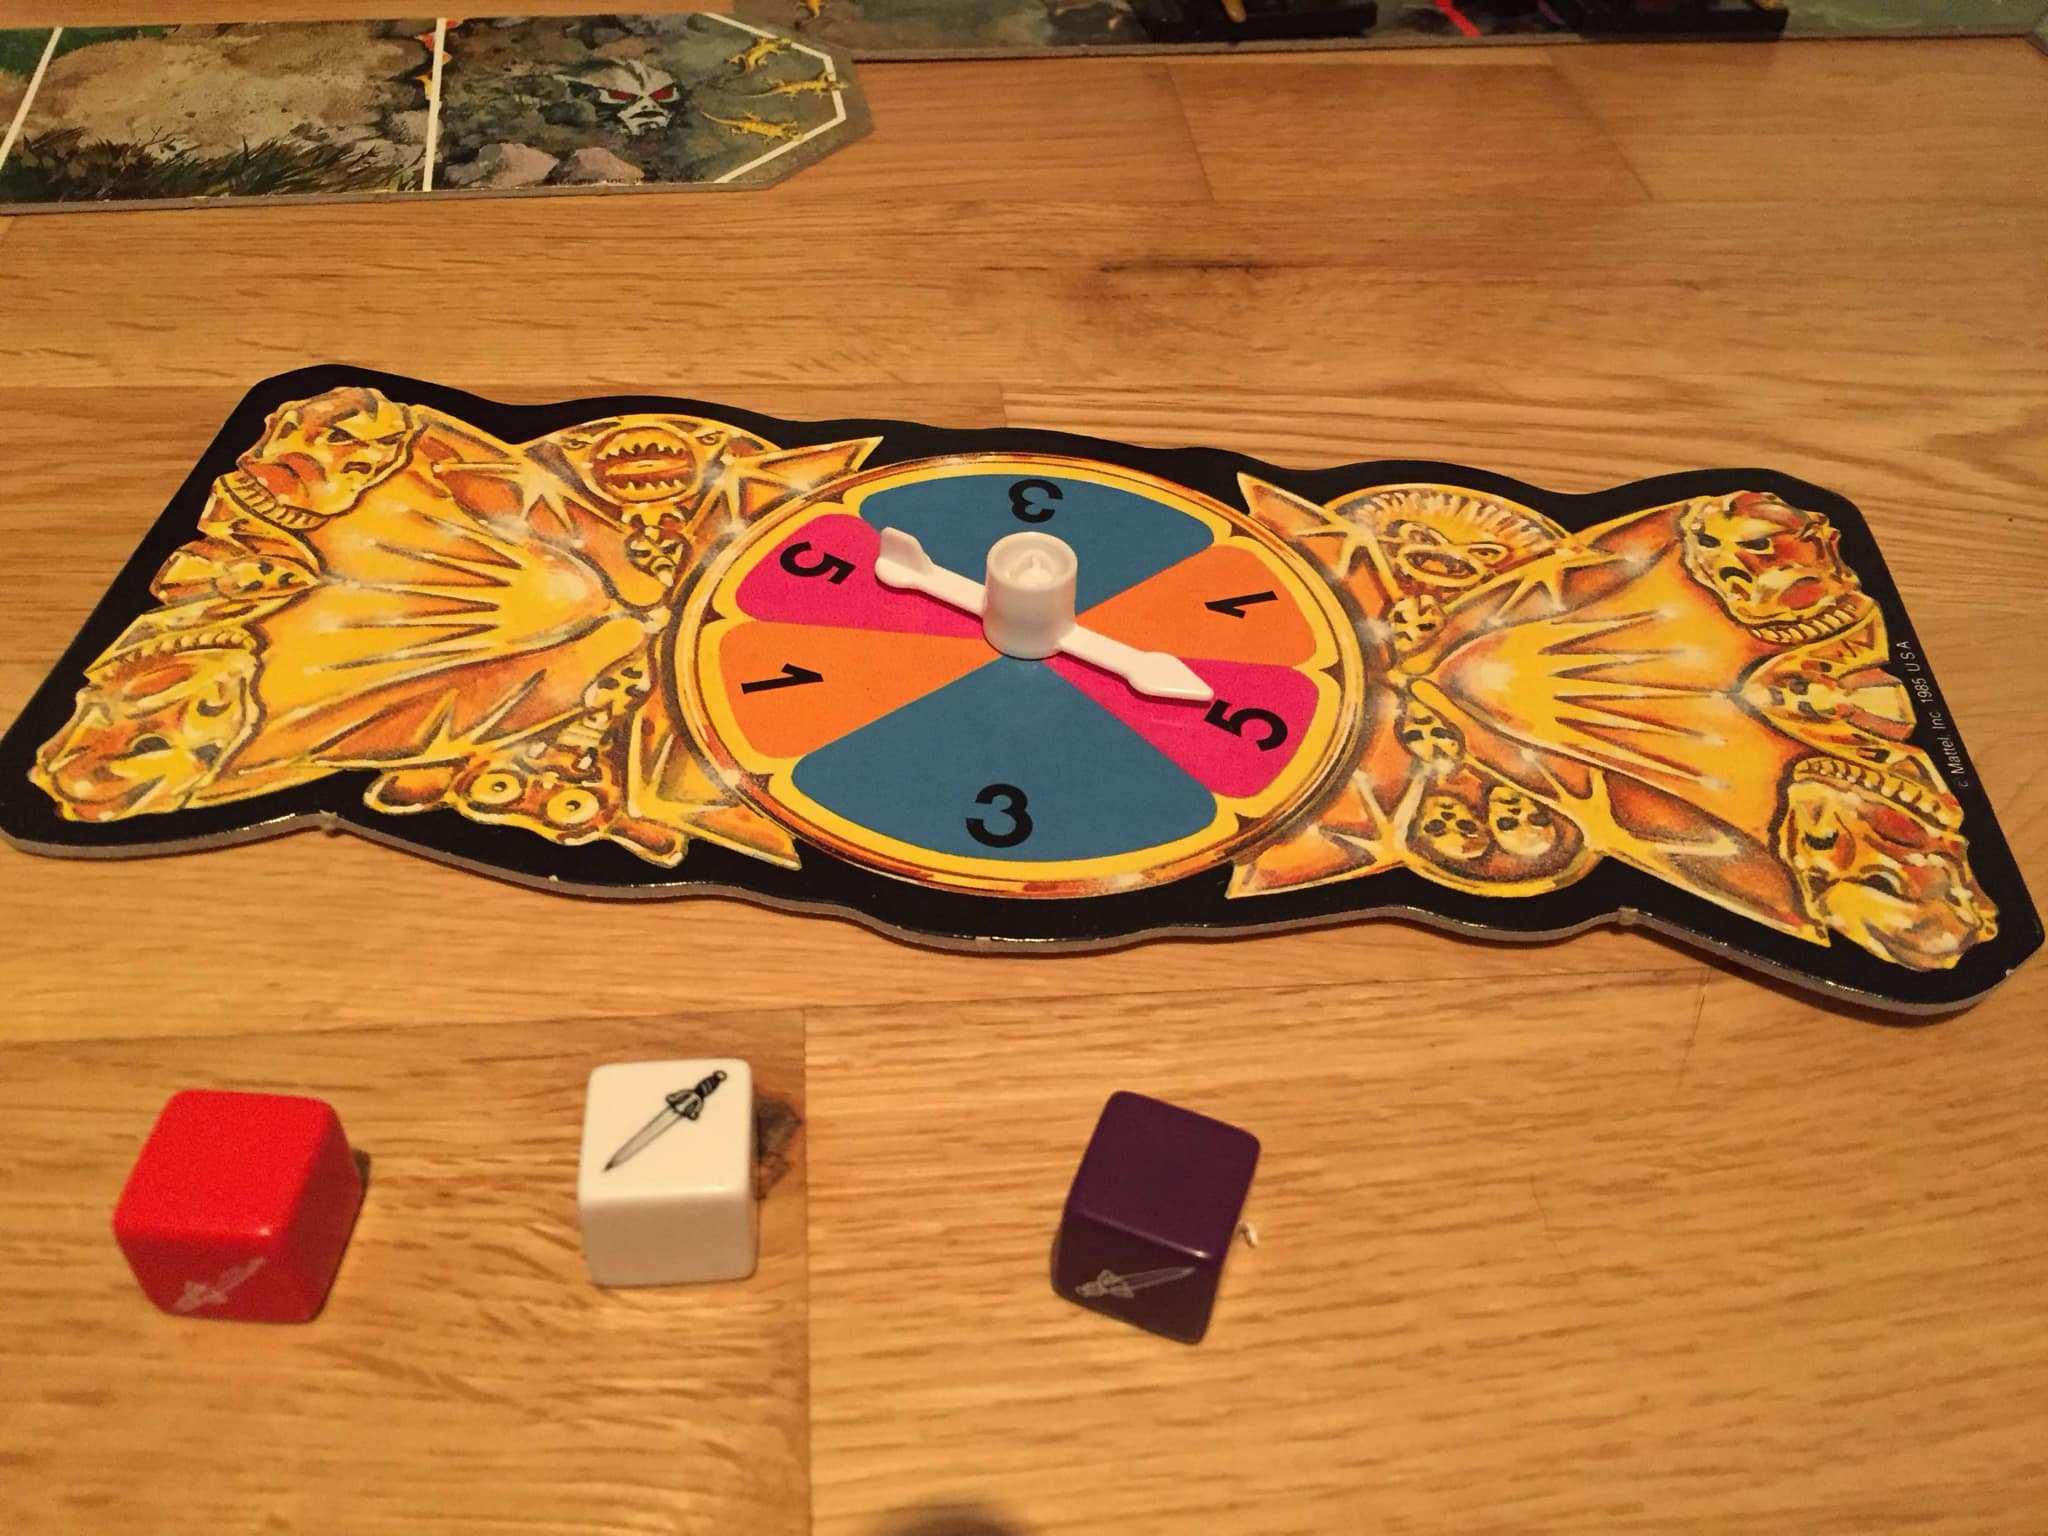
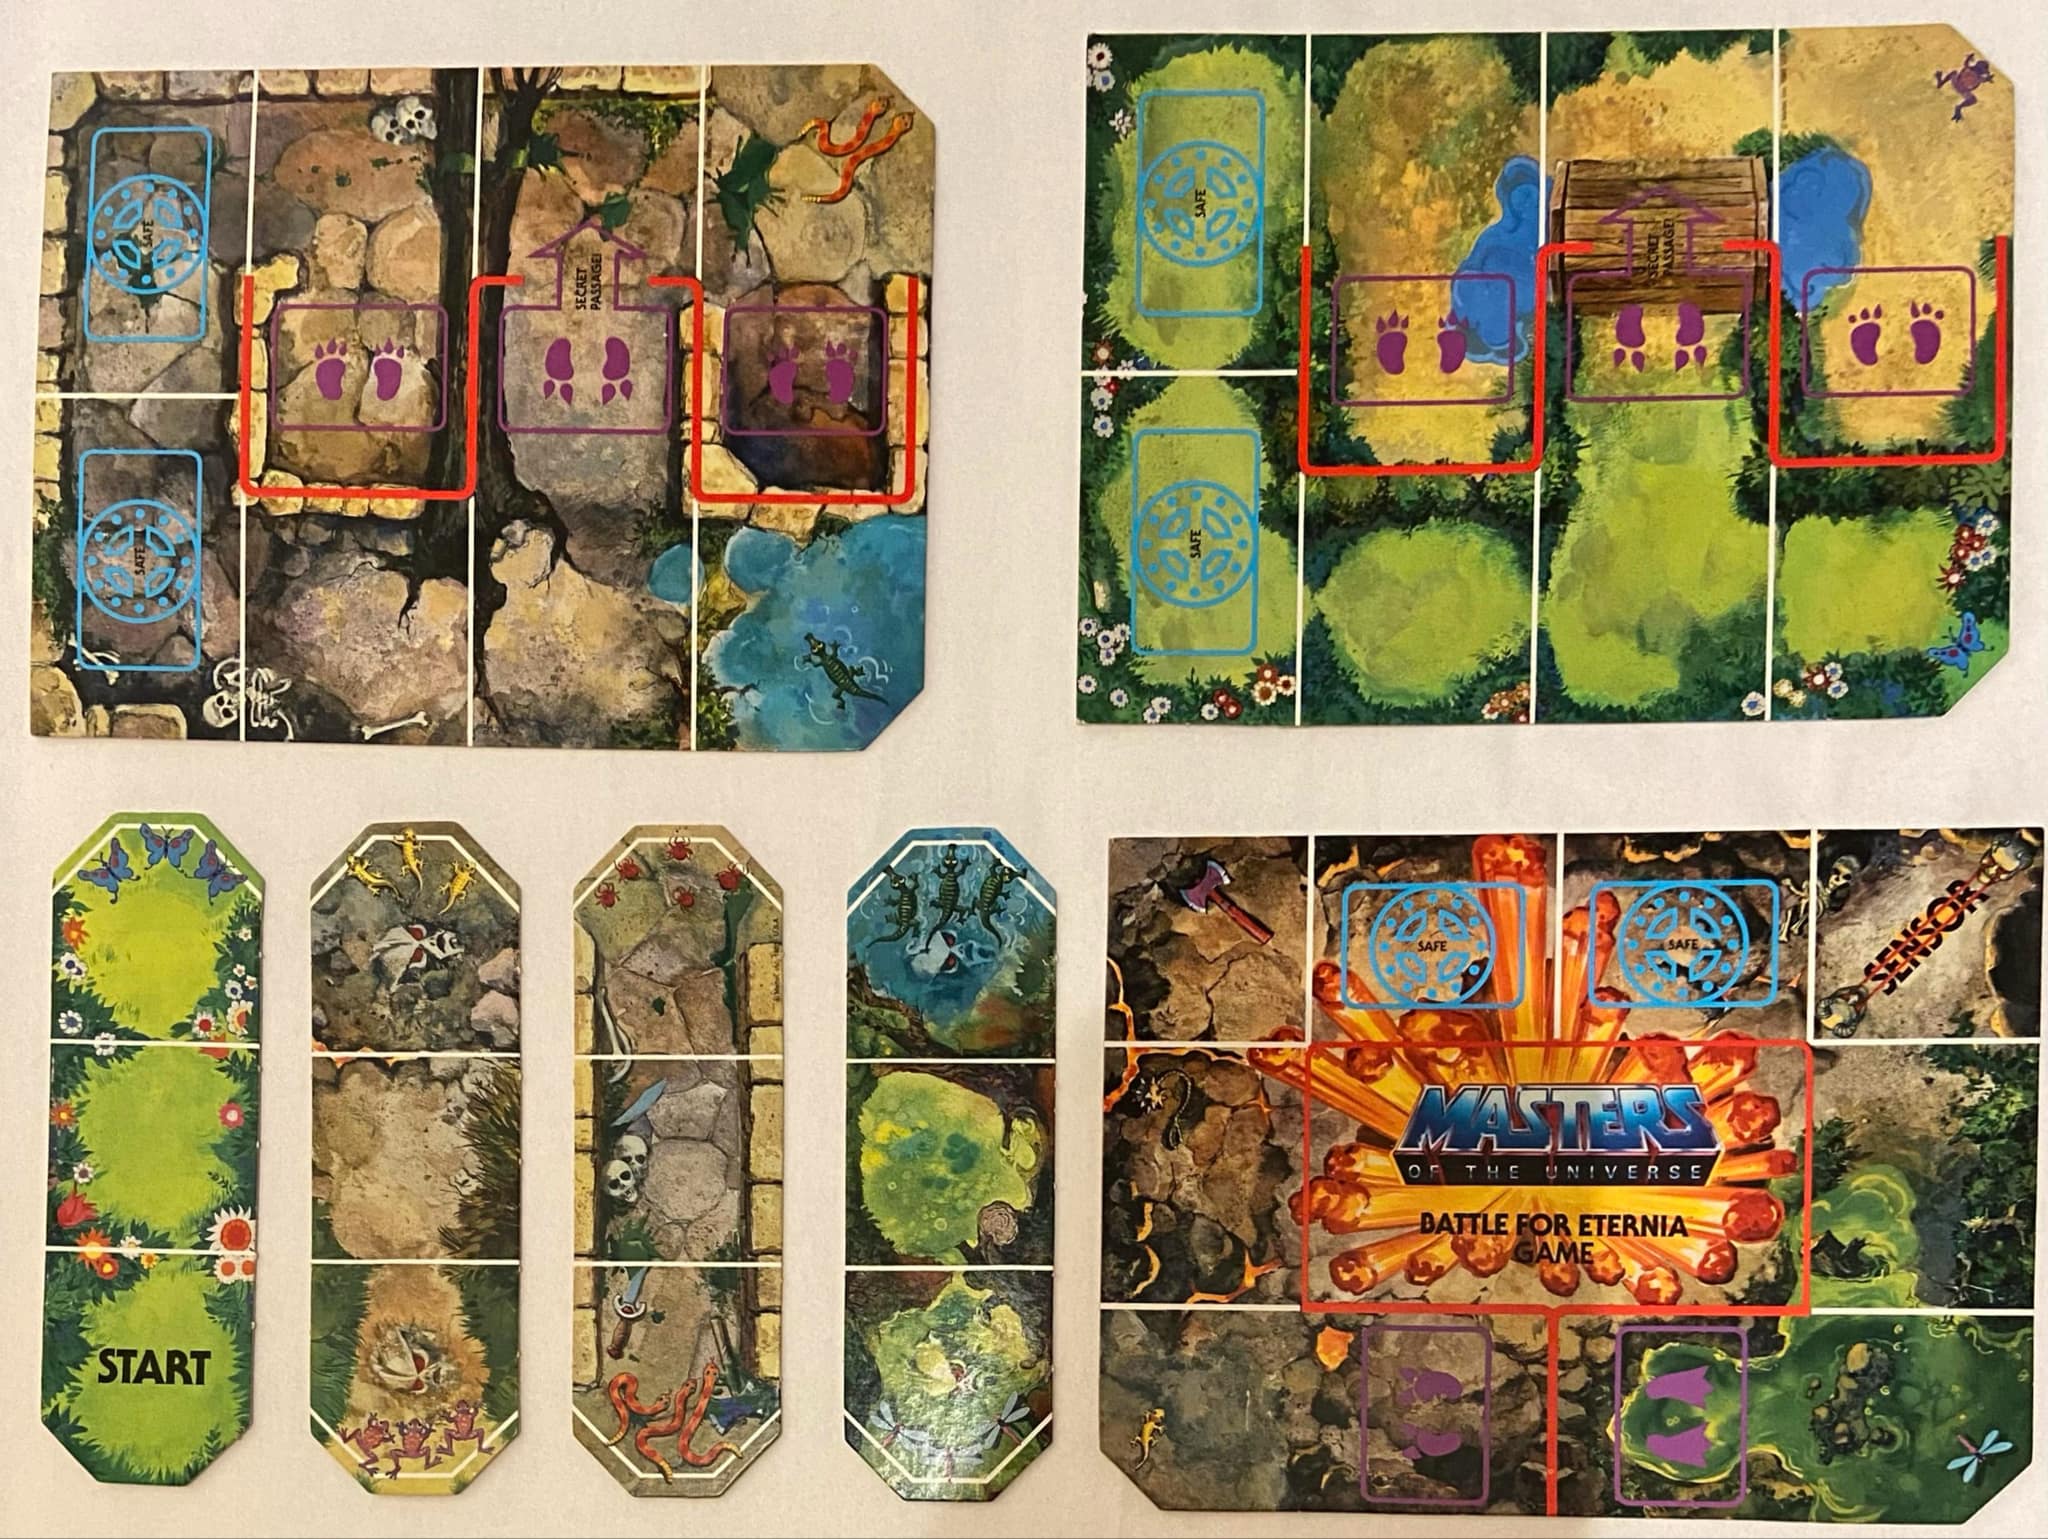
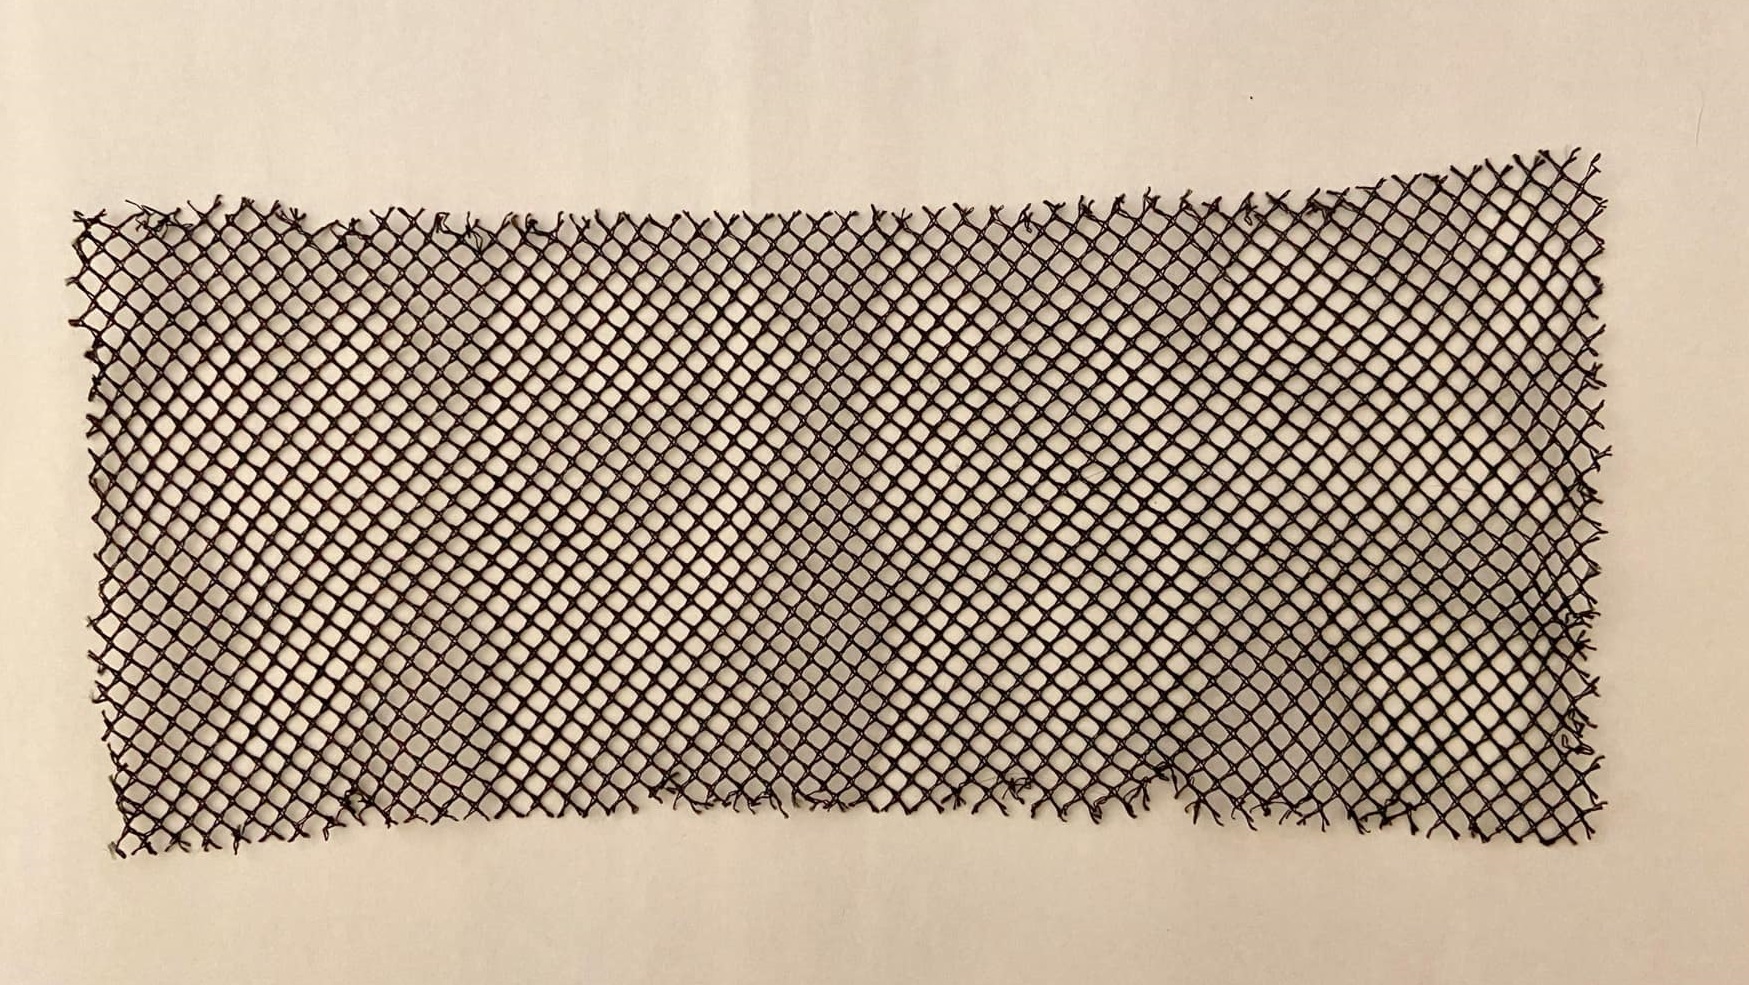
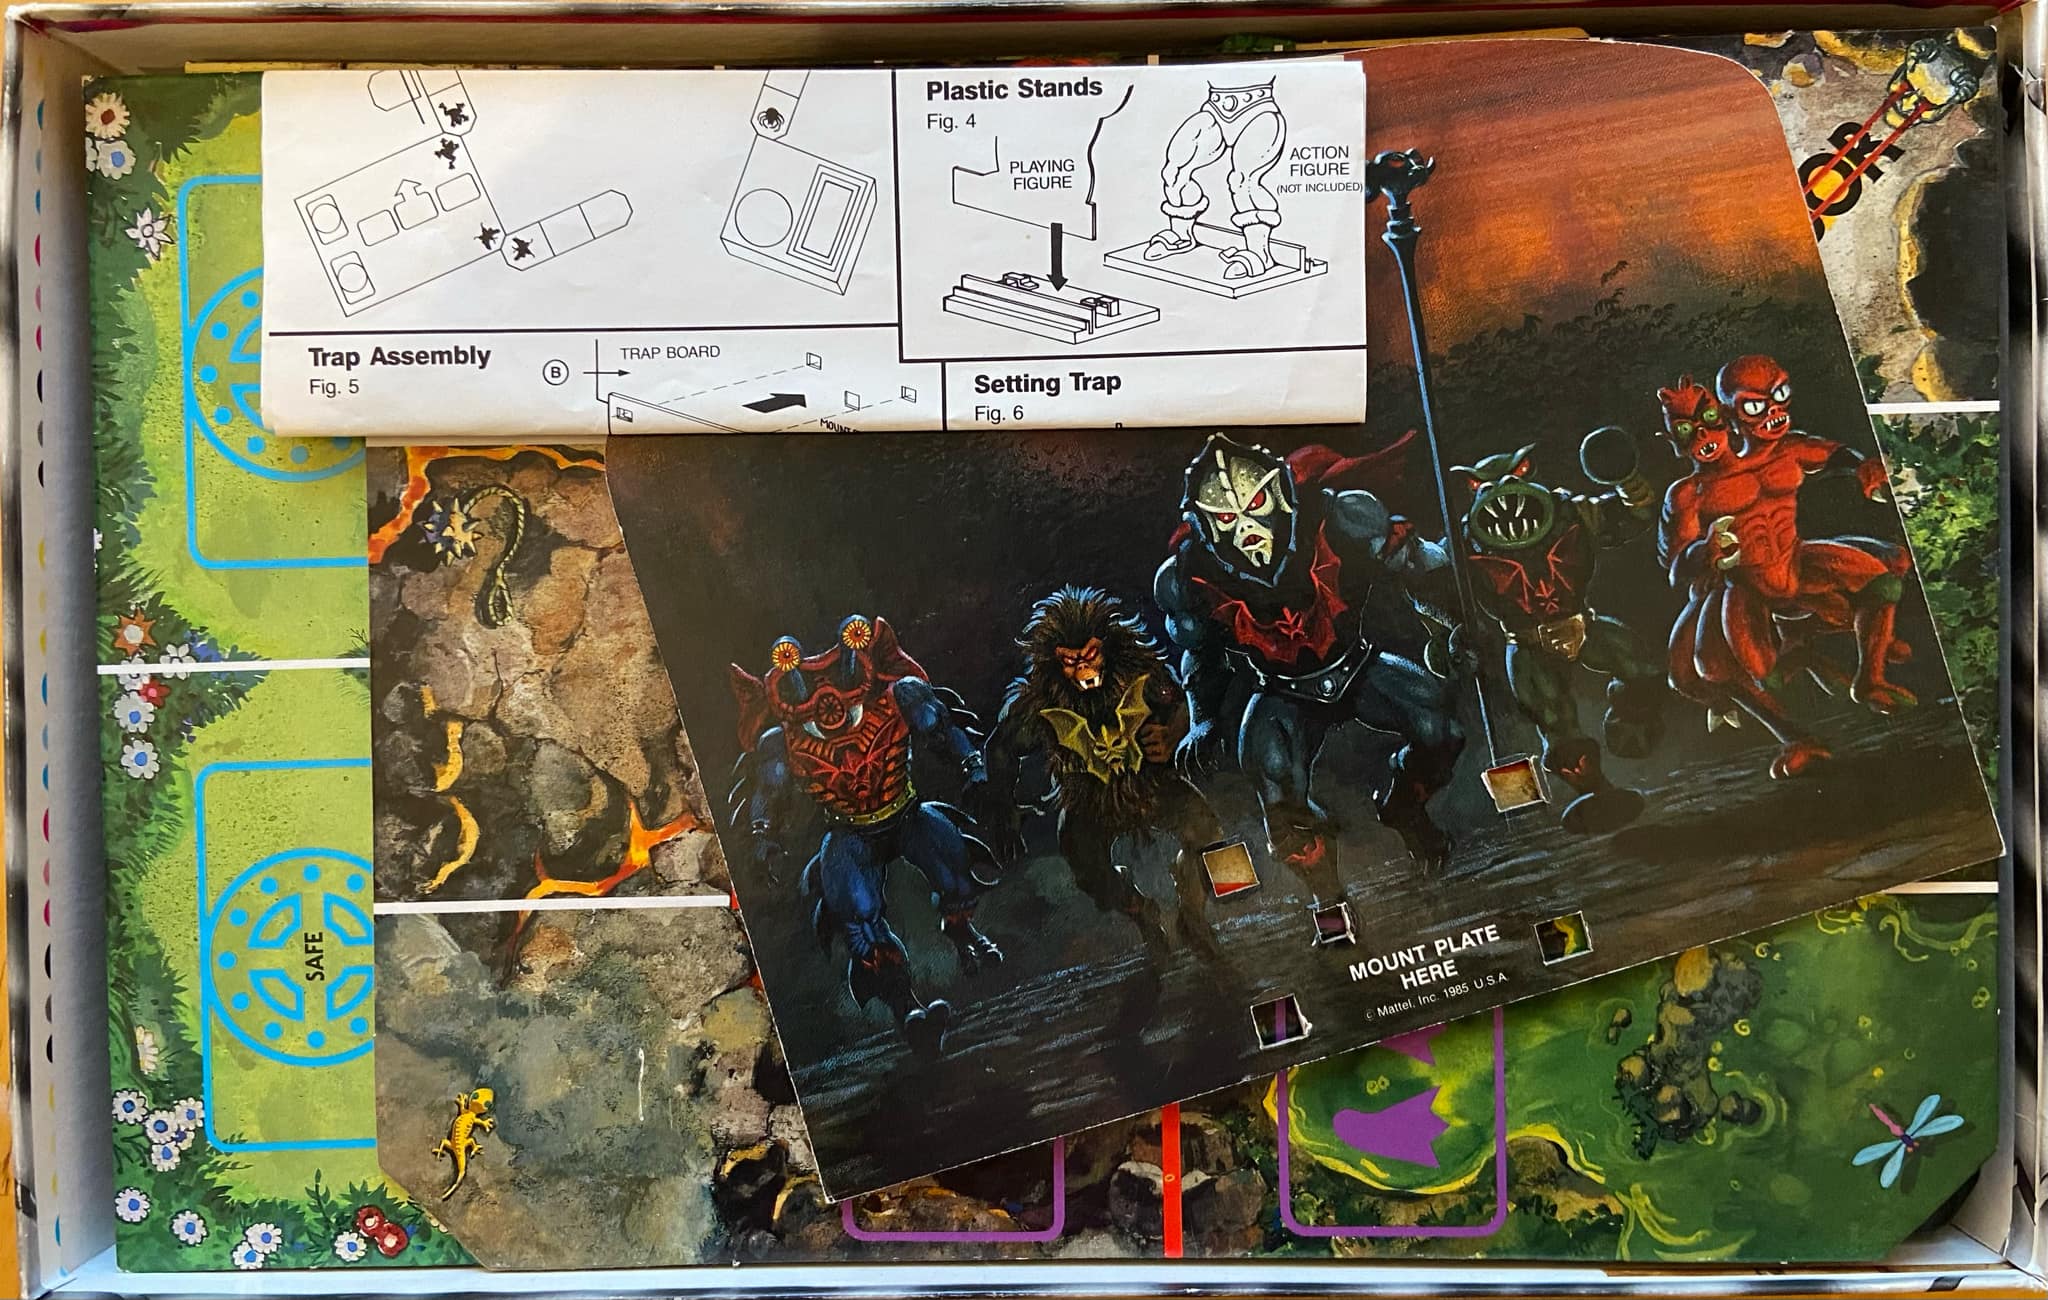
MASTERS OF THE UNIVERSE BATTLE for ETERNIA Contents: 1 He-Man Playing Figure 1 Skeletor Playing Figure 8 Evil Warrior Playing Figures 4 Heroic Warrior Playing Figures 14 Plastic Stands for Figures (can be used to hold either the Playing Figures (included) or your own Masters of the Universe® Action Figures included). 8 Plastic swords 8 Path Sections including: 3 Chambers (square) 4 Corridors (rectangular) 1 Evil Lair (raised platform) 1 Fright Zone Trap with Trigger Mechanism & Randomizer Disk 3 Special Dice: 1 White, 1 Red, 1 Purple 1 Spinner 1 Piece of Netting 1 Assembly Sheet (Trap Assembly, Game Layout, Spinner & Stands)
Object of the Game:
Be the first player to travel the path to the Evil Lair and defeat Skeletor in a dice-rolling sword fight. If you succeed, you rescue He-Man and win the game!
Getting Ready to Play:
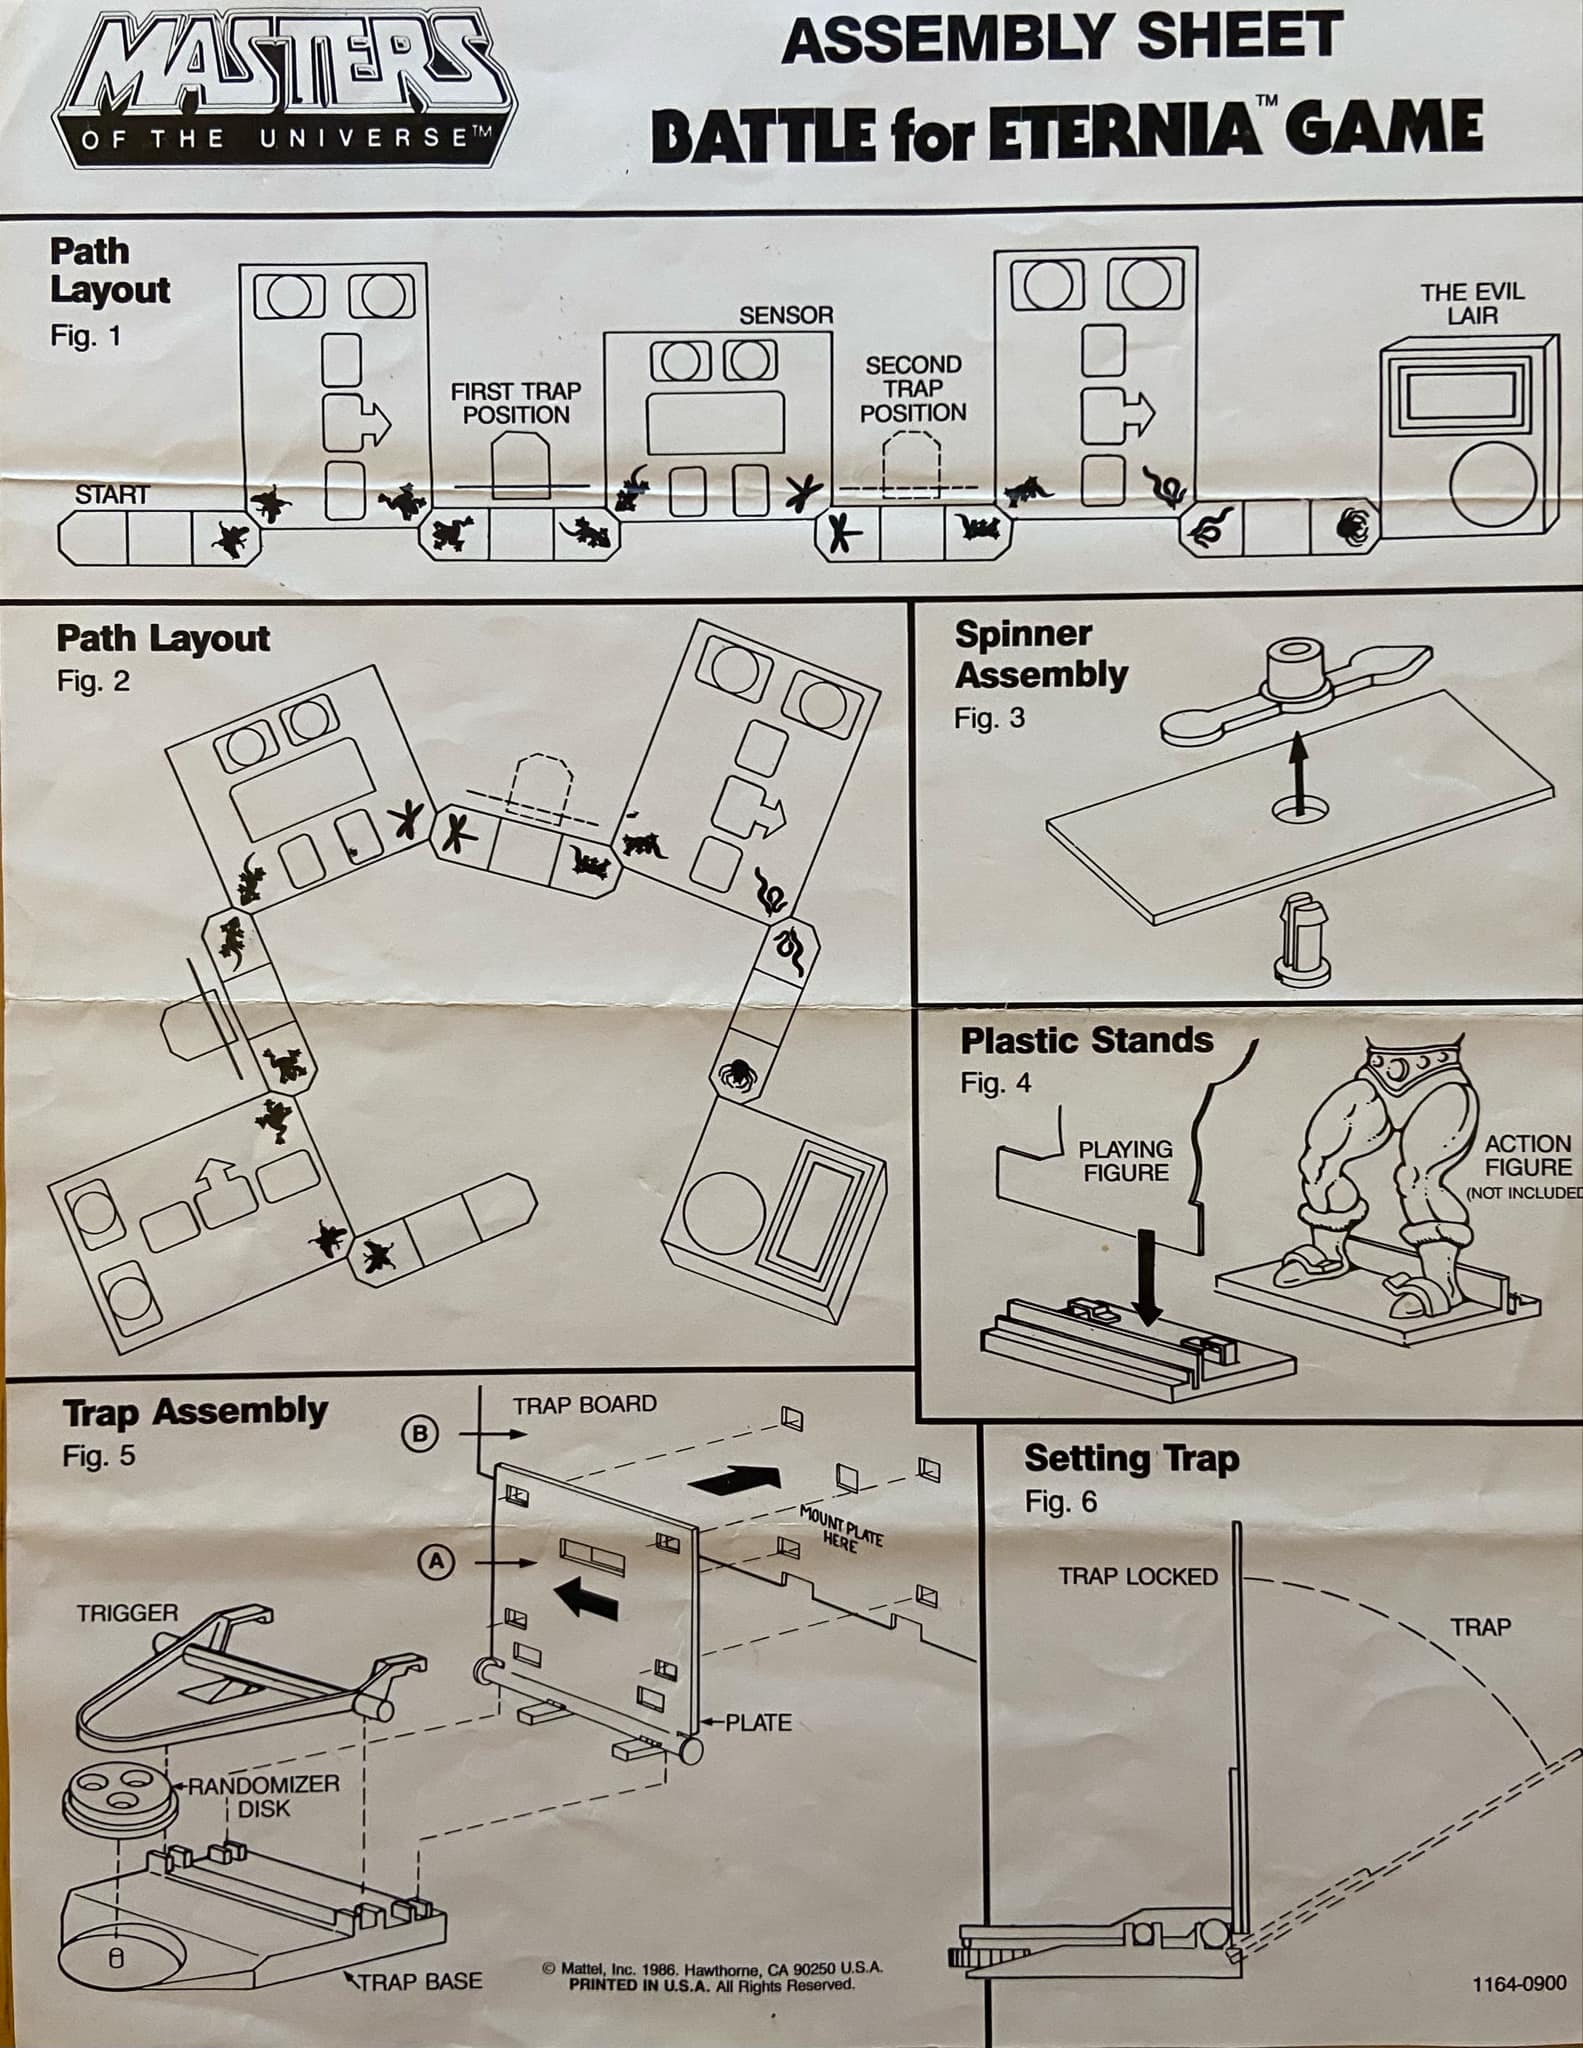
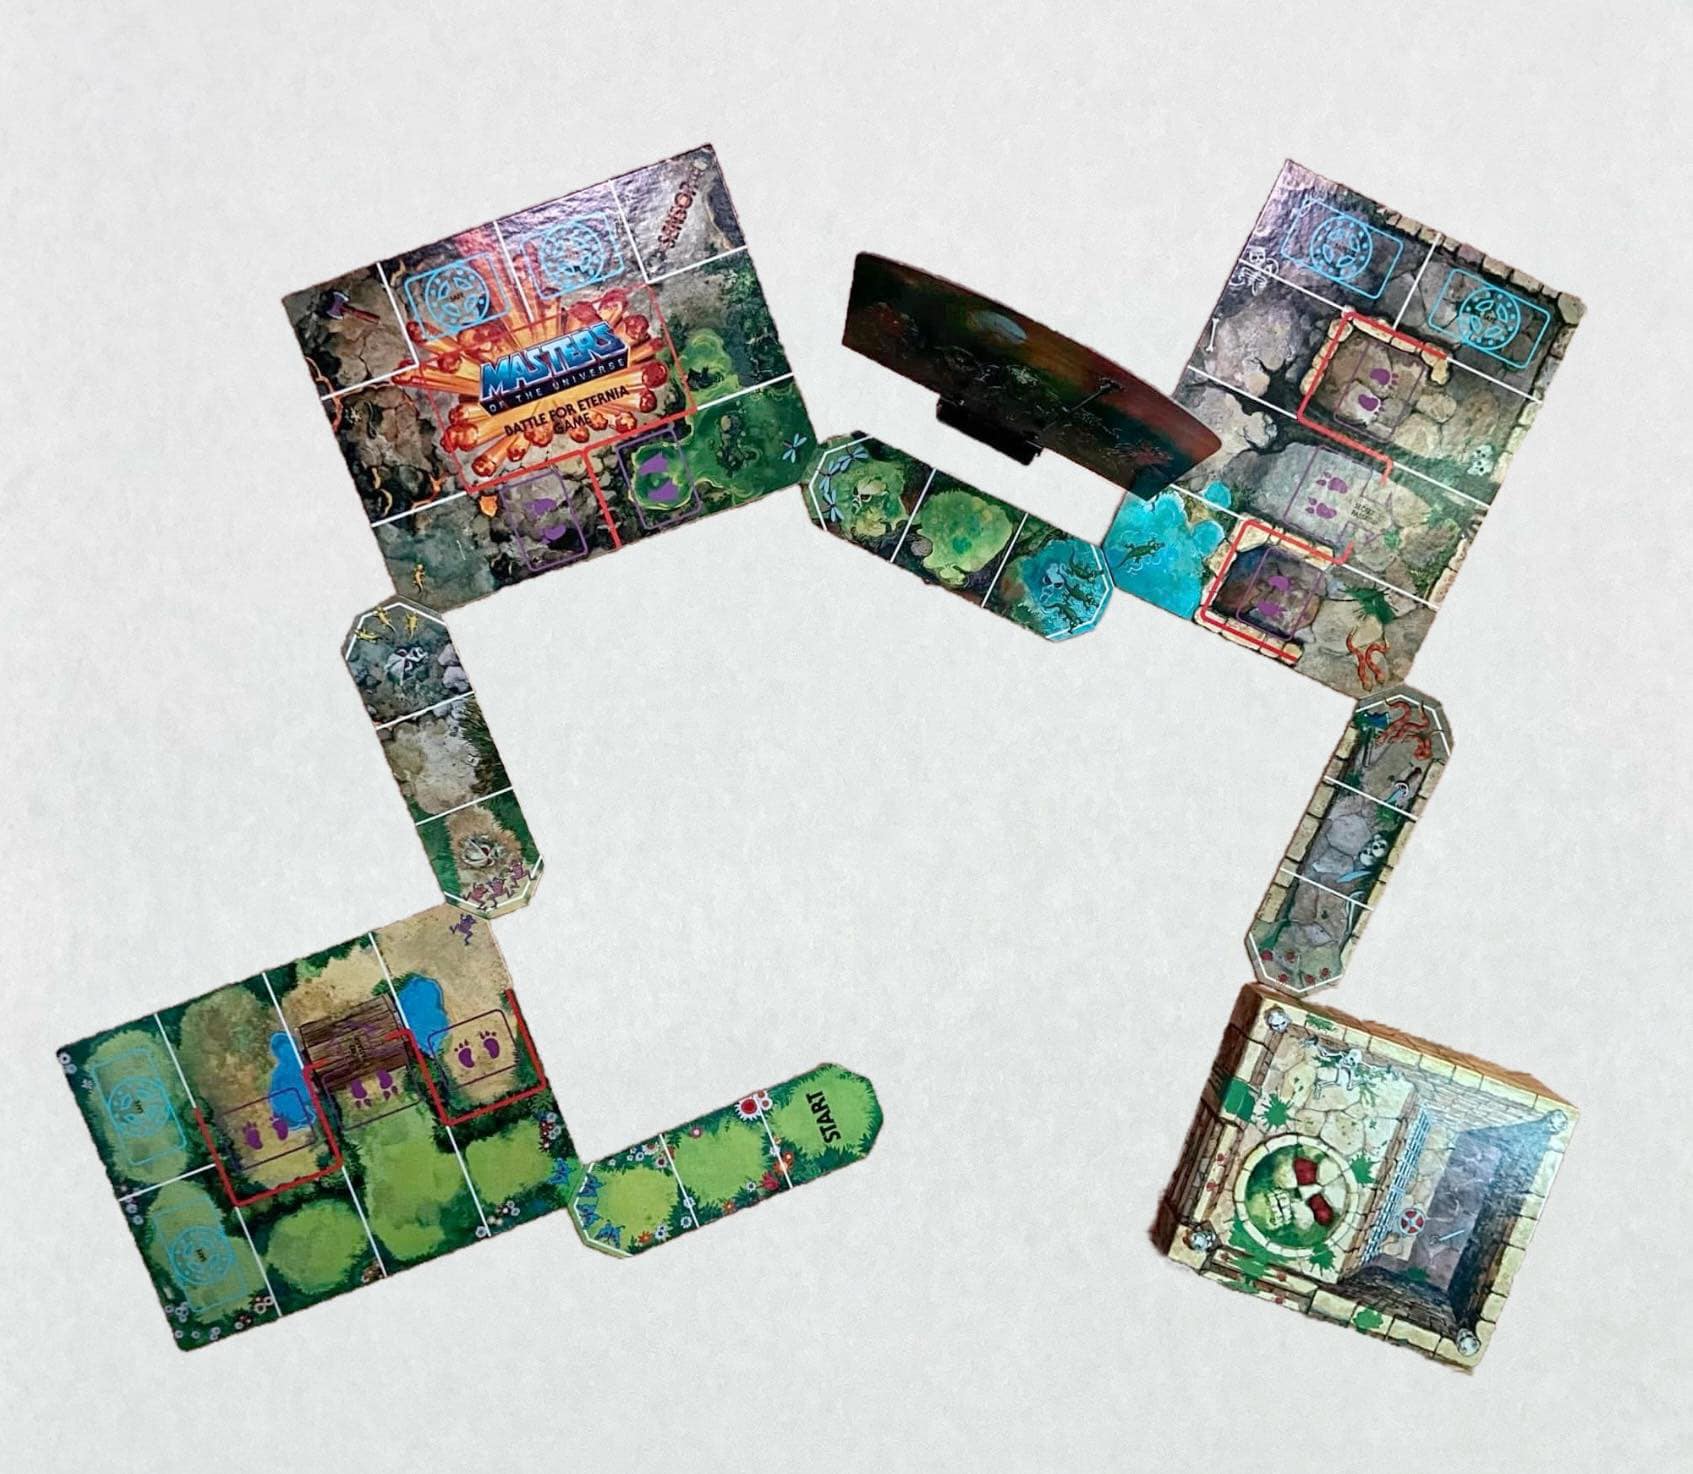
Lay out the path by placing the 8 sections in the correct order. To do this, begin with the corridor section which has START on one end and simply match up the creature on the other end (a butterfly) with the same creature printed on the corner of one of the chamber sections. Continue matching the creatures on the rest of the sections in this way to finish lay- ing out the path. See figures 1 and 2 on Assembly Sheet for possible layouts.
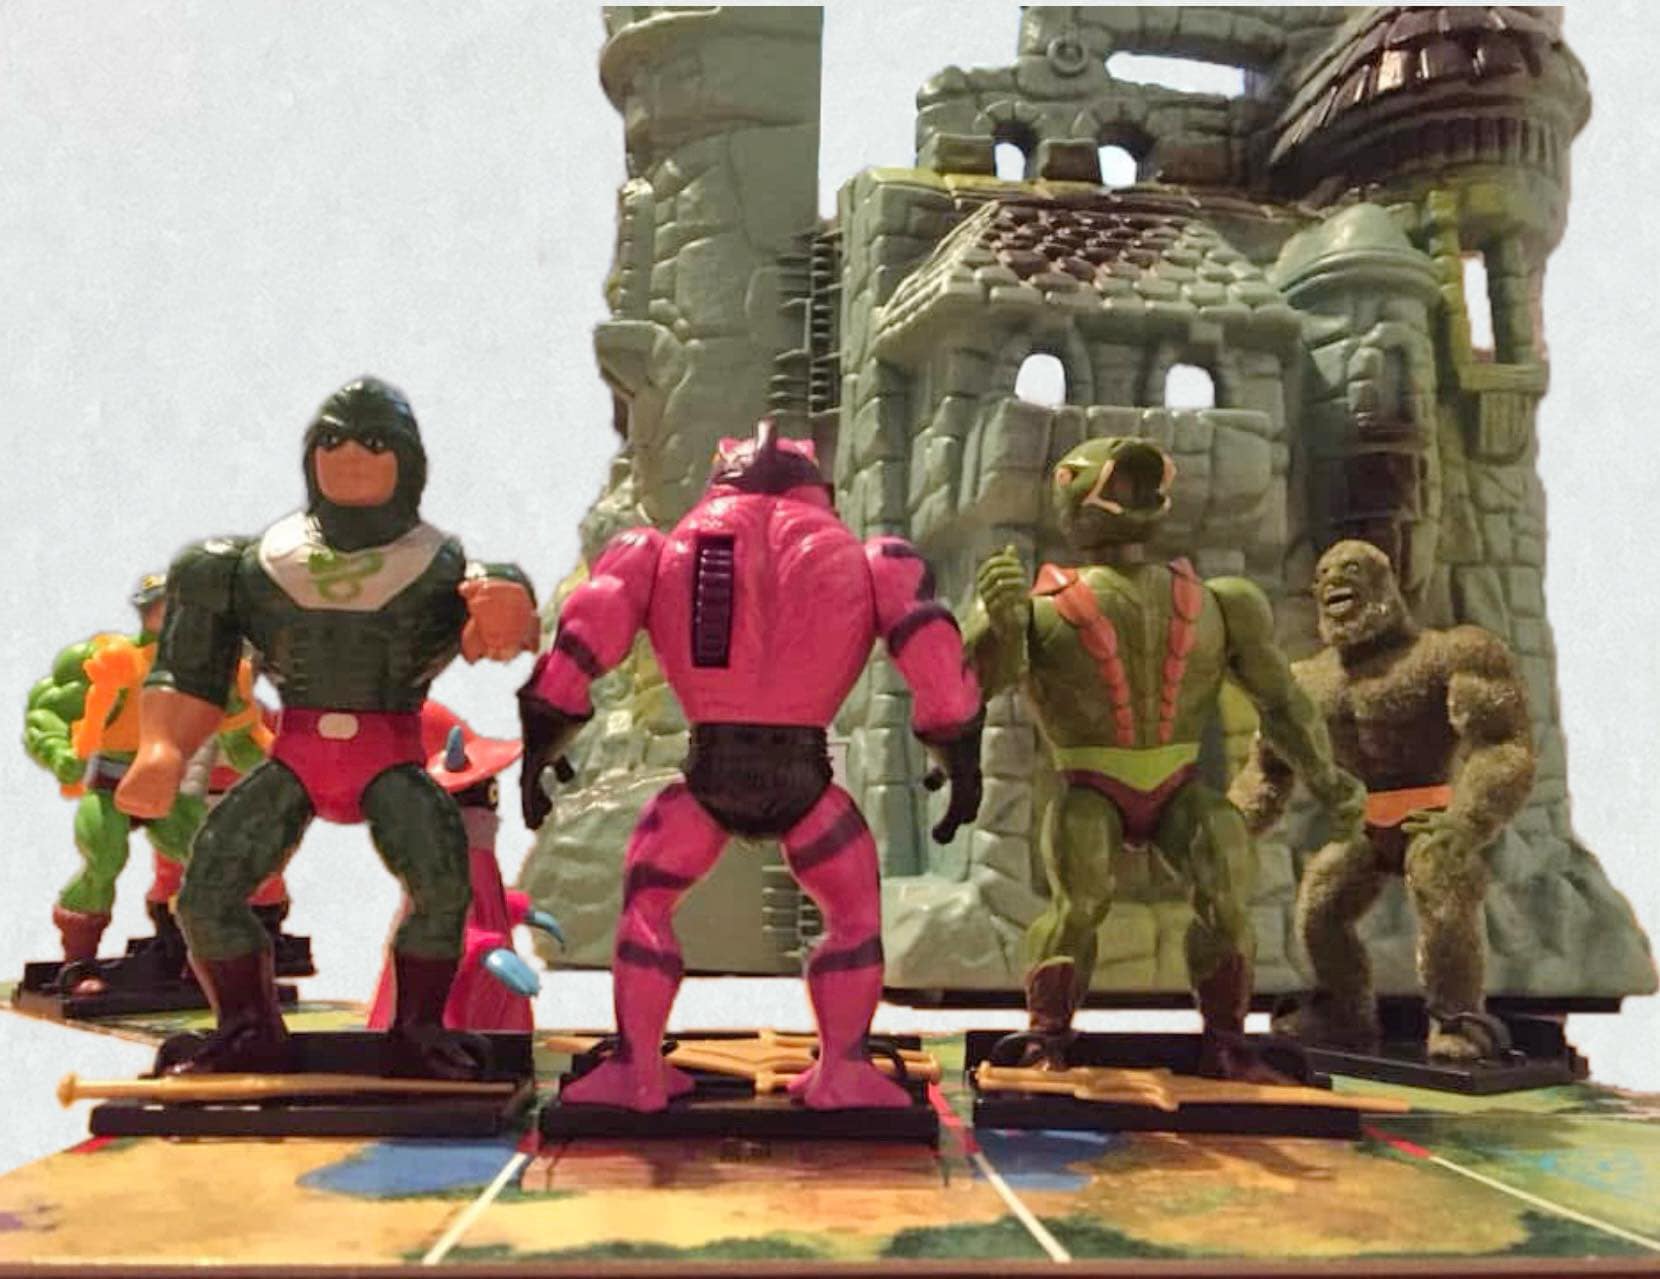
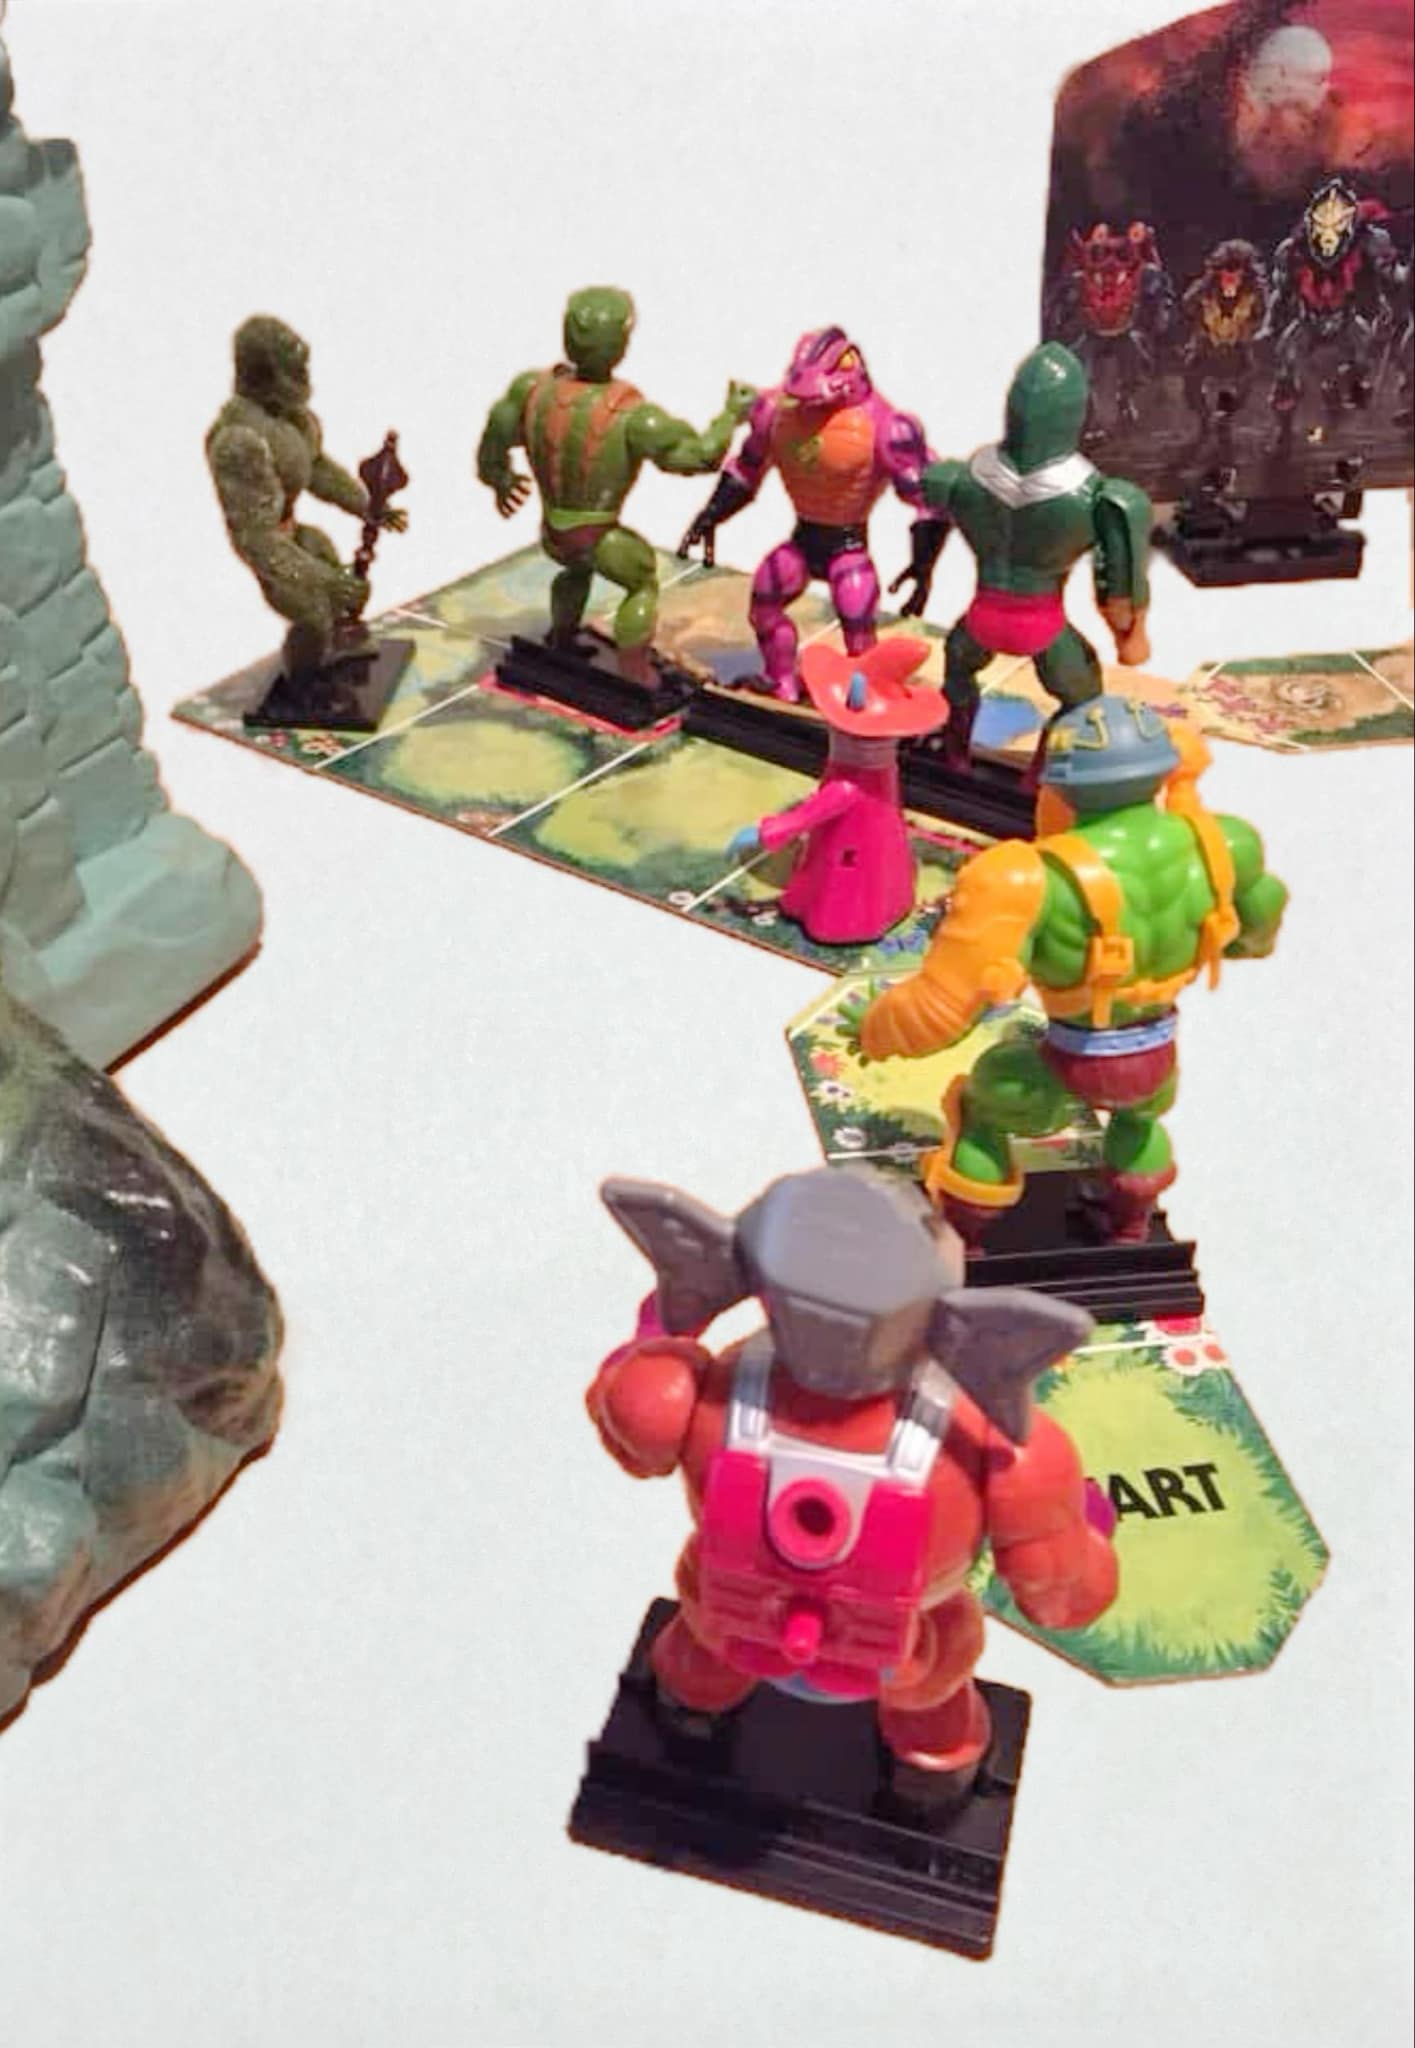
Choose one of the Heroic Warrior figures as your playing piece and insert it into a plastic stand (see figure 4). Then put your playing piece near the START area but not on it until it is your turn.
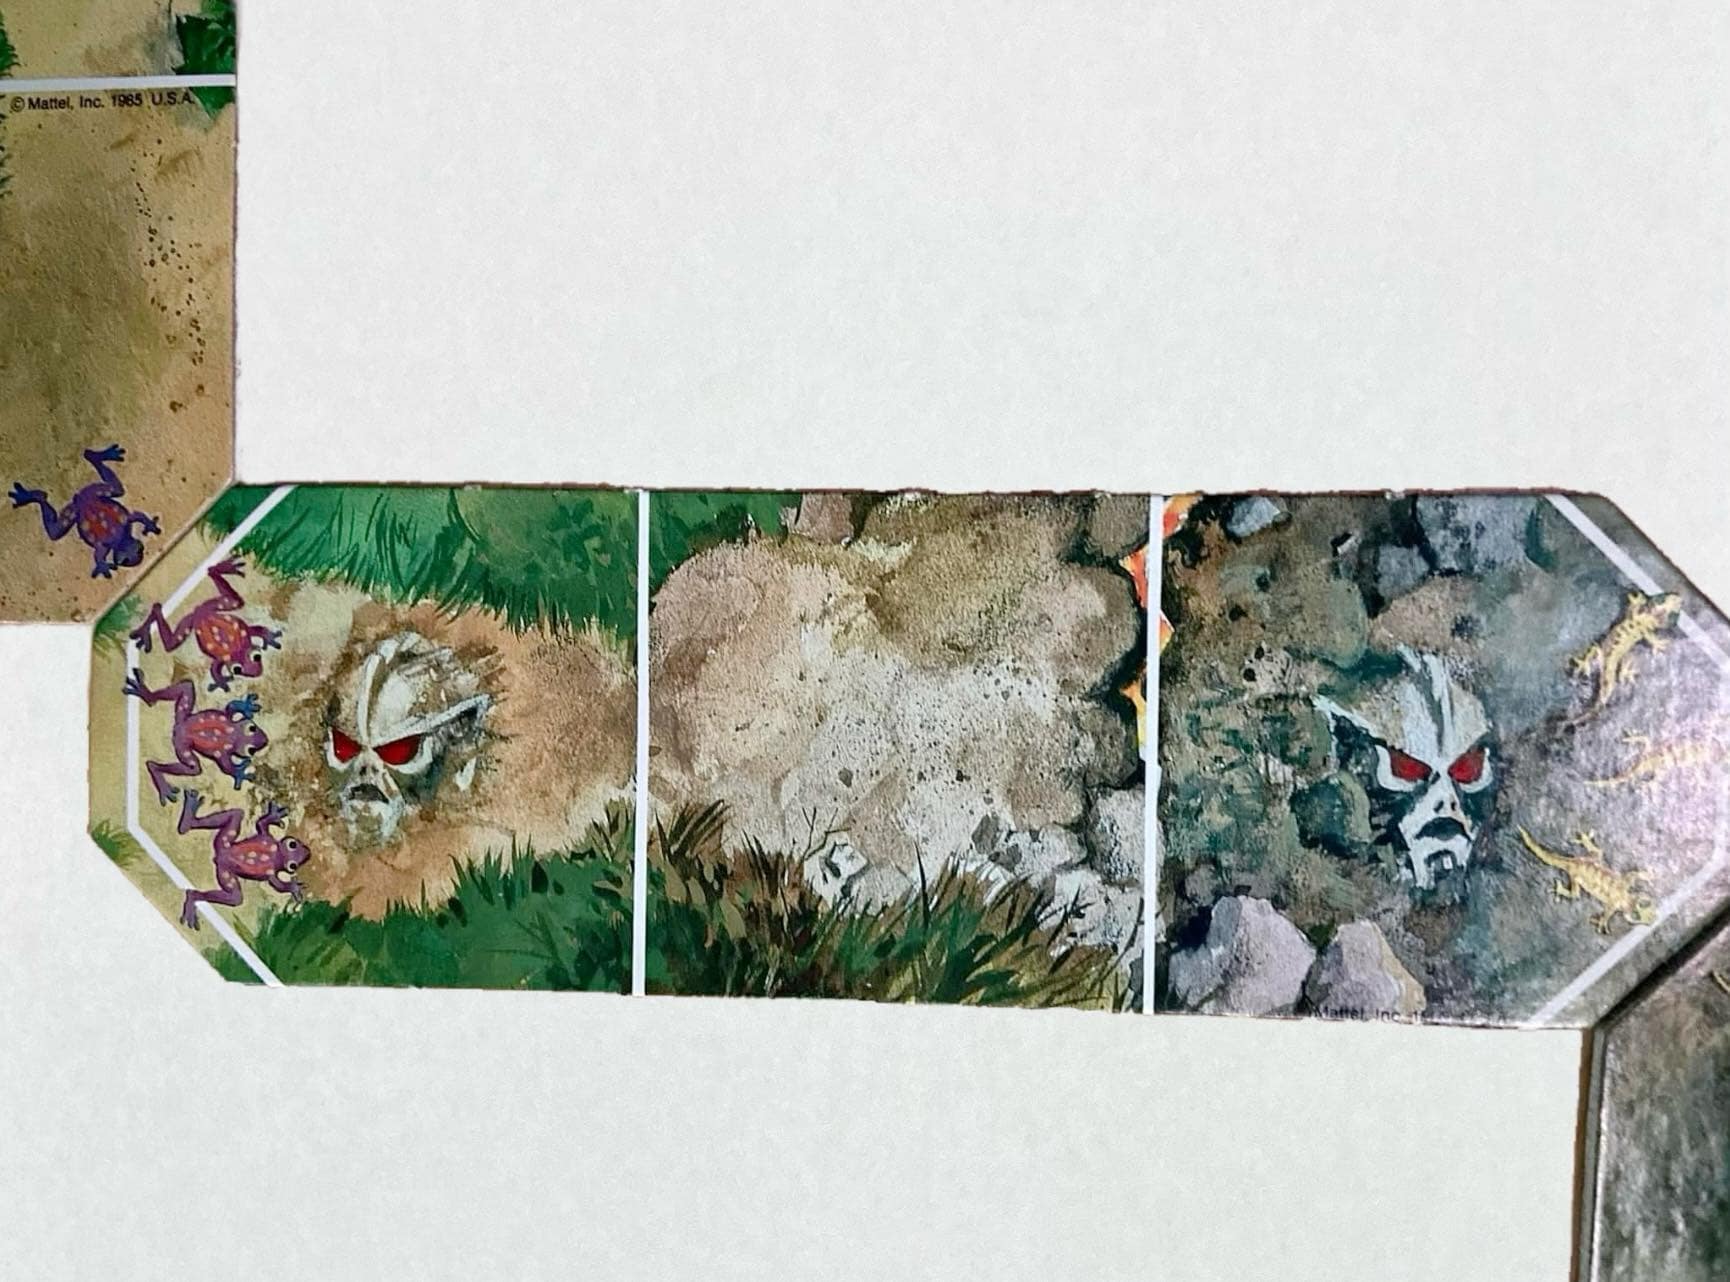
Insert the 8 Evil Warrior figures into plastic stands. Place them on the purple footprints along the path so they face the same direction as the footprints.
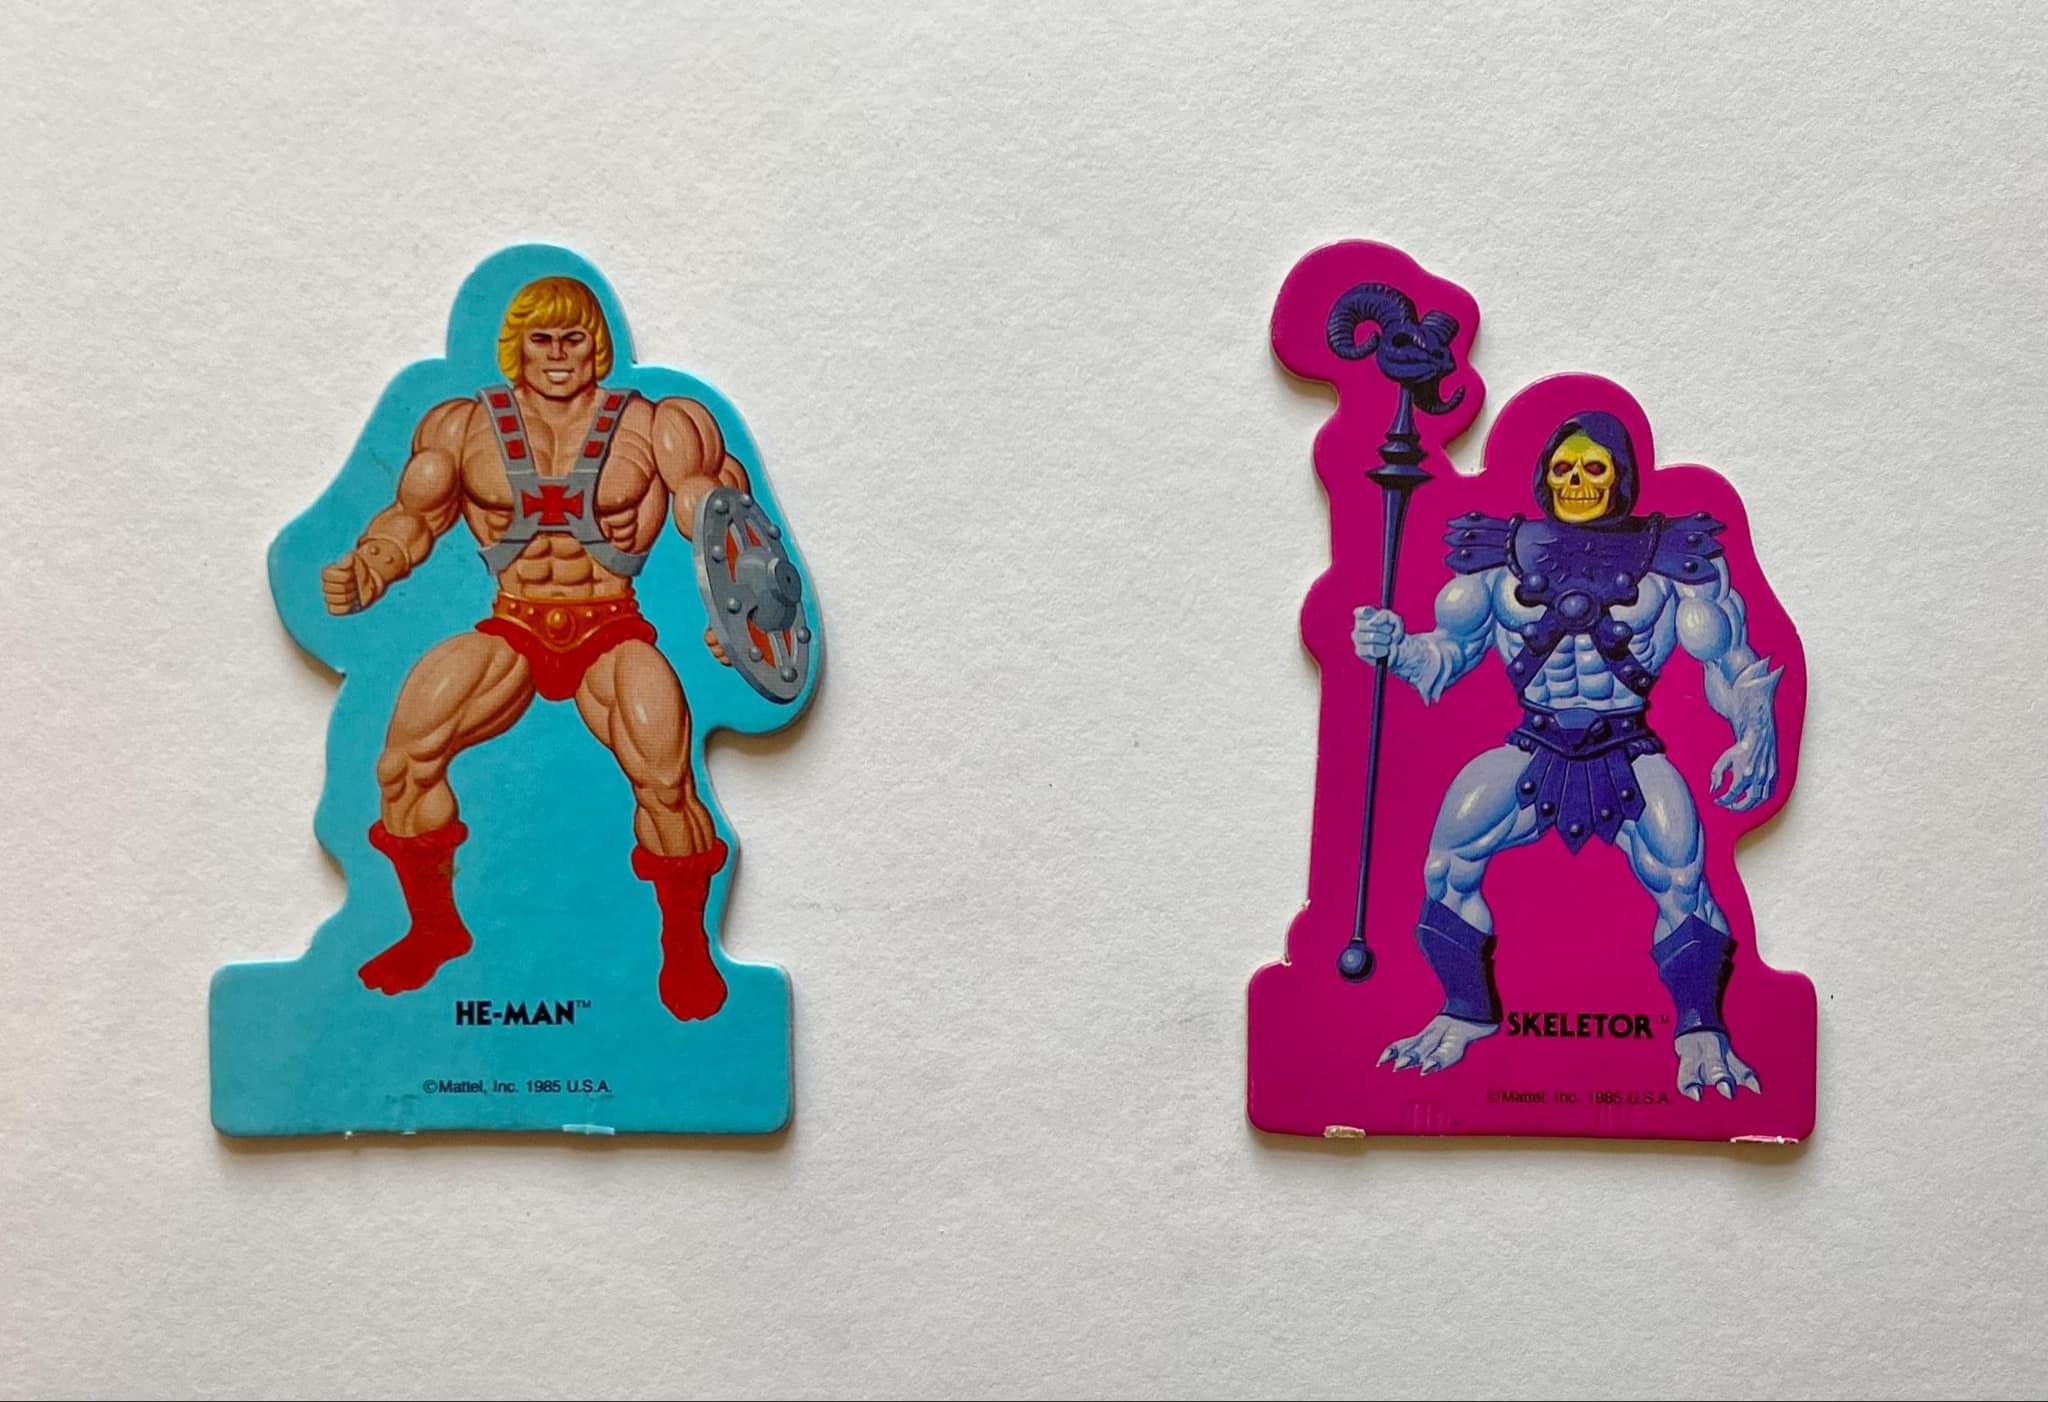
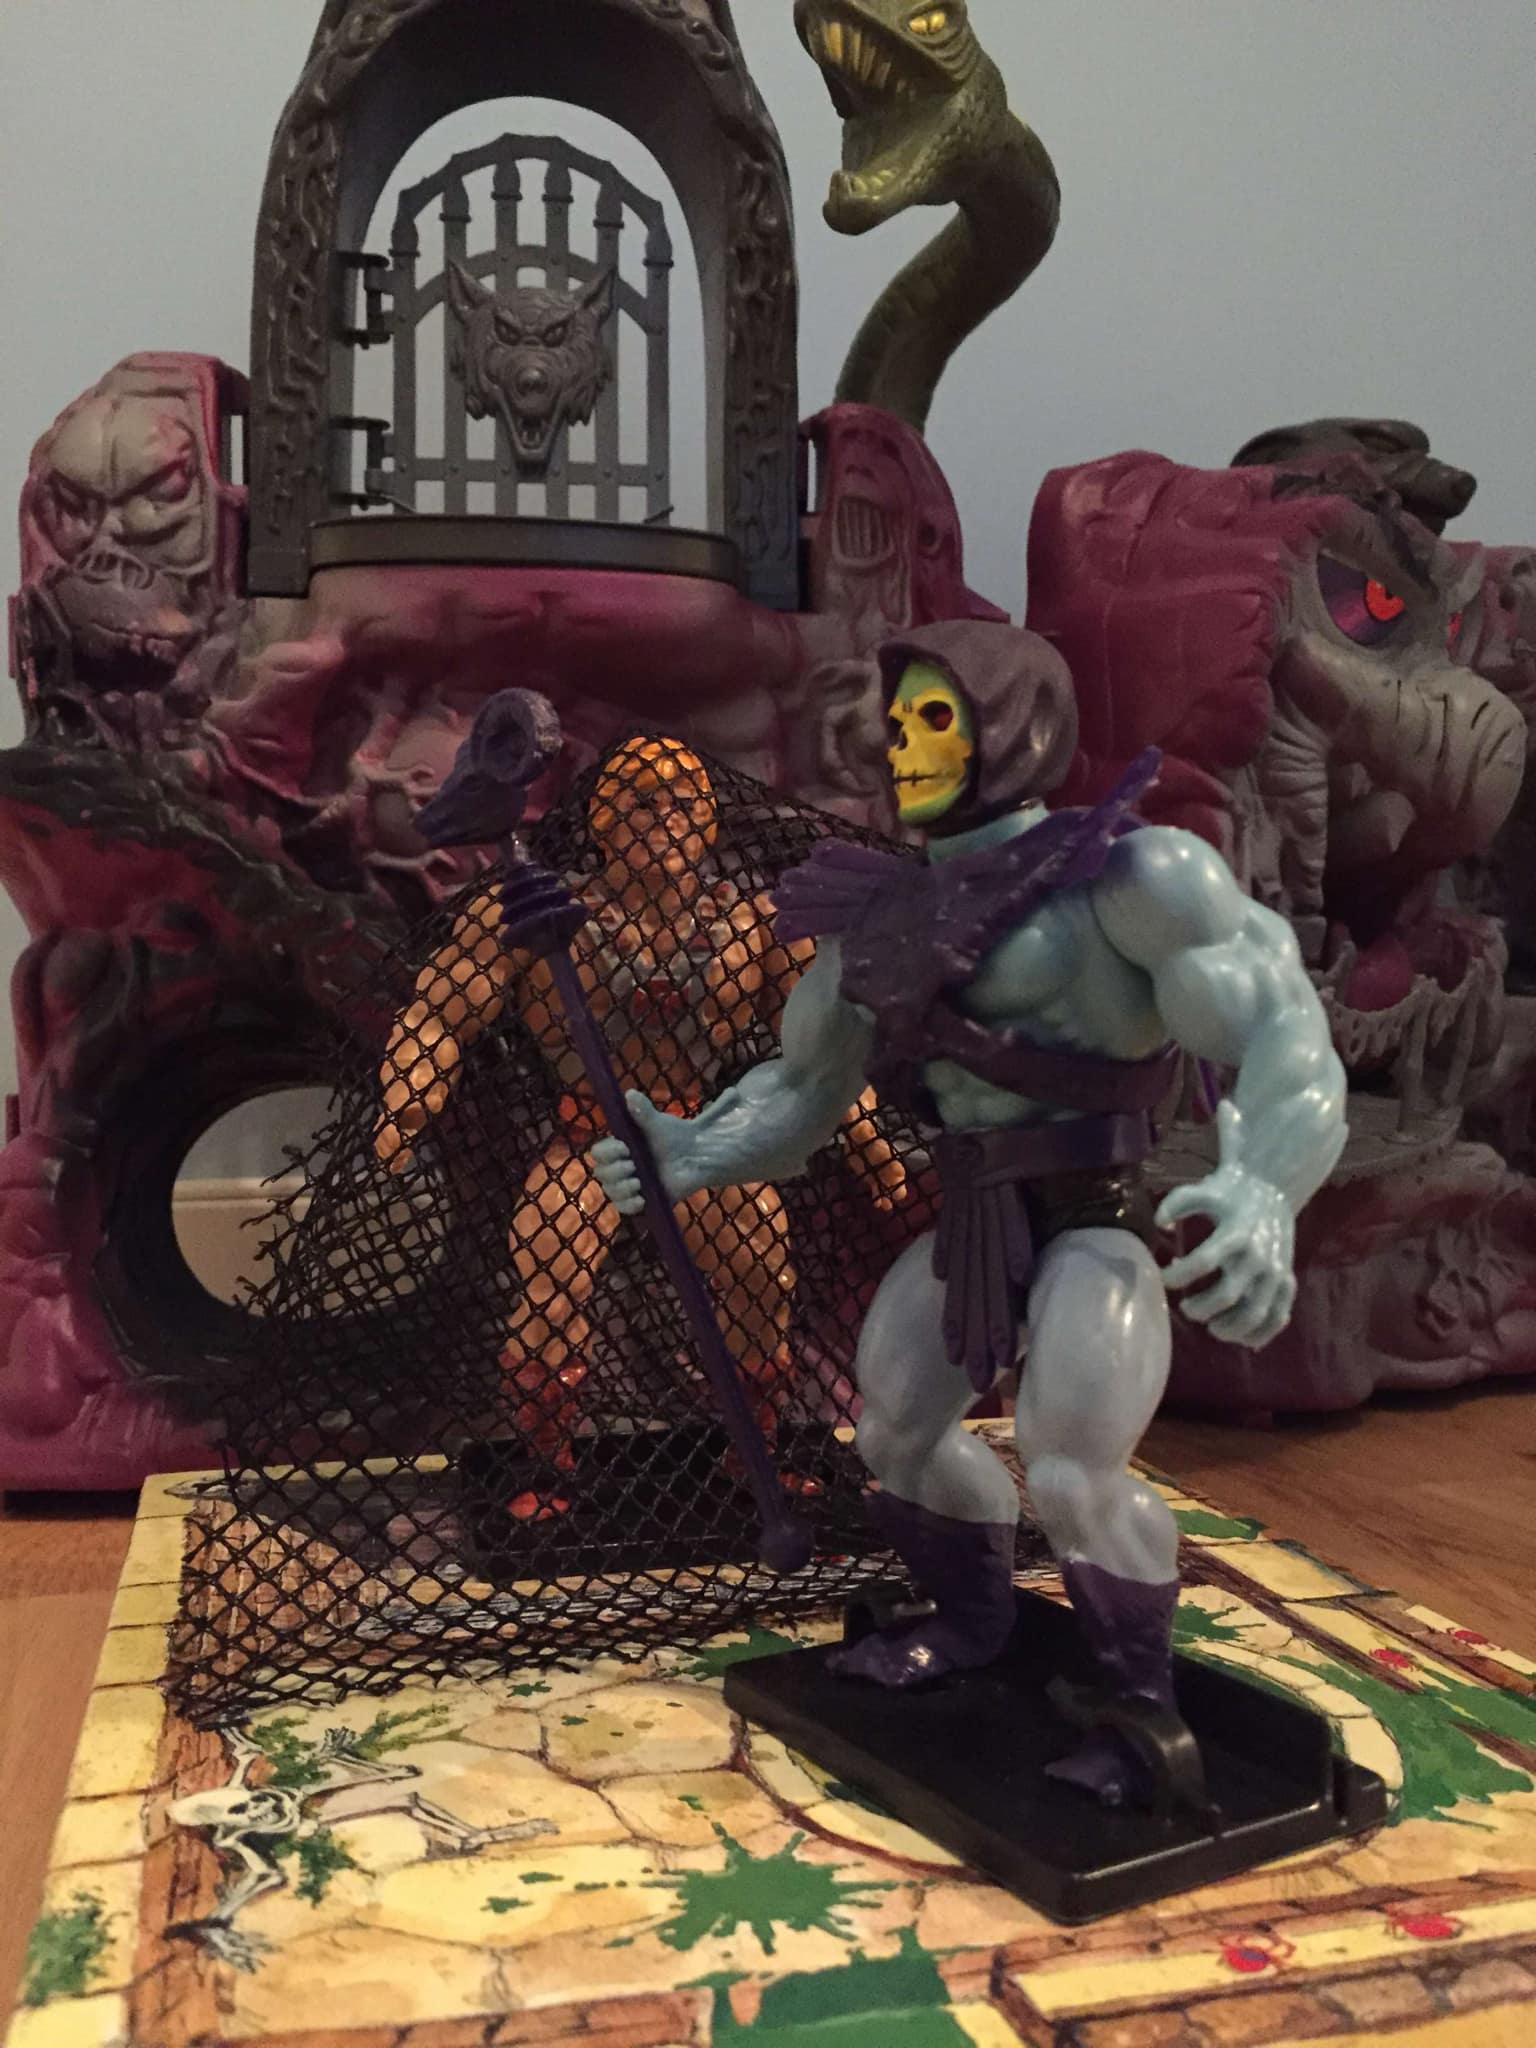
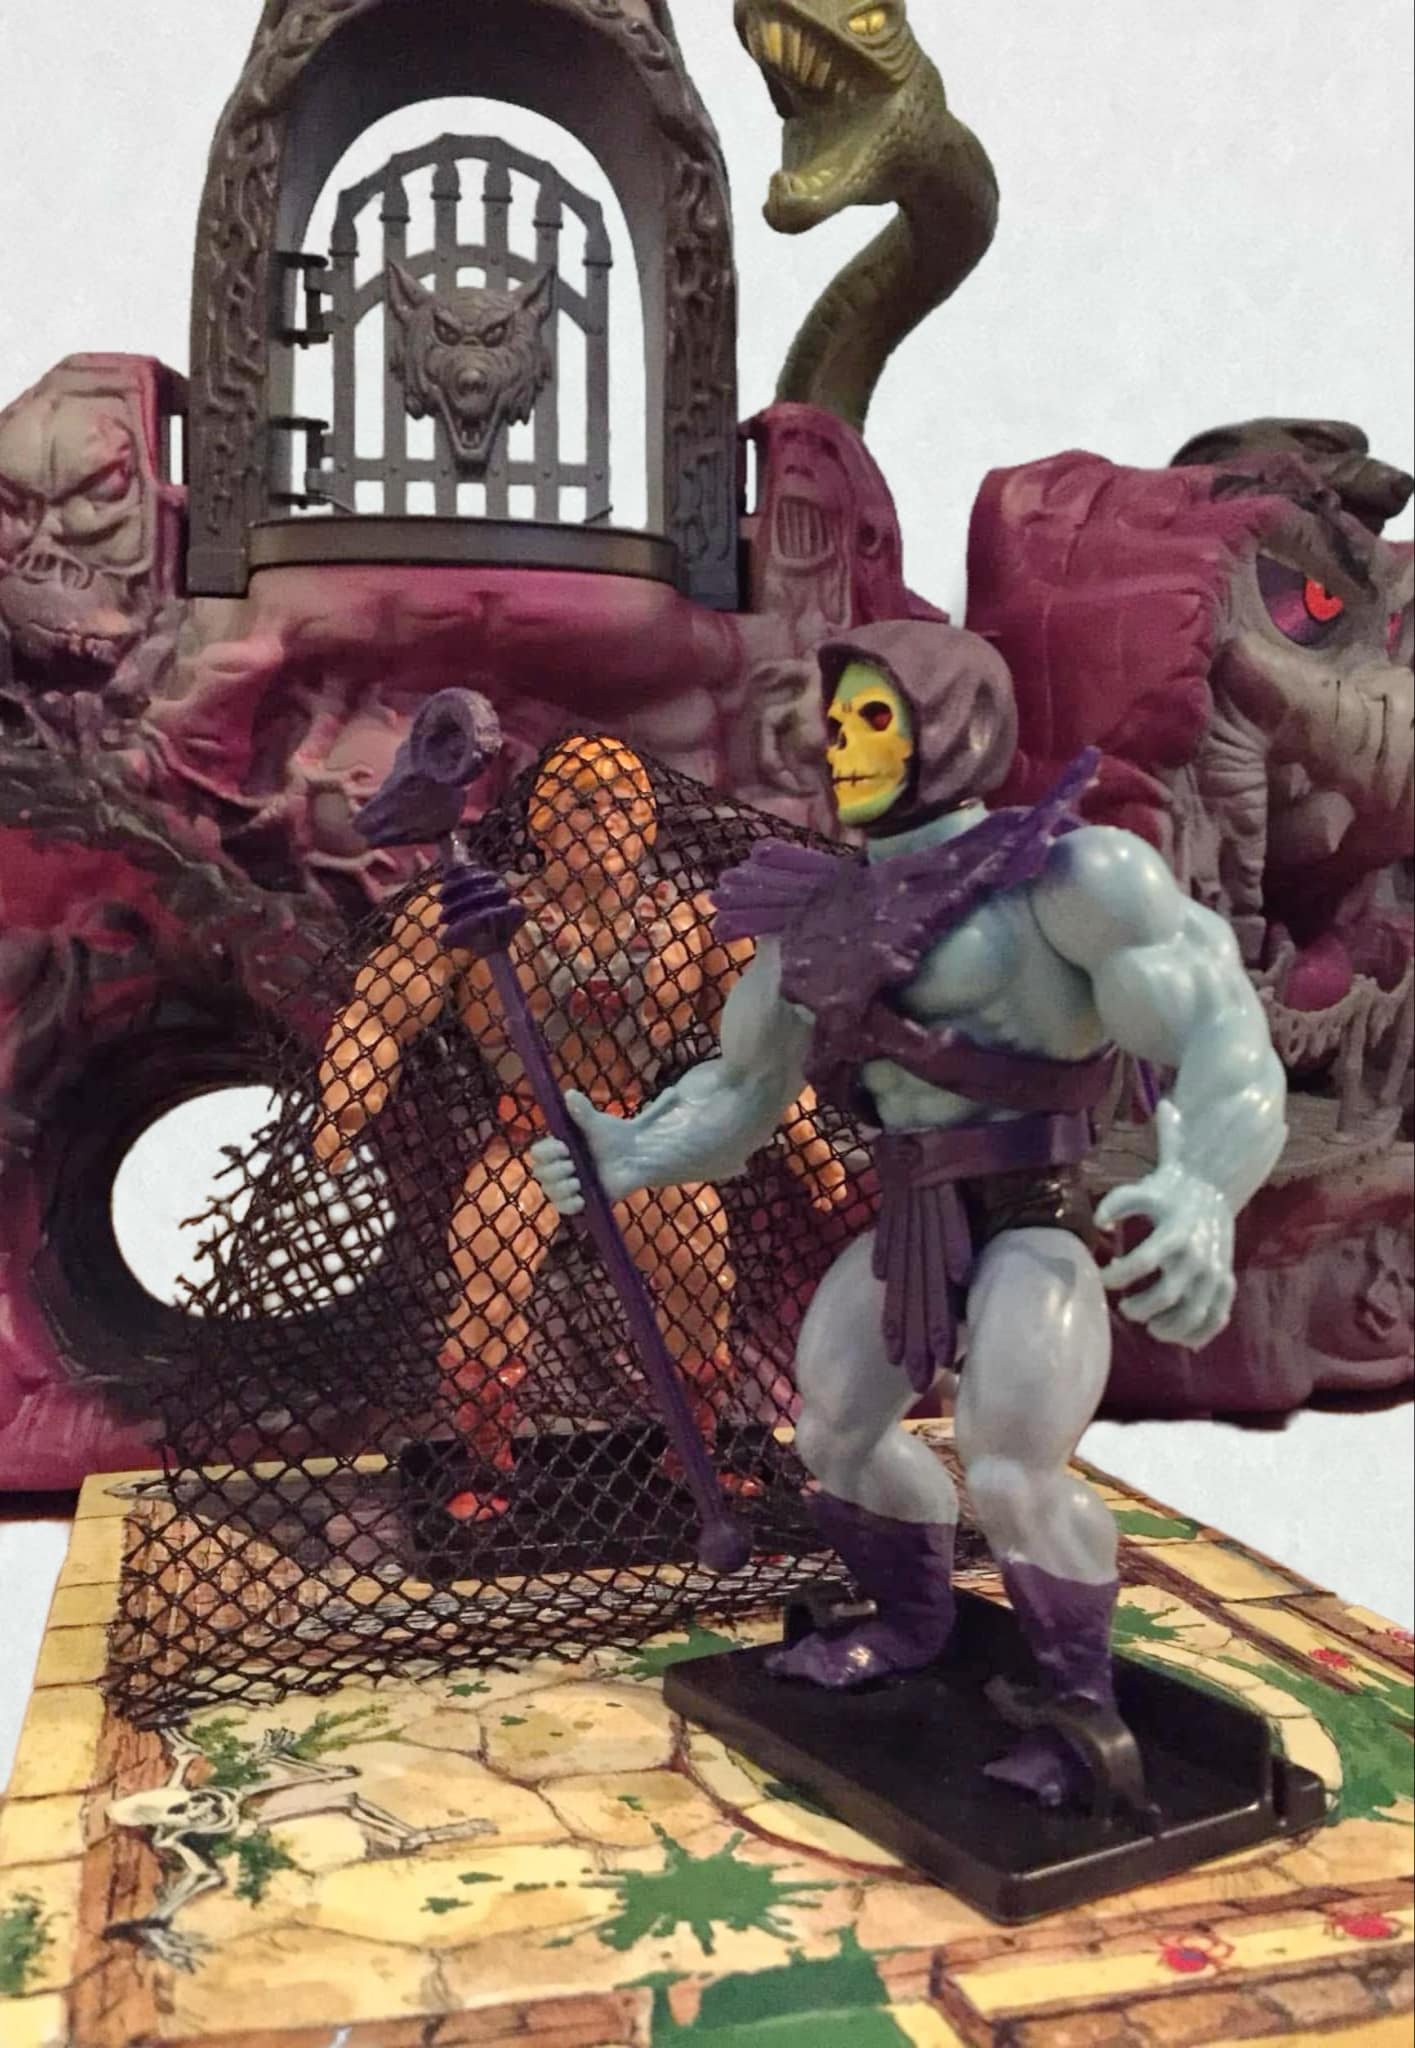
Insert the Skeletor and He-Man figures into stands and place them on the Evil Lair (the raised platform). Put Skeletor on top of the Skull symbol and the captive He-Man in the “Pit” covered by the net. NOTE: You can substitute your own Masters of the Universe® Action Figures for some or all of the cardboard Playing Figures included in the game. The same stand will hold either one. See figure 4.
Place one Plastic Sword on the stand at the foot of each Evil Warrior.
Assemble spinner as shown in Figure 3.
Assembling the Trap:
Referring to figure 5 on the assembly sheet, attach the plastic Plate (A) to the side of the Trap Board (B) which says “MOUNT PLATE HERE.” Be sure to line up tabs on the Plate with the 4 holes on the Board. Slide the Plate to the left to lock in place. Once it is properly locked in place, the two holes on the bottom of the Plate will be lined up with the two holes on the Board.
Snap the Trap Board and Plate firmly into the Trap Base as shown. Be sure the side of the Board with the Plate mounted on it is facing the Trap Base.
Attach the Randomizer Disk to the pin on the Trap Base and be sure it snaps into place. NOTE: It if doesn’t snap into place, try turning it over.
Snap the Trigger into place on the Trap Base as shown on the assembly sheet.
Stand the Trap Board upright so it locks (see figure 6) and place it in the first Trap Position along the path as shown in the layout diagram. Be sure the trap is facing the path as shown in figure 1. NOTE: During the game the Trap will move to a second position.
Playing the Game:
All players spin to see who goes first. The player with the highest spin starts followed by the person to their left and continuing in a clock- wise direction.
In your turn, place your Heroic Warrior Figure on the START area, spin the Spinner again, and move the number of spaces shown. NOTE: The START space itself does not count when you move for the first time.
Two Heroic Warriors cannot occupy the same space at the same time. If your spin would land you exactly on a space occupied by another Heroic Warrior, move ahead to the next open space.
Combat:
When your Heroic Warrior lands by exact count on a space with an Evil Warrior facing it you must do battle with him right away before your turn ends. Turn your playing figure toward the Evil Warrior and roll the Red and White Sword Dice. The White Die represents your Heroic Warrior while the Red one represents the Evil Warrior. There are 4 possible results from rolling these dice: a. 2 Blank Sides OR 2 Swords are rolled: tle, your turn continues and you are still in combat. You must roll the dice again. b. 1 Red Sword, 1 White Blank: you lose this battle and your turn ends. You must fight the Evil Warrior again in your next turn. c. 1 White Sword, 1 Red Blank: you’ve defeated the Evil Warrior and have won his SWORD. Pick it up (to use later) and remove the Evil Warrior from the board. Your turn is now over
NOTE: You will only be able to continue on your mission to rescue He-Man after you have defeated the Evil Warrior in combat by rolling a White Sword and a Red Blank.
On your first turn after defeating an Evil Warrior, turn your Heroic Warrior back around so it faces in the direction of movement and spin to move again. NOTE: If the Evil Warrior you have just defeated was blocking a SECRET PASSAGE, you will now be able to take a short cut (See below).
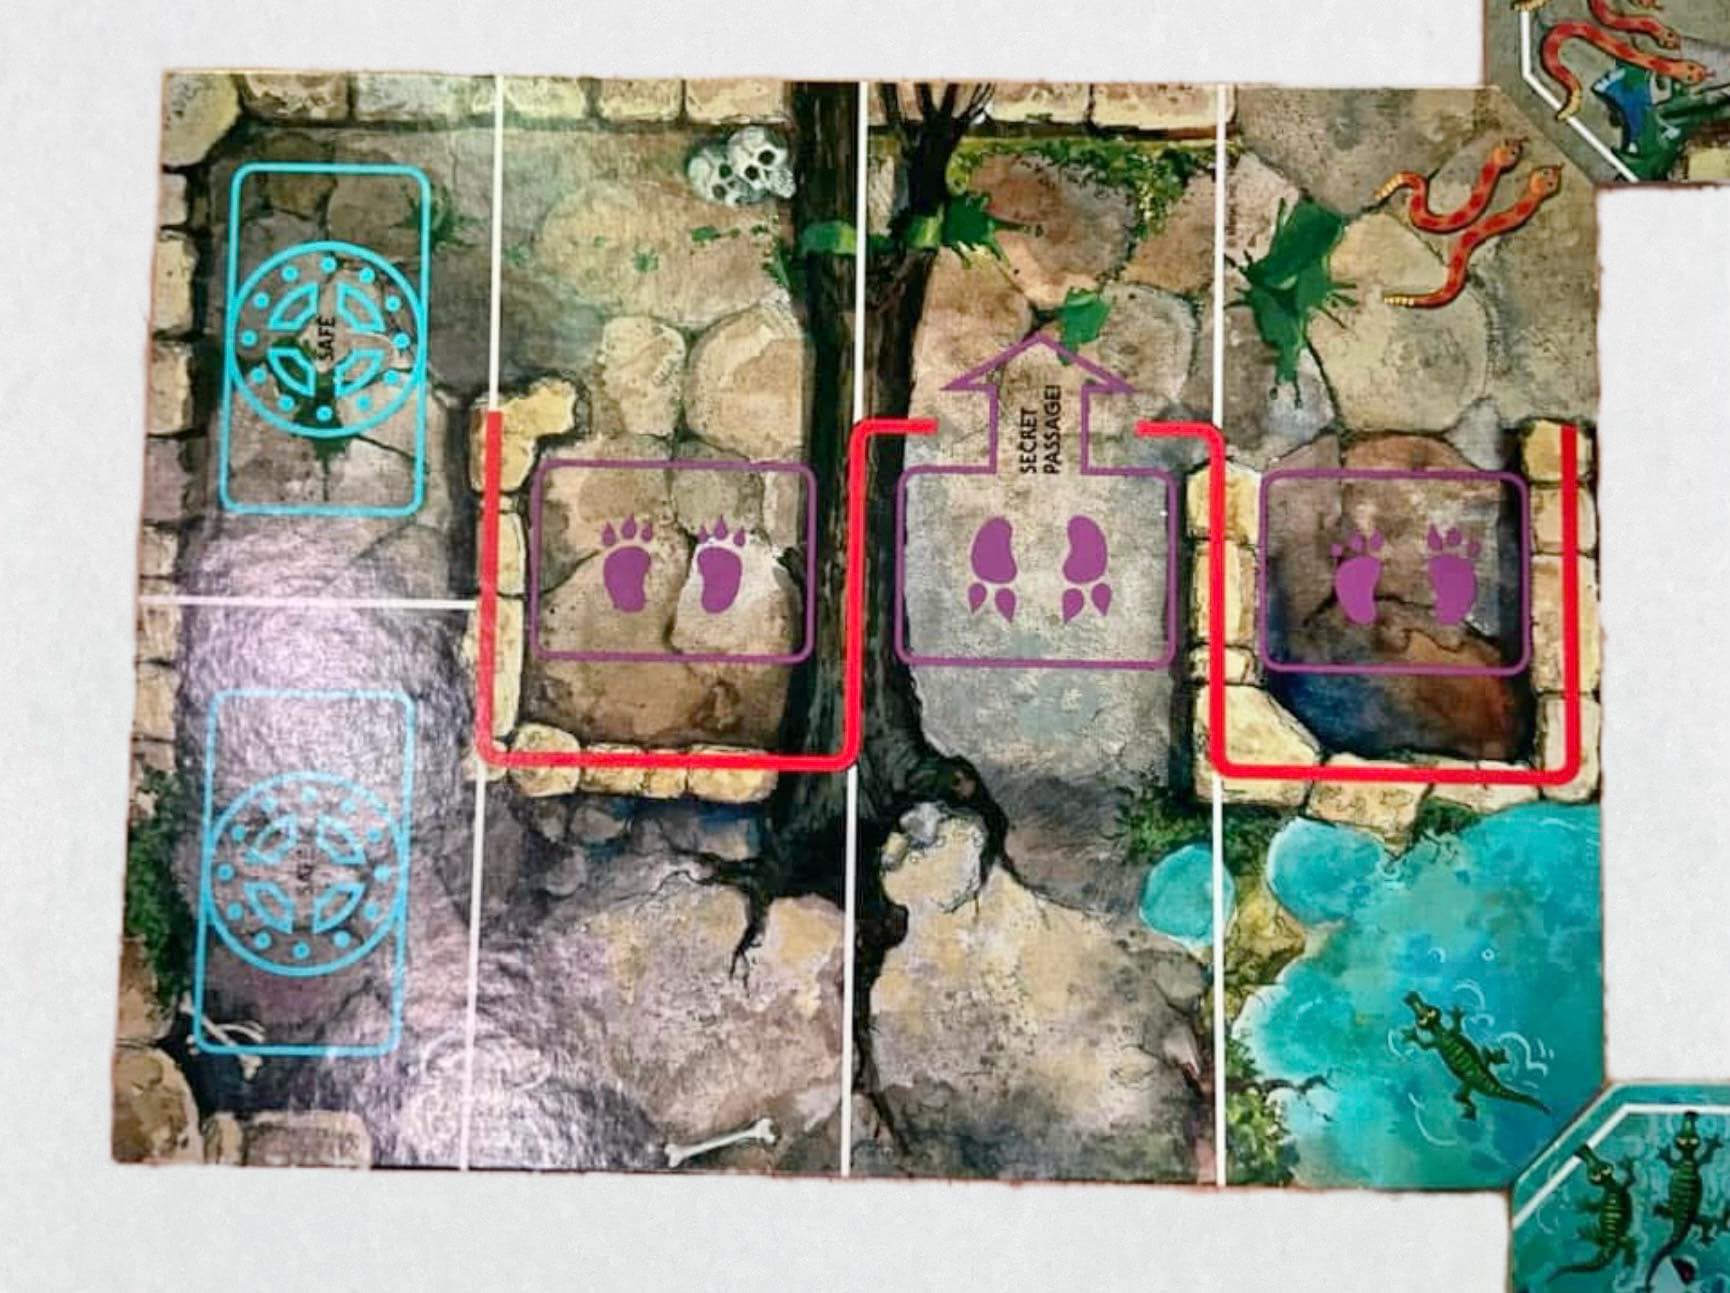
Secret Passage:
There are special SECRET PASSAGES in both the first and third cham- bers which are blocked by Evil Warriors at the beginning of the game. If you land on one of these spaces by exact count or if you are forced to land on it, you must defeat the Evil Warrior in a dice-rolling battle before you can pass (follow the arrow). You can’t go through the passage until your first turn after you win the battle. If there is no Evil Warrior guarding the passage when you land there by exact count, simply move through it on your next turn. NOTE: The part of the passage where your Heroic Warrior lands and the Evil Warrior stands guard are in fact only one space when moving through the SECRET PASSAGE.
Trap:
In front of each trap position on the path are two spaces with pictures of HORDAK. If the Trap is In position when you land on one of these spaces by exact count, then in that same turn you must spin the Randomizer Disk on the Trap and press the Trigger to see if it goes off. BE SURE TO LET THE RANDOMIZER DISK STOP SPINNING BEFORE PUSHING THE TRIGGER. NOTE: The random-action Trap will only go off some of the time. You won’t know if it will spring until you push the Trigger.
If the Trap goes off when the Trigger is pressed, it will fall forward and any Heroic Warriors who are standing on the three spaces in front of it. Every Warrior who is hit by the falling Trap must go back to the nearest unoccupied SAFE space, starting with the player whose Warrior actually set it off. Other Warriors who were hit by the Trap are then moved back to a SAFE space according to the order of the players’ turns. If all SAFE spaces are occupied, the Warrior must be moved back to START.
After the Trap has sprung, and all the Heroic Warriors who were hit have been moved back to SAFE spaces, reset it by pushing the board back upright and locking it into place. Now it is ready to trap other victims who land there.
If the Trap does not go off when the Trigger is pressed, you are safe for the moment. However, you still might set off the Trap on your next tum, or you could be hit if someone else springs it while you are still within range.
In the middle Chamber there is a space with a SENSOR beam across the path. If you are the first player to land on this space or to pass through it, you cause the Trap to move to the second TRAP POSITION (see layout diagram). When you pass through the SENSOR, you must pause while the Trap is moved to its new position and set. You can then finish your turn if you have more spaces to move.
EXAMPLE: If you spin a 5 and land on the SENSOR after 3 spaces, you must pause, move the Trap, and be sure it is set. Once the Trap is in its new position you can move your last 2 spaces.
After the SENSOR has been triggered and the Trap has been moved, the HORDAK spaces in front of the first TRAP POSITION are safe for the rest of the game. Now if someone lands there nothing happens. Once the Trap has been moved the SENSOR is also a normal space.
Fighting Skeletor:
When you enter the Evil Lair, you must immediately engage him in battle. Roll your White Sword Die and his evil Purple Die. When fighting Skeletor, there can be no ties: you either win (by rolling a White Sword and Purple Blank) or lose (by rolling 2 Swords, 2 Blanks, or a Purple Sword and White Blank).
If you lose the dice battle to Skeletor, one of two things can happen:
a. You can stay in the Evil Lair by surrendering a SWORD that you won earlier by defeating an Evil Warrior. To do this, put the SWORD back on the stand of one of the defeated Evil Warriors and place the Warrior back in the game on the open space with purple footprints closest to the Lair. From then on, other Heroic Warriors who land on that space must defeat the Evil Warrior to get his SWORD and move ahead. Once the Evil Warrior and SWORD are in place your turn ends, but your Warrior will still be in the Evil Lair to challenge Skeletor again on your next turn. NOTE: An Evil Warrior can only be put on a space that doesn’t already have a Heroic Warrior on it. b. If you lose your dice battle to Skeletor and do not have a sword, you must retreat to the first unoccupied SAFE space and your turn ends.
If you throw a winning roll and DEFEAT Skeletor, you free He-Man and win the game!
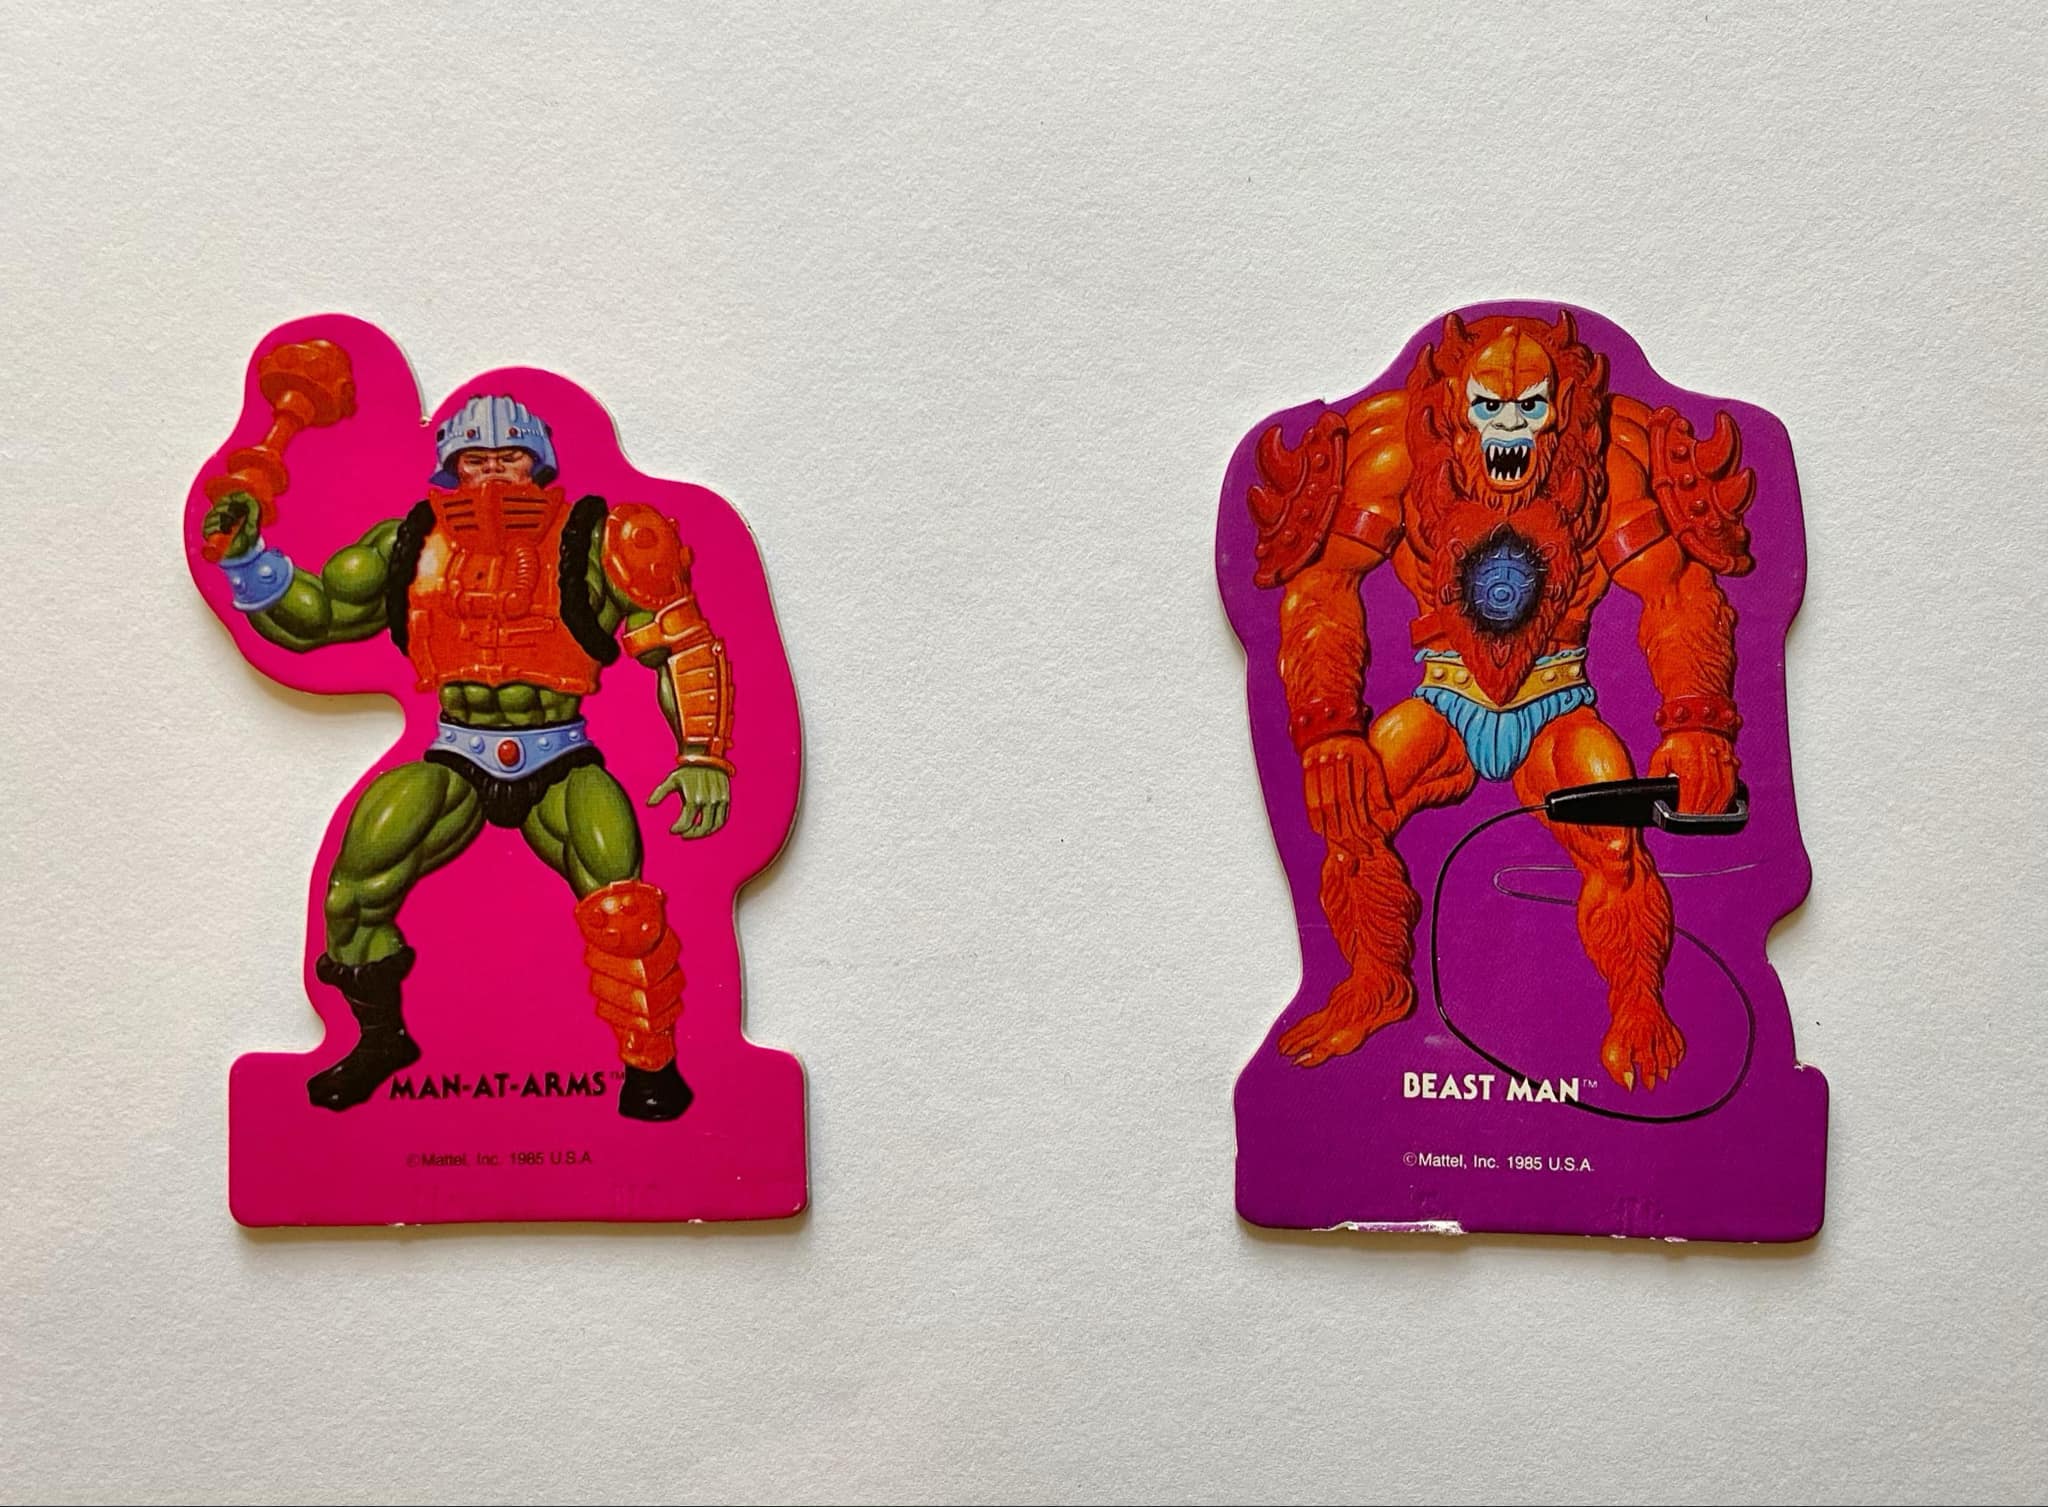
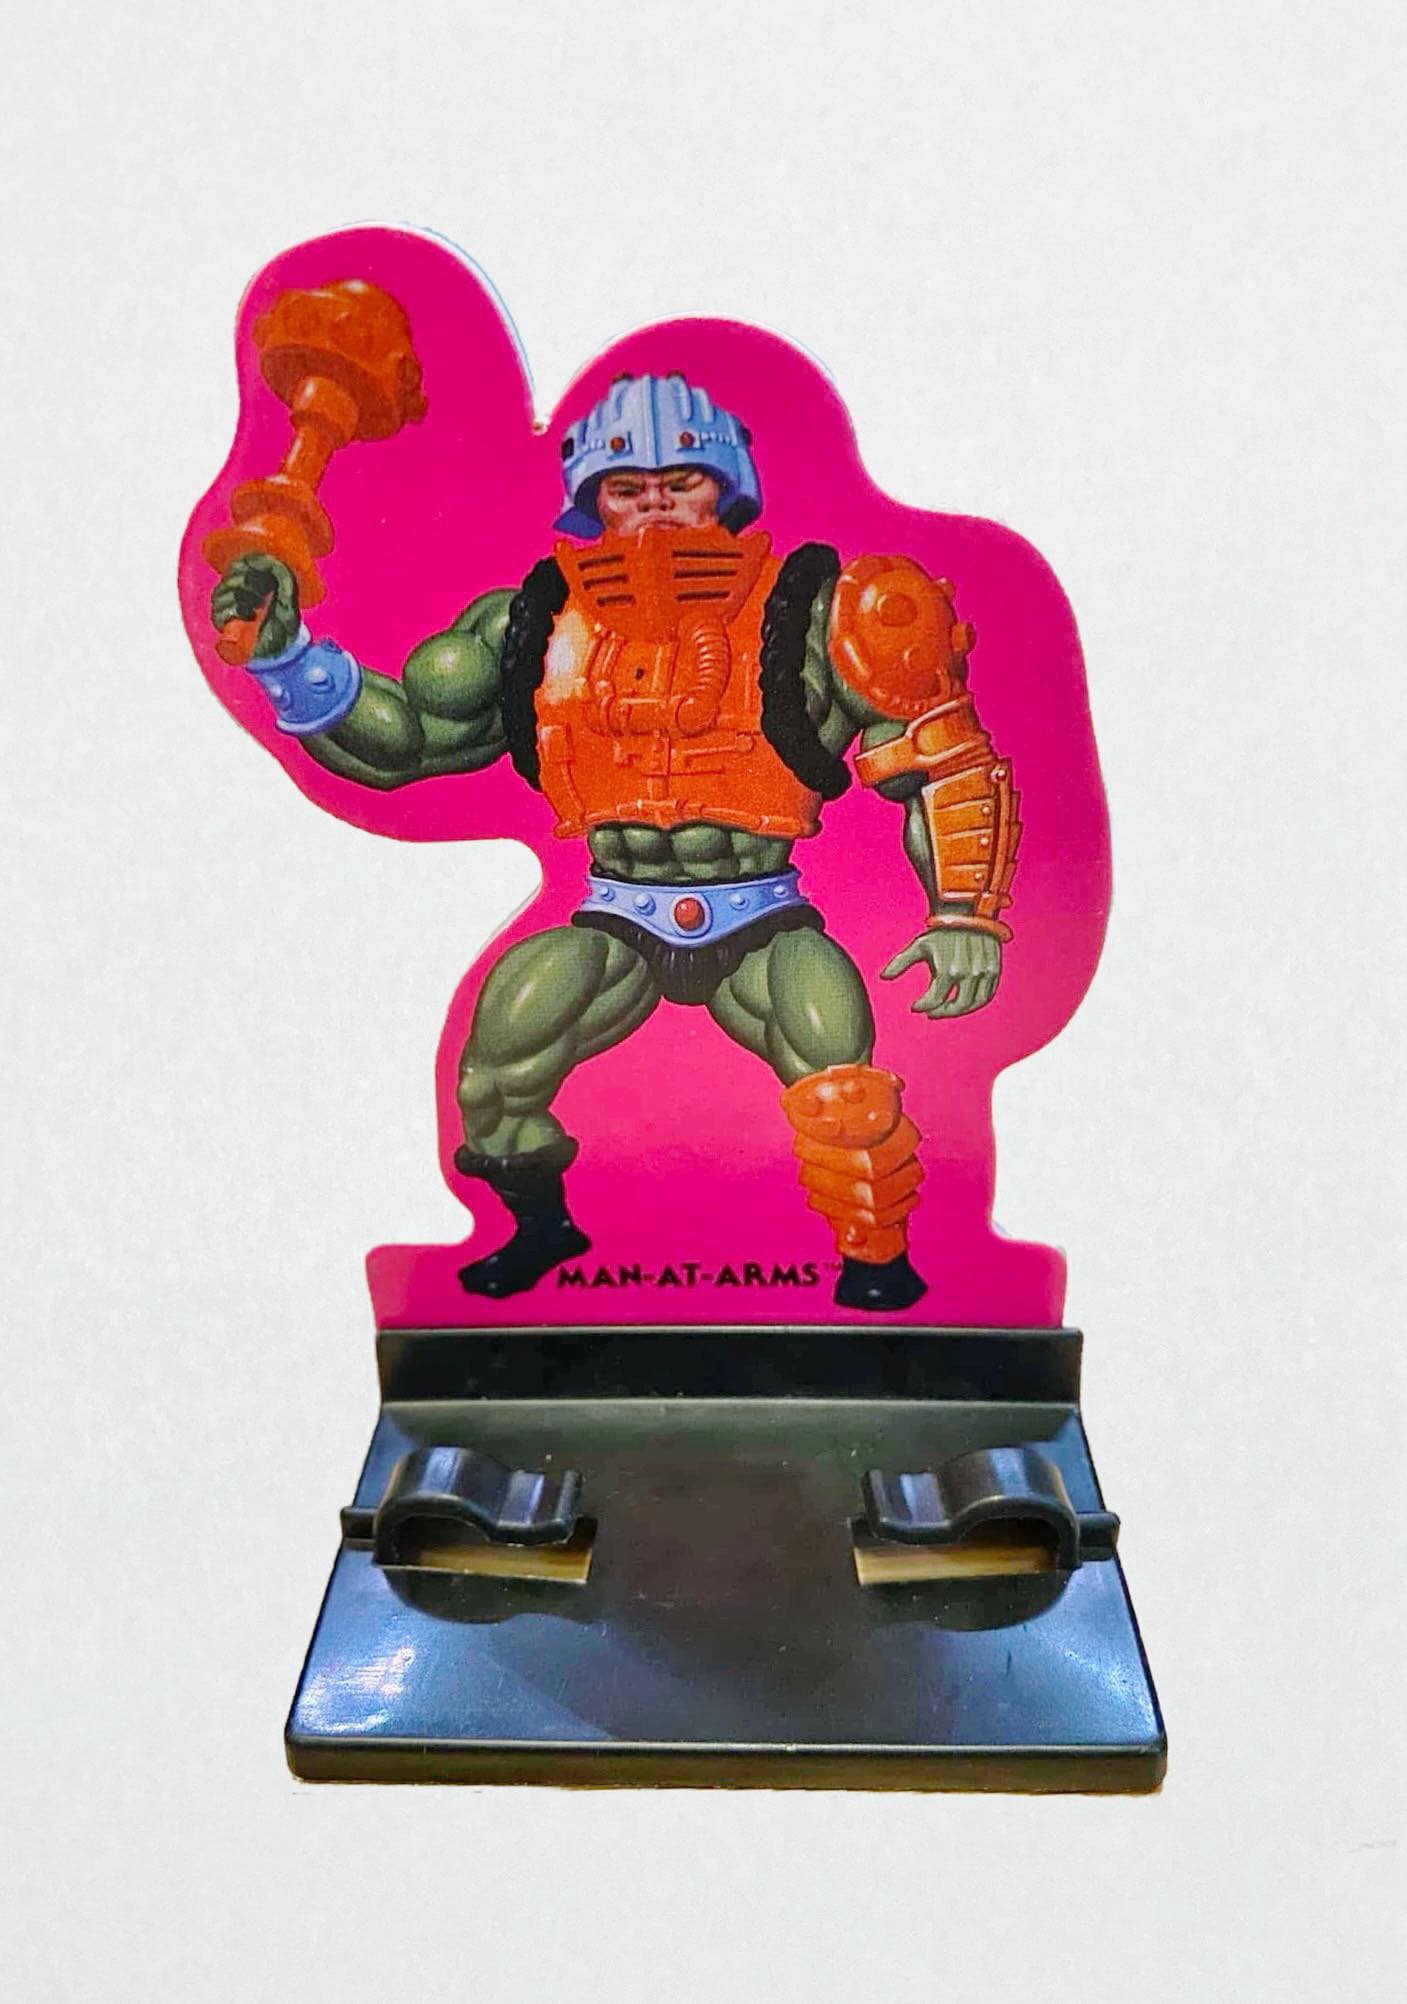
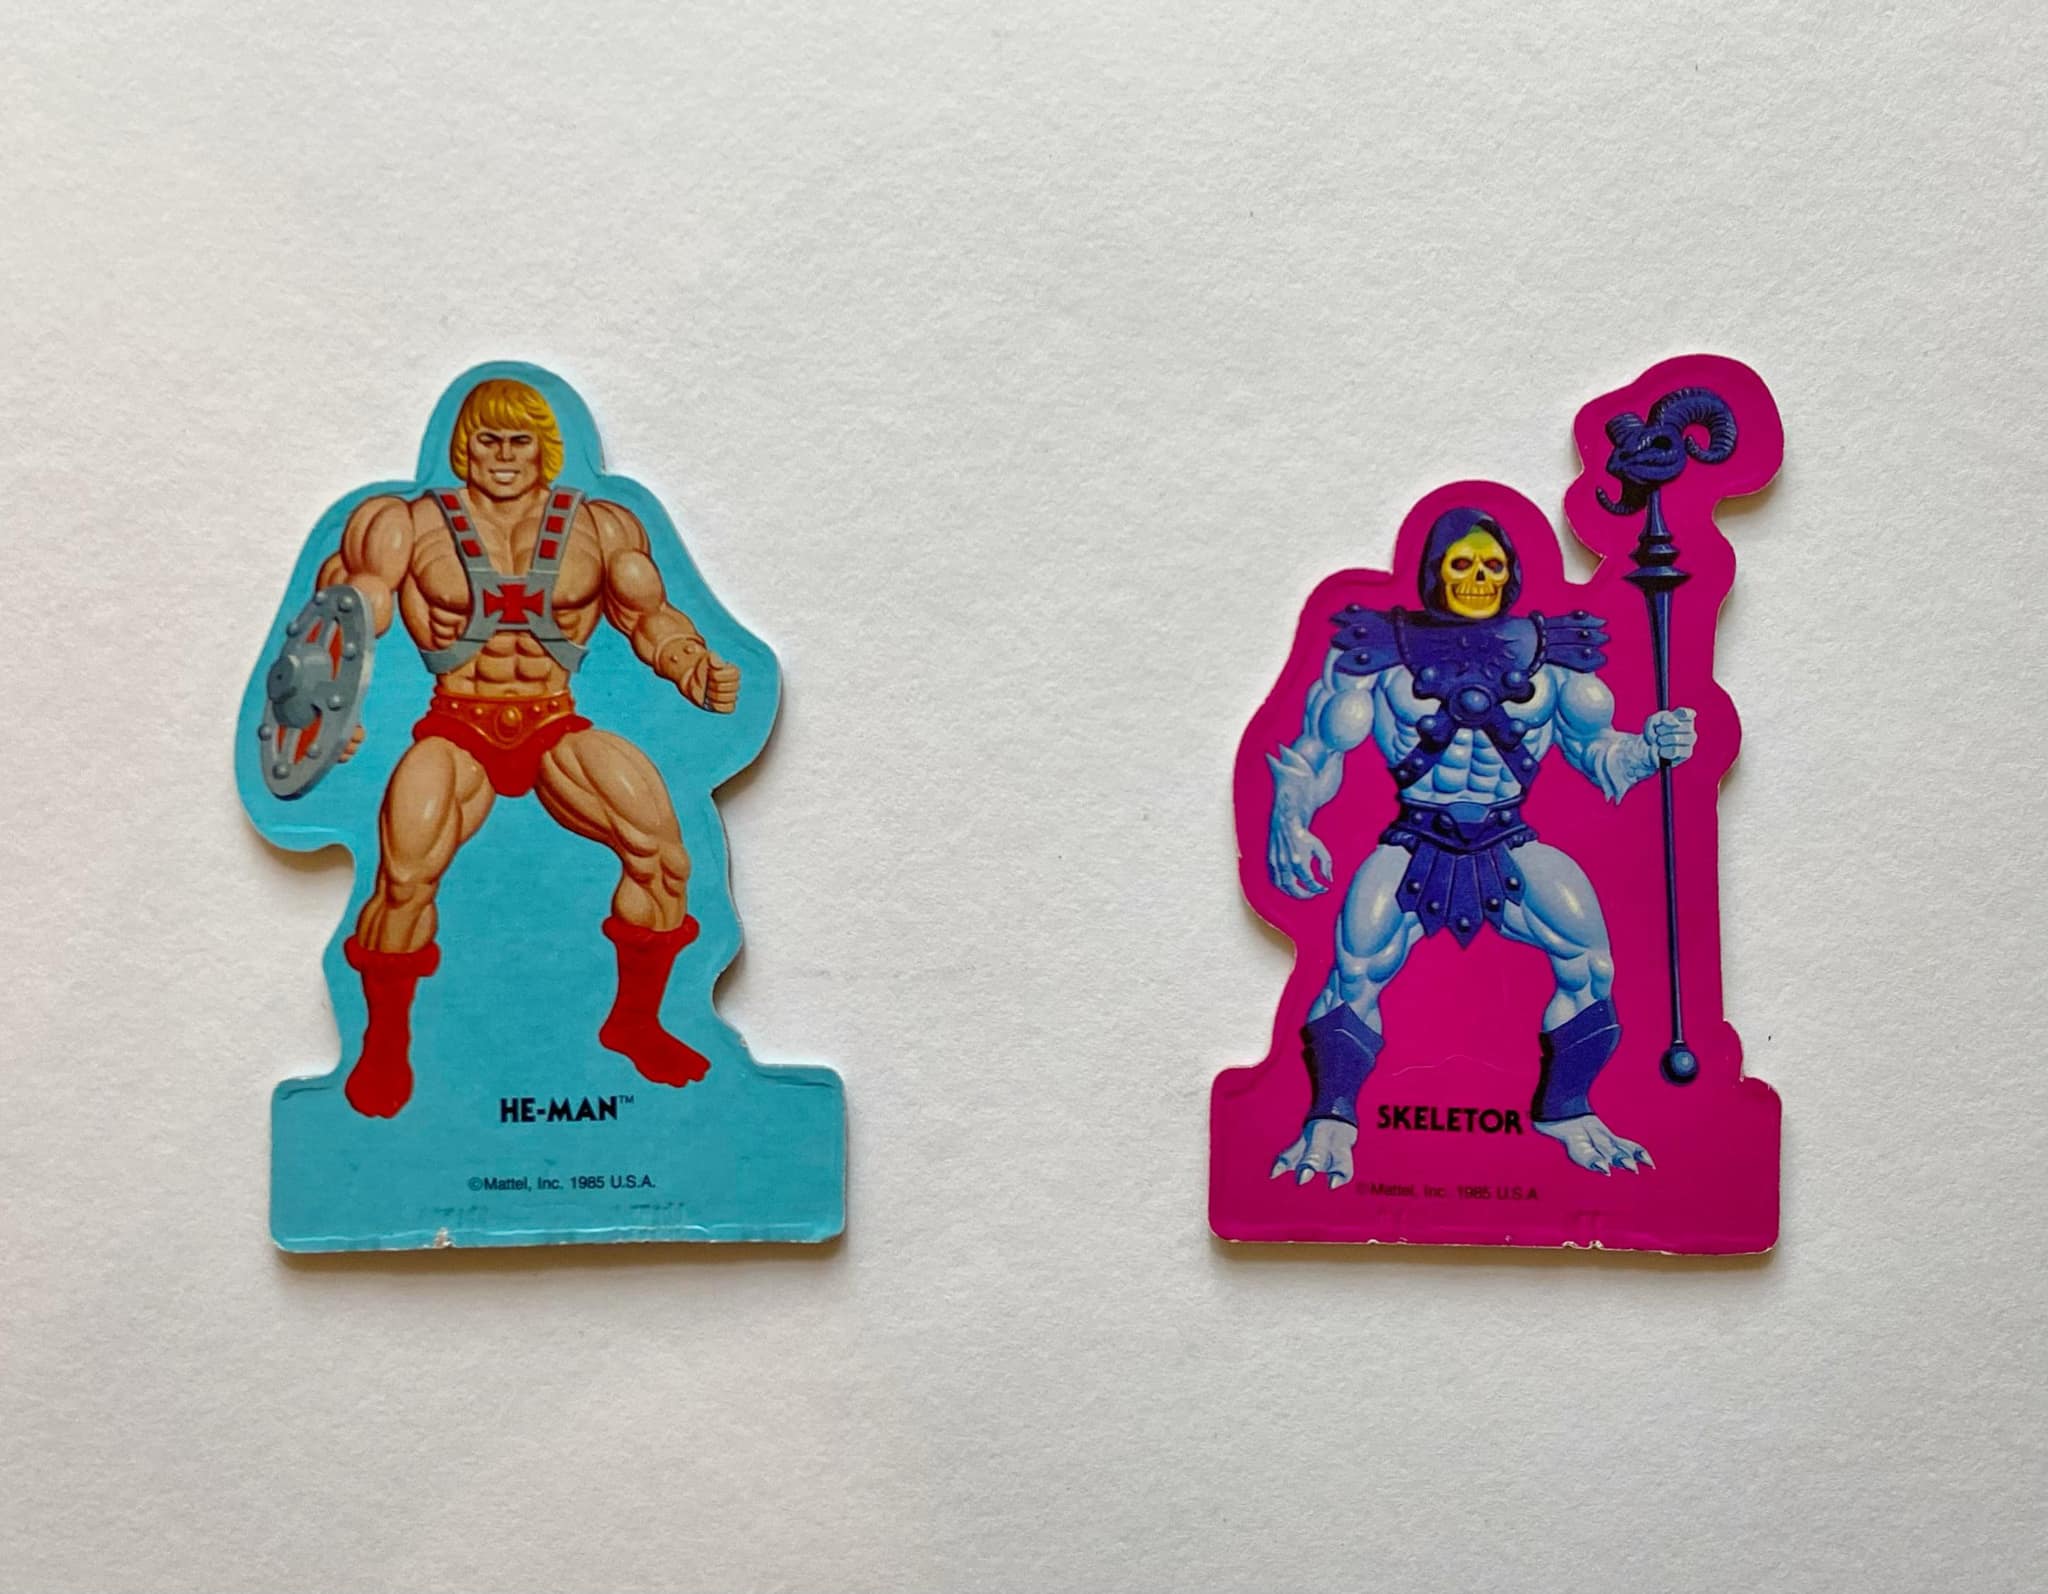
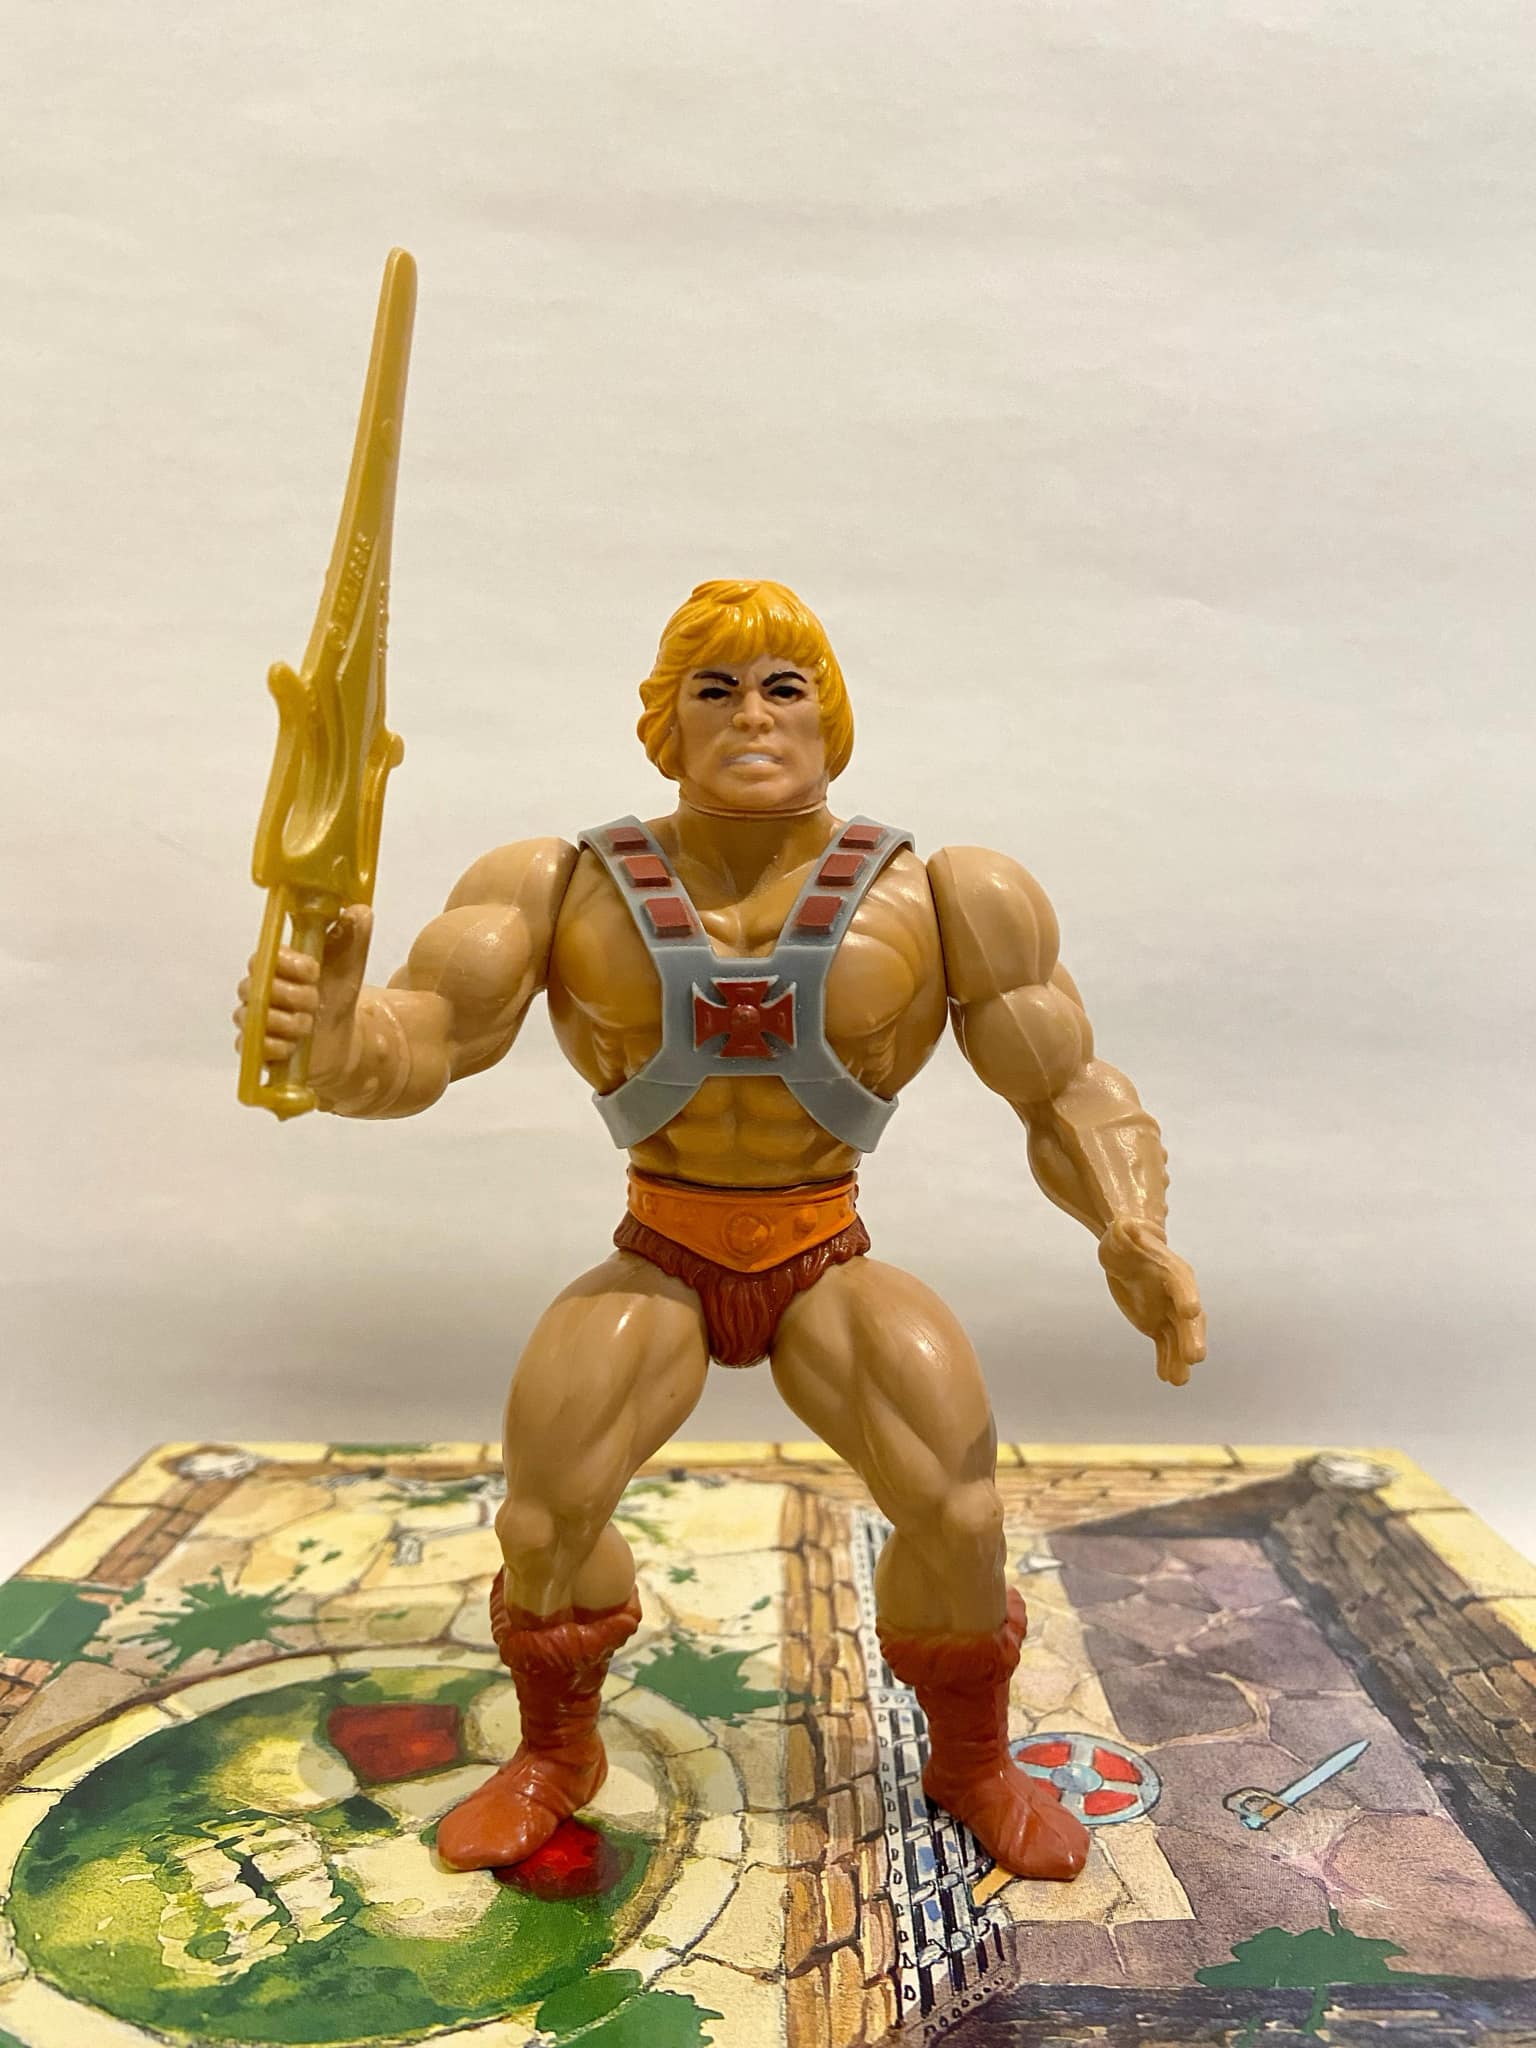
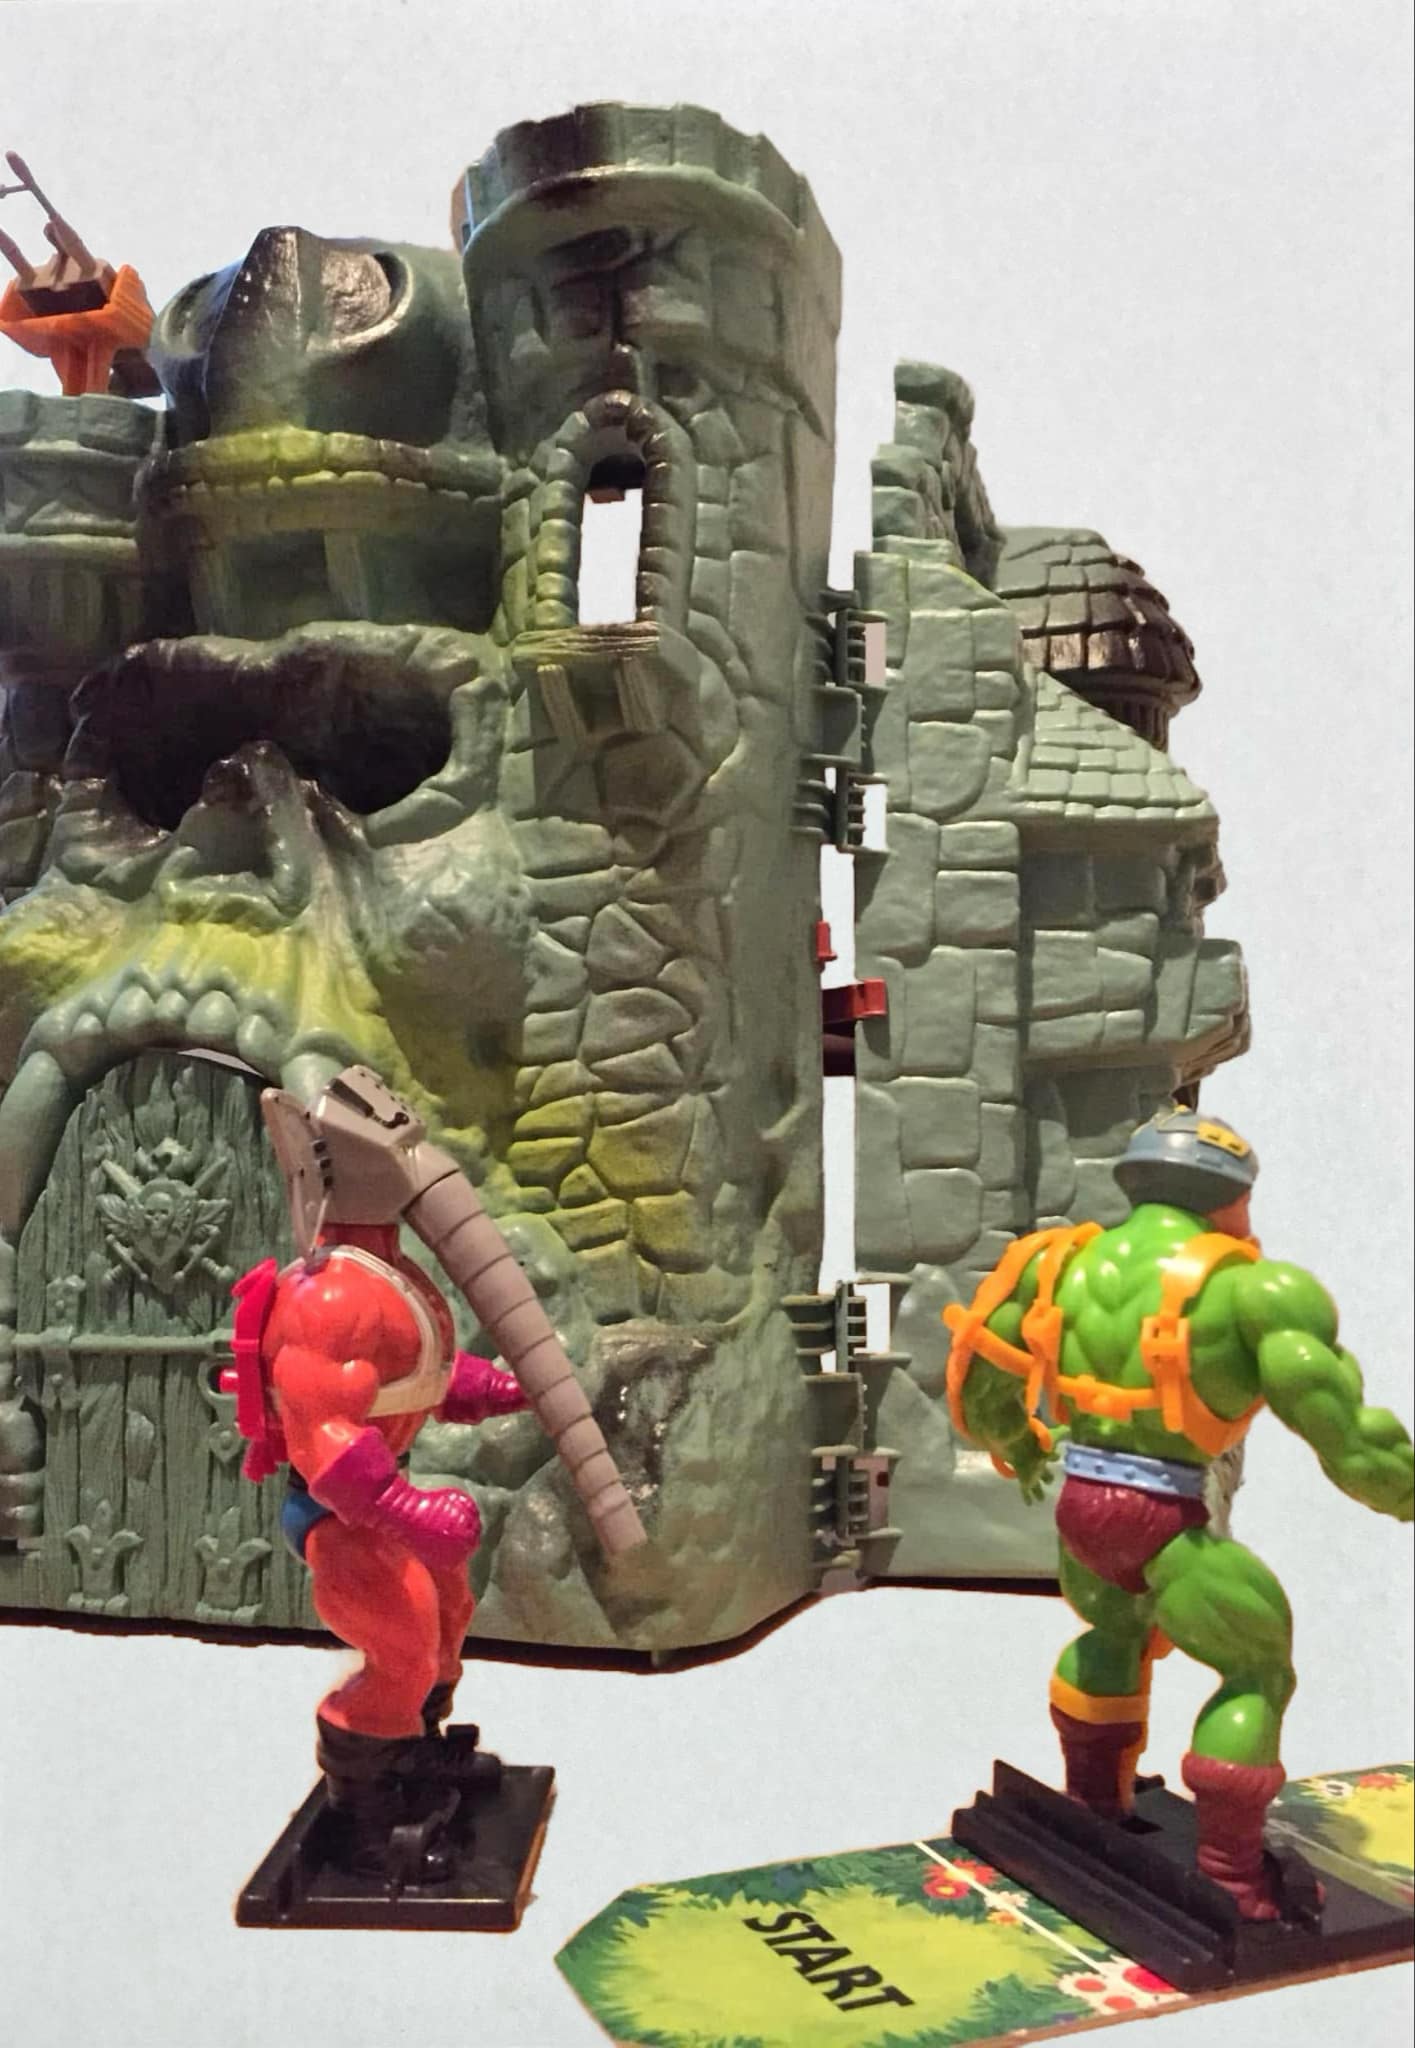
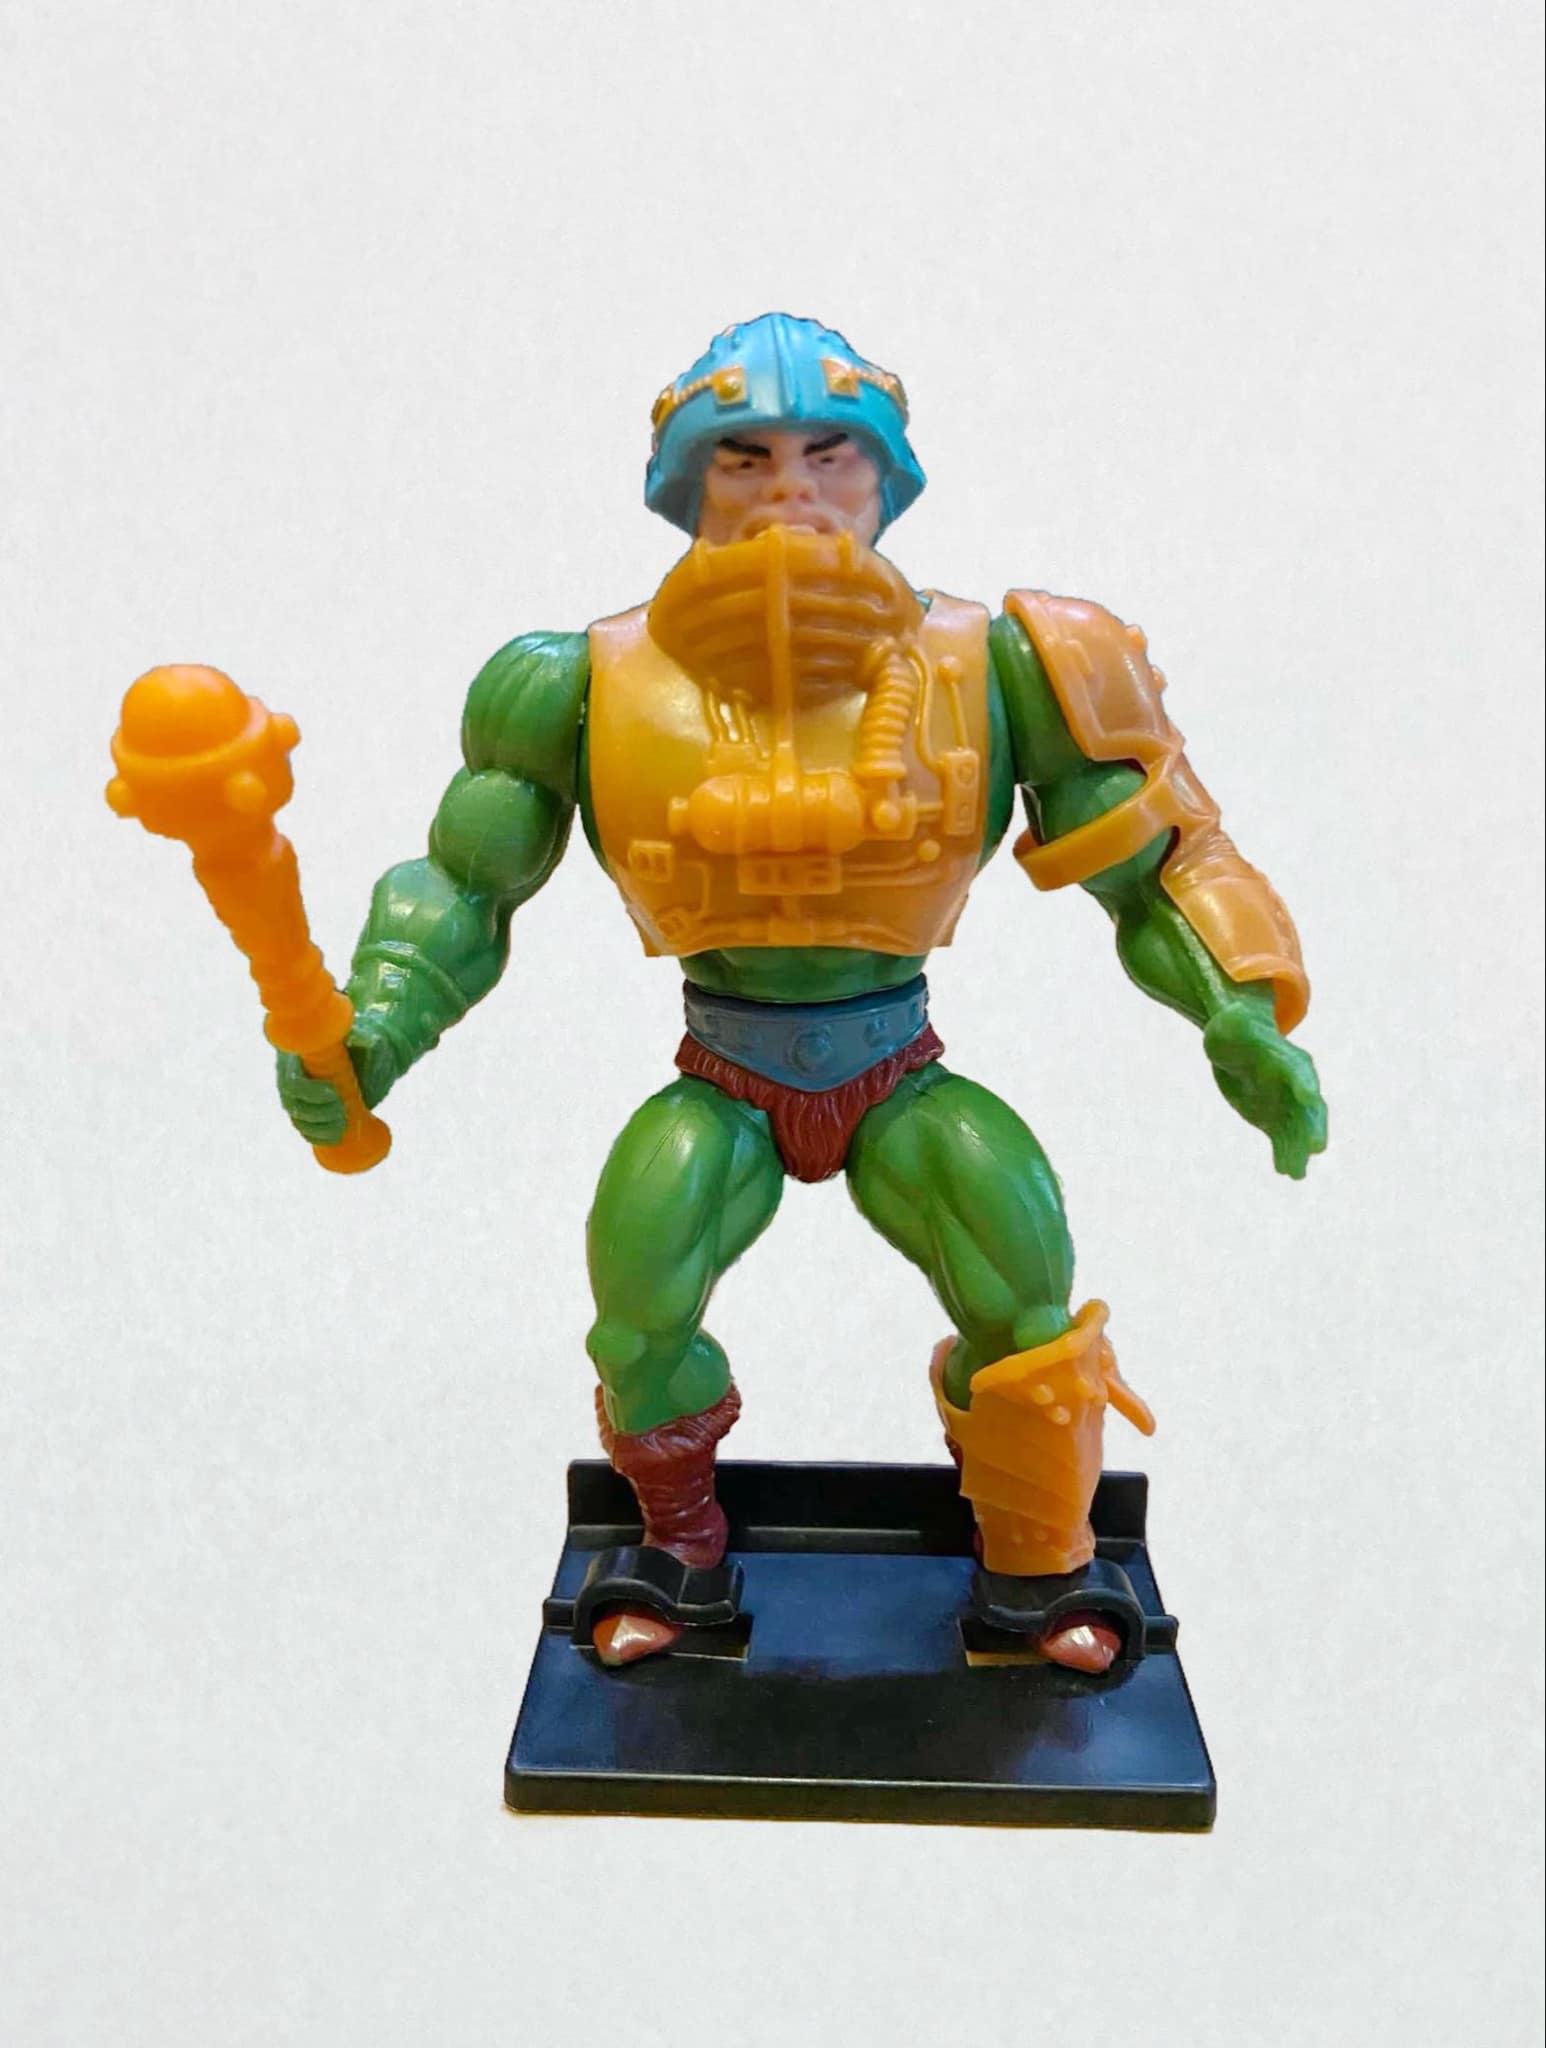
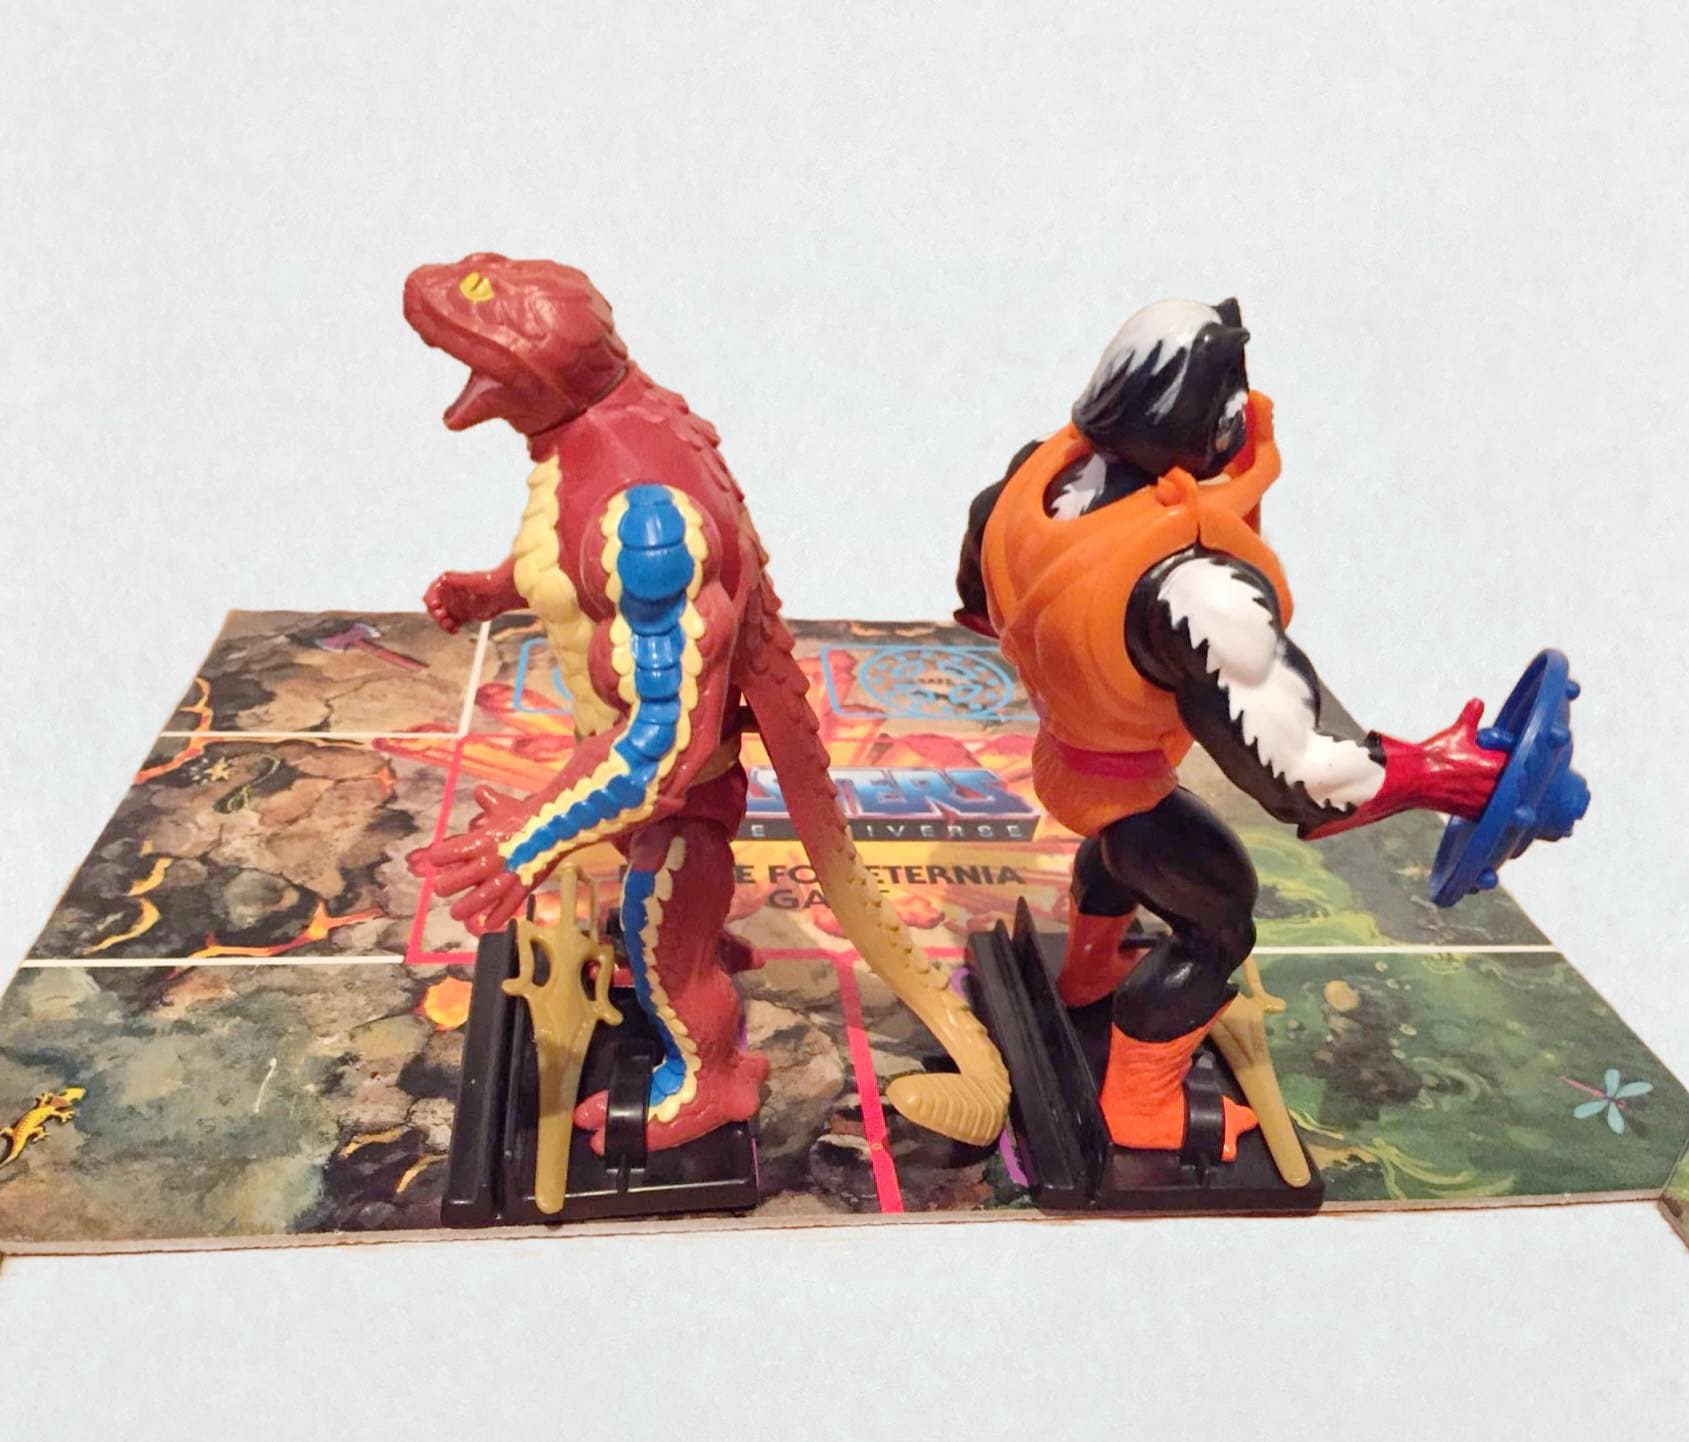
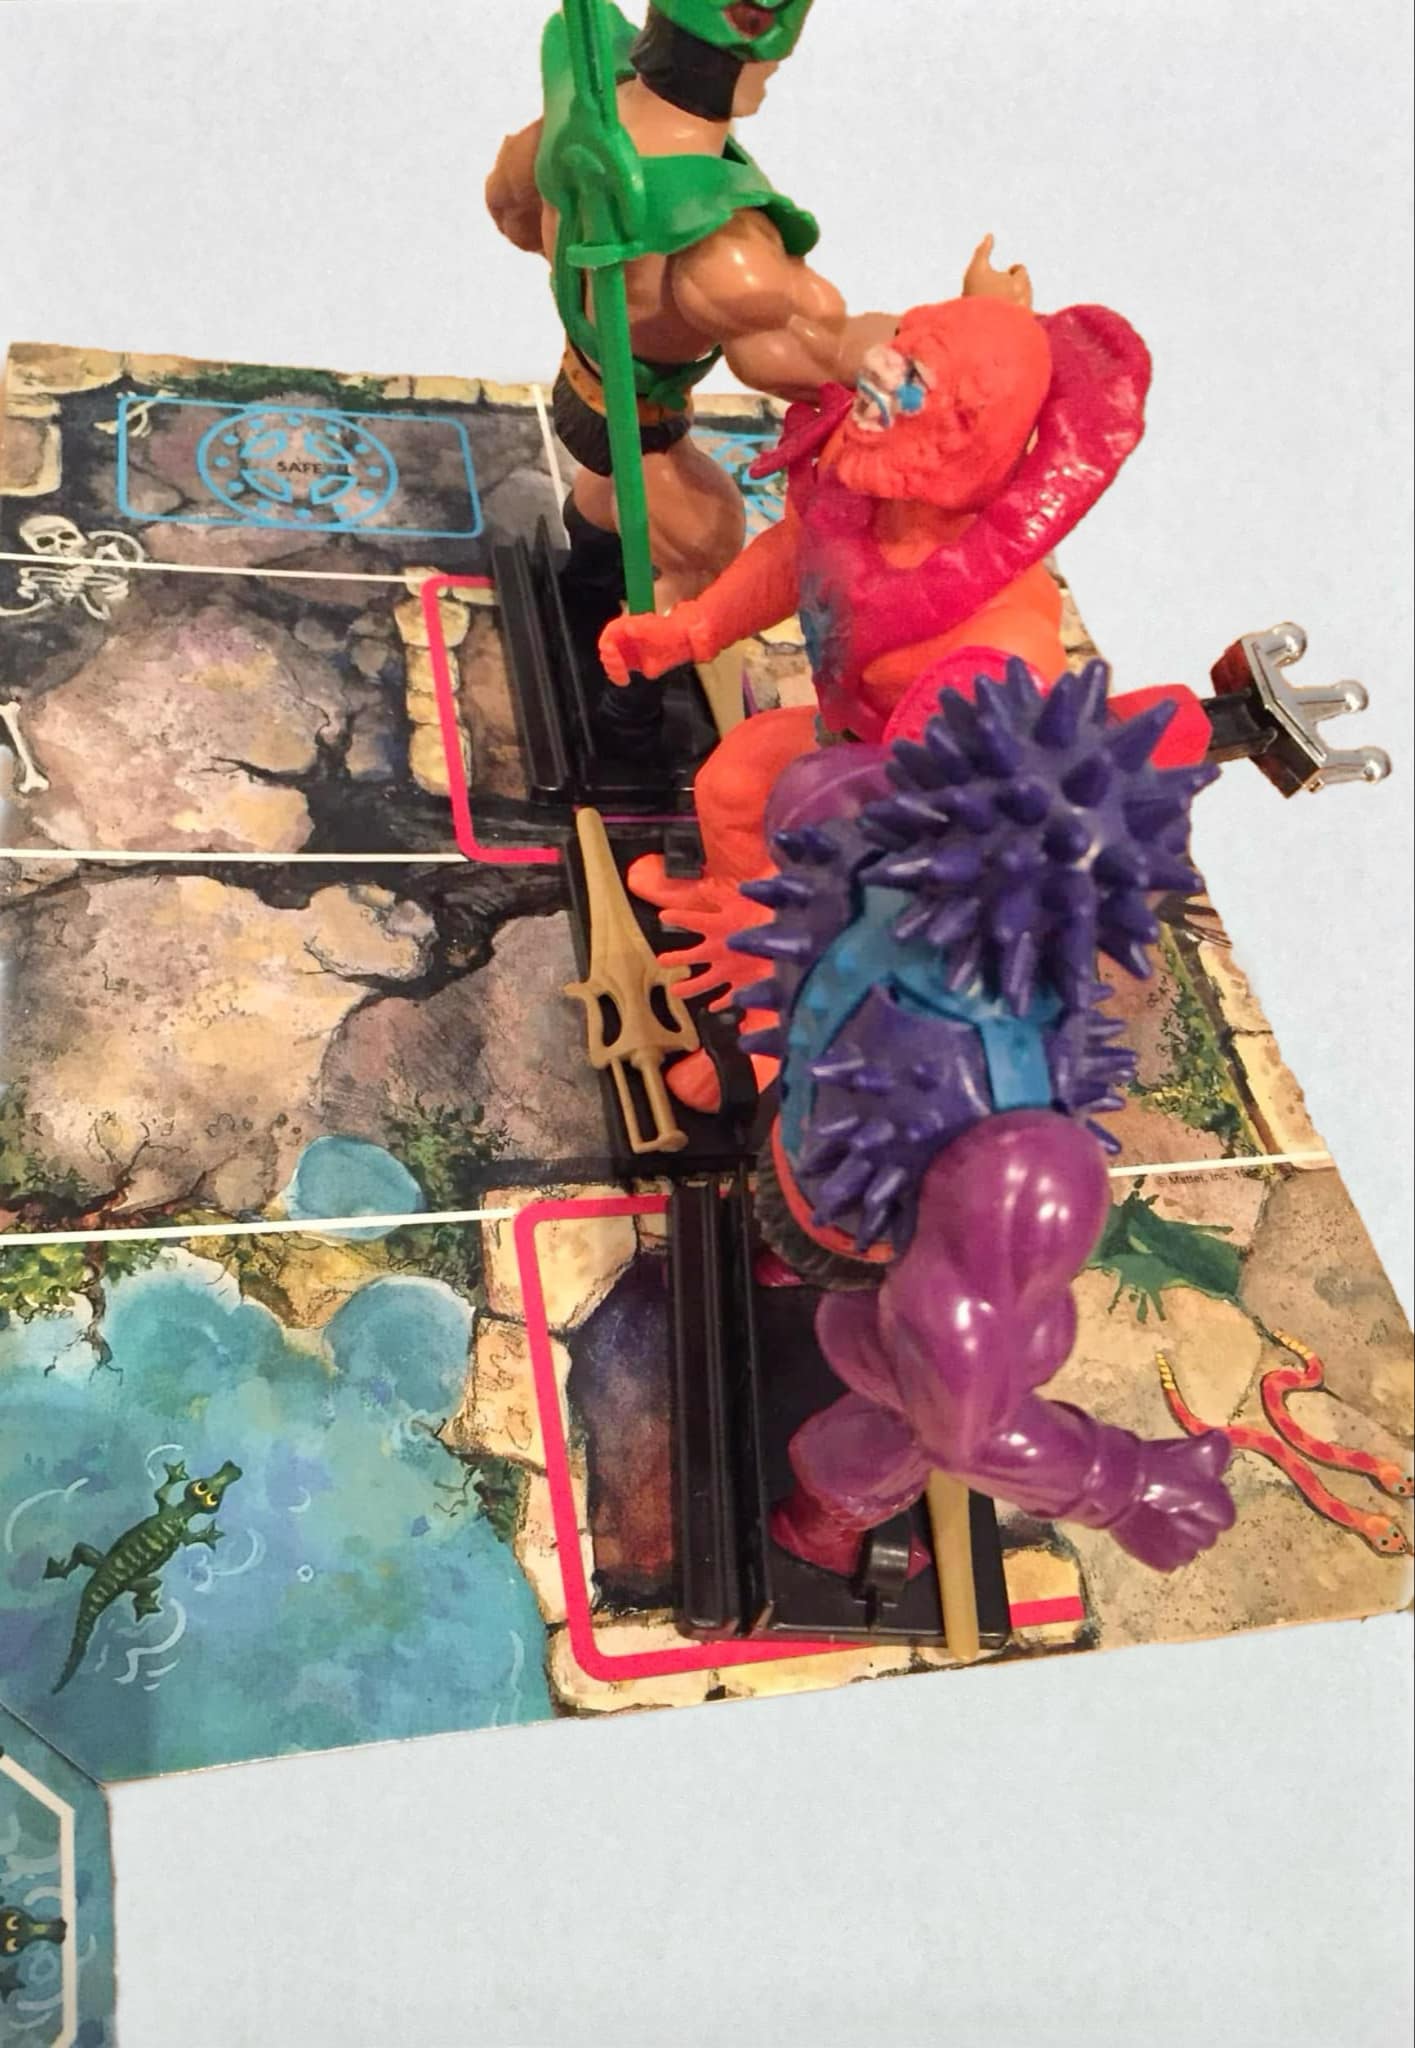
Compared to the MOTU Pop-Up Game (1982), this one is much more complicated! I don’t actually own this game – all images of it come courtesy of my friend Øyvind Meisfjord. First, here are the playing figures, dice, and swords mentioned in the instructions. The “figures” are based on the cross sell art, sometimes modified to remove or reduce the size of their weapons. The swords are interesting – they are full versions of the action figure Power Sword, as opposed to the half version sword that came with the He-Man and Skeletor figures. Some people use these with their Thunder Punch He-Man figures due to the gold color.
The stands also include foot clips so you can put your actual Masters of the Universe figures on them:
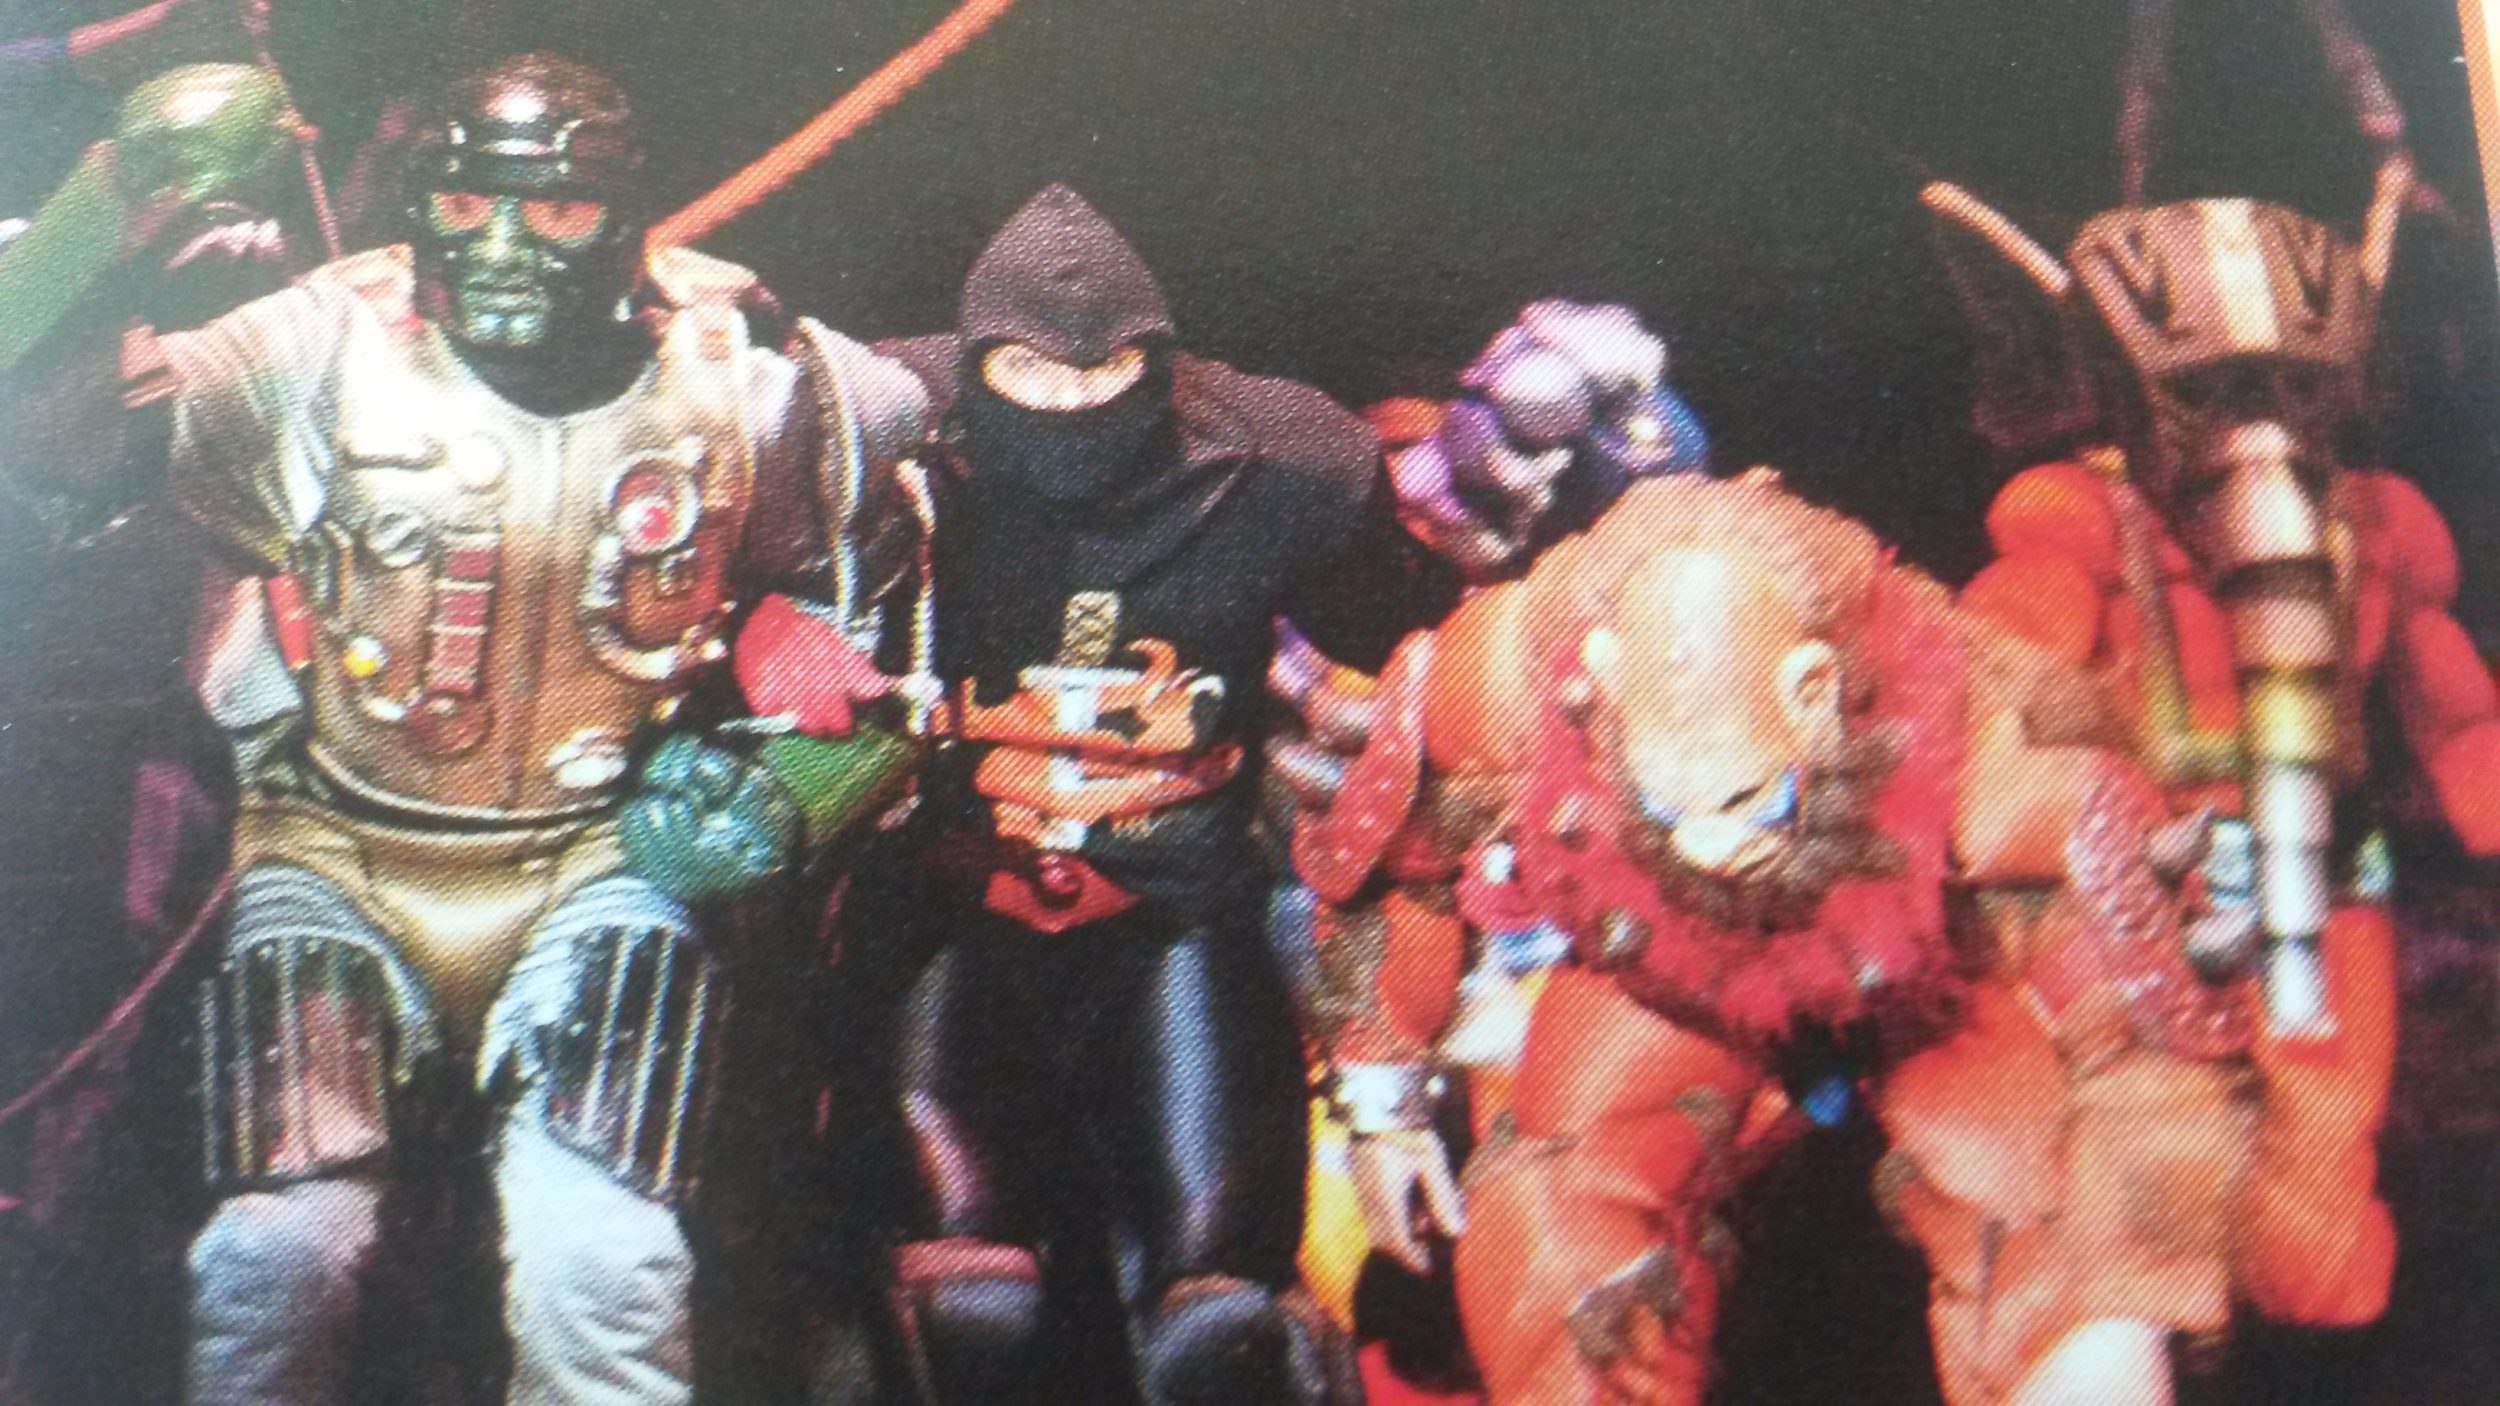
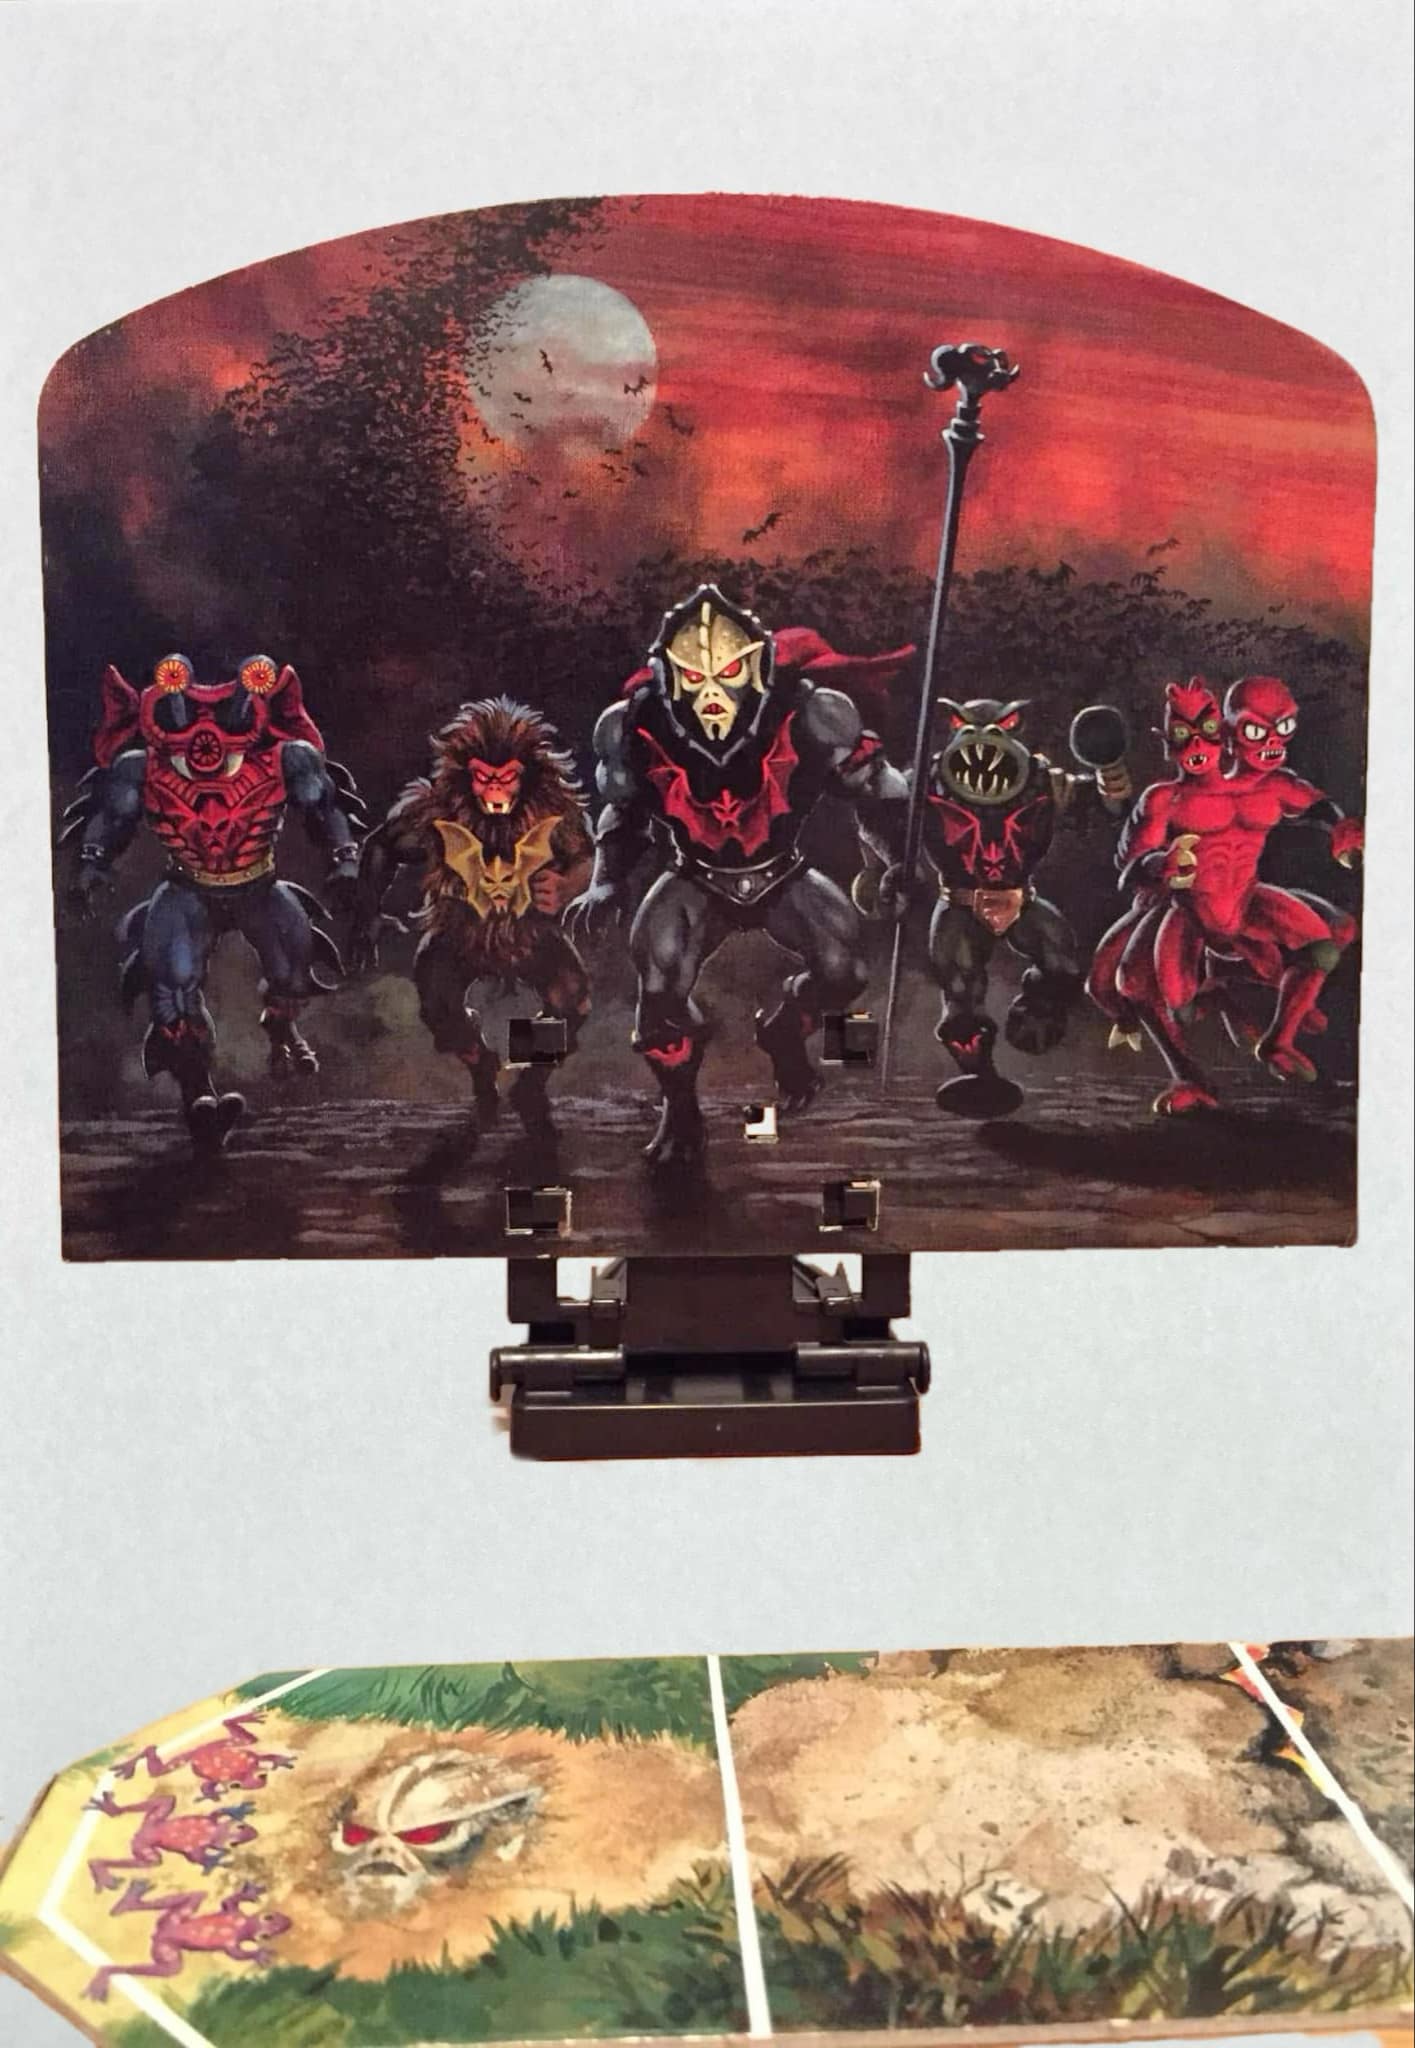
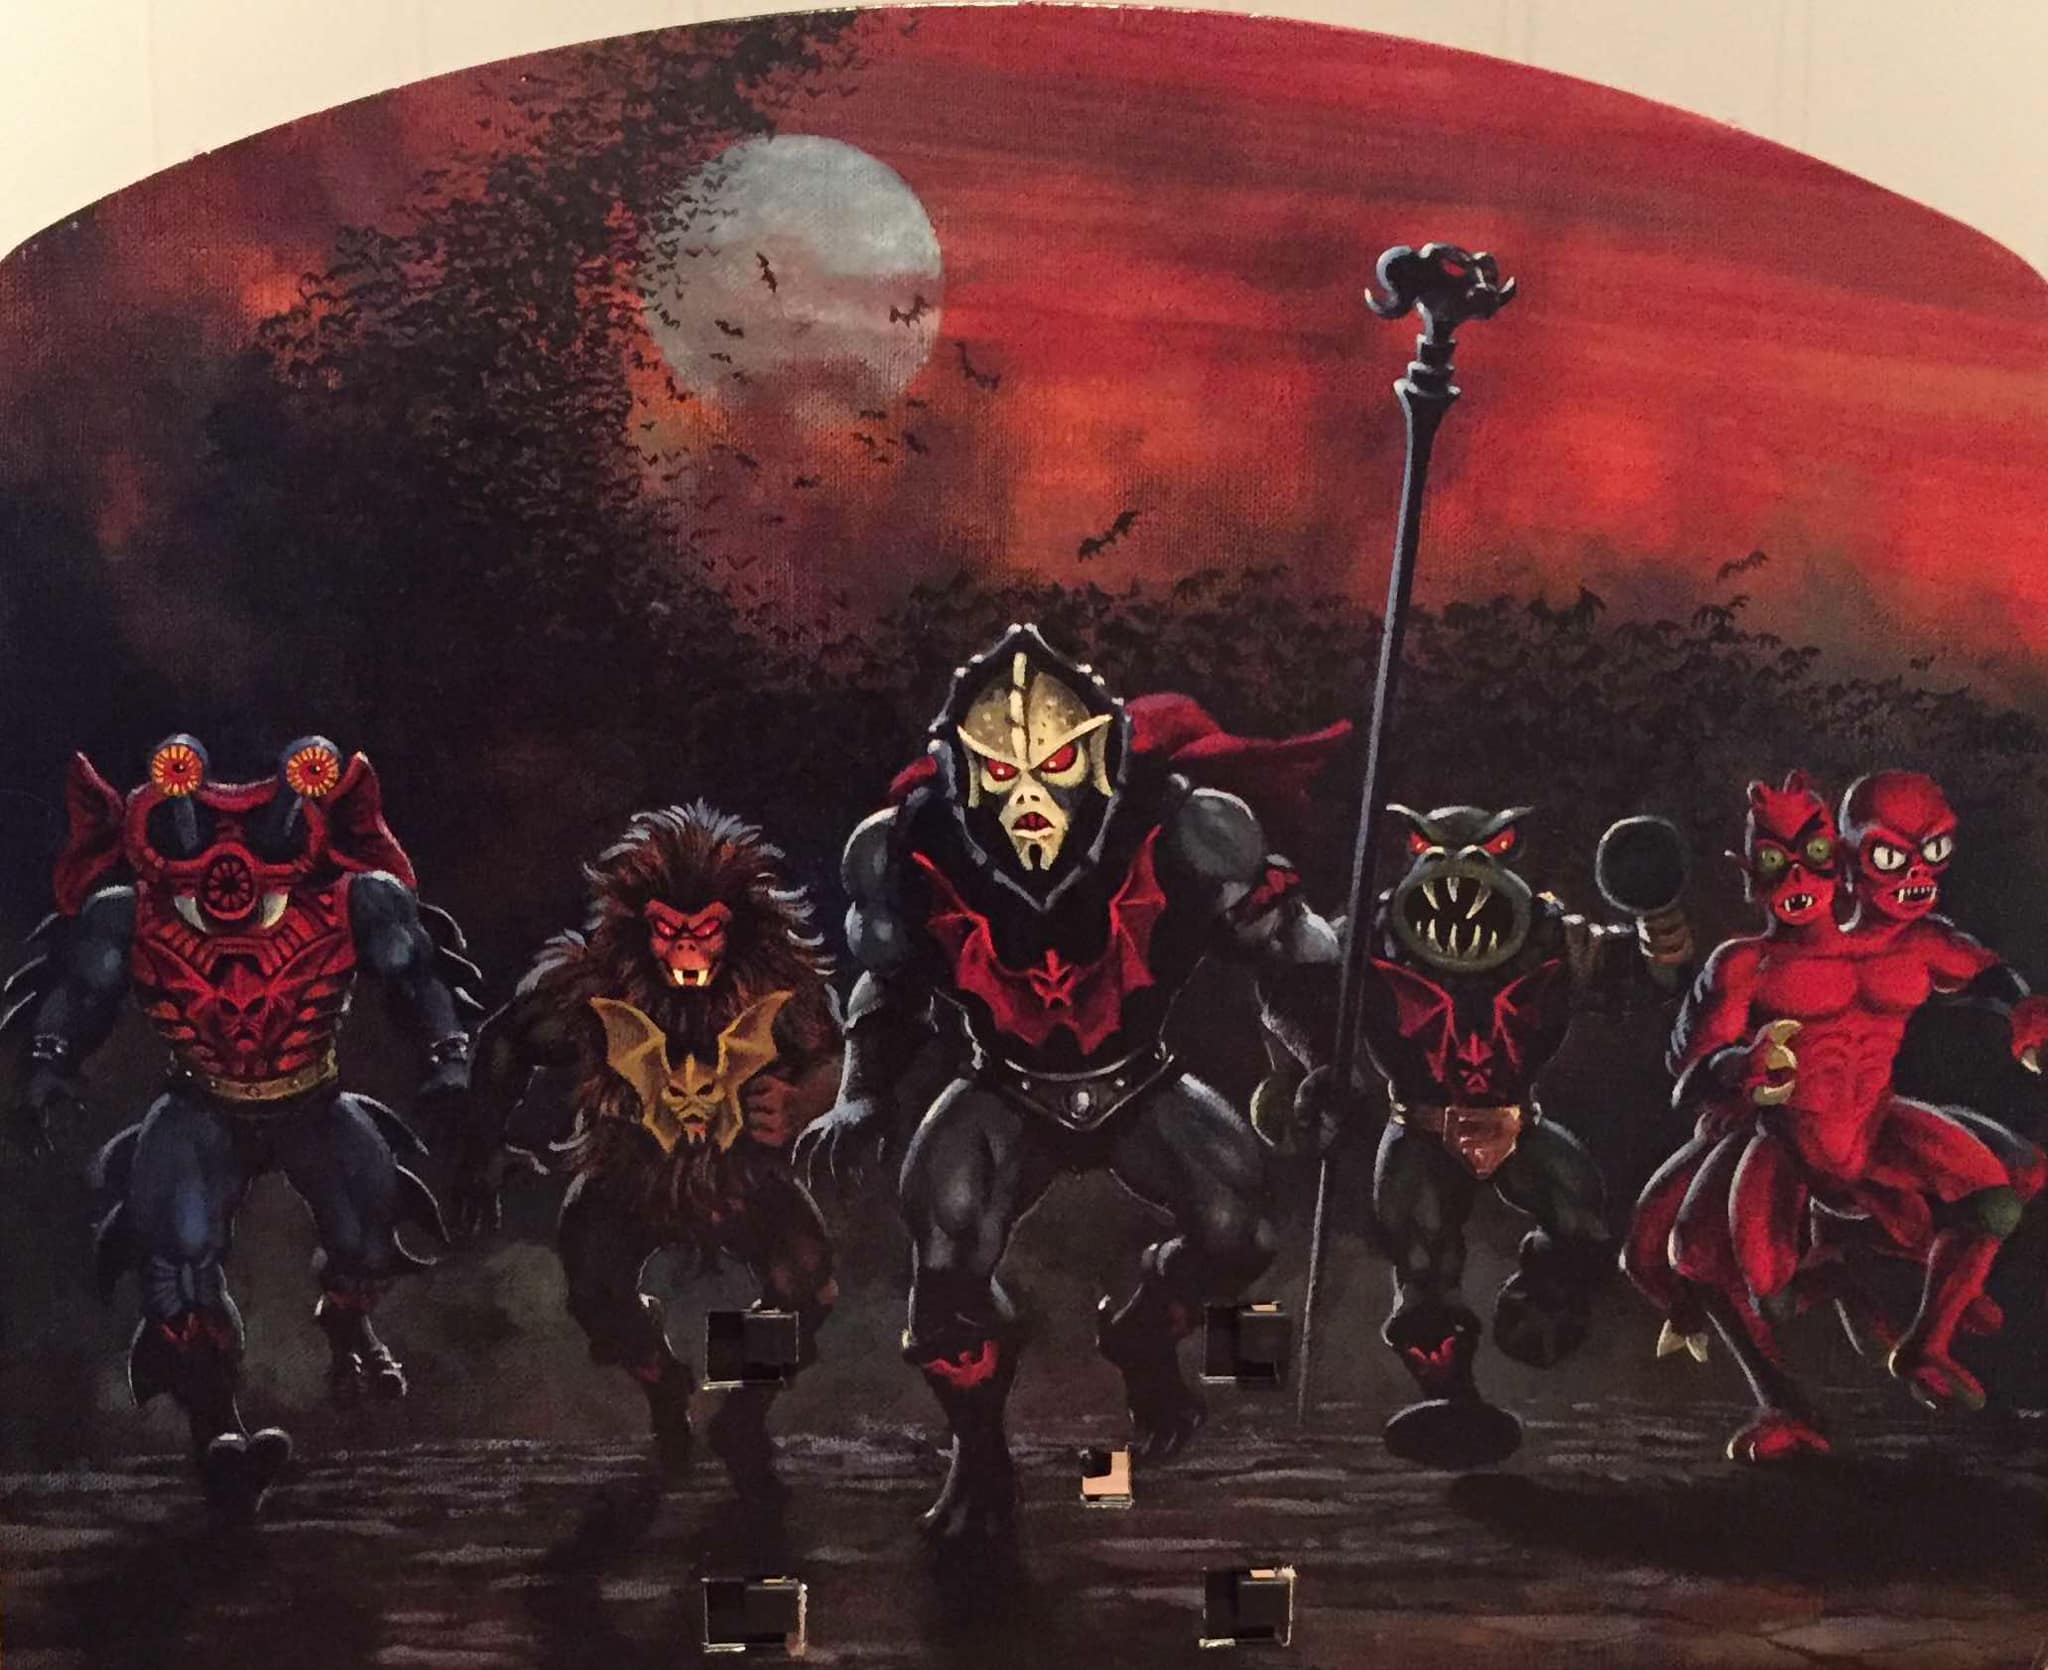
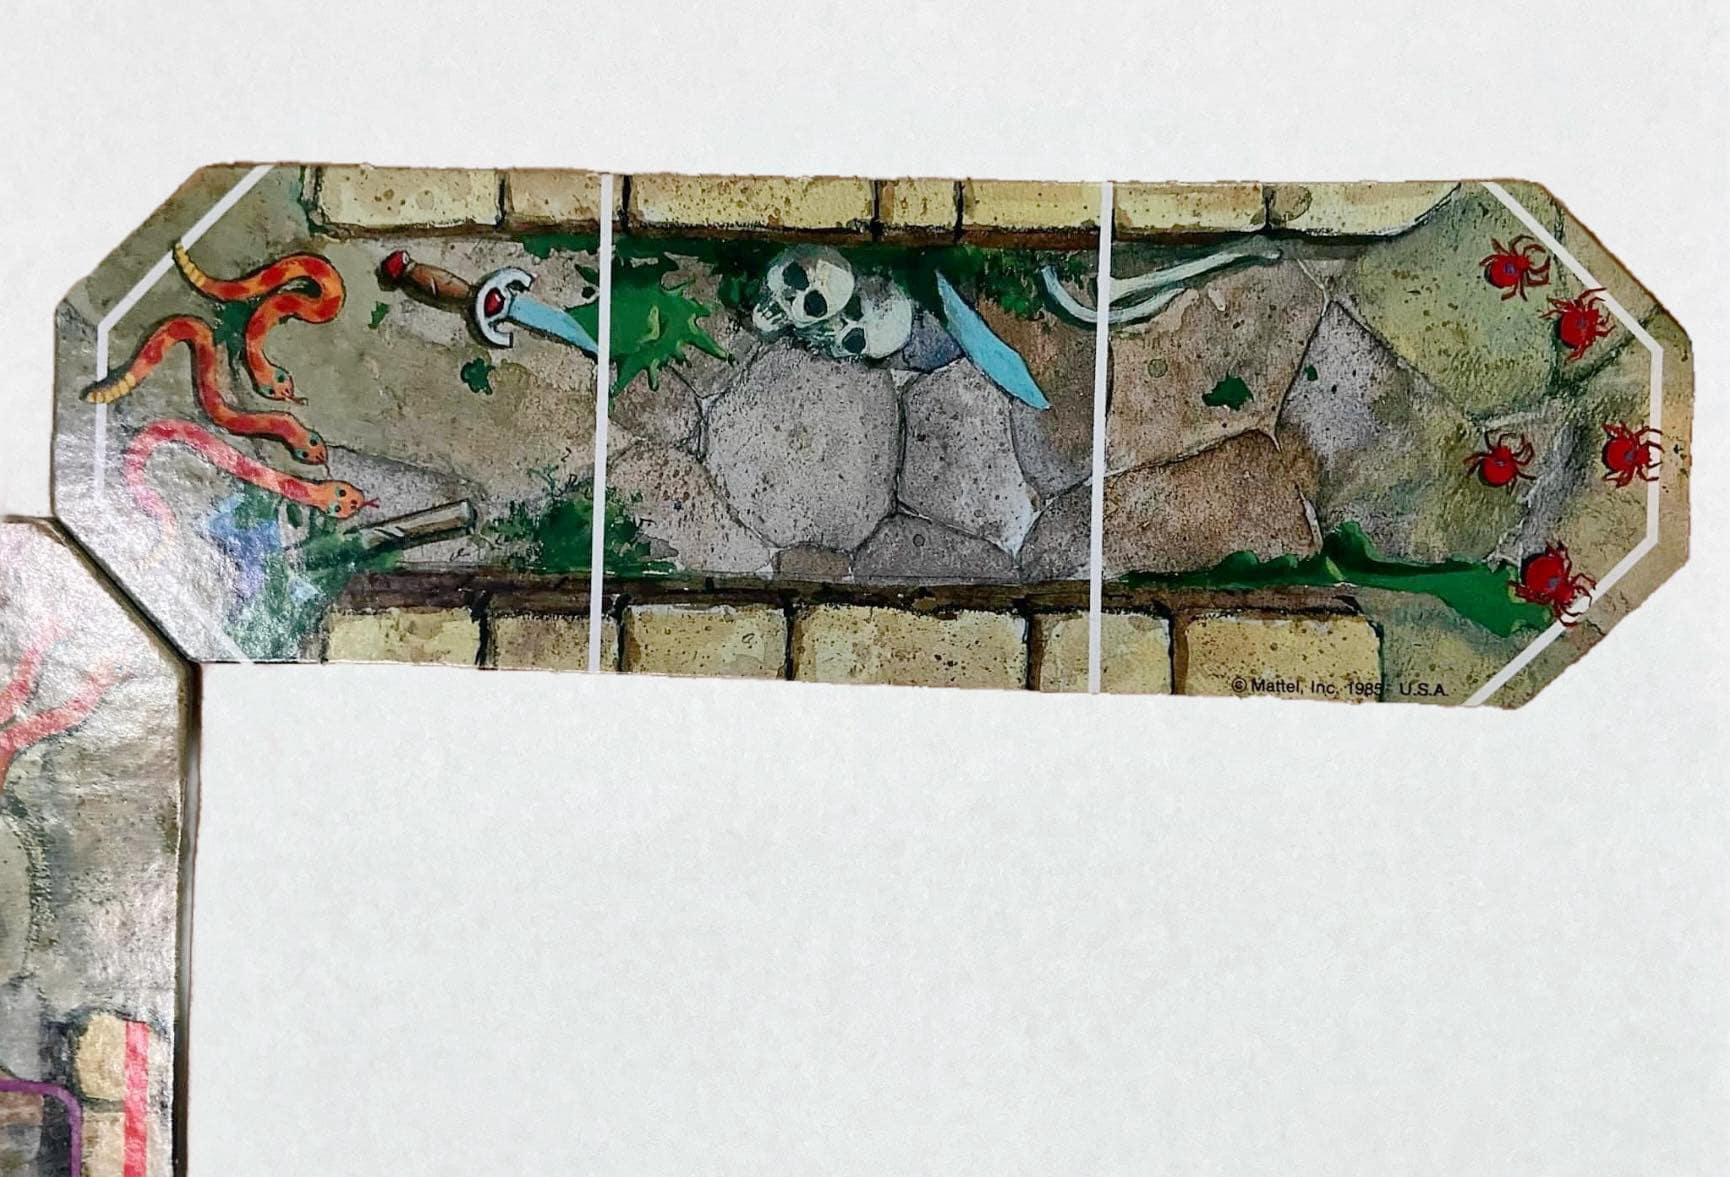
Here are the rest of the sections of the board and paths, as well as the Fright Zone Trap and spinner. All of the artwork on this game is a lot of fun, but the Fright Zone Trap stands out the most! The Horde look like nightmares from a horror movie. Note in the illustration that Grizzlor has the all yellow harness, which was a feature of the prototype version that appeared in some catalogs. Also note Hordak is carrying Skeletor’s Havoc Staff, just like on Hordak’s cardback artwork.
I can’t personally give a review of the gameplay since I haven’t played it, but it looks like a lot of fun and everything from the artwork to the character pieces to the swords looks really well done.
Special thanks to Øyvind Meisfjord for all of the images he shared for this article!
Thank you to the following individuals who are current Patreon supporters or Facebook subscribers!
Adalberto V.
Adam A.
Allen B.
Allison T.
Andy Y.
badtaste®
Ben M.
Chupakaibra
Cory from Make Shape Create
Dane R.
Elsmasef – The MotU Channel
Eric H.
Erik B.
Garry H.
Gianluca V.
J Man
JackieX
James C.
James Z.
João S.
Johnny L.
Jon E.
Kris K.
Lyca
Max I.
Michael M.
Mike G.
MotuOriginsCork
Nate B.
Orion W.
Ove K.
Øyvind M. (Patreon & Facebook)
Patrick F.
Philip O.
Rich S.
Robert B.
Scott B.
Steven K.
Tate W.
Todd G.
tupalev
Want to support the blog? Consider becoming a Patreon supporter or Facebook subscriber. You’ll also gain access to exclusive content and early access to posts on the blog. Thank you!