Roger Sweet passed away Tuesday morning on April 28 (which happens to be Masters of the Universe day) at the memory care facility he was staying in. Generous fans donated to his GoFundMe after he was diagnosed with dementia, which allowed him to have the care he needed. He was 91 years old.
In Roger’s memoirs (Mastering the Universe), he recalled that he and Mark Taylor were both listed as the creators of He-Man when the idea was pitched to Mattel. He also later acknowledged that his barbarian He-Man prototype (below, center) was based on Mark Taylor’s concept art. Roger’s important contribution was less about the design of He-Man himself and more about the attributes of the line as a whole, including the highly muscled look of the figures, the power-punch waist action feature, the idea for interchangeable costumes, and of course the name “He-Man.”
Roger Sweet sculpted these three prototypes for the He-Man pitch. The center design, based on Mark Taylor’s artwork, was the one that was approved by Mattel.
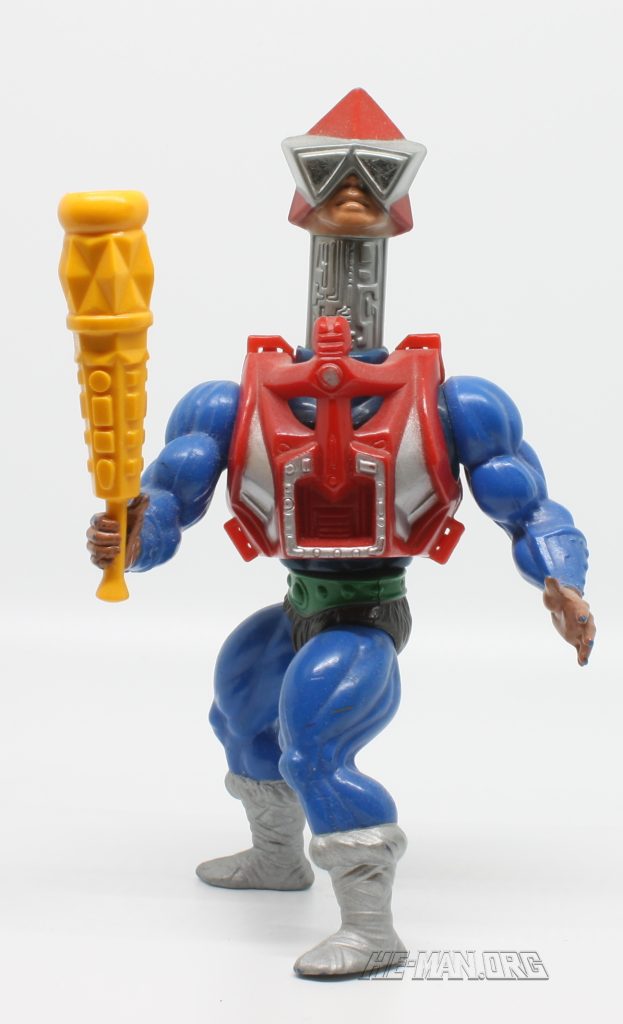
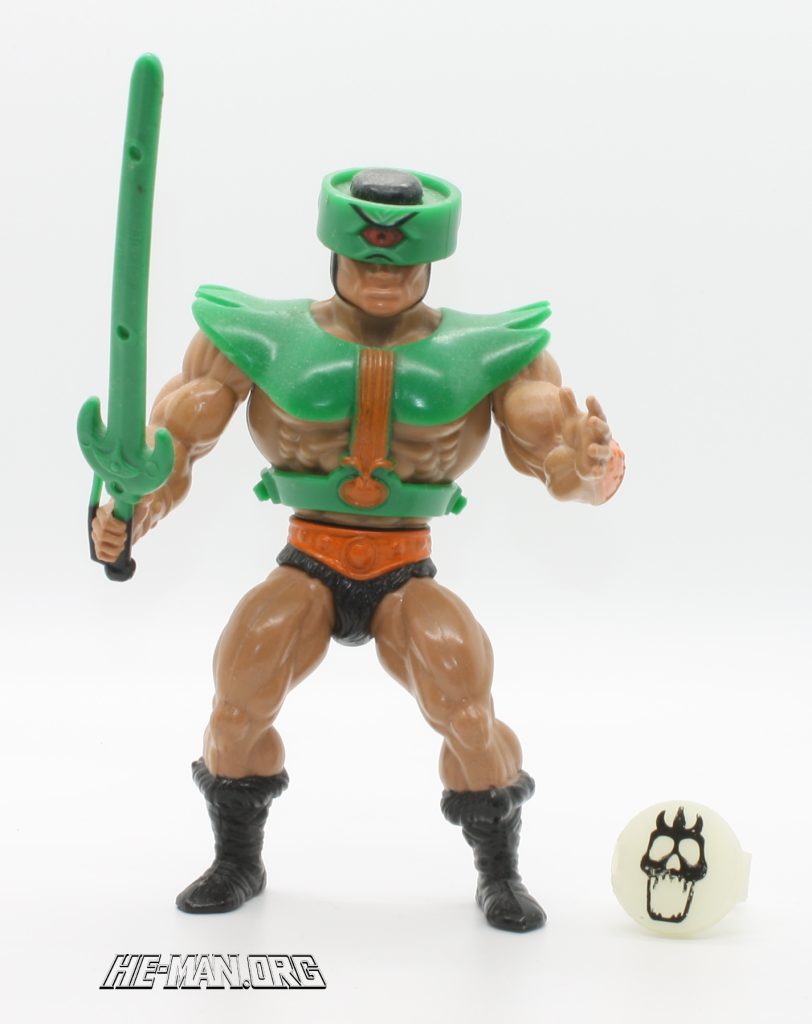
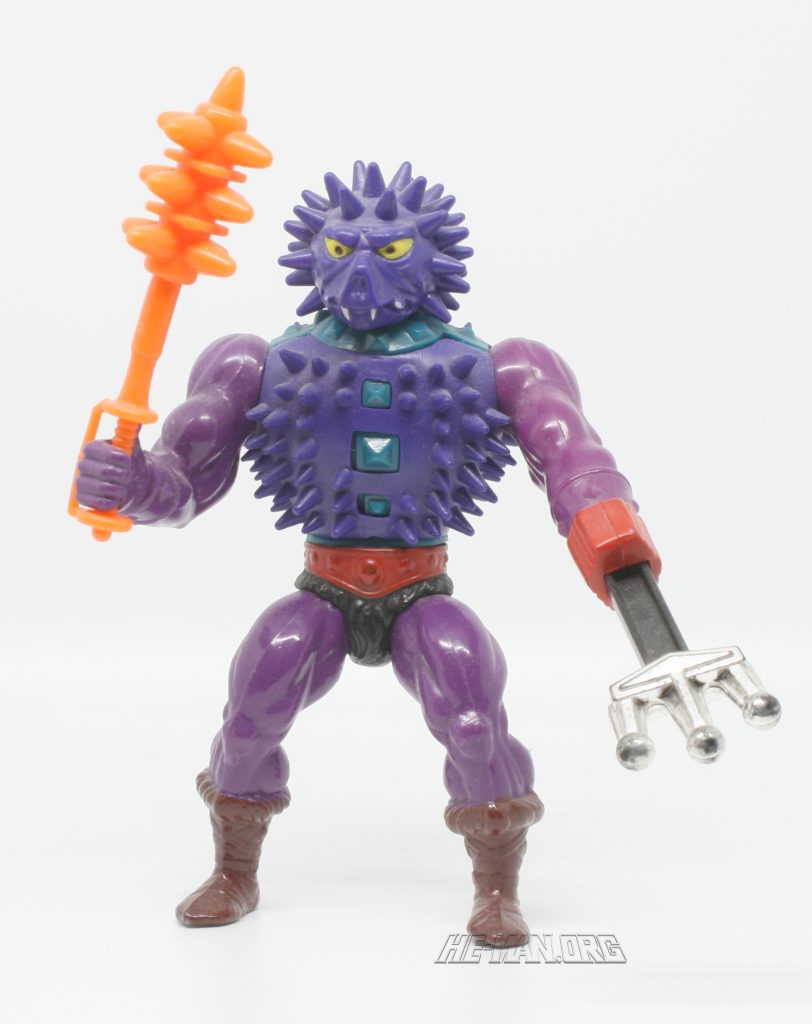
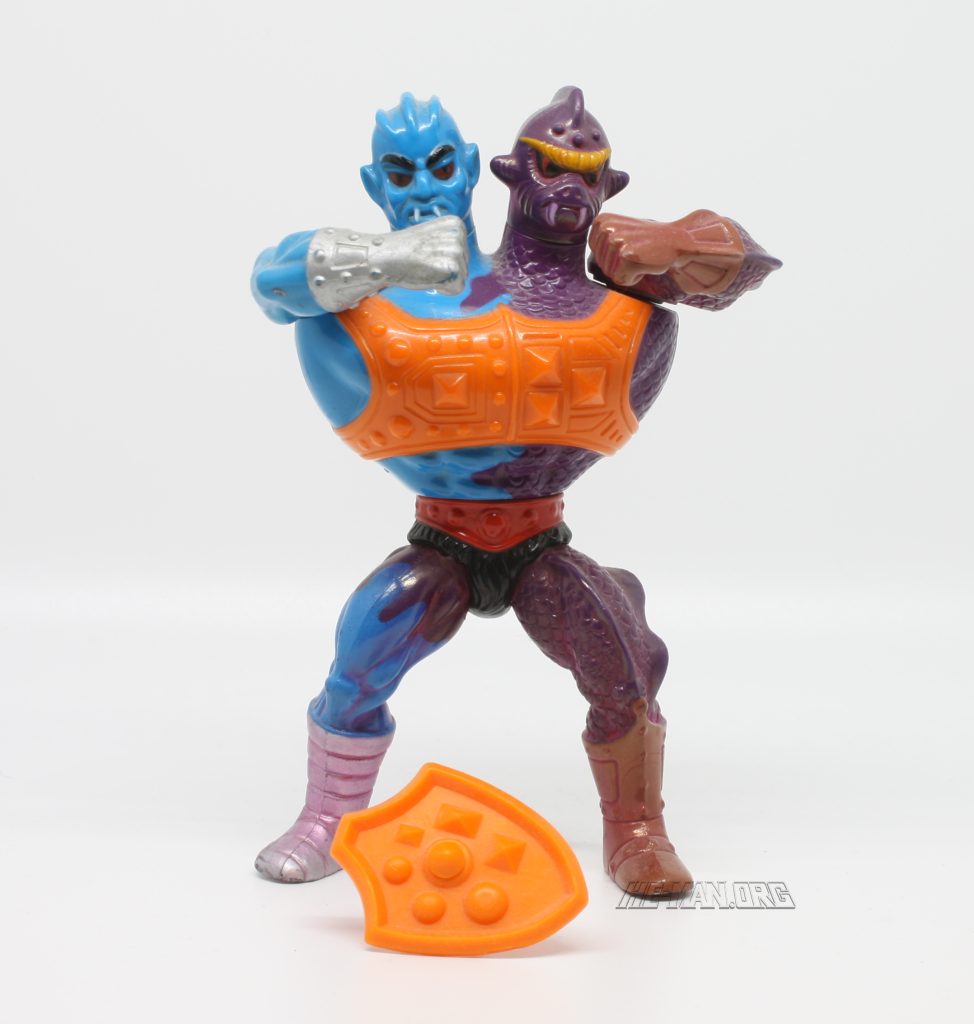
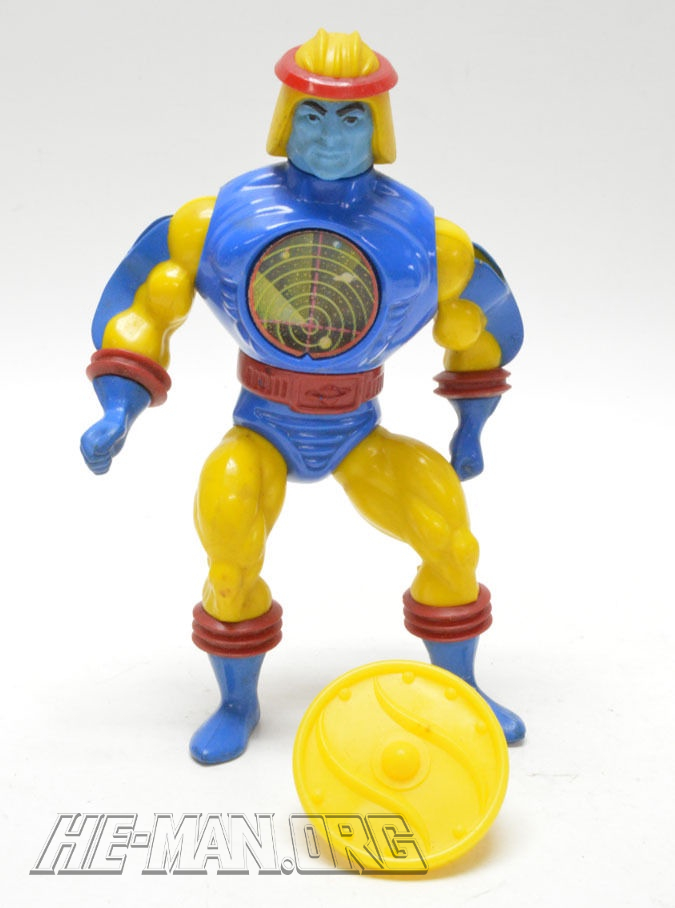
When Roger was put in charge of design of the line in its second year, after Mark Taylor left the position and the company, he created many beloved characters, including Tri-Klops, Mekaneck, Sy-Klone, Spikor, and Two Bad. He was also in charge of the team tasked with designing the line, which included Ted Mayer, Ed Watts, Martin Arriola, Colin Bailey, and others.
MekaneckTri-KlopsSpikorTwo BadSy-Klone
Our hearts go out to Roger’s wife Marlene. We should celebrate Roger’s many contributions to Masters of the Universe. Aside from his design skills, Roger was a talented inventor who came up with many of the action features used on various figures and vehicles in the Masters of the Universe line. According to HeraldNet, Roger graduated from Institute of Design in Chicago and started work at Mattel in 1972.
Our hearts go out to Roger’s wife Marlene. We celebrate Roger’s many contributions to Masters of the Universe. Aside from his design skills, Roger was a talented inventor who came up with many of the action features used on various figures and vehicles in the Masters of the Universe line. According to HeraldNet, Roger graduated from Institute of Design in Chicago and started work at Mattel in 1972.
Roger Sweet points to Mark Taylor’s He-Man B-sheet artRoger Sweet holds the first MOTU mini comic, “He-Man and the Power Sword”A photo of Roger Sweet in 2017, when he was being interviewed for The Toys That Made UsA signed photo of Roger Sweet with the MOTU Classics He-man figure. The photo is signed to Chris Vint, a He-Man podcaster and interviewer
Note: this article is based on the story I wrote for He-Man.Org announcing Roger’s passing.
Courtesy of Battle Ram Blog Patreon supporter JackieX, here is a scan of the Kid Stuff story, Castle Grayskull. This French edition is special because unlike the US version, the inside pages are colored. This story includes the rarely used backstory for Castle Grayskull as the transformed Hall of Wisdom. In the story, the Elders put all of their power into a single orb, hidden inside the castle, awaiting the coming of He-Man. This is one of those early stories where the Sorceress is the version with the snake armor as opposed to the Filmation version with the falcon motif.
Thank you to the following individuals who are current Patreon supporters or Facebook subscribers!
Adalberto V. (Facebook)
Adam A. (Patreon)
Allen B. (Facebook)
Allison T. (Patreon)
Andy Y. (Facebook)
Asad (Patreon)
badtaste® (Patreon)
Barbarossa (Facebook)
Ben M. (Patreon)
Chris C. (Patreon & Facebook)
Chupakaibra (Patreon)
Cory from Make Shape Create (Patreon)
Dane R. (Patreon)
Eric H. (Patreon)
Erik B. (Patreon)
Garry H. (Patreon)
Gianluca V. (Patreon)
Gristlebeard M. (Patreon)
J Man (Patreon)
JackieX (Patreon)
Jacob T. (Patreon)
James C. (Patreon)
James Z. (Facebook)
João S. (Patreon)
Johnny L. (Facebook)
Jon E. (Patreon)
Juan P.V. (Patreon)
Kris K. (Facebook)
Lyca (Patreon)
Max I. (Patreon)
Michael M. (Patreon)
Mike G. (Patreon)
MotuOriginsCork (Patreon)
Nate B. (Patreon)
Oprah D. (Facebook)
Ove K. (Patreon)
Øyvind M. (Patreon & Facebook)
Patrick F. (Patreon)
Philip O. (Patreon)
Robert B. (Patreon)
Rich S. (Patreon)
Scott B. (Facebook)
Stephen B. (Facebook)
Steven K. (Patreon)
Tate W. (Patreon)
Todd G. (Facebook)
tupalev (Patreon)
Want to support the blog? Consider becoming a Patreon supporter or Facebook subscriber. You’ll also gain access to exclusive content and early access to posts on the blog. Thank you!
A while back I built the Laser-Light Skeletor figure kit from Barbarossa, and recently I was able to pick up the Laser Power He-Man kit to complete the set. I thought I’d write up a review as well as a provide photo documentation of the process for those interested in building one.
The kit comes with everything needed for the complete figure, including the LED, switch, wires and battery. You will also need some super glue, some paint, and probably an Exacto knife to trim any flash from the parts. You also need a soldering iron and some solder for the electronics.
The parts that come with the kit are the usual high quality that I’ve come to expect from Barbarossa. Compared to the Laser-Light Skeletor kit, there is very little painting required for this kit, so it’s a pretty fast build. I started out with the arms and legs. The boots and gloves are separate pieces that need to be glued together with superglue. I did use an Exacto knife to scrape the surfaces to be glued to make sure they were a bit more flat. The best way to go about this is to apply glue to one of the pieces, hold them together for about a minute just to be sure, and then set them down and let them really cure for about an hour. It’s nice that the boots and gloves come in the colors they are supposed to be, so you don’t have to paint them!
The next step is to screw the eyelet screws in to the legs, and then set the assembly into the two halves of the pelvis piece, as shown below. Then apply super glue around all the connecting edges and hold them tightly together. The instructions advised the use of rubber bands to hold them tightly together while curing.
The next step is to paint the head that your figure came with. You could do this after putting the upper body together, but I figured I was less likely to get yellow paint on He-Man’s back if I painted it before assembling it. Barbarossa was nice enough to include both versions of the head in my kit. For those who don’t know, the original made in Italy Laser Power He-Man came with the head on the left, below. A year later Spain manufactured a different version with the classic He-Man head, shown on the bottom right. I went with the Italian version just to differentiate him more from my other He-Man figures.
Painting the hair isn’t all that difficult, but painting the eyes is tricky. In retrospect I would have done the eyes first. If you screw up the eyes, you’ll need to quickly run the head under a tap and perhaps rub the paint away with a Q-Tip so you can start again. That’s easier to do if the hair hasn’t already been painted. You’ll want to use acrylic paints, which you can get from any craft store. I also used a bit of gloss clear coat on the hair because vintage figures had glossy paint, but you can also get acrylic paints that are already gloss or satin finish. In my case, I did the hair first, and then put it together with the two halves of the torso. It comes with a connector bar that acts as the anchor for both arms, and the assembly is as shown in the photos below. As before, put super glue on all the connecting surfaces and hold everything together for about a minute, and then let it cure for at least an hour.
Once cured, heat up the shoulder area of the arms with a hair dryer to soften them and pop them onto the figure.
The included chest and arm armor needs some silver paint. Barbarossa recommends a paint pen. I got a silver acrylic paint pen from a craft store and was able to pretty easily paint the correct areas. It did require several applications, with time for drying between each application.
He-Man’s belt is a separate piece of flexible silver plastic. I started by gluing the front section and moving around one half of the belt toward the back, and then the other side was glued down after. I trimmed the excess as shown. If it’s not perfectly even on the back, don’t worry – his backpack will hide this area. You can also see I’ve painted on the eyes and eyebrows in the center image below.
The sword requires both gluing and soldering. The soldering part can be intimidating if you haven’t done it before. Some things to note: the included LED fits inside the hilt of the sword, and should be nestled up against the cutout in the blade. The longer lead on the LED is the positive end, and should be connected to the red wire, while the black wire goes to the shorter lead. The leads need to be cut short, so that the wires tuck up inside the hilt, meeting the leads at the empty section inside the very bottom of the hilt.
The included switch already has wires attached. The two wires should be fed through the hole in the backpack before you solder anything. The switch has two screws that can be removed to allow you to insert the included battery.
Ideally some rubber shrink tubing should be used to isolate the leads of the LED from each other so they don’t short out. I didn’t have that, but some tape will do in a pinch. This is important because you want your sword to actually light up! Once you’re ready, glue the assembly together with super glue as before.
Here is the completed Laser Power He-Man without his armor. He has a hole in his back because his original light gimmick was activated when he raised his arms. But in this version, the light is activated with a switch inside the backpack.
Here he is with his sword, armor and backpack!
Overall I’m very pleased with the final results. Barbarossa’s stuff is always high quality, and the ability to get it in a kit is a nice money saver, if you feel comfortable putting it together yourself. If not you can have Barbarossa make you an already assembled figure, for a bit more money. I’m a big fan of the laser figures, and these kits are a great way to get them without dropping thousands of dollars for the vintage versions.
My MOTU Origins Laser Power He-Man coincidentally just arrived as well, so I thought I’d compare the Barbarossa version with the Origins and MOTU Classics versions:
And for good measure, here’s the Barbarossa Laser Power He-Man with all three of the New Adventures He-Man variants:
Thank you to the following individuals who are current Patreon supporters or Facebook subscribers!
Adalberto V. (Facebook)
Adam A. (Patreon)
Allen B. (Facebook)
Allison T. (Patreon)
Andy Y. (Facebook)
Asad (Patreon)
badtaste® (Patreon)
Barbarossa (Facebook)
Ben M. (Patreon)
Chris C. (Patreon & Facebook)
Chupakaibra (Patreon)
Cory from Make Shape Create (Patreon)
Dane R. (Patreon)
Eric H. (Patreon)
Erik B. (Patreon)
Garry H. (Patreon)
Gianluca V. (Patreon)
Gristlebeard M. (Patreon)
J Man (Patreon)
JackieX (Patreon)
Jacob T. (Patreon)
James C. (Patreon)
James Z. (Facebook)
João S. (Patreon)
Johnny L. (Facebook)
Jon E. (Patreon)
Juan P.V. (Patreon)
Kris K. (Facebook)
Lyca (Patreon)
Max I. (Patreon)
Michael M. (Patreon)
Mike G. (Patreon)
MotuOriginsCork (Patreon)
Nate B. (Patreon)
Oprah D. (Facebook)
Ove K. (Patreon)
Øyvind M. (Patreon & Facebook)
Patrick F. (Patreon)
Philip O. (Patreon)
Robert B. (Patreon)
Rich S. (Patreon)
Scott B. (Facebook)
Stephen B. (Facebook)
Steven K. (Patreon)
Tate W. (Patreon)
Todd G. (Facebook)
tupalev (Patreon)
Want to support the blog? Consider becoming a Patreon supporter or Facebook subscriber. You’ll also gain access to exclusive content and early access to posts on the blog. Thank you!
“Temple of Nepthu” by the late, great Michael Halperin is a mini comic adaptation of the Filmation He-Man and the Masters of the Universe script for “Temple of the Sun.” The story features Nepthu, a Filmation villain of the week.
Nepthu after being transformed by the magical Sun Scarab.
In “Temple of the Sun,” Nepthu is a poor man who finds the eponymous temple in the Sands of Time. Finding the Sun Scarab artifact inside, he is transformed in appearance and gains magical power. Nephthu captures the Sorceress in her form as Zoar the falcon when she happens to be flying overhead. She sends a message telepathically to Prince Adam, who transforms into He-Man. Nepthu sends some sand demons to attack the heroes when the come to rescue the Sorceress. He-Man eventually defeats Nepthu by breaking the Sun Scarab. Zoar meanwhile had been transformed into crystal after she had tried to break free. She was returned to normal after the Sun Scarab was destroyed.
Now let’s take a look at Michael Halperin’s adaptation, “Temple of Nepthu.” Many thanks to Danielle Gelehrter for sharing this scan with me!
In Halperin’s version, Nepthu is actually an ancient wizard, not some poor traveler who was magically transformed. Halperin’s script was written June 8, 1983, just a month after the script for “Temple of the Sun” was approved. Perhaps the early draft for the Filmation episode also featured Nepthu as an ancient wizard – I don’t have any information to support that, however. The temple is Nepthu’s home, and he captures the Sorceress in falcon form when she flies too close to it over the Sands of Time. Nepthu views her capture as an omen of power. Meanwhile, the Sorceress telepathically calls for He-Man to come to her aid. He sets off with Teela, Man-At-Arms, Battle Cat and Ram Man on the Attak Trak.
In the story, Nepthu has a scarab with a jewel affixed to its back that he uses to magically attack the heroic warriors as they approach. He causes a magical sand storm to impede their progress, and then creates a giant scorpion. After defeating these elements, Man-At-Arms remarks that the temple appears only every 300 years.
He-Man uses his Power Sword to get into the temple. Upon entering, Nepthu sends Time Demons to attack the heroic warriors, described as living creatures made from clock parts. After defeating them, Nepthu threatens the Sorceress with the scarab if they come any closer. The Sorceress telepathically tells He-Man to “get the jewel of the desert — that makes the scarab strong.”
Meanwhile, Man-At-Arms leaped at Nepthu, causing him to drop the scarab. The scarab started to grow and began to attack the heroic warriors. After some fighting, He-Man managed to flip the insect on its back, causing it to lose its jewel. Without the magical stone, the scarab turns back into an ordinary bug and scampers away. Nepthu starts to lose his powers, and the Sorceress as Zoar the falcon is freed. The Time Demons start to dissipate and the Temple of Nepthu gradually vanishes away.
This story was repurposed into “Temple of Darkness.” Many of the same elements and plot points are there. However, Nepthu was replaced with Skeletor. The Temple’s name was changed to the Temple of Darkness. Instead of the Attak Trak, He-Man raced to the temple on the Road Ripper, while the others rode on separate Attak Traks. (I think this was done not only to promote the new Road Ripper vehicle, but also to address the reality that the Attak Trak toy seats only one figure.) There isn’t a giant scorpion, but Skeletor attacks the heroes with a magical sandstorm and the giant scarab. And like “Temple of Nepthu,” the scarab is defeated by flipping it over and popping the jewel from its back.
“Temple of Darkness” was written by Michael Halperin, with pencils by Larry Houston, inks by Gerald Forton, colors by Charles Simpson, letters by Stan Sakai. Here is the full list of Halperin’s mini comic credits, many of which were adapted from Filmation episode scripts (links go out to the full comic scans on He-Man.Org):
Thank you to the following individuals who are current Patreon supporters or Facebook subscribers!
Adalberto V. (Facebook)
Adam A. (Patreon)
Allen B. (Facebook)
Allison T. (Patreon)
Andy Y. (Facebook)
Asad (Patreon)
badtaste® (Patreon)
Barbarossa (Facebook)
Ben M. (Patreon)
Chris C. (Patreon & Facebook)
Chupakaibra (Patreon)
Cory from Make Shape Create (Patreon)
Dane R. (Patreon)
Eric H. (Patreon)
Erik B. (Patreon)
Garry H. (Patreon)
Gianluca V. (Patreon)
Gristlebeard M. (Patreon)
J Man (Patreon)
JackieX (Patreon)
Jacob T. (Patreon)
James C. (Patreon)
James Z. (Facebook)
João S. (Patreon)
Johnny L. (Facebook)
Jon E. (Patreon)
Juan P.V. (Patreon)
Kris K. (Facebook)
Lyca (Patreon)
Max I. (Patreon)
Michael M. (Patreon)
Mike G. (Patreon)
MotuOriginsCork (Patreon)
Nate B. (Patreon)
Oprah D. (Facebook)
Ove K. (Patreon)
Øyvind M. (Patreon & Facebook)
Patrick F. (Patreon)
Philip O. (Patreon)
Robert B. (Patreon)
Rich S. (Patreon)
Scott B. (Facebook)
Stephen B. (Facebook)
Steven K. (Patreon)
Tate W. (Patreon)
Todd G. (Facebook)
tupalev (Patreon)
Want to support the blog? Consider becoming a Patreon supporter or Facebook subscriber. You’ll also gain access to exclusive content and early access to posts on the blog. Thank you!